Calibrating Equipment

There are several points in the brewing process where it becomes necessary to take measurements to either verify that all is well, or know that an adjustment needs to be made to assure success for a batch of beer. There are any number of instruments brewers use to make these assessments. In this article we’ll take a look at how to calibrate some of the basic instruments used by nearly every homebrewer: thermometers, hydrometers, scales, brew kettles and fermenters.
Thermometers
There are many times in the brewing process when I reach for my thermometer, such as; checking the temperature of my strike water, mash, sparge water, wort in the hydrometer test jar and wort in the fermenter prior to pitching yeast. Each of these measurements is critical for proper wort production and yeast performance.
Calibrating a thermometer requires an easily reproducible standard temperature environment for the thermometer to measure. Such an environment is simply a glass of distilled liquid water with a lot of distilled solid water (ice). The point where solid and liquid distilled water are at equilibrium is the standard temperature environment where we can be assured that the water will be exactly 32 °F (0 °C). To do this, simply freeze about a half-cup of distilled water until it is solid. Then place this ice (crushed) into about a cup of cold liquid distilled water and let it sit for at least ten minutes to equilibrate. Next, place the stem of a dial thermometer or the bulb-end of a glass and spirit (alcohol-dyed red) thermometer into the ice water and slowly stir for a minute or two until the thermometer reading no longer moves. If the thermometer reads precisely 32 °F (0 °C) then you are good to go. If a dial thermometer is off from 32 °F (0 °C), then fit a wrench or pliers to the adjustment nut under the dial and carefully turn the stem until the dial reads correctly. For a glass and spirit thermometer, record the temperature and note how much above or below 32 °F (0 °C) the reading is. If the reading is above 32 °F (0 °C), then you will need to subtract the difference from future measurements or, if the reading is below 32 °F (0 °C), then you will need to add the difference to future measurements with that thermometer.
Hydrometers
While you have a calibrated thermometer and some distilled water handy, you can also check the accuracy of your hydrometer. The reproducible standard for specific gravity (weight per unit volume) is distilled water at 4 °C (39.2 °F), which has a specific gravity of 1.000 grams per cubic centimeter. Even though distilled water at 4 °C is the scientifically recognized standard, hydrometers are instead standardized to either 60 °F (15.6 °C) or 68 °F (20 °C). My hydrometer is standardized to 60 °F. I know this because the little paper scale inside the glass stem of the hydrometer reads; “SP. GR T: 60 °F”. You will have to look at your own hydrometer to determine the standardized temperature for which it is designed to operate.
Knowing the temperature standard for your hydrometer, place enough distilled water in your hydrometer test jar to float the hydrometer, and with your calibrated thermometer check to be sure the water is at the desired temperature (either 60 °F or 68 °F) for your hydrometer. Carefully warm the test jar and contents by running hot tap water along the outside of the test jar, or cool it by placing it in the refrigerator until the proper temperature is achieved. Once you have the distilled water in the test jar to the correct temperature for your hydrometer, carefully float the hydrometer in the water and give it a gentle twist or two with your fingers to dislodge any bubbles that might be clinging to the glass. Then get your eye at the same level as the surface of the water in the test jar and observe the reading at the point where the scale is visible just under the surface of the water. Do not read where the air meets the water surface, nor where the water rides up the sides of the glass stem of the hydrometer or test jar.
If your hydrometer reads precisely 1.000, you have an instrument that is spot-on and requires no adjustment factor. If your hydrometer reads above or below the 1.000 mark, take note of that number and subtract it from 1.000. For example, if your hydrometer reads .998; subtract that from 1.000 to get +.002 (1.000 – .998 = .002). This is your adjustment factor to use with any future readings with that hydrometer at the standardized temperature. Therefore, if you took a reading of 1.044 on a sample of wort you would actually have wort that was 1.046 (1.044 +.002 = 1.046). Because it is not always expedient to adjust the temperature of a sample of wort to exactly the standardized temperature for a given hydrometer, all hydrometers have accompanying documentation that shows how to adjust specific gravity readings that are taken at temperatures other than the standard temperature. Such a table provides correction factors that will need to be added to your reading if it was taken above the standard temperature or subtracted from your reading if the sample is below the standard temperature. That is why it is important to measure the temperature of your sample when it is tested for specific gravity and include the temperature adjustment factor in addition to any calibration adjustment factor you derived by performing the calibration exercise just described.
Scales
Throughout the brewing process there is a need to weigh malt, hops and other brewing ingredients accurately. Some ingredients, such as malt, are weighed by the pound (or kilogram) to the nearest ounce (or gram), while others, such as hops or spices may be weighed to a fraction of an ounce (or gram). It is difficult (and often expensive) to find a scale that will weigh things accurately across the whole range from several pounds (or kilograms) to fractions of an ounce (or gram). Therefore, most homebrewers have two separate scales; one for big weighing jobs and another for small ones. A kitchen scale that can weigh up to 10 pounds (or 4 to 5 kilograms) usually works well for weighing malt, malt extract, specialty grains, honey and other mash adjuncts. A postage scale that weighs up to a pound (about half a kilogram), but can discern fractions of an ounce (or gram), is essential for weighing out hops, spices and other adjuncts that are used in relatively small quantities. Depending on the scale, different strategies can be used. For example, a clean US penny (1983 and beyond) weighs 2.5 grams, which is an easy way of checking hop and chemical scales.
To calibrate scales, we again turn to distilled water as our standard. However, water is only an accurate standard of weight if we can accurately measure its volume. If you recall from our discussion of hydrometers and specific gravity, a milliliter of water at 4 °C weighs one gram. Correspondingly, one liter (one thousand milliliters) of distilled water at 4 °C weighs one kilogram (one thousand grams). Since a kilogram weighs 2.2046 pounds, 453.6 milliliters of water would weigh one pound and 28.4 milliliters would weigh one ounce. Therefore, if we can accurately measure a volume of water to the nearest milliliter, we will have an accurate standard of weight to calibrate a scale.
Most kitchen measuring cups are not particularly precise. Accurately measuring the volume of water necessary for accurate scale calibration requires a more exacting volumetric measure such as a graduated cylinder. A graduated cylinder is a cylindrical vessel very similar in size and shape to a hydrometer test jar except a graduated cylinder is “graduated” or marked to show incremental units of volume in milliliters. A graduated cylinder that is a good compromise between size, accuracy and price is one with a capacity of 250 milliliters. Such an instrument can be purchased for around $10 from laboratory suppliers such as American Science and Surplus (www.sciplus.com) or ProLab Scientific (www.prolabscientific.com) and at many homebrew or winemaking shops.
With a 250-milliliter graduated cylinder you can accurately measure 28 milliliters of water as your standard for an ounce of weight, or 454 milliliters as your standard for a pound. Note that most graduated cylinders are standardized to measure the volume of water at a temperature of 20 °C (68 °F) instead of 0 °C (32 °F), so for best results check the temperature of the distilled water you are using to get it to the standard temperature stamped on the graduated cylinder. An eyedropper is a handy tool to add water, a drop at a time, to get to the final volume.
Once you have the volume of water measured for your standard weight, adjust the scale to read zero and place a container with the measured water on the scale and note the weight as accurately as possible. Then empty the water from the container and place the empty container back on the scale and record the weight again. The difference between the two measurements should be exactly the chosen weight you are calibrating for (i.e. one pound using 454 milliliters of water). As in the hydrometer discussion, subtract the resulting difference from one to produce a correction factor. For example, a graduated cylinder with 28.4 milliliters of water in it weighed 2.7 ounces and the empty graduated cylinder weighed 1.5 ounces, which means the scale showed a result of 1.2 ounces for the weight of the water when it actually weighed an ounce. Subtracting 1.2 from 1 yields a correction factor of -.2 ounce for that particular scale (1 – 1.2 = -.2). The correction factor (if any) would have to be included in readings from that scale for any measurements made with it in the future.
Volumes in vessels
The 250-mL graduated cylinder can also serve as an instrument for calibrating larger vessels such as brewpots or fermenters. Using an intermediate sized container, such as a 1 or 2-L soft drink bottle, one can carefully measure 250-mL of water at a time with the graduated cylinder (at the standard temperature) and transfer the water into a soft drink bottle to achieve a precise measure of one or two liters. A measure of 946 milliliters can be contained in a one liter bottle to represent a quart and 1,892 milliliters can be held in a two liter bottle as a measure of a half gallon. The bottles can then be marked with a permanent marker at the water line while the bottle is resting on a level surface. The bottles can then serve as larger volumetric measures to calibrate brewpots and fermenters to gallons or liters.
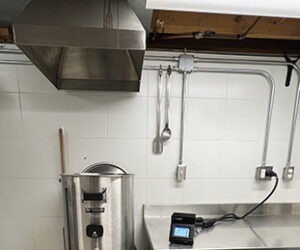
Use tape to mark volume increments on brewpots and fermenters. After the containers are heated and/or washed, replace the tape. Use permanent markers to mark the outside surface of plastic fermenters. Use glass etching paste to permanently etch gallon marks on the outside of glass carboys. Glass etching paste can be found at craft stores or from www.etchworld.com. For stainless steel pots, mark a plastic spoon or racking cane with a permanent marker and use it as a “dipstick” in a particular pot to gauge the volume of the liquid in the pot by its depth.