Muscle into Kegging
Homebrewing is a fun hobby. However, when pressed on the subject many homebrewers would say the least fun aspect of this pastime is the process of cleaning, sanitizing, and filling bottles. With the average batch of homebrew requiring more than two cases of 12-ounce bottles, it’s not surprising that it is at this stage in the process where many sanitization problems begin to surface. Wouldn’t it be nice if a case of bottles were as easy to clean and sanitize as, say, one fermenter?
Getting away from bottling is the single biggest reason that most homebrewers get into kegging their beer. When you consider that four Cornelius-style kegs easily fit into most refrigerators when the shelves are removed and hold the same amount of beer as approximately eight cases of bottles, there is a space savings as well. Sweep up
broken glass just a few times and kegs begin to look better even faster.
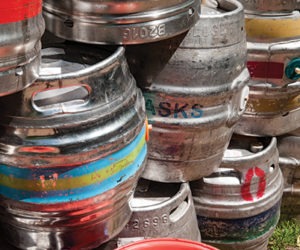
While there are many styles of draft systems available today for homebrewing, by far the most popular and versatile is based on the stainless steel cylinders formerly used for soda-pop syrup canisters. These tanks, generally referred to as Cornelius-style kegs, are readily available as the major soda manufacturers all switch over to a “bag in the box” format for packaging pre-mixed soda syrups.
Brewer, Meet Your Keg
Soda syrup canisters come in two major styles and in a variety of sizes from several different manufacturers, yet all share some common traits. They are manufactured from durable stainless steel, making them ideal for use with beer. They are available in several sizes from two to 10 gallons, with five gallons being the most common and perfectly suited for most homebrew batch sizes. They each have a large lid that facilitates filling along with easy cleaning and inspection of the interior of the keg.
The major external difference between the two different styles of kegs are the quick-disconnect fittings that are used to hook the keg to supply and dispense hoses. The two primary forms of kegs are the ball-lock style used by Pepsi-Cola and its associated brands and the pin-lock style used by Coca-Cola and its various brands.
Regardless of the style, every keg has two fittings. One is for the supply of gas to the keg and the other for fluid dispense. The two are distinctly different and not interchangeable. This prevents the hookups from being inadvertently reversed in the field. In the center of each of the fittings, regardless of style, are two spring-loaded valves called poppets that are depressed into an open position when a quick-disconnect is connected. These fittings are threaded onto nipples welded to the keg and are easy to remove using a wrench or socket of the appropriate size.
Pin-lock fittings, due to the pins that are spaced around the perimeter, require a special socket that has been ground with slots to accommodate the pins. Using a tool that is not designed to clear the pins to open the fitting will break the pins and render the fitting useless. The sockets can be purchased at most homebrew supply shops or easily manufactured at home using a socket of the appropriate size and a small, hand-held grinder.
Underneath each of the quick-disconnect fittings and protruding into the interior of the keg are two stainless steel pipes called dip tubes. The inlet, which is the gas-side fitting, usually has a short tube that barely projects into the keg; its primary purpose it to help seal the fitting to the keg. Sometimes this short tube is made of plastic.
The fluid or dispense side features a long tube that projects down into the center or depressed area in the bottom of the keg, allowing fluid to be drawn from the bottom of the keg until it is empty. Cornelius-style kegs need to be placed upright to dispense! It is not uncommon for these tubes to be gently curved to reach the center of the bottom of the keg.
The two dip tubes are interchangeable; it is critical whenever a keg is disassembled to ensure that the proper dip tube is reassembled with the appropriate quick-disconnect. Failure to do so can result in a full keg that will not dispense when properly hooked up.
All kegs will have some type of removable lid, usually located just between the two quick-disconnect fittings and held onto the keg by means of a rotating lock or a spring-loaded bail. Located in the center of the lid is usually some type of pressure-release or safety valve. Never attempt to remove the lid from a keg that has not been fully depressurized! Sometimes these valves are fitted with an external pull ring or tab allowing manual bleeding of the pressure within the keg. However, it is also common to see release valves that can’t be manipulated externally and are set to release at a preset pressure to prevent a dangerous overpressurization of the keg and a possible component failure.
On kegs without manual valves, it is simple to depressurize a keg by depressing the poppet on the gas or inlet side of the keg with a small screwdriver or key to bleed the pressure. Never attempt to disable or lock down a leaky pressure-release valve! If a valve is leaky, replace it with a working one; an overpressurized keg can become a dangerous bomb.
All soda kegs come with five replaceable soft parts called O-rings: one large one to seal the lid into the keg, two small ones that seal the dip tubes to the keg, and two slightly larger ones that are on the outside of each of the quick-disconnects to seal the valves to the fitting when the keg is in use. These O-rings are usually made of a foodgrade material and should be inspected for wear or cracking every time the keg is cleaned. The first time you use any keg that
previously held soda syrup, replace all of the O-rings. The goal not only is to prevent any possible leaks but also to prevent any soda flavors and aromas that may have permeated the material from getting into your homebrew. (Root beer is particularly bad.)
Which style of keg is best? The answer is generally whatever is most widely available in your area of the country. Both work equally well for homebrewing, but critical parts such as the quick-disconnect valves are not interchangeable between the two styles without
special adapters, so try to build a system around one style or the other, and then stick to it.
The ball-lock style of kegs requires a little more care than the pin-lock style to prevent inadvertently switching the gas and fluid connections (externally they appear very similar), yet this should only be a minor consideration. Use of what is available locally will ensure a constant supply of parts for the future at affordable prices. Beware of purchasing kegs that are missing parts or are incomplete; many times finding and purchasing the parts to make the keg serviceable will cost more than the purchase price of a complete keg.
The vast majority of kegs available on the market today are used kegs, varying in quality from those still filled with syrup residue that will require some cleaning and parts replacement to make serviceable for homebrewing to models in various levels of recondition. When purchasing a reconditioned keg, determine whether it is simply one that has been cleaned and pressure tested or one that has had all of the O-rings replaced as well.
The Art of the Quick-Disconnect
The quick-disconnect fittings that attach the gas and dispense hoses to the keg come in two types depending on the style of keg for which they are designed.
The pin-lock design locks to the keg with a collar that has either two slots to connect with a two-pin fitting for the gas valve of the keg or a three-pin fitting for connection to the fluid (dispense) side of the keg.
The ball-lock design is so named because the quick-disconnect is locked to the keg by means of four small, stainless steel balls that float freely inside of a spring-loaded collar on the fitting and lock into a groove on the outside of the keg fitting when the collar is released. Again, like the pin-lock design, the gas fitting is not interchangeable with the fluid fitting, even though they appear very similar.
Regardless of style, all quick-disconnects work by means of a spring-loaded needle valve located in the center of the fitting. When connected, it serves to depress the poppet valve located in the center of the keg fitting to allow gas or fluid to enter or exit the keg. All quick-disconnects are designed to be connected to supply hoses either by means of a threaded connection to which a barbed nipple can be attached or by a hose barb molded directly into the fitting. When not connected to the appropriate keg fitting, quick-disconnects serve to provide a fluid and gas-tight seal for the hoses to which they are connected.
The most commonly available quick-disconnect fittings are molded out of plastic, but durable stainless steel connections are available for both keg styles. They are easy to disassemble by means of a threaded stem that is sealed to the body of the fitting by a small O-ring. This stem protrudes down through the center of the fitting and supports the spring and needle valve. With plastic connections, many times this stem or even the whole valve is color-coded to the intended use of the connection. Gray is commonly used for the gas/inlet hookup, and black is used for the fluid/outlet connection. This leads to the pneumonic of “gray is gas and black is beer” to help remember which fittings go to which connections.
The answer to which style is better is the same as with keg selection: Go with the style that is readily available in your location. Both ball-lock and pin-lock will serve well, and the cost difference between the two is minimal. Try to limit your system to one style and stick with it to minimize problems with plumbing your tap system.
The stainless steel versions of the quick-disconnects can cost upward of seven times more than their plastic counterparts yet are virtually indestructible.
It’s a Gas
Of all the factors involved in building a tap system, CO2 bottle selection is probably the easiest. C02 bottles are available in a variety of sizes from small two-pounders all the way up to 100-pound monsters. The rating refers to the volume of gas the cylinder holds when full.
You can purchase your own cylinder or get one from the many gas suppliers who provide them for a small fee. This is done on an exchange basis where you return the empty cylinder for a different, full one. The advantage of this arrangement is that the owner of the cylinder takes responsibility for the required periodic testing to make sure it is safe for continued use.
Base cylinder selection on your proposed usage. If you plan to take your homebrew tap setup to different events and dispense from kegs, then the larger cylinders can be a nuisance to transport. Choose a two- to five-pound size. If you are dispensing primarily from a refrigerator at home and transportation is not a consideration, then the larger, 10- or 20-pound cylinders can cut down on making repeat trips to the local gas supplier to get a refill.
The cost of refilling a cylinder is primarily labor. Some gas suppliers charge a flat rate of roughly $8 for refilling a cylinder of up to 20 pounds. Most local industrial gas suppliers, welding suppliers, and fire-extinguisher maintenance operations can refill cylinders. The length of time a cylinder will last depends on a system usage; those brewers who artificially carbonate their beer will not get as much distance out of a tank as will the homebrewer who naturally conditions and carbonates his beer, using the C02 only for dispense. Still, a l0-pound cylinder should adequately dispense a few dozen five-gallon kegs of homebrew.
Always treat C02 cylinders as you would any pressurized gas cylinder. Even when they are not in use, have them properly strapped or restrained to prevent accidental tipping.
Taking Control
A good C02 regulator can easily represent the largest level of financial investment in any tap system. All C02 regulators are designed to perform the same basic function: to adjust gas from a high-pressure source such as a C02 bottle down to a low working pressure. It is not uncommon for a C02 bottle to have more than 1,000 psi in it, and most beers are dispensed at pressures varying from as low as 2 psi to 15 psi or more. The regulator is what allows this to happen. This is accomplished by an adjustable, spring-loaded diaphragm located within the body of the regulator that senses the pressure on the low-pressure side of the system and only allows enough gas to pass from the high-pressure side of the system to maintain this level.
There are literally hundreds of different makes and styles of regulators over a wide price range, but there are certain characteristics you should look for.
There are two types of connections for hooking up the regulator to the C02 bottle. While the threads and hookups are identical and will interchange, some regulators have a built-in O-ring that seals the regulator to the bottle, while others require a small crush gasket to obtain a leak-free seal. Failing to use a gasket on a regulator that requires one or using one where it is not necessary can result in a leak.
Always use a regulator that has a built-in pressure-release or safety valve. The pressures encountered in C02 systems can become high enough to create danger to the operator in the event of a component failure or misuse. Safety release valves, while they should never be relied on absolutely, can go a long way toward preventing disaster.
Dual-gauge regulators feature two gauges: one that reads the high side, or tank pressure, and one that indicates the low side, or output pressure. These are nice because the high-pressure gauge serves as an indicator of the volume of gas left in the C02 tank and can prevent you from running out halfway through your next homebrew party. Many gauges have a red zone that serves as a reminder for when the bottle pressure is beginning to drop into a low zone. The low-side gauge indicates the output pressure that is being used to dispense the beer. With all gauges, look for ones that have large, easy-to-read faces.
An inexpensive piece of insurance, and one that is just about mandatory for a mobile tap system, is some sort of “gauge cage” that bolts to the body of the C02 regulator. The cage helps prevent damage to the regulator and gauges in the event that a C02 bottle is bumped or knocked over.
Two features that are essential on any well-made regulator and that are unfortunately missing from many bargain-basement units are an on/off valve located on the output side of the regulator and a back-check valve. The on/off valve is usually a simple one-quarter-turn ball valve that can be used to manually prevent any gas from escaping through the output side of the regulator. It provides an easy way to shut off the gas when the system is not going to be in use. A back-check valve ensures that the gas flow will always be one way: from the regulator to the keg. This can prevent beer and foam from backing up the gas inlet hose and entering the regulator, ruining it.
On large systems in which several kegs are dispensed from one central C02 source, it is advisable to insert additional regulators, called secondary regulators, between the gas source and each keg. This allows each keg to be individually tailored for optimum dispense pressure. Secondary regulators are essential when several widely varying styles of beer are being dispensed or the hose lengths of different taps are dramatically different. These secondary regulators are usually equipped with only a low-pressure gauge and hose barbs for both the inlet and outlet sides of the unit and are meant to be used downstream of a proper dual-gauge primary regulator.
And Into the Glass
Tap selection for homebrew systems is usually pretty simple and can be based on the usage parameters of the system. If the tap system is going to be an on-the-go unit that is taken to various parties and events, then the cobra-head style of hand-held plastic picnic tap is pretty much the only way to go. For those setups that are part of a permanent refrigerator or kegerator installation, the extra expense of installing tap shanks and professional
lever-type faucets provides better performance.
Quality Tubing Counts
Hoses and fittings may seem pretty straightforward, but this is not an area to cut corners and not just any old food-grade tubing will do. Remember that unlike siphon tubing, hoses used in a tap system are under pressure, and a hose failure can lead to an empty C02 bottle or five gallons of homebrew sprayed into the refrigerator. Use tubing specifically designed for pressure dispense; usually it will have a substantially thicker wall and will be reinforced with nylon. Look for a pressure rating stamped on the tubing, and try to stick to ratings of 50 psi or higher.
Use hose barbs and fittings that are sized appropriately for the hose. Clamping an oversized hose onto a too-small fitting will result in a connection that not only is weak but one that may leak or create a foam-causing restriction as well. Use some type of hose clamp on all connections.
Keep in mind the intended application for your tap system. Clear hoses are sufficient for that system housed in your refrigerator, where they are kept in the dark. But clear lines can easily become a built-in skunking system to create light-struck beer if they are used to dispense outdoors on a bright sunny day. For picnic-style applications there are tap hoses available in both blue and black to help block out harmful ultraviolet rays. You can also wrap clear lines in
aluminum foil.
Be Mr. Clean
As with any facet of homebrewing, cleanliness and sanitization are critical to successful kegging. While you may not be cleaning and sanitizing cases of bottles, there are still plenty of cleaning chores associated with a properly used tap system.
Completely disassemble each keg prior to use for cleaning. Not only does this allow easy access to hard-to-clean areas such as the dip tubes and poppet valves, but it also allows for inspection of the O-rings to check for cracks or wear that may lead to leaks. Any unusual odors or soda-like flavors in your last batch of beer? Replace the O-rings!
Plenty of hot water, a mild detergent or cleanser, and lots of elbow grease are usually all that is necessary to clean even the dirtiest of kegs. If you can’t reach inside the keg, try using a brush designed for cleaning carboys. When cleaning and sanitizing kegs you might consider avoiding products that contain bleach (sodium hypochlorite). Under certain conditions, chlorine exposure can pit and corrode stainless steel, resulting in possible metallic off-flavors in any beer that later is stored in these kegs. Consider an iodophor-based sanitizer.
Most quick-disconnect fittings and taps are easy to disassemble, and it is usually a simple matter to loosen hose clamps to run hot water through the beer lines. As with any brewing equipment, when there is not beer in the system the best policy is to flush or rinse everything to prevent the buildup of residue and resulting bacteria.
On systems that are more complex or where complete disassembly is not always practical, hooking up a keg of clean warm water or a commercially available beer-line cleaning solution and flushing the system immediately after each
keg is emptied of beer will help keep your lines fresh tasting and trouble free. When using a cleaning solution, always follow the instructions for mixing and use provided with the product.
Ready for the World
You can either prime your kegged beer or use artificial carbonation. Regardless of which method you choose, hook your clean and freshly sanitized keg to the C02 system and lightly pressurize it to 2 psi to 4 psi. This allows you to check for leaks on the reassembled keg. Also, by manually releasing the pressure-release valve in the lid, you can purge the keg of oxygen to help preserve the beer and prevent premature staling. Kegs without manual pressure-release valves can be purged with C02 as well. Depressurize the keg, open the lid, and then briefly hook up the C02 to the fitting of the open keg to allow a burst of C02 gas to enter. Since C02 is heavier than air, the CO2 will fill the keg and force air out through the open lid. At this point the beer to be kegged can be quietly racked into the vessel. Just as with bottling, keep splashing or agitation to a minimum.
For beers using natural priming, at this point simply treat the keg as one giant bottle and add priming solution to the beer. The only adjustment is that due to the large amount of beer, a slightly smaller amount of priming sugar is necessary to achieve the same relative level of carbonation. Experiment with one-third to two-thirds cup of corn sugar or dextrose for priming five gallons. Seal the keg, then once again hook the now-full keg to the C02. Lightly pressurize the keg to 4 psi to check for leaks and to ensure that the lid is fully sealed. Allow the keg to condition/carbonate at room temperature for the appropriate period of time.
For artificial carbonation, you need to have some basic understanding of physics. What follows is only a brief overview; whole books have been written on the subject and many charts exist that take into account variables such as gas pressure, beer temperature, time, and wort gravity to determine the final level of carbonation in the beer. Also, much like brewing, there is no one right way to do this, so a couple of methods will be mentioned here.
The advantage of artificial carbonation is that a beer can be made fully carbonated and ready to drink in a matter of minutes. In addition since there is no secondary fermentation in the keg, the resulting yeast sediment will be minimal with a cleaner, clearer beer as the result.
For starters, the beer to be carbonated needs to be as cold as possible. Rack your beer to the prepared keg. At this point the keg can be hooked up to a C02 supply and the pressure set at 20 psi. Leave the keg cold under this pressure for a period of 48 hours. An alternative method would be to take the keg and hook it to a C02 source set at a higher pressure of 25 psi to 30 psi, then vigorously shake the keg for three to four minutes. As you are shaking the keg, gas can usually be heard running into the keg as it is absorbed into solution. If the keg is held upside down, C02 gas will actually be heard bubbling through the beer. If you neglected to heed the warning about incorporating a C02 check valve into your tap system, at this point you might also notice beer running up the gas line into your now-ruined regulator! After
shaking, allow the keg to settle for several minutes.
Regardless of the carbonation method used, the method of tapping the keg to check carbonation is the same. Begin by depressing the pressure-release valve or gas poppet to dispense pressure. After gaining some experience with your tap system, you will quickly learn at what pressure your system works best, but for starters set the dispense pressure at 2 psi to 5 psi and draw a sample of beer.
Adjust the pressure up or down to achieve a satisfactory pour, then evaluate the carbonation of the beer. If the beer requires further carbonation, repeat the steps taken to artificially carbonate. If, however, the beer is overcarbonated, simply disconnect the keg, shake it lightly, and bleed off the resulting pressure.
Repeat this until the desired carbonation level is reached or until the beer is flat, and then begin the carbonation process again. The first few times it may seem difficult, but it will become easier as you gain experience. Very quickly you will be able to get your beer carbonated just right with little or no difficulty.
When you first tap a naturally conditioned beer, the first pint or two may be full of the yeast sediment sucked off of the bottom of the keg. As long as you don’t disturb the keg, this should clear up within the first glass or two.
If this is objectionable, you can shorten the dip tube that goes to the bottom of the keg. Use a hacksaw or tubing cutter to do the work. Cutting off about 1 inch should allow you to draw clear beer from above the yeast sediment. Furthermore, using a fining agent such as Polyclar, gelatin, or is in glass at kegging time can aid in settling the yeast.
To keep your system pouring smoothly with a minimum of foaming and hassles, it is important to keep a few things in mind. The beer transfer lines should be kept as short as is practical, avoiding restrictions, lots of connections or splices, tight bends, and temperature changes.
Any time that the system is not in use, the quick-disconnect fittings should be unhooked and the C02 source valve turned off. If the system will not be in use for many days or the lines are not refrigerated, run warm water or a mild cleaner through them to prevent any microbial growth.
Fine Tuning
As with any part of homebrewing, the best way to get the most out of your new tap system is to experiment with it. Continual tinkering will ensure a system free from glitches. When in doubt, don’t hesitate to seek the help of more experienced people such as the supplier of your tap system or your gas supplier. Remember that any time you are dealing with pressurized canisters and tanks, proper safety precautions must be followed.