Wort Boiling
“Double, double toil and trouble; fire burn, and caldron bubble.” —
Shakespeare, Macbeth
One aspect of the brewing process shared by nearly all brewers is boiling the wort. In fact, the symbol for brewing has long been the kettle used for boiling, easily the most recognizable feature of any brewery. In short, boiling is nearly universal and also important. It affects many of the qualities — gravity, color, bittering, flavor, purity and clarity, to name only the major factors — of the beer we brew. It’s worth investigating in some detail.
Boiling by the numbers
During the boil, some of the water evaporates, thereby concentrating the wort. The amount of evaporation varies with the size and geometry of the kettle, the surface area exposed to the air, the intensity of the heat source and to a lesser extent other variables such as the ambient temperature, humidity, air pressure and any movement of air surrounding the kettle.
For homebrew-size batches (5–15 gallons/19–57 L), the evaporation rate is normally measured in gallons (or liters) per hour, with typical values of 1 to 1.5 gallons (3.8 to 5.7 L) per hour. It’s worth experimenting to determine the average value for your brewing system. This requires a means of accurately measuring the kettle volume. You can scribe marks on the side of the kettle or make a “dipstick” by marking a tall spoon, rod or a dowel. Gradually fill the kettle with measured volumes of water and make the appropriate marks. Measure the volume both at the beginning and end of the boil and calculate the difference. Divide by the boiling time in hours to determine the evaporation rate.
For example, if the beginning volume is 7.5 gallons (28 L), the ending volume is 5.5 gallons (21L) and the boiling time is 90 minutes, the evaporation rate is 1.33 gallons (5.0 L) per hour:
(7.5 gallons – 5.5 gallons) / 1.5 hours
= 1.33 gallons/hour
Assuming the same kettle and burner are used, and that they are capable of maintaining an adequate boil, the boiling losses are largely independent of the batch size because the major factor is the surface area.
It should be remembered that the boiling point decreases with the altitude above sea level. At sea level and standard barometric pressure, water boils at 212 °F (100 °C). Although the formula is not truly linear, a reasonable rule of thumb for the altitudes at which most people live is to decrease the boiling point by one degree Fahrenheit for every 500 feet above sea level (one degree Celsius for every 300 meters). For example, in Denver, Colorado, at an altitude of 5,280 feet (1,609 meters), the estimated approximate boiling point is 201 °F (95 °C). [The more accurate calculated value, using the more complex formula, is
201.8 °F (94.3 °C).]
Hitting the target
If you know your boiling losses and the pre-boil specific gravity, you can estimate the post-boil original specific gravity (OG) of your beer with reasonable accuracy. The formula for calculating the approximate post-boil OG is:
Post-boil gravity points =
(Pre-boil volume * pre-boil gravity points) / Post-boil volume
Specific gravity “points” (or GP) are the portion of the specific gravity reading to the right of the decimal point multiplied by 1000. For example, a specific gravity of 1.050 is 50 points.
Using the pre-boil and post-boil volumes from the example above, with a pre-boil specific gravity of 1.036, the projected post-boil OG would be 1.049.
(7.5 gallons * 36 GP) / 5.5 gallons =
49 GP (equivalent to SG 1.049)
Calculating the post-boil OG at the beginning of the boil is valuable because this is the easiest point to make adjustments. If the calculated OG differs appreciably from the target for the recipe, additional extract or water can be added. This subject is covered in detail in the July-August 2005 and January-February 2007 issues of Brew Your Own, but the following general rules may be of use to more relaxed brewers:
To increase the gravity of a 5-gallon (19 L) batch by approximately 1 GP at the end of the boil, add 2.5 oz. (72 g) — roughly one-half cup/118 mL — light dried malt extract, or approximately three-quarters cup (177 mL) liquid extract. To decrease the gravity of the same batch by approximately 1 GP, add 24 fl. oz. (710 mL) water prior to boiling. You can also manipulate the OG by changing the boiling time. In the above examples, a 9-minute increase in the boiling time will raise the OG by approximately 1 gravity point, while decreasing it by 9 minutes will lower it by approximately 1 point. The approximate change in the post-boil volume per 9 minutes will be 22 fl. oz. (640 mL).
The bitter truth
Among the most important roles of boiling is to produce bittering in beer. While the heat dissolves hop resins, the alpha acids in hops are not initially in a form that is soluble in wort or bitter. They must first be isomerized, which roughly means re-arranged. Isomerization requires the heat and physical agitation of boiling over a period of time.
Of the total amount of alpha acids in a charge of hops, only a certain percentage is isomerized; the “hop utilization” depends on many factors but in almost no case exceeds 40 percent. For homebrewers, the net figure is typically in the mid-20 percent range for hops that are boiled 60 minutes. (This figure accounts for bitterness lost due to alpha acids adhering to foam during the boil or absorbed by yeast during fermentation.)
What you don’t want
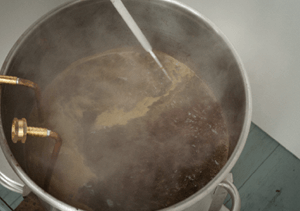
Nearly as important as what is transformed and retained during the boil is what is evaporated and driven off. Pale malts especially contain sulfur compounds that can be transformed during fermentation into dimethyl sulfide or DMS, which has a noticeable vegetal aroma and flavor variously described as being like cooked corn, cauliflower or parsnips. DMS is undesirable in nearly all beer styles. Fortunately, DMS is volatile, and a vigorous boil evaporates it and drives it off into the air with the steam. (Heat also converts the DMS’s pre-cursor, S-methylmethionine or SMM, into DMS.) For this reason it’s important to leave the kettle mostly uncovered during the boil so the steam does not condense and return to the wort. If you do not have a burner with sufficient heat capacity for a rolling boil with the kettle totally uncovered, at least ensure that a significant open area exists in order for the steam to escape.
For all-grain brewers, boiling stops the enzyme activity that results in the conversion of malt starches to sugars. While the alpha-amylase enzymes that are the major factor in this process begin to be deactivated at 158 °F (70 °C), some conversion continues even to the beginning of the boil. Were the enzymes not destroyed completely, the additional conversion would result in a thin beer lacking in residual unfermentable sugars.
Moreover, boiling plays a major role in wort sanitation. In addition to any potentially harmful bacteria, boiling also kills wild yeast and other microorganisms that result in souring and undesirable flavors. Wort boiled for more than ten minutes can be considered sanitary. Further ensuring the safety of beer is the fact that alcohol produced by fermentation, as well as the acidity, also inhibits contamination. No known human pathogens (harmful microorganisms) can survive in beer.
Eat your protein
Homebrewers know that clarity is often a desirable quality, and also that any number of factors can cause the beer to be otherwise. Boiling is part of the solution to this problem. Malt contains proteins and compounds known as polyphenols are present in both the grain husks and hops. Some of these are necessary because they contribute to beer foam and an attractive head on the glass, but in excessive amounts they are a major cause of haze. Many of us have seen the chill haze that can develop when beer is refrigerated and the proteins flocculate (coagulate and become visible). Some of the same occurs when wort is boiled.
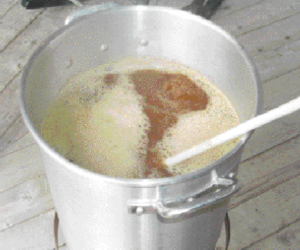
During the boil, the heat and agitation — both are necessary — causes the larger proteins and polyphenols to separate from attached water molecules and collect together. The phenomenon is clearly (pun intended) noticeable, and results in the hot break material that appears soon after the beginning of the boil. In worts with significant amounts of protein, such as those containing wheat, the appearance is pronounced, something like that of Chinese egg drop soup (which is caused by denatured egg proteins). Rather quickly (generally within 10–15 minutes) the wort, which has become cloudy as the boil begins, clears considerably, with large particles of hot break floating throughout.
To further assist in the coagulation of proteins and polyphenols, Irish moss is typically added during the last 15 minutes of the boil. Made from a type of seaweed that contains a polymer called carageenan, the moss has a negative electrical charge that is attracted and bound to the positively charged protein molecules.
Unless it is strained, much of the coagulated proteins, break material and Irish moss remain in the wort when it is chilled and transferred to the fermenter, but they are ultimately left behind when the beer is packaged, thus promoting the desired clarity. There is also some indication they provide necessary nutrients for healthy yeast reproduction.
Too much of a good thing
Almost every brewer has experienced the dreaded boilover. Seemingly within a matter of seconds, foam begins to collect on the surface of the hot wort, and the next thing you know it is climbing up and out of the kettle and onto the burner, sticking and burning and creating a mess to be cleaned up afterward. Another potential time for boilovers is during the addition of pellet hops. The tiny particles can provide nucleation sites for bubbles that cause foaming.
Learn to recognize the changes in the appearance of the wort as it comes to a boil. Keep a close watch on the kettle, leaving it uncovered at this point and turning down the heat somewhat at the first signs of agitation. Some brewers skim and discard the early foam, but all that is required is to gently stir the foam into the wort rather than allowing it to build up on the surface. Once a proper rolling but not excessive boil is achieved and the hot break material begins to flocculate, the situation becomes much less critical. Briefly turning down the heat and stirring the wort well immediately after hop additions eliminates problems at those times.
Professional brewers control boilovers with a hose. Spraying water onto the surface of the wort as it begins to come to a boil helps to disperse the foam. Homebrewers can imitate this procedure with a clean garden hose sprayer or spray bottle filled with cold water.
How long?
Boiling times vary with the recipe and the beer style. Extract brewers are generally told to boil the beer for 60 minutes. Coagulation of the proteins in malt extract should occur within about ten minutes. However, the hop alpha acid isomerization necessary for bittering takes considerably longer; at 60 minutes more than 90 percent of this will have taken place. Boiling darkens the wort and the beer; reducing the boiling time will result in a lighter color. A far more important factor in determining color is the wort gravity, another reason to boil the full wort volume if possible, rather than boiling concentrated wort and diluting it with water in the fermenter.
Traditional brewing texts recommend that all-grain beers be boiled for 90 minutes, but my personal experience is that 60 minutes can be sufficient, especially for lower gravity and lighter colored beers. Reasons for a longer boil include the desire for higher wort gravity due to the greater evaporation, and also for flavor changes that occur and are desirable in some styles. Rich beers with complex flavors are often boiled longer.
When subjected to the temperature and agitation of boiling, complex reactions occur between sugars and amino acids, producing substances known as melanoidins. These are usually considered pleasant, resulting in flavors typically associated with the browning of meats and bread. Longer boiling times result in increased melanoidin production and are a major cause of wort darkening. It should be noted this is not quite the same thing as sugar caramelization, which requires higher temperatures and less water than what is present during boiling. Caramelization is part of the process that occurs during the production of crystal and other colored malts.
Sometimes the most reasonable way to produce high gravity wort for a strong beer is by means of a long boiling time. Using the formulas in the previous section on hitting the target gravity, you can adjust the time and calculate the gravity and volume accordingly. For example, if the evaporation rate is 1.33 gallons (5.0 L) per hour, a 120-minute boil of 7.5 gallons (28 L) will increase the pre-boil gravity from 1.070 to 1.108 and reduce the wort volume to
4.83 gallons (18 L).
Additional indications for a longer boiling time include brewing at high altitude where the temperature is lower (the undesirable volatile fractions take longer to evaporate), and situations where the boil is less vigorous than otherwise would be optimal.
What it all boils down to
Boiling is a very straightforward — but essential — brewing procedure. With a little knowledge and understanding of all the particulars and the procedures, you can be the master of your kettle and ensure that your beer is everything you want and more.