Brewing a Hop Bomb, Yeast Dosing Specifics and Carbonating in a Unitank
Q
I am a total and complete hop head, and here is my question for you: how are so many brewers getting so much aroma and flavor in their beers (mainly IPAs and pale ales)? I’ve used many hopping techniques over many years, and still haven’t been able to achieve what they’re getting. Most recently I’ve used more late hops, hop stands, dry hops, and even Cryo hops.
Rick Pfarr
Marysville, Ohio
 A
A
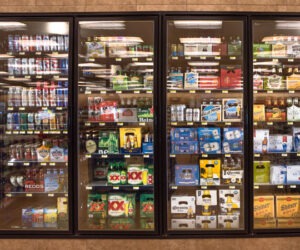
As simple as it sounds, many brewers who are brewing super hoppy beers are using lots and lots of hops! And I do mean lots of hops. Back in the 1980s, few beers in the world contained more than 1 pound of hops per US beer barrel (this is equivalent to 2.6 ounces/5 gallon batch, 3.9 grams/liter, or 0.4 kg /hl). This metric refers to the total weight of hops added to beer during the process. A respectively hopped Pilsner has about ½ pound/BBL (2 g/L) when low-alpha, noble hops are exclusively used in the brewhouse. Today, it is possible to buy beers that are hopped in the 3–5 pound/BBL (12–20 g/L) range. Looking for obscenely hoppy beer? Check out brewers boasting hopping rates in the 10 lbs./BBL (40 g/L) range.
Personally, I think this gratuitous use of hops is like driving a gas guzzler from the ‘60s that uses gas like water, but to each their own. If you want tons of hop aroma and flavor in your beer, sometimes you need to use a ton of hops! But why is it that some brewers are better at this game than others?
One of the real tricks to brewing terrific hop bombs is by starting off with the best hops. Seriously, if you want to grill the best steak at home you need to start with a terrific piece of meat. Brewing the best hoppy beer is not different, except the market is different. The fact is that most homebrewers and small-scale commercial brewers don’t go to the hop market to pick out the hops that will be used in their beer. You may go to a homebrew store or order hops from a supplier known for great products, but this is not the same as picking out your hops at the hop market. Commercial brewers who have hop contracts with hop growers and/or hop merchants can, in fact, go to the hop market during harvest to select lots of hops for their contracts. And homebrewers who live near hopyards, whether the hopyard is in your backyard or within a reasonable road trip from home, can also travel to the hop market.
Going to the hop market is not like going to the local gourmet grocery store because you typically don’t leave with a bag of hops. The purpose of hop selection, which is really what happens at the hop market, is choosing lots of harvested hops (a lot refers to bales of hops harvested from an area, so a sample from one bale is used to represent the lot) before they are processed. In the days when all breweries used cone hops, a trip to the market could end with a bale of hops in the back of the pick-up. But today most brewers use pellet hops, and the selected hops are pelletized by hop processors following selection. The real take-home here is that brewers who select hops have a leg up on brewing hoppy beers because not all hops are created equally. I will get back to hop oils and products like Cryo hops in a moment, but let’s move onto brewing process.
The trend with these hop bombs has been adding hops at multiple points in the brewing process, with a real focus on adding hops later in the game. Rewind the clock 20 years and you land in a world where few craft brewers were dry hopping or whirlpool hopping. And the brewers who did use these methods were looking for a bump in aroma to let folks smell hops in beer. No one was really thinking of brewing beers that smelled like hop juice. Words like Torpedo, hop bursting, biotransformation, and Randall had no hopcentric meaning to brewers. Today, there are few hop heads who don’t know what these terms mean.
OK, so how does this help you? For starters, seek out the best hops you can find. This may involve posing all sorts of questions to your local homebrew supplier, seeking hops from local breweries who have the inside track on certain varieties, or getting to know some hop farmers. The next thing you need to do is add hops early and often. Mash down that hop pedal and start adding!
Hop character can be layered into beer by adding hops to the kettle, whirlpool, late in fermentation, at the end of fermentation, and to the serving vessel. But there are two major problems with this strategy. The first is crazy beer losses associated with the beer sponges that brewers call hops. Add enough hops to beer, and there is no beer left to drink. While this is a slight exaggeration, some commercial breweries have staggeringly expensive, hop-associated, beer losses that approach 30%. The other commercial problem is that hops are expensive, and if hopping rates are pushed into the 5–10 pound/BBL (20–40 g/L) range the selling price of the beer must reflect this massive increase to the cost of raw materials. These are very real challenges to the business of brewing, so creative solutions continue to follow the trend in hoppy beers.
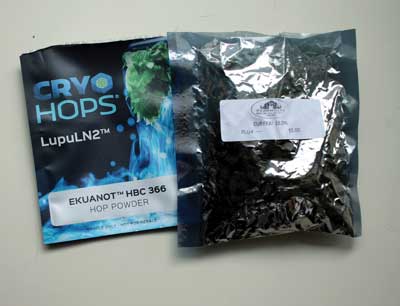
This is where ingredient and process technology enters into the conversation. Hopping method can reduce the hopping rate required to achieve a given level of hoppiness. Commercial breweries have a major leg up on homebrewers because large kettles, whirlpools, and fermenters have a smaller surface-to-volume ratio, thereby minimizing aroma loss at surfaces. Aside from that difference, specialized hop backs, dry hopping vessels, and new hopping methods like late fermentation hopping have all improved hop aroma yield in beers. The ingredient improvements are also quite real. New hop oils, Cryo hops, greater availability of Type 45 (and other) pellets, and enzyme treatments aimed at biochemically changing the volatility of hop oils are some examples of advancements in the ingredient world.
I want to end this answer with a few tips suggested by craft brewer extraordinaire and BYO reviewer, Mitch Steele, whose reviews of my columns are always much appreciated. So here are some great concluding points from Mitch:
• Do consider multiple dry hop additions, but remove the first addition before adding the second. Independent of the number of additions, remove hop material after two days contact time. This will maximize extraction of the good oils you want and minimize the addition of vegetative and/or stem flavors.
• Minimize oxygen pickup when dry hopping. Nothing pulls out hop aromatics faster from your beer than exposure to oxygen. Admittedly, this is very hard in a homebrew set up, and if trying to do multiple dry hops, but it is something to work hard to accomplish.
• Hop oils are a nice way to augment hop flavor and aromatic intensity. I don’t like using them in place of pellet hops, but adding a small amount along with the pellets can help increase flavor intensity and how long the hop flavors last in the beer.
Q
As part of your “Top Homebrewer Tips” in the May-June 2018 issue of BYO, you advise to “clarify, rack and dose when bottle conditioning” with sugar and “dried yeast added at the rate of 0.2 g/L.”
I am wondering what general method you suggest to accomplish this. Sprinkling some US-05 into my bottling bucket with the usual dose of priming sugar does not seem like the right idea. Do I cold crash along the way?
Alex Wasowicz
Davidson, North Carolina
A
The basic method for this process uses a carboy and plastic bottling bucket, and begins with relatively clear beer. If you want maximal clarity, cold crashing definitely makes a big difference; this is true of gravity clarified, fined, and filtered beers. Independent of clarifying methods you may use, ale fermented at 68 °F (20 ˚C) contains about 0.8 volumes of carbon dioxide (1.6 g/L) after non-pressurized fermentation, and lager fermented at 50 °F (10 °C) contains about 1.1 volumes of carbon dioxide (2.2 g/L) after non-pressurized fermentation. You need to know the base-line carbonation level so you can calculate how much sugar to add to achieve the desired level in your beer, and you must know your beer volume. The volume is also needed to determine how much yeast to add. I will come back to some basic calculations, but want to stick to process for the moment.
Using this basic set up of carboy and bottling bucket, you start by determining the beer volume in the bottling bucket because the dosing rate of yeast and sugar ties directly to beer volume (I will get to these details in moment). Next, hydrate your dried yeast in about 100 mL (3.4 fl. oz.) of boiled and cooled water, make up your priming sugar as usual, and very gently stir these into your beer to mix. At this stage of the process, your beer may be warm or cold depending on the use of a cold-crash step; it really makes no difference at this point. If you bottle the beer within an hour, you should have no major issues with yeast settling in the bucket, but if this concerns you, gently stir the bucket a couple of times during the bottle run. The basic set up has two main limitations: The first is that the beer is flat going into the bottle, and the second is the very real risk of oxygen pick-up and subsequent oxidation when using an open bottling bucket.
Yes, I did just write that flat beer going into the bottle is a limitation to this method of bottle conditioning. While bottle conditioning does add carbonation to the beer in the bottle, hence the term bottle conditioned, it is not the only source of carbon dioxide. In fact, most commercial brewers who bottle condition their beers use the method to improve shelf life and/or achieve higher carbon dioxide levels than are possible by bottling carbonated beer (anything over about 3.0 volumes or 6 g/L is not practical due to excessive foaming).
A more advanced bottle conditioning technique is to add priming sugar and yeast to a keg of beer that is carbonated to about 2.2 volumes (4.4 g/L) of CO2. This method presents the challenge of knowing how much beer is in the keg, but also makes the mixing process less risky from an oxygen pick-up perspective. The easiest way to know how many liters of beer are in the keg is by weight. Simply weigh the keg before and after filling (kilograms are used for simplicity), and dividing the difference in weight by the specific gravity of the beer. For example, if the empty keg weighs 1.5 kg (3.3 lbs.) and the full keg weighs 19 kg (42 lbs.), the beer weight is 17.5 kg (38.6 lbs.). Divide this by the beer specific gravity and you now know beer volume. For example, if the final gravity after fermentation is 1.008, 17.5 kg (38.6 lbs.) ÷ 1.008 kg/l (38.4 lbs.) = 17.4 liters (18.4 qts.). As long as the keg was purged with carbon dioxide before filling, you can gently rock the keg to mix your yeast and sugar solutions with your beer. After allowing the beer to rest for a few minutes, you can bottle using a counter-pressure filler and cap on foam for the best shelf life. Again, the reason for bottle conditioning is not just beer carbonation. This method gives you better beer stability in the bottle and it also allows you to produce highly carbonated beers without struggling during filling.
Both of the methods described above discuss bottling cold beer. It is important to store the filled bottles at room temperature for conditioning. Since fresh yeast is being used, the process is typically complete within 2 weeks of bottling.
Now that the process has been discussed, what about the math? I like to use grams of CO2/liter of beer because the math is easiest (2.00 grams of carbon dioxide per liter of beer equals 1.02 volumes of carbon dioxide). Chemistry shows that 2.05 grams of glucose produces 1 gram of carbon dioxide when fermented (dextrose, corn sugar, and invert sugar are common names for glucose). So here are two examples for a “flat ale” and a lightly carbonated lager:
Flat Hefe Weizen (ale) Example
• 17.4 L of beer
• Estimated carbonation level is 1.6 g/L (20 °C at 0 psig)
• Target carbonation level of 7.0 g/L using corn sugar (sorry speise lovers!)
• Need to increase carbonation by 5.4 g/L (7.0 g/L – 1.6g/L)
• 17.4 liters beer x 5.4 g CO2/liters beer x 2.05 g glucose/g CO2 = 192.6 grams glucose
• 193 grams ÷ 28.4 grams/ounce = 6.8 ounces glucose
• Target 0.5 to 1.0 million yeast cells per mL of beer using dried yeast with density >6 billion cells per mL; add 0.1-0.2 grams of yeast per liter of beer
• 17.4 liters beer x 0.1-0.2 grams yeast/liter = 1.8 to 3.5 grams of yeast
Carbonated Lager Example
• 17.4 L of beer
• Estimated carbonation level of 4.4 g/L
• Target carbonation level of 5.2 g/L using corn sugar
• Need to increase carbonation by 0.8 g/L (5.2 g/L – 4.4 g/L)
• 17.4 liters beer x 0.8 g CO2/liters beer x 2.05 g glucose/g CO2 = 28.5 grams glucose
• 28.5 grams ÷ 28.4 grams/ounce = 1.0 ounces glucose
• Target 0.5 to 1.0 million yeast cells per ml of beer using dried yeast with density >6 billion cells per ml; add 0.1-0.2 grams of yeast per liter of beer
• 17.4 liters beer x 0.1-0.2 grams yeast/liter = 1.8 to 3.5 grams of yeast
Q
I’ve been brewing now for around 2 years and always bottled the beer out of my plastic buckets. Recently, I stepped my game up a bit and plunged into the realms of Ss Brewtech’s 7 gallon (26.5 L) Chronical. Great bits of kit, really impressed. So, I now have a unitank and a glycol chiller. My question is how do I go about carbonation using the unitank and carbonation stone?
Can’t seeMm to find an awful lot online regarding the actual method and how long to carbonate. I’ve just done a trial on a lager that I ruined due to leaving it on the yeast for too long so didn’t mind over-carbonating or wasting it. My steps were as follows:
• Temperature set to 3 °C (37 °F)
• Crank the CO2 pressure up to 20 psi (138 kPa) and left it for approximately 1 hour
• Being scared of over-carbonating, reduced the pressure down to desired 10 psi (69 kPa) to give around the 2.4 mark, and left it for a few days in the unitank at this pressure.
Came back to it at the weekend and it felt under-carbonated. Any advice on this? I like doing my research and would like a tried and tested method using a carbonation stone.
James Broadbent
Wakefield, England
 A
A
There a few ways to go about carbonating beer using a stone, and I think your approach is sound, but needs a few changes. I will review the method that has worked for us at the Springfield Brewing Company in Springfield, Missouri for the last 20 years because what we have is not too different from the set up you describe. Our nominal batch size is 20 hL (2,000 liters or 528 gallons), so our tanks are not so large to be totally different beasts. The beers that we carbonate or nitrogenate with a stone are adjusted in the bright beer tank, and then dispensed directly to our taps. Just giving a bit of background to establish that I will be describing something that is routinely used for this process.
There are really two key pieces of data that you need to know about your system. One is the pressure required to push gas through your carbonation stone; in engineering lingo this is called the pressure drop, or ΔP, across the stone. Pressure drop is important because it lets you know the pressure after the gas flows through the stone. The easiest way to determine the ΔP is to connect your stone to a carbon dioxide line with a gas regulator controlling the pressure to the stone, submerge the stone in a bucket of water, and slowly increase the pressure while watching the stone for bubbles. When you see gas bubbles flowing from the stone, you have determined the ΔP across the stone. It may be a good idea to check this a few times to verify your findings. A typical value is about 2 psi (14 kPa). Beer deposits, like beer stone or calcium oxalate, will increase the ΔP across the stone, so this is a good reason to soak stones in acid after use. I will come back to ΔP in a moment.
The second value you need to determine is the hydrostatic pressure exerted by the beer when your tank is full. In small tanks this value is negligible, but it exists, so let’s not ignore it. A medium-sized tank in a pub may be 10 feet tall (3 m) and the beer level at 8 feet (2.4 m) above the tank bottom when the tank is full. A one foot (30.5 cm) column of beer exerts approximately 0.43 psi (3 kPa) of pressure, so 8 feet (2.4 m) of beer is equal to 3.4 psi (24 kPa). This value is often called liquid head by engineers. This is where things get a little fuzzy; serving tanks and kegs change level when used, so the liquid head changes over time. I figure the average height between full and empty is about as exacting as one can be, so I would use 1.7 psi (12 kPa) for the liquid head value in this example. This beer height in your 7 gallon (26.5 L) tank is about 3 feet (0.9 m), so your average liquid head is about 0.7 psi (5 kPa).
Now that we have the ΔP across your stone and the average liquid head of your beer, we need to know the carbon dioxide pressure required to hit the desired carbonation level. Your target of 2.4 volumes is actually a bit low, so your test beer may have seemed a bit low in CO2 because of your target value. For the purpose of this example, I am going to bump this value to 2.5 volumes. Referring to a gas chart, for example http://www.zahmnagel.com/wp-content/uploads/2017/04/Zahm-Nagel-CO2-in-Beer-Chart.pdf, the pressure at 3 °C (37 °F) required for 2.5 volumes can be determined, and that pressure is about 11.5 psi (79 kPa).
Now it’s time to use the pressure drop and static head information. The pressure drop must be overcome by adding more pressure, so the 11.5 psi (79 kPa) required for carbonation needs to be increased, and the liquid head increases gas solubility by adding pressure to the system, so this value is subtracted. The resulting math looks like this:
Target pressure delivered to the inlet of the stone = 11.5 psi (79 kPa) + 2 psi (14 kPa) – 0.7 psi (5 kPa) = 12.8 psi (88 kPa).
The easiest and most robust method is to adjust your gas pressure to 12.8 psi (88 kPa), open the valve to the stone, and leave things be for 24-36 hours. This should be plenty of time for the system come to equilibrium. The stone size does factor into this because the size is related to area, and insufficient area will slow down the gas transfer rate (as will a dirty stone), but this is unlikely with a 7-gallon (26.5-L) tank.
A variation on this theme that can really speed things up is to use an adjustable pressure relief valve on the top of your tank, and adjust this pressure to the pressure fetched from the chart minus your liquid head; 11.5 psi (79 kPa) – 0.7 psi (5 kPa) = 10.8 psi (74 kPa). Then bump the 12.8 psi (88 kPa) in the example above by about 0.2 (1.4 kPa) to 13 psi (90 kPa). What will happen is that a slow flow of carbon dioxide will escape from the relief valve as an excess of gas constantly flows into the system because we have set the conditions up to force a flow of gas through the beer. Depending on the size of your stone, this method will carbonate your beer in about an hour. It is important not to get too carried away with the inlet pressure because this method will cause foaming if too much gas flows through the beer. It also may result in aroma loss, beer loss, and reduced foam stability, not to mention a potential mess if foam spits out of the pressure relief valve.