Brewing Basics for Beginners
Basic Equipment
Some of these you may already have in your kitchen. The others you can find in your local homebrew store.
- Fermenting bucket (food-grade white plastic, 5-6 gallon)
- Bottling bucket with spigot attached (food-grade white plastic, 5-6 gallon)
- Large canning pot, 4-7 gallons (coated steel or stainless steel—avoid aluminum)
- Bottle capper (two-handled type is most common)
- Rigid siphon tube or cane (2 feet) with tip (attaches to siphon hose)
- Flexible siphon hose (4-6 feet)
- Floating thermometer (temperature range 40-240°F)
- Large spoon (wooden, plastic, or stainless steel)
- Bottle filler (attaches to bottling bucket spigot with a short piece of tubing)
- 2-4 cases of empty bar bottles (refillable, strong glass—no twist-offs)
- Plastic airlock device (half-filled with water, allows carbon dioxide to escape and keeps oxygen out)
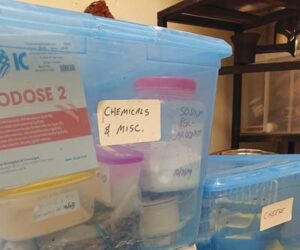
- Miscellaneous: can opener, colander/strainer, rubber gloves, sauce pan, 1 quart measuring pitcher, bleach (unscented), B-Brite cleanser
If possible, try to have equipment reserved just for brewing. This way your first brew won’t have pieces of last night’s stew floating in it because you used the same large pot to boil your brew.
Beer Ingredients
Even though beer tends to be this magical mixture, the basic ingredients are really down to earth.
- Water. Spring water or well water is the best to use. If you have chlorinated city water, you may want to pre-boil three gallons the night before. Then let it cool covered overnight. The pre-boiling gets rid of any chlorine present in the water.
- Malt extract. This comes in dry and liquid forms. Malt extract is basically a sugar called maltose, which is created by converting (mashing) malted grains (i.e. barley, wheat, etc.) from starch to sugar.
Do you remember as a kid eating chocolate malted balls? Well that was chocolate coated maltose—the main ingredient in beer! No wonder you like beer so much.
The Brewing Process
Brewing your beer is the process of boiling the ingredients, cooling, adding the yeast, fermenting, bottling, carbonating, and aging. To brew your beer implies the whole process, not just the boiling part. Now here’s the nitty gritty.
Cleaning and sanitizing. You need to clean any equipment that comes in contact with your precious brew. Then you need to sanitize the equipment.
For cleaning use B-Brite brand of powder cleanser, then rinse with hot water. For sanitizing use a weak bleach solution of 1 teaspoon to five gallons of water. Then soak everything for 15-20 minutes, drain, and shake off the excess sanitizer. No need to rinse; any chlorine drops will be negligible.
Boiling. You will start with 2.25 gallons of water. Boil. Add the ingredients at different times depending on the recipe you’re using. Boiling lasts 30-60 minutes.
Cooling. Before you can add the yeast, the temperature must be below 70-75°F. Just add three gallons of starting-to-freeze water to your plastic bucket (fermenter). Then carefully ladle (with a sanitized saucepan) the unfermented beer into the bucket.
Fermenting. This is where the yeast beasties can get to have their way with the lovely liquid wort (unfermented beer, pronounced wert). You add (also called pitch) one or two dry yeast packets into the cooled wort. Store in cool, dark place.
Bottling. Use your bottling bucket, with bottle filler attached, to fill your bottles. Leave a 1/2-inch to one-inch headspace at the top of each bottle, then cap. The priming sugar (gently mixed throughout the beer in the bottling bucket) gives your first batch just enough carbonation.
Carbonating. Storing your beer for one week at 65-70°F allows a mini-secondary fermentation to create carbon dioxide in your beer. Drink one homebrew after one week. If it’s still not carbonated, wait another week and try again.
Aging. Although you probably don’t have a beer cellar (yet!) you should store your beer in a cool closet or down in the basement. 50-60°F is optimum. As your homey ages, it becomes smooth. Give it two to three weeks to properly age.
Drinking. Need we say more. Always pour your homey into a tall, clean glass. Your precious brew doesn’t deserve to be swigged from the bottle.
Remember to stop pouring your homebrew when you see yeast sediment just starting to flow out.
Although the yeast is rich in Vitamin B, it gives your homebrew a cloudy and yeasty taste. Some homebrewers will drink the yeast in the bottom separately. It tends to ward off evil headaches caused from drinking alcohol.
Good health and enjoy!!
First-time homebrewer’s biggest problem? Not brewing the second batch soon enough. Your first batch will go so quickly, you will have wished you started earlier.


