Brewing Hoppy American-Style Beers
 During the past 20 years or so, there has been an obvious upward trend in modern American brewing culture when it comes to the creation and consumption of hoppy beers. Hoppy American-style pale ales have given way to even hoppier American IPAs, and American double IPAs have pushed hop character to its limits.
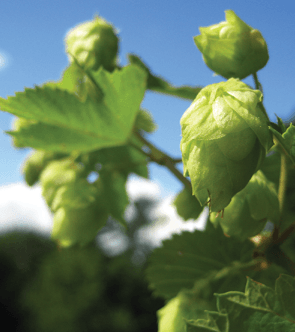
So why are we so crazy about these little green cones and what makes American hops so special? Generally speaking, hops are the yin to the malt’s yang when it comes to the balance of bitter versus sweet in beer flavor. They also inhibit the growth of some beer-spoiling bacteria, promote head retention and even assist in clarification.
If you have ever tried to make a beer with just malt and no hops, you’d find out quickly that it’s got very little foam, it’s pretty sweet (not in a good way!) and aging of any kind would become a risky proposition.
American hops are unique because, well, they are American. Hops from Europe were transplanted here in the US, and find themselves in a new environment. Many of them were bred with native varieties in their respective regions which all have a distinct climate and soil profile. Over time, growers and brewers alike have driven the selection process to give us the high alpha, citrusy, piney and floral characteristics we know and love today. A few classic varieties that exemplify this hop evolution are Cascade, Centennial, Chinook and Columbus — the so-called “C” hops. With Rolling Stone-like staying power, they have brought their coveted bitterness and unique flavors to our pint glasses for decades. These have been the backbone of many great beers and work well alone, with each other and some of the more recently released varieties.
What’s in Hops?
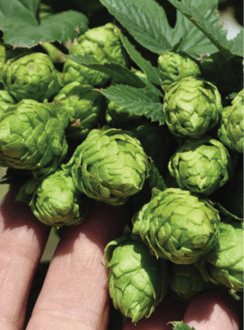
Before we get into the heart of how to best brew a hop forward beer, I think we should briefly put on our lab coats and delve into the the composition of a hop cone as it pertains to brewing value. Most of the compounds that end up in our beer can be found in the lupulin glands. These are the yellow, sticky spots on the underside of each tiny bracteole (leaf). They contain the all powerful alpha acids that are the root source of bitterness. These acids go through a chemical change in the boil and become isomerized (and solubilized) so that they can stick to the bitterness receptors in your mouth. These iso-alpha acids are also responsible for the preservational quality of hops, as they prevent Gram-positive bacteria from being able to absorb nutrients, severely limiting their ability to reproduce. When purchasing hops, the percentage of alpha acids listed on the package is a direct indication of the hops bittering potential.
The oil content is a good baseline indicator of how much flavor and aroma a particular hop can add to your beer. Though not commonly listed on the package, the level of oil is typically expressed in mL/100g, generally ranging from 0.5–3.0. These oils contain varying degrees of volatile compounds that give them their individual character. Many of these compounds, such as myrcene, are highly volatile and are quickly lost in the vapor during the boil. While others, such as linalool, are more soluble and can survive into the final beer more easily.
The polyphenols in hops have almost a Dr. Jekyll and Mr. Hyde relationship when it comes to their contributions to beer. During the boil, they help coagulate proteins and drop them out in the kettle, preventing them from making it to fermentation. Further down the road, when the beer is chilled, these same compounds bind with remaining proteins to create chill haze. That is why dry hopped beers tend to be a bit cloudy, since some of the polyphenols were extracted post-boil. Tannins are the most notorious of this group because in large amounts they can cause your beer to become highly astringent. Since they mostly come from the plant material itself and not the lupulin glands, using high alpha hops in your bitter beers will get you the alpha acids you need and keep those pucker face inducing tannins in check. If you have any ideas about making an all Cascade Imperial IPA, you may want to think twice. It could end up a little rough around the edges—not to mention suffer from severe beer loss!
 Brewing Hoppy Beers
Now we can get to the topic at hand. The beer styles that are most known for showcasing American-style hops are American pale ale (APA), American IPA and Imperial IPA.They are not what you would call balanced, but keeping your beer from going too far to the bitter side is critical. When planning out your recipe, you should keep an eye on the bitterness units vs. gravity units ratio (BU/GU). For example, if an IPA has a projected IBU of 75 and an OG of 1.075, then it would have a BU:GU ratio of 1.0 (75 IBUs/75 “gravity points”). This is a much better indicator of how bitter your beer will end up than if you just look at the projected IBUs. I’d shoot for the following values: APA (0.6–0.8), IPA (0.8–1.0), IIPA (1.0–1.3).
Ingredient Selection
As far as ingredient selection goes, I would say that it is mostly an area of personal preference, but here are a few guidelines. When selecting your malt bill, try not to make it too complicated.
Remember, you want the hops to be the star of the show here and the malt is more like a supporting actor. Using 2-4 different malts in any of these styles should create enough complexity to keep things interesting. Keep the crystal malts under 10% for an APA and less than 5% for the IPA and especially the IIPA, if you use any at all. Slightly kilned malts like Munich make a nice complement to a standard 2-row pale malt base. You could also use a more robust base malt like Maris Otter or Golden Promise if you like. Sugars can be used in addition to malt to help keep the beer on the dry side, especially in the high gravity styles like an Imperial IPA. I would keep them at 15% or less if you choose to use them.
Extract brewers should stick to a pale malt extract as a base and possibly include some Munich extract in your recipe if you can get your hands on it. A small addition of some crystal malt steeped for about 30 minutes in a nylon bag wouldn’t be a bad idea either.
Hop selection will be critical to how these beers end up tasting. You can do some research on beers you already like and see if you can find out the variety of hops that were used in them or just use some of the ones mentioned above. In addition to those, there are others like Simcoe®, Amarillo®, Citra®, Willamette, and many more, that blend well with the “C” hops. There really is no limit to how many varieties you can include in your recipe, but some people choose to do the exact opposite and go for a single hop beer. That’s a great way to explore what a variety is truly like.
Another decision you will come across is what form of hops you would like to use. Some people prefer pellets, whole hops, hop extracts or a combination of these options at different points of the process. Traditionalists tend to lean toward whole hops and usually feel that they benefit from being less processed giving a more pure hop flavor to the beer. This is due to the lupulin glands remaining intact until you are ready to unleash them. On the other hand, those that prefer pellets would argue that a higher utilization rate and less plant material contributing to beer loss more than makes up for it. The debate on whether there is a flavor difference between the two has been going on for some time. I will only point out that many commercial breweries use pellets from start to finish without any complaints from their customers. And if you really want to maximize the yield on your next batch, you could give hop extracts a shot. The ones I have seen are 90% pure iso-alpha acids that can add bitterness to the beer post boil. I wouldn’t eliminate the use of hops entirely in lieu of extracts, as you would miss out out on many of the benefits we’ve already covered, not to mention a lack of hop flavor in the beer.
I think it is also worth mentioning what to look for when you rip open that chilled, vacuum sealed or nitrogen purged package. That is the state you found your hops when you purchased them right? I hope it was, since air, heat and sunlight are enemies of the hop and your beer if it was exposed to one or more of these degredational factors for any length of time. You’ll know fairly quickly if your hops are in trouble just by looking at them. They tend to turn yellow, tan and even brown as they progressively go downhill. Also, if the first whiff you get reminds you of stinky cheese or sulfur, you know it’s time to find another supplier and call your brew buddy to borrow some of his secret stash of hops.
The yeast strain you choose will have two major impacts on how bitter your beer ends up being. The first is the yeast’s ability to metabolize sugars in the wort, also known as attenuation. The higher the attenuation, the less sugar is left in the beer. The less sugar that is left in the beer, the more bitterness you will taste. The three beer styles mentioned should be on the dry side, so a strain with an apparent attenuation of 72–80% would be ideal. The other impact that it has on bitterness is the yeast’s ability to adsorb alpha acids. Some strains promote bitterness and others eat up a fair portion of it. There isn’t a number associated with this characteristic, but the yeast supplier’s description or your local homebrew shopkeeper should be able to point you in the direction of one that will best suit a hopped up brew.
Water
The last and most abundant ingredient in your beer is obviously water. Depending on your source and water profile, you may or may not already be treating it with brewing salts. When it comes to promoting a crisp hop bitterness to your beer, an addition of calcium sulfate (gypsum) can help get you there. And yes, that’s the stuff that sheet rock is made of, although I wouldn’t recommend scraping some off the piece that’s showing in your garage and dropping it into your kettle. If you don’t have a clue what’s in your brewing water and your beers usually turn out fine, I wouldn’t mess with it. If you do have that information available, then I would try to get a sulfate vs. chloride ratio from 2–3 to 1 with a max of 300 ppm for the sulfate. Chloride accentuates maltiness, while sulfate brings out the bitter side in a beer, but not so much that it gets harsh tasting. For every gram of gypsum you add to a 5-gallon (19-L) batch, you will get about a 30 ppm increase in sulphate in your wort.
Techniques
Let’s now look at the process of brewing a solid American hoppy beer. A single infusion mash with a temperature range of 148 °F (65 °C) through 152 °F (68 °C) will help you achieve a high conversion of starch to fermentable sugars, giving you the low final gravity and subsequent dryness you are looking for. The higher the gravity or percentage of specialty malts you use in your recipe, the lower mash temperature should be on this spectrum.
The timing of your hop additions will largely determine what flavors and aromas get into your beer. The earlier you add your hops, the more bitterness you will get, but less hop aroma and flavor. The later you add them, the reverse is true. This is why hoppy beers rely on multiple additions during the brewing process to get the best of both worlds. Some brewers go as far as “continually hopping” during the entire boil in an attempt to harness every possible flavor from the hop spectrum.
Utilization is a term that refers to the degree to which the alpha acids added to the wort get converted to iso-alpha acids and remain in the wort after the boil is completed. There are many different factors of varying degrees that impact this number. They include: Length and vigor of the boil (More vigor/longer boil = higher utilization%), wort gravity (lower gravity = higher utilization%), wort composition (varies), wort pH (Higher pH = higher utilization%), hopping rate (more hops = lower utilization%) and whole cone vs pellets (pellet utilization% is slightly higher). Most homebrewers rely on a computer program like BeerSmith, ProMash or Beer Calculus to calculate their estimated IBUs. (Note that this number is an estimate, and other factors can impact how bitterness is perceived — a 40 IBU sweet stout brewed with chloride-rich water will likely not taste as hoppy as a 40 IBU dry pale ale made with high-sulfate water.)
The mash is the first point where you can add your hops, although this is not a very common practice. Some brewers believe you’re able to get a more smooth bitterness, a higher utilization rate by adding the hops this early and also reduce wort loss in the kettle. I don’t know of any scientific evidence to support this, as the temperature is pretty low in relation to boiling and the leftover malt could hold some of the alpha acids back. Give it a try and you can be the judge of that.
First wort hops are added to the kettle when the runoff is being transferred over from the mash. This practice began as a way to prevent boilovers, but some brewers today feel first wort hopping adds a distinct character, although the evidence does not support this idea.
Once the wort starts boiling, that’s when most people begin their hop additions. Hop utilization increases as the time they are boiled increases. However, the return on investment for boiling your hops longer than 60 minutes is minimal. Any hops added to the kettle prior to 30 minutes remaining, will contribute a significant amount of bitterness and very little in the way of actual hop flavor. This is where high-alpha hops typically come into play. Inside the final 30 minutes of the boil is when flavoring hops are usually added. The later you add them, the more of the volatile compounds from the hop oils will make it on to fermentation.
If you are using pellets, you can just throw them into the kettle freely and create a whirlpool once the boil is finished to separate them from the wort. Whole cones can be added this way too or you can put them in a nylon bag for ease of removal later on. Placing them in the bag may reduce the amount of contact the hops get with the wort, resulting in a little less extraction of alpha acids and oils.
Once the boil is finished and we have reached flame out, you can add one last hop charge prior to cooling or you can employ the use of a hop back or hop jack. These two names refer to the same concept of a small, covered storage container capable of holding a few ounces of hops with an inlet and an outlet for wort flow. It works by flowing the hot, but not boiling, wort through the hop filled container on its way to being cooled through a counter-flow or plate heat exchanger or back to the kettle prior to being cooled there. The idea is that the hot work will pick up much of the hop oils and retain most of them on its way to the fermentor as it cools down.
As with any other beer, the wort should be sent off to the fermenter, aerated and the yeast added. Dissolved oxygen levels in the wort when using air for aeration should be okay for both the APA and the IPA. Where it could get a little tricky is the IIPA as the higher gravity wort and subsequently higher pitching rate of yeast will greatly benefit from the use of pure oxygen. Pitch rate can be determined by what has worked for you in the past for certain beers of a similar gravity or you can use a pitching rate calculator, such as that found at mrmalty.com (Jamil Zainasheff’s site). In regard to a a big beer like a IIPA, for those that want to keep it simple, I would pitch 2-3 times what you normally would for a 1.050 gravity beer.
The next port of call for adding hops is when the yeast has finished its magic and you now have green beer in your fermenter. At this point, you can take it to the next level by dry-hopping — add hops (usually whole hops) to your conditioning beer. This is usually conducted at room temperature from 5 days to 2 weeks. Any longer than that will likely impart vegetal flavors to the beer which is not pleasant. During this process, the newly created ethanol in the beer acts as an organic solvent and pulls the flavorful hop oils into the beer. Since there is no heat involved, no isomerization of alpha-acids occurs. That means you are getting all hop flavor and aroma with no bitterness!
Make sure you are using a hop variety that brings the characteristics you are looking for in that particular beer. You should be safe by choosing a hop labeled as aroma or as dual purpose. Some high alpha hops like Summit can add an onion-like aroma to the beer when used this way. Dry-hopping can be used in any of the styles I have discussed. Some commercial APAs are dry hopped, and the vast majority of IPAs and IIPAs are. Depending on the oil content of the varieties used, anywhere from 0.5– 4.0 oz (14–113 g) per 5-gallon (19-L) batch is appropriate, with the high end reserved for the 8% ABV and above beers. For you worry worts out there, hops are very resistant to bacteria on their own, so don’t go soaking them with sanitizer beforehand.
Post-Fermentation
When transferring and packaging your beer, be sure to purge whatever you can with CO2, as many of the compounds in hops can become oxidized, producing off flavors. Just when you thought it was over, there is one place you can add even more hops to the beer, just before serving. The Randall, invented by the Dogfish Head Brewery, is a small chamber containing whole cone hops, similar to a hop jack, that the draft beer flows through on the way to the glass. They can be purchased or easily made at home. More recently I’ve seen that some people are pouring their beer into a French press filled with hops prior to dispensing it.
So to sum it up: don’t let your malt bill interfere with the hop character, and don’t let the sweetness of a beer detract from the bitterness. Use fresh hops and think about the form — whole, pellets or extracts — you use in your hoppiest beers. Choose a yeast strain that won’t dull your hops and make your water sulfate-rich enough to accentuate them. Add high-alpha bittering hops early in the boil, lower-alpha aroma or dual-purpose hops later in the boil, and be aware of other possibilities (mash hopping, first wort hopping, using a hop jack or using a Randall).
So there you have it. The groundwork for creating a perfectly hoppilicious beer has been laid before you. The question is: What do you intend to do about it? You could just walk over to your fridge and grab a cold one, but where’s the fun in that? I think the answer is pretty obvious. Get out there and brew your own!
American Hop Varieties: Four of the Classic “C” Hops
Cascade
 Cascade
Type: Aroma
Alpha Acids: 4.5–7.0%
Cohumulone: 33–40% of alpha acids
Total Oil: 0.7–1.4 mL/100g
Aroma: Floral, citrus (grapefruit)
Description: One of the earliest American bred hops, Cascade has been a favorite among craft brewers and homebrewers alike since the 1970s. Its aromatic properties and low alpha acids lend its use to late boil and dry hopping.
Commercial Beer Highlighting This Hop: Sierra Nevada Pale Ale
 Centennial
Type: Dual purpose
Alpha Acids: 9.5–11.5%
Cohumulone: 29–30% of alpha acids
Total Oil: 1.5–2.3 mL/100g
Aroma: Medium Intense, floral, citrus
Description: Sometimes referred to as Super Cascade, it lacks the signature grapefruit character of the Cascade hop, but makes up for it with a higher oil content and alpha acid percent- age, hence its selective use at all points of the brewing process.
Commercial Beers Highlighting This Hop: Stone Ruination IPA, Bell’s Two-Hearted Ale
 Chinook
Type: Dual purpose
Alpha Acids: 12.0–14.0%
Cohumulone: 29–35% of alpha acids
Total Oil: 1.7–2.7 ml/100g
Aroma: Spicy, piney, grapefruit
Description: Developed by the U.S.D.A. in the 1980s, this dual purpose hop tends to be used commercially for bittering and flavoring during the boil. It can be used for dry hopping as well and will give a distinct aroma to your beer.
Commercial Beer Highlighting This Hop: Stone Arrogant Bastard
 Columbus
Type: Super high alpha
Alpha Acids:14.5–16.5%
Cohumulone: 28–32% of alpha acids
Total Oil: 2.0–3.0 ml/100g
Aroma: Pungent
Description: This hop also goes by the names Tomahawk and Zeus, depending on which farm it was grown on. It is used primarily for bittering due to its very high alpha acid content and moderate levels of cohumulone.
Commercial Beer Highlighting This Hop: Dick’s Bottleworks IPA
American Hop Varieties: Hops that Blend Well with the “4 Cs”
 Amarillo®
Type: Dual purpose
Alpha Acids: 8.0–11.0%
Cohumulone: 21–24% of alpha acids
Total Oil: 1.5–1.9 ml/100g
Aroma: Floral, tropical fruit, citrus
Description: A highly prized dual purpose hop in the brewing industry. Its combination of low cohumulone levels, good oil content and desirable aroma properties have brewers scrambling to get their hands on it.
Commercial Beer Highlighting This Hop: Brewdog Punk IPA
 Citra®
Type: Dual purpose
Alpha Acids: 11.0–13.0%
Cohumulone: 22–24% of alpha acids
Total Oil: 2.2–2.8 ml/100g
Aroma: Intense citrus
Description: This hop lives up to its namesake by delivering large amounts of citrus flavor and aroma when added late in the boil to the hopback or by dry hopping.
Commercial Beer Highlighting This Hop: Sierra Nevada Torpedo
 Simcoe®
Type: Dual purpose
Alpha Acids: 12–14%
Cohumulone: 15–20% of alpha acids
Total Oil: 2.0–2.5 ml/100g
Aroma: Intense, pine-like
Description: Released in 2000 and developed by the Yakima Chief Ranches, this hop is often used in conjunction with citrusy hops to round out its strong pine aroma and flavor.
Commercial Beer Highlighting This Hop: Russian River Pliny the Elder
 Willamette
Type: Aroma
Alpha Acids: 4.0–6.0%
Cohumulone: 30–35% of alpha acids
Total Oil: 1.0–1.5 mL/100g
Aroma: Mild, pleasant, spicy
Description: As a descendent of the English Fuggle hop, it exhibits much of the same characteristics. Not as potent in flavor or aroma as many of the other American hop varieties, it is often used to complement them.
Commercial Beer Highlighting This Hop: Odell 5 Barrel Pale Ale
Hoppy Recipes
Sam The Eagle American Pale Ale
(5 gallons/19 L, all-grain)
OG = 1.053 FG = 1.013
IBU = 36 SRM = 7 ABV = 5.3%
Ingredients
10 lbs. (4.5 kg) North American 2-row pale malt
1.0 lb. (0.45 kg) American crystal malt (40 °L)
1 tsp. Irish moss or 1 whirfloc tablet (15 min)
5.5 AAU Chinook hops (60 min)
(0.50 oz./14 g of 13% alpha acids)
5.5 AAU Cascade hops (10 min)
(1.0 oz./28 g of 5.5% alpha acids)
11.0 AAU Cascade hops (0 min)
(2.0 oz/57 g of 5.5% alpha acids)
White Labs WLP001 (California Ale), Wyeast 1056 (American Ale) or Fermentis Safale US-05 yeast
(1.25 qt./~1.25 L yeast starter)
0.75 cup (150 g) priming sugar
Step by Step
Mill the grains. Dough in using 2.5 gallons (9.5 L) of water with a target mash holding temperature of 152 °F (67 °C). Hold the mash temperature for approximately 60 minutes or until the conversion is complete. Raise the temperature of the mash to 168 °F (76 °C) and begin sparging with 170 °F (77 °C) water until you collect 6.0 (23 L) gallons of wort in the kettle. The total wort boiling time for this recipe is 60 minutes. At the onset of a full rolling boil add your scheduled hop addition. When there are 10 minutes remaining in the boil, add the second hop addition and be sure to add your Irish moss or whirfloc tablets to help with precipitation of the hot break. At flameout, prior to cooling the wort, add the final hop addition. Cool the wort to 70 °F (21 °C), transfer to your fermentation vessel and aerate the wort adequately. Add the contents of your yeast starter (if using liquid yeast) to the chilled wort. Ferment around 70 °F (21 °C) until the final gravity is reached, which should be in 5 to 7 days. Rack to a secondary vessel and allow the beer to mature another 5 to 7 days around the same temperature. Rack into a keg or bottle along with the priming sugar.
Sam The Eagle American Pale Ale
(5 gallons/19 L, extract with grains)
OG = 1.053
FG = 1.013
IBU = 36 SRM = 8 ABV = 5.3%
Ingredients
6.75 lbs. (3.1 kg) light liquid malt extract (such as Briess or Alexander’s)
1.0 lbs. (0.45 kg) American crystal malt (40 °L)
1 tsp. Irish moss or 1 whirfloc tablet (15 min)
5.5 AAU Chinook hops (60 min)
(0.50 oz./14 g of 13% alpha acids)
5.5 AAU Cascade hops (10 min)
(1.0 oz./28 g of 5.5% alpha acids)
11.0 AAU Cascade hops (0 min)
(2.0 oz./57 g of 5.5% alpha acids)
White Labs WLP001 (California Ale), Wyeast 1056 (American Ale) or Fermentis Safale US-05 yeast
(1.25 qt./~1.25 L yeast starter)
0.75 cup (150 g) priming sugar
Step by Step
Mill the specialty grains. Place the milled grains in a grain bag. Steep them in 2 gallons of 152 °F (67 °C) water for 30 minutes. Rinse the grain bag with about 2.0 quarts (1.9 L) of water and allow it to drip into the kettle for about 15 minutes, but be sure not to squeeze the bag.
Add enough water for a pre-boil volume of 6.0 gallons (23 L). (If you cannot perform a full-wort boil, boil at least 3 gallons/11 L of wort and reserve about half of the malt extract for the final 15 minutes of the boil.) Stir in the malt extract and begin the boil. The total wort boiling time for this recipe is 60 minutes. At the onset of a full rolling boil, add your scheduled hop addition. When there are 10 minutes remaining in the boil, add the second hop addition and be sure to add your Irish moss or whirfloc tablets to help with precipitation of the hot break. At flame out prior to cooling the wort, add the final hop addition. Cool the wort to 70 °F (21 °C), transfer to your fermentation vessel and aerate the wort adequately. Add the contents of your yeast starter to the chilled wort. Ferment around 70 °F (21 °C) until the final gravity is reached, which should be in 5 to 7 days. Rack to a secondary vessel and allow the beer to mature another 5 to 7 days around the same temperature. Your beer is now ready to rack into a keg or bottles along with the priming sugar.
Hop Skip & A Jump American IPA
(5 gallons/19 L, all-grain)
OG = 1.069 FG = 1.017
IBU = 66 SRM = 6 ABV = 6.9%
Ingredients
12.0 lbs. (5.45 kg) North American 2-row pale malt
2.0 lbs. (908 g) Munich malt (10 °L)
0.50 lbs. (227 g) American crystal malt (15 °L)
1 tsp. Irish moss or 1 whirfloc tablet (15 min)
13.1 AAU Columbus hops (60 min)
(0.85 oz./24 g of 15.4% alpha acids)
4.0 AAU Amarillo® hops (30 min)
(0.50 oz./14 g of 8.0% alpha acids)
6.5 AAU Simcoe® hops (10 min)
(0.5 oz./14 g of 13.0% alpha acids)
4.0 AAU Amarillo® hops (0 min)
(0.5 oz./14 g of 8.0% alpha acids)
13.0 AAU Simcoe® hops (dry hop)
(1.0 oz./28 g of 13.0% alpha acids)
8.0 AAU Amarillo® hops (dry hop)
(1.0 oz./28 g of 8.0% alpha acids)
White Labs WLP001 (California Ale), Wyeast 1056 (American Ale) or Fermentis Safale US-05 yeast
(2.25 qt./~2.25 L yeast starter)
0.75 cup (150 g) priming sugar
Step by Step
Mill the grains. Dough in using 3 gallons (11 L) of water with a target mash holding temperature of 150 °F (65 °C). Hold the mash temperature for approximately 60 minutes or until the conversion is complete. Raise the temperature of the mash to 168 °F (76 °C) and begin sparging with 170 °F (77 °C) water until you collect 6.0 (23 L) gallons of wort in the kettle. The total wort boiling time for this recipe is 60 minutes. At the onset of a full rolling boil, add your first hop addition and the other three additions as scheduled above. When there are 10 minutes remaining in the boil, be sure to add your Irish moss or whirfloc tablet to help with precipitation of the hot break.
Cool the wort to 70 °F (21 °C), transfer to your fermentation vessel and aerate the wort adequately. Add the contents of your yeast starter to the chilled wort. Ferment around 70 °F (21 °C) until the final gravity is reached, which should be in 5 to 7 days. Rack to a secondary vessel and allow the beer to mature another 5 to 7 days around the same temperature. Your beer is now ready to rack into a keg or bottles along with the priming sugar.
Hop Skip & A Jump American IPA
(5 gallons/19 L, extract with grains)
OG = 1.069 FG = 1.017
IBU = 66 SRM = 8 ABV = 6.9%
Ingredients
8.25 lbs. (3.75 kg) light liquid malt extract (such as Briess or Alexander’s)
1.0 lb. (454 g) Munich malt extract (10 L)
0.5 lbs. (227 g) American crystal malt (15 °L)
1 tsp Irish moss or 1 whirfloc tablet (15 min)
13.1 AAU Columbus hops (60 min)
(0.85 oz./24 g of 15.4% alpha acids)
4.0 AAU Amarillo® hops (30 min)
(0.5 oz./14 g of 8.0% alpha acids)
6.5 AAU Simcoe® hops (10 min)
(0.5 oz./14 g of 13.0% alpha acids)
4.0 AAU Amarillo® hops (0 min)
(0.5 oz./14 g of 8.0% alpha acids)
13.0 AAU Simcoe® hops (dry hop)
(1.0 oz./28 g of 13.0% alpha acids)
8.0 AAU Amarillo® hops (dry hop)
(1.0 oz./28 g of 8.0% alpha acids)
White Labs WLP001 (California Ale), Wyeast 1056 (American Ale) or Fermentis Safale US-05 yeast
(2.25 qt./~2.25 L yeast starter)
0.75 cup (150 g) priming sugar
Step by Step
Mill the specialty grains. Place the milled grains in a grain bag. Steep them in 2 gallons of 150 °F (66 °C) water for 30 minutes. Rinse the grain bag with about 2.0 quarts (1.9 L) of water and allow it to drip into the kettle for about 15 minutes, but be sure not to squeeze the bag.
Add enough water for a pre-boil volume of 6.0 gallons (23 L). (If you cannot perform a full-wort boil, boil at least 4 gallons/15 L of wort and reserve about half of the malt extract for the final 15 minutes of the boil.) Stir in the malt extracts and begin the boil.
The total wort boiling time for this recipe is 60 minutes. At the onset of a full rolling boil, add your scheduled hop addition. When there are 10 minutes remaining in the boil, add the second hop addition and be sure to add your Irish moss or whirfloc tablets to help with precipitation of the hot break. At flame out prior to cooling the wort, add the final hop addition.
Cool the wort to 70 °F (21 °C), transfer to your fermentation vessel and aerate the wort adequately. Add the contents of your yeast starter to the chilled wort. Ferment around 70 °F (21 °C) until the final gravity is reached, which should be in 5 to 7 days. Rack to a secondary vessel and allow the beer to mature another 5 to 7 days around the same temperature. Your beer is now ready to rack into a keg or bottles along with the priming sugar.
The Tri-Centennial DIPA
(5 gallons/19 L, all-grain)
OG = 1.096
FG = 1.021
IBU = 106 SRM = 11 ABV = 10.0%
Ingredients
18.0 lbs (8.17 kg) Maris Otter pale malt
1.0 lb. (454 g) Carared® (17 °L)
1 tsp Irish moss or 1 whirfloc tablet (15 min)
30.0 AAU Centennial hops (first wort)
(3.0 oz./85 g of 10% alpha acids)
30.0 AAU Centennial hops (5 min)
(3.0 oz./85 g of 10% alpha acids)
30.0 AAU Centennial hops (dry hop)
(3.0 oz./85 g of 10% alpha acids)
White Labs WLP001 (California Ale), Wyeast 1056 (American Ale) or Fermentis Safale US-05 yeast
(4.25 qt./~4.25 L yeast starter)
0.75 cup (150 g) priming sugar
Step by Step
Mill the grains. Dough in using 4.5 gallons (17 L) of water with a target mash holding temperature of 148 °F (65 °C). Hold the mash temperature for approximately 60 minutes or until the conversion is complete. Raise the temperature of the mash to 168 °F (76 °C) and begin sparging with 170 °F (77 °C) water until you collect 6.0 gallons (23 L) of wort in the kettle. As runoff begins, add the first wort hops to the kettle.
The total wort boiling time for this recipe is 60 minutes. When there are 10 minutes remaining in the boil, be sure to add your Irish moss or whirfloc tablets to help with precipitation of the hot break. Add the second hop addition 5 minutes prior to flame out.
Cool the wort to 70 °F (21 °C), transfer to your fermentation vessel and aerate the wort adequately. Since this is a very high gravity beer, you will likely need to use pure oxygen to get the levels of 10–12 ppm needed to ensure a complete fermentation. It should also be noted that normal pitching rates will be inadequate as well. To be on the safe side, you should pitch about 2–3 times the amount of yeast you normally do for a 1.050 beer. (The yeast starter size listed in the ingredients list a compromise between the optimal amount of yeast for fermenting a beer of this gravity and the fact that overpitching can scrub some hop character.) Add the contents of your yeast starter to the chilled wort. Ferment around 70 °F (21 °C) until the final gravity is reached, which should be in 10 to 14 days. Rack to a secondary vessel and allow the beer to mature for 1 week around the same temperature. Then dry hop the beer for an additional week. Your beer is now ready to rack into a keg or bottles along with the priming sugar.
The Tri-Centennial DIPA
(5 gallons/19 L, extract with grains)
OG = 1.096 FG = 1.021
IBU = 106 SRM = 11 ABV = 10.0%
Ingredients
12.25 lbs (5.55 kg) liquid light malt extract (such as Muntons)
1.0 lbs (454 g) Carared® (17 °L)
1 tsp Irish moss or 1 whirfloc tablet (15 min)
30.0 AAU Centennial hops (first wort)
(3.0 oz./85 g of 10% alpha acids)
30.0 AAU Centennial hops (5 min)
(3.0 oz./85 g of 10% alpha acids)
30.0 AAU Centennial hops (dry hop)
(3.0 oz./85 g of 10% alpha acids)
White Labs WLP001 (California Ale), Wyeast 1056 (American Ale) or Fermentis Safale US-05 yeast
(4.25 qt./~4.25 L yeast starter)
0.75 cup (150 g) priming sugar
Step by Step
Mill the specialty grains. Place the milled grains in a grain bag. Steep them in 2 gallons (7.6 L) of 148 °F (66 °C) water for 30 minutes. Add the first wort hops to the kettle. Rinse the grain bag with about 2.0 quarts (1.9 L) of water and allow it to drip into the kettle for about 15 minutes, but be sure not to squeeze the bag.
Add enough water for a pre-boil volume of 6.0 gallons (23 L). (If you cannot perform a full-wort boil, split your wort into two 2.5-gallons (9.5-L) batches and boil individually. Split the ingredients proportionally between batches.) Stir in the malt extracts and begin the boil. The total wort boiling time for this recipe is 60 minutes. When there are 10 minutes remaining in the boil, be sure to add your Irish moss or whirfloc tablets to help with precipitation of the hot break. Add the second hop addition 5 minutes prior to flame out.
Cool the wort to 70 °F (21 °C), transfer to your fermentation vessel and aerate the wort adequately. Since this is a very high gravity beer, you will likely need to use pure oxygen to get the levels of 10–12 ppm needed to ensure a complete fermentation. It should also be noted that normal pitching rates will be inadequate as well. To be on the safe side, you should pitch about 2–3 times the amount of yeast you normally do for a 1.050 beer.
Add the contents of your yeast starter to the chilled wort. Ferment around 70 °F (21 °C) until the final gravity is reached, which should be in 10 to 14 days. Rack to a secondary vessel and allow the beer to mature for 1 week around the same temperature. Then dry hop the beer for an additional week. Your beer is now ready to rack into a keg or bottles along with the priming sugar.


