Charged Up!
Many brewers choose to brew outdoors on gravity-fed systems using gas and need no electricity. However an increasing number of brewers are choosing to convert some or all of their operations to electricity. There are several advantages of heating with electricity such as lack of noise and exhaust fumes. Also electricity can run a pump so you don’t have to rely on gravity.
But before you run out and drop a bunch of money on a shiny new kit, you should learn some things about electricity and enough theory to verify your safety. This overview is not intended to be a substitute for having a qualified electrician pull a permit and wire your equipment; however, it will give you an idea as to what is needed and why.
What is electricity? In short, it’s the movement of electrons across a conductive material. Until the first electrical power distribution grids appeared in the 1880s, its use was mostly confined to laboratory experiments. The most conspicuous part of the grid is the ubiquitous utility pole carrying overhead power lines. Those power lines are the delivery system of electrical currents from the factory (power plant) to the consumer. In the power plant there are generators that convert stored energy (hydraulic, geothermal, solar, wind, coal, etc.) into electrical energy. The stored energy is used to provide the power necessary to rotate a very large magnetic rotor around a copper winding. As the magnetic rotor spins, electrons begin to flow through the winding, and electricity is generated. At the other end of the system is you, the consumer.
Early experiments with electricity were conducted with simple chemical batteries. Scientists also learned that electricity could be generated with the magnetic field generator described above. Nikola Tesla’s experiments led him to a develop an alternating current (AC) power distribution system that could transmit electrical power very long distances without the voltage drop problems inherent to transmitting direct current (DC) power over long distances. Today, our homes and business are supplied with AC power. Typically, homes and offices are wired with single-phase power and industrial buildings are wired with three-phase power.


There are a few key terms that need to be understood when discussing electricity. Current is the flow of electrons through a conductor and is measured in Amperes (A). Resistance is the opposition to current flow, and is measured in Ohms (Ω). Voltage is used to measure the difference in electric potential between two points along a conductor and expressed as Volts (V). Finally, power is a measurement of how much work is being done and is measured in Watts (W). This leads us to the two equations that solve most of the electrical calculations we will run into.
V = IR
P = I2R
Where,
V = Voltage in Volts
I = Current in Amperes
R = Resistance in Ohms
P = Power in Watts
We can rearrange these equations to calculate different measurements with a little algebra. I only have two memorized, so I use this handy cheat sheet:

With this understanding of fundamental electrical terminology, we can shift the discussion to electrical safety. Electrical power used for brewing is no joke. It can start fires, cause severely injure, and even kill you (and others). Before setting up an electrically-powered brewery in your home, you must make this is your primary focus. In our case, safety means two things: Protecting people against electrical shock hazards and protecting your property against fire hazards.
Protecting people from shock hazards involves making sure people can’t touch a live high voltage circuit and making sure if the circuit connects (shorts) to ground (e.g. the control box, the brewstand, or a kettle), there is a mechanism to shut the power off before it can cause an injury. The first job is provided by shielding the circuit with suitable insulators like the jacket of a wire and by using an enclosure to protect the connections.
To shut the power off when a wire touches something it shouldn’t, we use a two-pronged approach: Grounding and protective devices. Grounding means providing a low-resistance path to the building’s ground. In practice, every single conductive (metal) element in your brewery must have a solid connection to ground. To test, use an ohmmeter with one probe connected to the incoming ground (green) wire and touch the other probe to all of the metallic parts of your brewery. There should be zero Ohms of resistance at every test point. If not, the part isn’t properly grounded and needs to be fixed before you turn the power on!
To protect people from a shock we also have a device called a ground-fault circuit interruptor (GFCI). A GFCI measures the incoming current against the outgoing current and breaks the circuit if the difference is more than six milliamps (mA). 6 mA is below the level that can cause injury to people. In other words, if you grab a hot wire and 7 mA of current begins to flow through your body, the GFCI will open the circuit before it hurts you. A GFCI can open the circuit much faster than a standard breaker. Use of a GFCI is strongly recommended for all of the circuits in your brewery.
A GFCI will wear out over time so it is good to test them. Manufacturers make it easy. Push the test button and verify that the circuit shuts off. Press the reset button to make sure the power comes back on. That is all you need to do. The life expectancy of a GFCI is about 10 years. Older GFCI equipment can fail in a closed state and you would not know it had failed unless you perform the test. Newer designs are “fail safe,” meaning that if it fails, it fails with the circuit open.
The next thing we need to do in high-power electrical work is protect against fire. Most of the electrical codes are in place to prevent fires. The reason for inspection is to make sure two people checked for mistakes. The electrical code helps us figure out what size circuit breakers we need and what wire sizes we need for a given power demand (load). Let’s think of an example load.
Say we have a 120V, 2000W heating element in the boil kettle. We know the Watts (power) and Volts and we want to know how much current (Amps) are required. We look up our handy equation and voila I = P/V; I = 2000W/120V = 16.7A. Most outlets in a US home are rated at 15A. So, you cannot just plug it into a wall outlet. The circuit will need to be upgraded to support your brew kettle. The last time you went to your local home improvement store, you saw 20A-rated plugs, sockets, and breakers, right? Will a couple of cheap hardware swaps get us what we need? NO! Why, you ask? Because the wire between the breaker and the outlet is a key component. We must always choose the breaker to match the wire size.
A 15A circuit is normally wired with a 14-gauge wire. For a 20A circuit, 12-gauge wire (smaller number = bigger wire) is required.
The reason for this is that smaller diameter wires have more resistance per linear foot than larger diameter wires. Resistance creates heat, and heat increases resistance, creating a runaway situation where the wire melts the insulation and can start a fire.
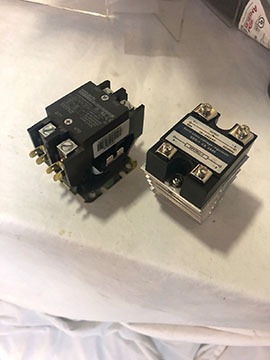
Once your wiring, sockets, breakers, and GFCI equipment is in place, how do we “turn it on” to start making some beer? The wrong way is to simply wire a plug to the wire hanging off of the element and plug it in. The socket and the plug are not designed to be used as a switch. Three kinds of switches are usually used in electric brewing rigs. The right way to turn the power on to the main system is to use a kind of switch called a contactor. To send power to the heating element during a brew, the most common device is a solid-state relay (SSR). Typically, pumps are turned on and off with a mechanical (not solid-state) relay.
Contactors use a small amount of electricity to energize an electromagnetic coil, which pulls a metal bar across the “line” and “load” terminals to switch high-current loads on and off. They can be rated for intermittent and continuous duty. For your main-power contactor, you should use one rated for continuous duty. Intermittent-duty contactors can generate a lot of heat when energized for a couple of hours during a brew. While wiring a contactor is pretty straightforward, any high current connection should be made using the correct terminals and connection practices. To select a contactor, we need to know the amount of current being switched and the coil voltage we will be using. Contactors use a wide range of coil voltages, so be careful to select the appropriate part. A mechanical contactor is ideal for things that won’t cycle on and off often. The main-system contactor is a good example. You turn it on at the start of your brew day and switch it off several hours later. They are good for more than 100,000 cycles.
For process control like a recirculating infusion mash system (RIMS) when the switch may cycle on and off a lot, an SSR is the go-to choice. There are many varieties and an understanding of the varieties of SSR is important. Like a contactor, the signal voltage has to be considered in the system design. Unlike a contactor, an SSR makes a large amount of heat and thermal management is a big part of the design. A good rule of thumb is that an SSR will produce 1.5W of heat for every Amp being controlled. Also, as an SSR warms up its current capacity is de-rated. A 20A SSR might be good for 20A at room temperature but it quickly heats up and at 110 °F (43 °C) will need to be de-rated according to the datasheet. The use of large heat sinks helps minimize the de-rating necessary. Mounting an SSR to a large heat sink or a heat sink with a fan is important for thermal management. Calculating the proper size heat sink is not a trivial task and buying a matched set might be in order. A thermal compound or pad is used to help conduct the heat from the SSR to the heat sink.

Graph is courtesy of Crouzet.
In addition to current capacity and signal voltage there are other things to consider when selecting an SSR. Most AC SSRs will be of the “zero-crossing” type. This means that after getting the signal the SSR waits until the AC voltage is crossing the zero point before switching. If we are controlling the heating element in a RIMS tube, a zero-crossing SSR is a straightforward component to use with a proportional-integral-derivative (PID) controller.

To adjust the power to a boil element, we need to generate a current proportional to the power needed and not simply full-on or full-off. A proportional SSR is the right tool for that job. A proportional SSR will take a variable input, like 0 to 10V (DC), and create a proportional AC current output across the main terminals. They work by turning on the power a little past the zero crossing mark and then turning it off again a little before. The amount of time it shaves off the sine wave adjusts the power. This is called “phase angle control.” Even though these turn the power on and off at 120 times per second they are very reliable. Normally for a boil kettle or a distillation head, the voltage is set with a DC power supply and a potentiometer controlling the trigger signal. Some components will even have an internal supply to reduce the total number of components in the system.
A proportional SSR is also the best choice for a PID controller in a RIMS set up. In this application, the PID uses a temperature sensor and some math to keep the controller from overshooting the set-point temperature. It also keeps the temperature from bouncing up and down around the set point (hysteresis). Tuning a PID is system-dependent and can be a little tedious. Most people will use an auto tune on the controller and make small adjustments from there. Once tuned, the PID controller sends a variable signal to the SSR to set the power to the right level. Mash temperatures can then be repeatable and consistent from batch to batch.
Electric elements are available in many varieties. The important parameters to consider are power, power density, and coatings. We need enough power to boil vigorously enough to drive off Di-methyl Sulfide (DMS). As a quick guide you will need approximately 1800W for a 5-gallon (19-L) boil, 4500W for a 10-gallon (38-L) boil, and 5700W for a 20-gallon (76-L) boil. This depends a lot on geometry, ambient temperature, and insulation.
The power density is the ratio of the element surface area to the power. If it is not published, you will need to measure the diameter and the length to calculate area. Since some elements are folded it can be tedious to get an accurate length.
Area = Diameter x Length x Pi
Watt Density = Power/Area
Most hardware-store water heater elements are > 50W/in2 (8W/cm2). At these high power densities of scorching of the wort could occur. Elements are available at < 25W/in2 (4 W/cm2). These have minimal flavor and color impact, equal to a direct fire system. Brewers have found that having a power density of < 30W/in2 (5W/cm2) is a solid choice.
Finally, the first experimenters in brewing with electric elements were using uncoated high-watt density elements from water heaters. While they were able to make beer, it was quickly noticed the wort was getting scorched and the elements had a short life. Stainless elements with special coatings are now common in the marketplace.
Whatever you decide to do, please take the time to do proper research first! Consult with a licensed professional electrician or electrical engineer to make sure that every aspect of your system is safe. Any modifications to the electrical system in your house will require a permit and the services of a licensed electrical contractor. Failing to bite this bullet can result in fire or injury, and result in large fines and a huge expense to meet local codes.
There are a lot of very good resources out there to help select the equipment and design to match your brewing style. The Electric Brewery at http://shop.theelectricbrewery.com and Homebrew Talk’s Electric Brewing sub-forum are both great places to start.