Into The Cider House: When fall calls, we pick up

Do you feel that? Cold temperatures are whispering their sweet sigh of relief after summer’s long tyranny of heat. And when the temperatures start to fall, it’s natural to think of apple cider — America’s foundational beverage. There’s so much fun to be had with apple cider fermentations . . . why wouldn’t you play?
Before we dig deeper, yes, hard cider was America’s original tipple of choice. Quality brewing ingredients were scarce in early days, but apples flourished in the colonies and required far less equipment and know-how to convert to a fine fermented beverage.
At the heart of it — hard cider, like other fruit wines, is simple stuff. Grow apples, crush them, ferment the juice and enjoy. Like almost all simple things, there’s deeply weird complex knowledge hidden just below the surface.
Picking Your Apples
The first is the apples themselves. The varieties you can find in the grocery store are “culinary” apples – apples for eating, either out of hand or baked, etc. The flavor profiles tend to the sugary sweet and highly tangy sharp — although these days it is harder to find apples that are acid focused without an overwhelming sweetness.
In the wide world of apples, there are thousands of varieties because apples don’t grow true from the seed. Most of those weird and wooly apples are tannic and horrifying to our palate (try eating a crabapple). But those tannic and bitter apples actually hold the key to making a great glass of cider.
If you’re Denny and live with land in a climate conducive to growing apples, then go forth, plant trees and have fun. (Trees, intentionally pluralized so you can reliably have pollinated trees that put out a good harvest). Starting with whole fruit, you do need tools to process the apples and get at the juice. Namely, you need to scrat the apples (great word for crushing the fruit into squeezable bits) and then squeeze the bits to yield fermentable juice. In the world of wine, this would be known as a crusher and press.
Denny has a lovely Correll cider press to transform his apples to juice in pure Cadillac style. If you’re not into spending the dosh on a purpose-built rig, you can crush and press the apples in any way that works. We’ve seen and used scratters based on clean garbage disposal units and even very carefully pulsed food processors. Presses can be made using mesh bags, boards, and a hydraulic jack. Remember, cider has been around a lot longer than modern tooling. If push comes to shove, you can even use a home juicer.
In the wide world of apples, there are thousands of varieties because apples don’t grow true from the seed.
Can’t get your hands on a slew of whole apples? For most folks in temperate climates, there is a good chance that you have an orchard somewhere nearby that is generating fresh apple juice. They’ll primarily be using culinary apples because that’s what most of us have come to expect, but most orchards have a few “weird” trees. Drew has had good luck calling up his “local” (70–80 miles in Los Angeles, California is still “local”) orchard and asking them to throw some of those weird apples into the mix. If you can’t do that, you may be able to find crab apples in your fancy grocery’s produce store.
And lastly, because we know sometimes you just want something cold, fruity, and fizzy: Pre-packaged store juice can work in a pinch. As always, go for the best quality juice you can get your hands on. Even frozen concentrates can be used to reasonable effect — but they’re much better as a post-
fermentation sweetener/fruit booster.
Fermentation Decisions
To ferment, you have several choices. For drier, more alcoholic and assertively acidic ciders, dried wine yeast works like a charm (Drew prefers white wine strains for their fruitiness). But for a more balanced cider we both tend to use beer yeasts. No surprise that Denny loves his namesake Wyeast 1450 “Denny’s Favorite.” Drew tends to use the English strains or something neutral and on-hand.
But who says you need extra yeast at all? Years ago, Drew got a chance to explore some small traditional English ciders. They were fermented with the yeasts and other critters found on/in the apples themselves. The resulting ciders had the weird funk and acidic complexity of a finest lambic. (Drew: There were several that packed such a pucker punch to make Cantillon seem soft and friendly.)
While you could go 100% natural, the variable and challenging nature of the resultant product makes you understand why brewers reach for a pure cultured yeast. Drew splits the middle by allowing fresh juice to sit in the fermenter for 2–3 days before pitching yeast. This process allows the cider to build complexity without becoming overwhelmingly funkified and is a technique commonly used in the wine world.
Drew’s not a fan of adding potassium metabisulfite (KMBS) because he has an allergic reaction to it in quantity. But if you don’t react, (no, sulfites don’t cause headaches, they cause legit allergic reactions in some asthmatics) then it’s a good idea to add sulfite to the juice either before or after the rest. Metabisulfites, when added to juice with a sufficiently low pH, will disassociate into free SO2 that prevents the growth of spoilage organisms long enough for a fresh supply of yeast (not sensitive to free SO2) to overwhelm the native flora and consume all the food. Wait 24 hours and pitch your yeast. Alternatively you can simply skip this sulfite step and just hit the juice with a healthy colony of yeast just after pressing.
One other consideration, and the only pre-ferment addition we’d consider, is the addition of a yeast nutrient. Like other fruit or sugar musts, apple juice is pretty poorly stocked for healthy yeast growth and ferments. Follow the instructions on your favorite wine or mead yeast nutrient (such as Fermaid K or Superfood). Drew’s played around with staggered nutrient additions, like those recommended for mead, and found improvement in fermentation performance.
It’s Packaging Time
When the cider is finished, in about 1–2 months, you can finally package and drink. Almost certainly, your cider will be tart and dry. Depending on your source apples, your cider may need some extra “bitterness” — the easy go-to answer is a small dose of grape tannin. Sold as a powder or liquid preparation, 0.25–1.25 tsp. is all you’ll need for a 5-gallon (19-L) batch. You may also want to add some extra acidity. (Acid and tannins are the salt and pepper of the wine world.) We highly recommend that you blend test samples with varying amounts of acid and tannin before dosing your full batch!
Drew’s played around with staggered nutrient additions, like those recommended for mead, and found improvement in fermentation performance.
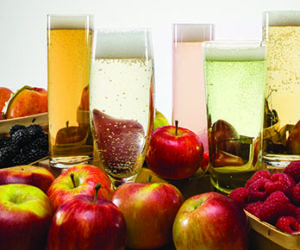
But what if you don’t want a dry cider? Apples are sweet after all. I want sweet, sparkling cider!
If you keg, you’re on easy street. Add potassium metabisulfite and Sorbistat K (potassium sorbate) to help prevent fermentation from re-starting. (Note: This doesn’t stop active fermentation). At that point, add the sweetener of your choice — frozen juice concentrate adds extra sugar and apple goodness with minimal dilution. Other sugar sources can add interesting flavors such as raw sugars or honey. Then force carbonate your cider in the keg.
If you bottle, things become trickier. Natural carbonation requires fermentation. That means active yeast, eating sugar and generating CO2 while removing the sweetness. It’s an inherent conflict of the explosive variety. Want fizzy bottles? Our best recommendation for easy success is to keg the cider as above and then counter-pressure fill your bottles. Sterile filtration is another possibility if you have the capability. If you must bottle with yeast, go with sturdy Champagne-style bottles or better yet, plastic soda bottles. Store the bottles cold and drink sooner rather than later.
One final option is something known as the pét-nat style of making sparkling wine. This cider would be bottled in Champagne-style bottles during active fermentation and the increasing pressure will eventually stall fermentation, leaving some residual sugar. This is a more advanced technique you can read more about here: https://winemakermag.com/article/pet-projects
One good tip for all natural-carbonation bottlers — fill a plastic 2-L with your cider, seal and when the bottle becomes rigid thanks to the carbonation — you’re ready to chill and drink.
We can’t recommend one of the popular methods you find online, bottle pasteurization, due to the inherent dangers of putting pressurized liquids in explodable vessels into hot liquids.
All of this has just barely scratched the surface of cidermaking. It’s a long-lived art (as befits what must be one of North America’s first alcoholic beverages) and thus there are lots of twists, turns, methods, and styles to explore. And we didn’t even start to talk about adding spices, fruits, and other flavors to the mix!
Give cider a go this fall. It’s both easier and harder than you think and the rewards are pretty dang tasty.
Self-Promotion Alert — you can find scads more information in Drew’s – available at all your finest bookish retailers.