An Introduction to Step Mashing
The move to all-grain for the homebrewer has been made easier in so many ways over the past decade. Better access to equipment and information has changed the game. The ease of all-grain brewing can leave the science and details behind the process a bit fuzzy for the first-time (and tenth-time) all-grain brewer. Mashing, the added magic that takes you from extract and steeping grains, rightly garners the most attention. So what if you want to improve and better understand your mash?
Let’s take a closer look at step mashing — raising the mash temperature through a series of rests, which can be a flavor enhancer, and an efficiency booster. All you need is a bit more time and effort, and you can improve numerous styles of beer through this traditional technique.
WAIT, WHY AM I DOING THIS?
It’s valid to ask why you’d want to add time and energy to your brew day, and possibly even additional equipment. Tradition, flavor, appearance, and possibly efficiency are all valid considerations. Also, with newer micro and craft maltsters coming on the scene there is a valid concern about the modification of malt on the market. They are using older processes such as floor malting, and small batch malting techniques that may not allow them perfect control over the process. This in turn leaves you with the potential for dealing with an under-modified malt, and the need for a step mash.
Tradition:
For those using the standard array of commercial malts available, your malt is fully modified, unless specified by the manufacturer. That doesn’t mean you can’t follow a traditional recipe. Lagers, and many German beer styles rely on step mashing to this day. Other styles include many farmhouse beers of Belgium and France, where high levels of adjuncts were added to the grain bill.
Styles that are still brewed by some commercial brewers using a step mash temperature program are: Czech Pilsner and other Czech lagers, German altbier, weissbier, Berliner weisse, roggenbier, and German amber lagers such as bocks and Märzens.
Flavor:
You may try step mashing to reach flavor goals, especially for the styles listed above. One way may be through decoction mashing, a type of step mashing we’ll discuss a bit further on, that has you boil the mash creating flavors through Maillard reactions. Or even more simply, by focusing in on two steps in just the saccharification range can cause changes in the perceived body and mouthfeel of a beer. More on approaches to step mashes will be found later in this article.
Appearance:
Clarity can be critical for many styles, and haze can be a challenge. If you’re using unmalted grains such as flaked wheat or oats you’ll find adding a step around 113 °F (45 °C) will activate beta-glucanase enzyme, which will break down gummy, sticky beta-glucans (a carbohydrate in grain), and allow for a better run-off from the mash tun, improving filtration and clarity.
If using less-modified malt, activating the protease enzyme at its peak, around 122 °F (50 °C), can help break down haze-causing proteins. Some research has shown that too long in this range with well-modified malt can negatively impact the beer’s body.
Efficiency:
Step mashing allows you to most efficiently activate enzymes in your mash. Instead of targeting a compromise between enzymes as you would with alpha amylase and beta amylase in a single step mash, you can now mash at their peak temperatures. If you’re able to hold near peak temperatures of beta and alpha amylase, an increase in sugar extracted may be seen. As mentioned in the earlier section, a “gum rest” around 113 °F (45 °C) can improve run-off, leading to a more efficient mash as well as clarity.
I’ll also mention yeast health as a potential benefit. Amino acids are created as the protease enzyme degrades proteins. Amino acids are critical for yeast health. Though, it has been shown you can have too much of a good thing — amino acids in abundance can negatively affect beer flavor and stability.
HOW TO STEP MASH
Enzymes have different optimal temperatures and a single step mash temperature between 149 °F and 154 °F (65 °C and 68 °C) allows the most important alpha-amylase and beta-amylase enzymes access to the soluble starch. In as little as 20 minutes, with some well-modified base malt, the majority of saccharification (conversion of starch to sugar) is often done. To review some of the enzymes we’ve started to discuss, let’s take a look at Table 1 showing peak temperatures.
You may find tables that use different ranges, or peak temperatures, but most should be fairly close to these numbers. Phytase, which is deactivated by the malting process, can be useful in undermodified malt mashes to help dial in pH through conversion of phytic acid to phosphates.
Although some enzyme ranges may be quite large, a good general rule of thumb is +/- 5 °F (2.8 °C) from peak for moderate to high activity. Depending on your enzyme package, duration of time in each range may vary, though with well-modified malt and a healthy amount of enzymes present, often steps can be as short as 10 minutes, and as long as 90 minutes.
Via Brewing Equipment:
The basic rule here is to be able to heat your mash to different temperatures, as well as to hold those temperatures for some time. Many brewing devices and brewing systems use a “Recirculating Infusion Mash System”, or RIMS. These systems often allow for precise adjust of the mash temperature, as the mash water is constantly recirculating over a heater. Most brewing systems can convert into a RIMS with the addition of a heating element in a tube or canister and a pump.
A “Heat Exchange Recirculating Mash System”, or HERMS function in the same way, though wort from the mash is typically pumped through a coil immersed in hot water, indirectly heating the wort, instead of through a direct heating element as in RIMS.
Finally homebrewers can add heat directly to their mash tun, but it is generally advisable to keep the wort circulating while heat is being applied. If your mash tun is induction compatible, that is a great option for heating the mash while recirculating or stirring.
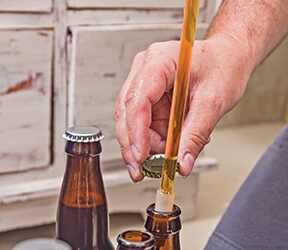
Via Boiling Water:
If you don’t have these capabilities (i.e. a separate heat source and a pump), an option is adding boiling water to the mash. This can be done in any mash tun or in a brew-in-a-bag (BIAB) mash.
From John Palmer’s classic book How To Brew, we can devise a step mash using a mash infusion equation:
Wa = (T2 – T1)(.2G + Wm)/(Tw – T2)
where:
Wa = The amount of boiling water added (in quarts).
Wm = The total amount of water in themash (in quarts).
T1 = The initial temperature (°F) of the mash.
T2 = The target temperature (°F) of the mash.
Tw = The actual temperature (°F) of the infusion water.
G = Pounds of grain in the mash (in pounds).
Let’s put this to practice with a three-step mash.
For this example, we are going to mash 12 lbs. (5.4 kg) of grain for a Märzen. We’ll step through a 104 °F (40 °C), 140 °F (60 °C), and 158 °F (70 °C) step mash schedule. We will assume that the brewer has taken the mash to 104 °F (40 °C) with 1 qt. strike water per lb. grain (2.1 L/kg). This is a good starting place, a bit thicker than most mashes, allowing room for further water additions. For the second infusion, we want to bring the temperature to 140 °F (60 °C). We will need to use the mash infusion equation. At 1 qt./lb. (2.1 L/kg), Wm is 12 qt. (11.4 L). We will assume our boiled water has cooled somewhat as we remove it from the heat and add it to our mash, to 210 °F (99 °C).
Wa = (T2 – T1) X (0.2G + Wm) / (Tw – T2)
Wa = (140 – 104) X (2.4 + 12)/(210 – 140)
Wa = 36 X 14.4 / 70 = 7.4 qt. (7 L)
For the third infusion, total water volume is now 12 + 7.4 = 19.4 qts. (18.4 L)
Wa = (158 – 140) X (2.4 + 19.4)/(210 – 158)
Wa = 18 X 21.8 / 52 = 7.5 qts. (7.1 L)
The total volume of water required to perform this schedule is 12 + 7.4 + 7.5 = 26.9 qts. or 25.5 L. Also of note, the final water-to-grain ratio has increased to 2.24 qts./lb. (4.7 L/kg).
Alternatively, use a calculator online for this formula at https://www.brewersfriend.com/mash/.
Via Decoction Mashing:
Decoction mashing is actually a fairly easy process of mashing for the homebrewer. Basically, you are step mashing by removing some of your mash wort, boiling it, and stirring it back into your mash until your next step temperature is reached. The boil helps to break down starch molecules, and may lead to a crisp, dry finish, like those characteristic of German lagers.
A good general rule for decoction mashing is to remove about 33% of your total mash volume and boil it for a few minutes. Stir the boiling wort back in until your next mash temperature is reached. If you haven’t used all of your wort, allow the wort to cool to your mash temperature and add back to the mash. Or, use it to hold your temperature by stirring in small amounts as needed to raise temperature. You can also reboil any remaining decoction for any further mash steps.
MASHING SCHEDULE IDEAS
There are many strategies for step mashing. George Fix, professor of mathematics and author, supports a traditional method, a favorite of craft and homebrewers alike. It follows a traditional double decoction (two mash boil) schedule.
George Fix Three Step Mash:
Step 1 — “Mash In” 104 °F (40 °C) 15 minute rest
Step 2 — “Beta Amylase” 140 °F (60 °C) 20 minute rest
Step 3 — “Alpha Amylase” 158 °F (70 °C) 40 minute rest
At 104 °F (40 °C), numerous enzymes kick off, and solubility improves as starch breakdown starts. A temperature raise to 140 °F (60 °C) starts alpha amylase and optimizes beta amylase. A final rest at 158 °F (70 °C) completes the mash in alpha amylase’s wheelhouse. Mash extraction should be enhanced due to the focus on time in both amylase’s range.
Three Step Flake & Adjunct Mash Infusion:
Step 1 – “Beta Glucanase” 113 °F (45 °C) 20 minute rest
Step 2 – “Beta Amylase” 149 °F (65 °C) 20 minute rest
Step 3 – “Alpha Amylase” 162 °F (72 °C) 30 minute rest
This mash is simple enough to understand — it’s focus is to help break down, and maximize any unmalted grain. All three steps allow you to take advantage of peak enzyme temperatures for beta glucanase, beta amylase, and alpha amylase. Adjunct lagers, cream ales, or wheat beers can benefit from this mash schedule.
Amylase Two Step Mash Infuion:
Step 1 – “Beta Amylase” 144 °F (62 °C) 20 minute rest
Step 2 – “Alpha Amylase” 158 °F (70 °C) 40 minute rest
Beta amylase is very efficient at making maltose sugar by chomping at the ends of starch molecules. If we allow it to go too long, the beer will be highly fermentable, and the resulting product will be very light in body. By allowing the mash to begin at 144 °F (62 °C), we will be within range of alpha amylase to begin, and will provide beta amylase with some time to work. Stepping up to 158 °F (70 °C) will denature the beta amylase and allow the alpha amylase to continue making a less fermentable wort working through larger parts of the starch still remaining a giving some body to the beer. Give yourself a total mash time of 60 minutes, and play around with these rest times and temperatures. Staying a bit longer in beta amylase will help you create a drier lighter bodied beer, less time at lower temperatures will get you a sweeter, maltier beer.
CONCLUSION
Step mashing can be an excellent tool for flavor and mash efficiency, but can also provide advantages toward appropriate style presentation of a beer, and clarity. Based on the numerous options for equipment that can help you through a step mash, or by just using your current set up and boiling water to ramp up your temperatures, step mashing is an approachable technique for all to try.