Reiterated Mashing: Multiple Mashes for Massive Brews
There are a couple standard ways that all-grain brewers make their wort for very big beers. The easiest way is to add enough grains to your mash tun so that you can fully sparge them and collect a reasonable amount of pre-boil wort for your batch size. Then, you simply add malt extract to raise the specific gravity. For example, you might add 10 lbs. (4.5 kg) of malt to your mash tun, run off the first wort, then sparge the grain bed until your final runnings drop to a specific gravity (SG) of 1.008-1.010. At this point, you will probably have collected around 6 gallons (23 L) of pre-boil wort at around SG 1.040 (10 °Plato). (The exact volume and gravity will depend on a lot of things specific to your brewery and procedures.) You could boil this down to 5 gallons (19 L) at SG 1.048 (12 °Plato) in 60 minutes. With the addition of malt extract in the boil, you can hit any target gravity you like. For example, if you added 5.0 lbs. (2.3 kg) of dried malt extract, you’d have 5.0 gallons (19 L) of an SG 1.093 (23 °Plato) beer.
Another way to brew a very big beer is collect “a ton” of wort and boil it “forever.” You might, for example, start with 20 lbs. (9.1 kg) of malt. When the grain bed is fully-sparged, this should yield around 12 gallons (45 L) of wort (at ~1.040/10 °Plato). You could then boil this down to 5 gallons (19 L), although this would take about 7 hours at a 15% evaporation rate. This would yield a beer with an original gravity (OG) around SG 1.096 (24 °Plato).
To save yourself some boiling time, there is another option. You could add even more malt, collect only the high-gravity first wort, and leave the grain bed unsparged. For example, you could add about 30 lbs. (14 kg) of malt to your mash tun (assuming you had 15 gallons (57 L) of space in your mash tun), mash the grains and drain only the first wort. At a normal mash thickness — in the 1.25 qt./lb. (2.5 kg/L) range — you might collect around 6 gallons (23 L) of wort at 1.085–1.090 (21–22.5 °Plato). Boiled down to 5 gallons (19 L), this would yield a beer with an OG around 1.105 (26 °Plato).
Advantages and Disadvantages
Each of these methods has its ups and down. In the first method, in which you supplement your wort with malt extract, you get good extract efficiency from your grains as the grain bed is fully-sparged. Plus, you don’t have to boil for an excessive amount of time. However, malt extract (or refined sugars) cost more than malted grain and — if you really want to make an all-grain beer — adding malt extract is “cheating.” (You didn’t hear it from me, but lots of commercial big beer producers “cheat” in this manner.)
In the second, very-long-boil method, you also fully sparge the grain bed, but you end up spending a lot of time (and propane) concentrating the wort. During the long boil, your wort will turn many shades darker from the heat. (In this method, the wort is concentrated boiling at atmospheric pressure. In the first method, the malt extract was also concentrated by a long boil, although under a vacuum and at lower temperatures.)
In the third, “big mash,” method, you leave a lot of sugars behind in your grain bed. But, the inefficiency of your mash is offset by the fact that you can do a normal-length boil. In this case, the wort is “concentrated” in large part by not diluting it with sparge water.
In my method, you fully sparge the grain beds, you don’t add malt extract (or sugars) and you only perform a normal-length boil. How can this work? Well, you might have noticed that I wrote “grain beds,” not “grain bed,” a couple sentences ago.
In my method, you concentrate your wort in the mash tun by mashing with wort. As such, no part of your wort gets boiled for an extended amount of time — either in your kettle at atmospheric pressure or at the extract plant under a vacuum — so you can brew beers that are ludicrously light-colored, given their enormous gravity. (Looked at another way, you can control the color of your beer through your ingredients choice, not kettle “caramelization.”) Another benefit of my method is that you can brew very big all-grain beers without a larger mash tun or a larger kettle. Using your present system, you can brew beers nearly triple the strength you normally could using normal methods. Finally, it’s a cheap way of brewing a very big beer, as you don’t shuck out for lots of malt extract or propane. The down side — and hey, there’s always a downside, isn’t there? — is that your brew day is fairly long. However, it’s no longer than with the long-boil method for a comparably-sized beer. So now, finally, allow me to introduce my method — and by “my method,” I mean a lot of ideas I mostly stole from a variety of other sources and rolled into one method, which I call . . .
Reiterated Mashing
The basic idea behind my method, which I call reiterated mashing, is that you mash your grains, run off the wort and then use that wort as mash liquor for your next grain bed. In short, you use wort for your mash liquor instead of water. I have done two types of reiterated mashes — a single reiterated mash (with two separate mashes) and a double reiterated mash (with three separate mashes). A single reiterated mash makes a beer that’s roughly twice the strength of a singly-mashed beer. A double reiterated mash makes a beer that’s about three times that strong. On my system, with my procedures, this yields unboiled wort around 1.075 (19 °Plato) for a single reiteration or 1.108 (27 °Plato) for a double reiteration. Boil these for an hour, from 6 gallons (23 L) down to 5 gallons (19 L), and the OGs are around 1.091 (23 °Plato) or 1.130 (32 °Plato), respectively. Assuming 75% attenuation from the yeast — a reasonably big assumption at these gravities — this yields beers around 9% or 13%, respectively. (With longer boil times, of course, you could hit any target gravity you want.)
The details of your system and brewing procedures — including how finely you crush your grains, your mash thickness, your water chemistry, your lauter tun efficiency and other factors — will affect what OG you reach. Take very good notes if you try this — and don’t be too disappointed if your first reiterated mash yields merely a big brute, not a gigantic, slavering monster of a beer.
Here’s how a reiterated mash works:
Recipe Formulation
To formulate your recipe, begin with the amount of pre-boil wort you plan to collect. From this, figure out how much grain it will take to make this volume of wort, assuming that you fully sparge the grain bed. (If you don’t know this value on your system, start by assuming that 10 lbs. (4.5 kg) will yield about 6 gallons (23 L) of wort once the grain bed is fully rinsed. This can vary quite a bit, though, depending on the raft of things mentioned earlier.) Your grain bill becomes that amount of grain, multiplied by either two or three. What grains go into your grain bill is, of course, your choice. For the purposes of this article, we’ll discuss a 5-gallon (19-L) batch of beer in which each mash will use 10 lbs. (4.5 kg) of grain.
First Mash
OK, now you’re ready for the first mash of the day. You’ve got a long day ahead, so keep two things in mind. First, you want to get done with this step as quickly as possible. And secondly, since you won’t be doing a mash-out — and hence all the enzymes will be run into the next mash —you don’t need to wait for this mash to fully convert before it is run off.
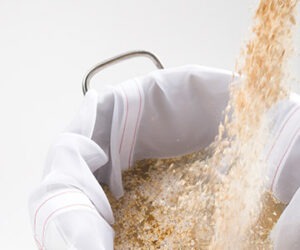
Mash your grains, in your mash tun, at a normal mash thickness at around 150 °F (66 °C). Let the mash sit for around 20 minutes. Stir it every 5 minutes or so to make sure all the starches, enzymes and other stuff gets into solution. Then, add 150 °F (66 °C) water so that your total mash volume is (at least roughly) equal to your intended pre-boil volume. Next, recirculate very briefly, for maybe 5 minutes, then quickly run all this wort off into your kettle. At this point, the starches in your mash may not be all converted, nor will your wort be as clear as it usually is. Neither of these issues is a problem.
The grains will absorb some of the water, so you will not have the full pre-boil volume of wort in your kettle. So, sparge the grain bed with hot water until you collect your full pre-boil volume. (In our example, it will probably take about an extra gallon of water for sparging.) Keep the sparge water heated only to the point that your wort runs off at 150 °F (66 °C). Once you have all the wort in your kettle, record the specific gravity, volume of wort and how much sparge water it took to reach your target volume. Congratulations, your first mash is done.
Second and Final Mash
I’ll first explain what to do if your first mash is also your final mash — i.e. if you’re doing a single reiterated mash. To start with, you’ll have your pre-boil volume worth of single-strength wort in your kettle. It should be at 150 °F (66 °C). Next, stir the crushed grains for your second mash into this wort (which is still in your kettle). In our example, we’d have 6 gallons (23 L) of wort around SG 1.040 and we’d stir 10 lbs. (4.5 kg) of grain into it. This will drop your temperature to around 140 °F (60 °C). If you end up lower than 140 °F (60 °C), add heat and raise the temperature to 140 °F (60 °C).
At this point, your mash is very thin in terms of the liquor-to-grist ratio. However, since the liquor is wort, there is no need to worry about the usual problems associated with a very thin mash.
Let the second mash rest at 140 °F (60 °C) for “awhile.” A rest in the 140–145 °F (60–63 °C) range yields a very fermentable wort. Given that we are shooting for a very high OG, this is a good thing. Your rest here should last at least 30 minutes and could be extended to a couple hours. Check your temperature every 15 minutes or so and add heat to keep it right around 140 °F (60 °C). (Always stir the mash vigorously when adding heat.) While this is resting, clean the spent grains out of your mash tun.
After the “fermentability rest,” ramp your mash temperature up to around 154 °F (68 °C). Heat the mash so that the temperature rises by about 2 °F (~1 °C) every minute. Stir constantly to avoid scorching the grains. Rest at 154 °F (68 °C) so that your total mash time is at least 90 minutes. If you already rested for longer than that at 140 °F (60 °C), rest at 154 °F (68 °C) for maybe 10–15 minutes.
Once you’re done at the 154 ° (68 °C) rest, heat your mash to 168 °F (76 °C) and transfer it to your mash tun. Let it sit in the mash tun for about 5 minutes. Use this time to rinse your kettle. Next, do a normal recirculation and run off the first wort back into your kettle. As with the first mash, the grains will have absorbed some liquid, so you won’t yield quite your full pre-boil wort volume. So, as before, sparge with enough water to reach the volume you desire. This time, however, the sparge water can be much hotter than before — just don’t let the grain bed temperature rise above 170 °F (77 °C). Once all the wort is in the kettle, record the volume, specific gravity and how much sparge water you used.
Now you’ve got your full pre-boil volume of “double-strength” wort in your kettle. Boil as you normally would and finish off your beer in the usual manner. After the boil, record the volume of wort and its specific gravity. (See the pg. 40 sidebar for tips on fermenting a big or very big beer.)
Second of Three Mashes
I learned the hard way that, in a three-mash brew, the second mash cannot be rushed. In my first experimental double-iteration mash, I added my single-strength wort to the crushed grains of the second mash, let it sit for about 5 minutes, then ran all the wort off. When I checked the gravity with my refractometer, it was about the same gravity as my single-strength wort. Why? Because it takes time for the starches from crushed barley to dissolve into your brewing liquor when your liquor is wort; the amount of time is much longer than when your liquor is water. So, given that constraint, here’s how to do the second of three mashes.
Stir your crushed grains into the single-strength wort in your kettle. The temperature should drop to around 140 °F (60 °C). Begin heating the mash immediately and ramp the temperature up to 150 °F (66 °F). Then, hold the mash temperature there for 60–75 minutes. Stir the mash every 15 minutes. Once an hour or so has passed, most of the starches from the second grains will have dissolved into your single-strength wort and it will be roughly double strength. (Interestingly, on my second experimental three-mash brew, my second wort was more than twice the strength of my single-strength wort — i.e. my mash efficiency went up for the second mash. See the graph on pg. 41 and the section on water chemistry for a possible explanation.) If you have a refractometer, it is easy to take small samples every 10 minutes or so and monitor the progress of second and third mashes.
Once the hour is up, or you have hit your target gravity for the second mash, scoop it to your mash tun and then run the wort off back into your kettle (which you will need to rinse out). Do not perform a mash-out at this stage; you want to retain as many enzymes as possible from the first and second mashes for the final mash. As with the first mash, add just enough sparge water to yield a kettle volume roughly equal to your target pre-boil volume. Record your specific gravity, wort volume and how much sparge water you used and proceed to your final mash.
The Third and Final Mash
The third mash of a doubly-iterated mash is a lot like the second mash in a singly-iterated mash. Basically, you rest at 140 °F (60 °C) for “awhile,” then ramp the temperature up into the saccharification range. Give the mash at least a couple hours total, and stir every 15 minutes or so. When you think you’re about 20 minutes from being done, take a small sample of wort and take the specific gravity. Then, 20 minutes later — when you think you should be done — take another gravity reading. If the gravity is still climbing and you are not in the range you want to be, stir the mash and wait another 10 minutes or so. Repeat this procedure until you hit the gravity you want (or you give up and say, “I’m done”). Next, recirculate normally, run off the first wort and sparge with just enough water to collect your pre-boil wort volume. For one last time, record your specific gravity, wort volume and how much sparge water you used. The information you collect each time you brew will help you tweak your procedures in subsequent brews.
Water Chemistry
One topic I have yet to experiment adequately with is water chemistry. In a normal, single mash, there are chemical reactions between calcium in your water and phosphates in the grain that lower mash pH. There are also acids in malt, especially in darker malts, that directly lower the mash pH. On the other hand, a mash is heavily buffered by amino acids. If distilled water is used to mash pale malt, the pH of this solution will be in the 5.8 range, and this largely due to the influence of amino acids on wort pH. (Look for more on buffers and their implications in brewing in an upcoming issue of BYO.) Any carbonate ions in the water will also moderate the degree to which the pH drops.
In a reiterated mash, it is possible that the calcium or carbonates get used up by the second or third mash. At the same time, with every mash, your wort gets thicker (and hence more buffered). Depending on how well-suited your water chemistry is to your grist, your extract efficiency may go up or down in subsequent mashes. For example, if you brew a light-colored “Pilsner” — at SG 1.130 — with soft water, the calcium in the water may be depleted after the first mash and your efficiencies for your later mashes may suffer. On the other hand, I did a three-mash brew using only Vienna malt. My water is fairly carbonate-rich and my efficiency improved with each mash. My interpretation was that the (slightly) darker Vienna malt was gradually depleting the water of carbonates and my pH was sliding down into the optimal range in later mashes. (Admittedly, there are other possibilities, having to do with wort thickness, increased stirring or other factors.)
If you have a pH meter and try this procedure, it may be worth your while to monitor the pH of each mash and stir in calcium (from gypsum or calcium chloride) or carbonate (from chalk or baking soda) as needed. At the least, stirring a little calcium into each mash for light beers or a little carbonate in each mash for dark beers may help you keep the mash pH in a reasonable range.
Conclusion
When I first experimented with reiterated mashing, I thought it would be interesting, but mostly a curiosity. The more I tried it, however, the more I began to see the strengths of the procedure. Also, as each experiment rolled by, my extract efficiency either went up or I figured out something that would improve it. I’m now (mostly) convinced that — with a little time, stirring and monitoring of wort pH and specific gravity — most brewers will be able to achieve an extract efficiency almost as high as their normal, single-mash efficiency. The big drawback, of course, is that multiple mashes add time to your brew day. However, when you add everything up, the time expenditure is comparable to collecting a lot of wort and boiling it down. And from an equipment perspective, you don’t need a larger mash tun, kettle or hot liquor tank to make a brew three times the size that your system is capable of using normal brewing procedures. If you frequently brew very big beers, you’re going to want to try this.
Mjollnir (Single Reiterated Mash)
(5 gallons/19 L, all-grain)
OG = 1.095 FG = 1.024
IBU = 35 SRM = 7 ABV = 9.2%
In Norse mythology, Mjollnir is the hammer of Thor, the God of Thunder. At one point, the King of the Frost Giants (Prymr), steals Mjollnir, hoping to use it entice Freyja (the Norse Goddess of Fertility) to marry him. To get his hammer back, Thor dresses up as Freyja and goes to the wedding banquet. When a love-struck Prymr presents “Freyja” with the weapon as a token of his affection, Thor rips off his disguise, slays Prymr and mops the floor with frost giants. Now, if Thor can go through all that for his Mjollnir, is it too much to ask for you to add a second mash to your brewday for yours?
Ingredients
First mash
3.0 lbs. (1.4 kg) 6-row pale malt
3.25 lbs. (1.5 kg) flaked maize
3.75 lbs. (1.7 kg) Pilsner malt
3⁄4 tsp. calcium chloride
Second mash
3.0 lbs. (1.4 kg) 6-row pale malt
3.25 lbs. (1.5 kg) flaked maize
1.25 lbs. (0.57 kg) Pilsner malt
2.5 lbs. (1.1 kg) Vienna malt
3⁄4 tsp. calcium chloride
11 AAU Magnum hops (0.69 oz./19 g of 16% alpha acids)
1⁄2 tsp. yeast nutrients
1⁄4 tsp. calcium chloride
White Labs WLP833 (German Bock) yeast (3 gallon/11 L yeast starter)
White Labs WLP885 (Zurich Lager) yeast (for kräusen beer)
Step by Step
Use soft water with under 50 ppm carbonates for your initial mash liquor. In your lauter tun, mash grains for the first mash at 150 °F (66 °C) in 15 qts. (14 L) of water. Stir in first dose of calcium chloride as you mash in. Hold at 150 °F (66 °C) for 20 minutes, stirring occasionally, then stir 150 °F (66 °C) water into the mash to make a total volume of 6 gallons (23 L). Let mash sit for about 5 minutes (for grains to settle), then recirculate briefly and run this wort off to your kettle. (You can do this very quickly.)
Dissolve second dose of calcium chloride into wort, then stir grains for second mash into wort and adjust mash temperature to 140 °F (60 °C). Clean out mash tun. Hold mash at 140 °F (60 °C) for 45 minutes, then ramp mash temperature up to 154 °F (68 °C) and hold for another 45 minutes. Stir mash when heat is being applied and adjust burner so that the temperature doesn’t increase more than 2 °F (~1 °C) per minute. Heat mash to 168 °F (76 °C), then scoop over to lauter tun. Let mash sit for 5 minutes, then recirculate and run off wort. Sparge with enough 170 °F (77 °C) water to collect 6 gallons (23 L) of wort.
Bring to a boil and add hops and last dose of calcium chloride. Boil for 60 minutes, adding yeast nutrients for final 15 minutes of boil. Cool wort to 50 °F (10 °C) and transfer 4.5 gallons (17 L) to fermenter. Reserve remaining 2 qts. (~2 L) in sanitized container in refrigerator. Aerate main wort with oxygen for two minutes. Pitch sediment from yeast starter. Aerate wort 8-12 hours later with a 1-minute shot of oxygen.
Ferment at 52 °F (11 °C) until fermentation ceases. Put reserved wort in a 6-gallon (23 L) carboy, aerate thoroughly, add a pinch of yeast nutrients and pitch Zurich lager yeast to this wort. Once this wort, now kräusen beer, is fermenting, rack main beer into it. Continue fermenting at 52 °F (11 °C). Once secondary fermentation slows, let temperature rise to 65 °F (18 °C) and gently swirl carboy once. When beer is done, rack to keg and carbonate. Mjollnir will condition faster than you think, so you can start pulling (small) tasting samples after 6 weeks. When Mjollnir is conditioned and ready, invite the giants over.
Ragnarok (Double Reiterated Mash)
(5 gallons/19 L, all-grain)
OG = 1.142 FG = 1.036
IBU = 34 SRM = 8 ABV = 14%
Ragnarok is the final, cataclysmic battle between the gods and the giants in which almost all life is destroyed. You’ll want to have some strong beer on hand.
Ingredients
First mash
3.0 lbs. (1.4 kg) US 2-row pale malt
3.75 lbs. (1.7 kg) US 6-row pale malt
3.25 lbs. (1.5 kg) flaked maize
1⁄2 tsp. calcium chloride
Second mash
3.0 lbs. (1.4 kg) German Pilsner malt
3.75 lbs. (1.7 kg) US 6-row pale malt
3.25 lbs. (1.5 kg) flaked maize
1⁄2 tsp. calcium chloride
Third mash
2.0 lbs. (0.91 kg) German Pilsner malt
1.0 lb. (0.45 kg) German Vienna malt
3.75 lbs. (1.7 kg) 6-row pale malt
3.25 lbs. (1.5 kg) flaked maize
1⁄2 tsp. calcium chloride
12 AAU Magnum hops (60 mins) (0.75 oz,/21 g of 16% alpha acids)
1⁄2 tsp. yeast nutrients
1⁄4 tsp. calcium chloride
White Labs WLP833 (German Bock) yeast (5 gallon/19 L yeast starter)
White Labs WLP885 (Zurich Lager) yeast (for kräusen beer)
Step by Step
Use soft water with under 50 ppm carbonates for your initial brewing liquor. Mash in to 150 °F (66 °C) and hold for 20 minutes. Recirculate briefly, then run wort off to kettle, sparging with enough water to yield 6 gallons (23 L). Stir grains for second mash into kettle and return temperature to 150 °F (66 °C). Hold for 60–90 minutes, stirring occasionally. Scoop mash to lauter tun and run off wort, again sparging with enough water to yield 6 gallons (23 L). Stir final grains into wort and adjust temperature to 140 °F (60 °C). Hold for 60 minutes, stirring occasionally. Ramp temperature to 154 °F (68 °C) and hold for another hour. Heat to 168 °F (76 °C), scoop to lauter tun, recirculate and collect 6 gallons (23 L) of wort. See the Mjollnir recipe for post-mash instructions. The first time you try this mashing technique, your brewday may not go as smoothly as you might hope. Taking thorough notes will ensure that your second attempt goes much better. So don’t worry if the first run-through is a bit chaotic . . . it’s not like its the end of the world.