Roasting Your Own Grains
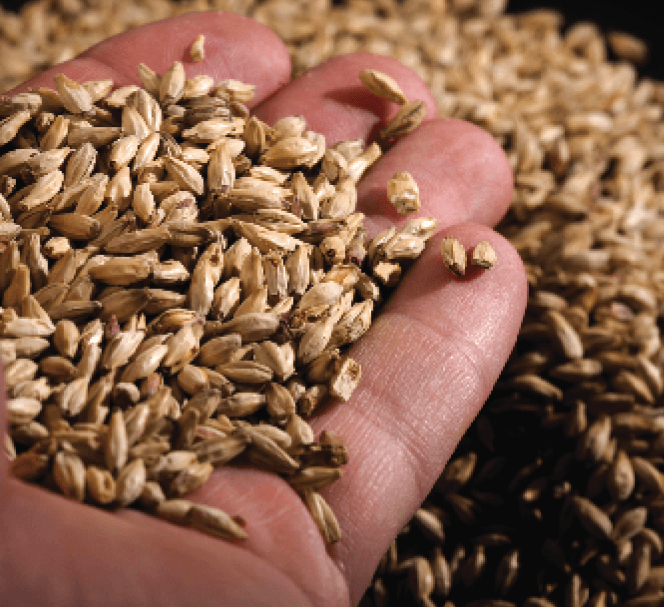
Part of the joy in homebrewing is making a beer that is uniquely your own, and one way of taking that a step further is by roasting your own malt. All you’ll need is base malt, an oven, and a cookie sheet in order to toast malts to your desired level.
The technique for most roasted malt (crystal/caramel is an exception) is really as simple as spreading your uncrushed pale or Pilsner malt out on a cookie sheet, tossing it in your oven, and giving it an occasional stir so you don’t char the grains. Of course, it takes a little more science (and patience) than that to get the result you are looking for, and getting the desired roasting level may take a little practice.
As for the science, you’ll want to familiarize yourself with the Maillard reaction — a complex series of chemical reactions between amino acids and reducing sugars that take place in the grain as it is heated. Dumbed down, this is a non-enzymatic browning of the malt from the heat that results in new flavor compounds. Making toast is an everyday example of the Maillard reaction as the soft bread changes in color, texture, and taste as it is heated. The Maillard reaction results in the formation of melanoidins, which contribute flavors and aromas of caramel, toffee, nutty, toasty, and raisins.
The time and temperature to roast the malt depends on the level of toast you are trying to achieve. As you can see from the chart below (courtesy of Randy Mosher’s Mastering Homebrew), roasting at 300 °F (149 °C) will give you a wider window of time to achieve the right roast level, whereas with hotter temperatures it is easy to miss your mark, especially if your oven temperature is not precise.
The best way to determine if the roasting is done is using your nose. To gauge doneness by color you have to crack open the husk as the inside toasts faster than the husk. The resulting beer will be darker than the malt itself, so get a better idea of what to look for by cracking open commercial malts to see the colors inside.
When done roasting, remove the malt from the hot pan immediately so it does not continue cooking and, once it is cool, allow the malt to cure a couple of weeks in a paper bag. Without this waiting period the grains will impart a harsh, unwanted taste that has been likened to an ashtray as the toasting process creates a lot of volatile chemicals that need to mellow out.
As noted earlier, the process varies a bit when making crystal or caramel malt. These need to be soaked in water for a few hours prior to roasting (this allows starches to be converted to sugars when heated). Then arrange them two inches (5 cm) thick in a covered roasting pan and place in an oven set to 180 °F (82 °C) for about 90 minutes, stirring occasionally. Now that the starches are converted to sugars, the malt must be dried — spread the grain into two pans so the bed is 1 inch (2.5 cm) thick and raise the oven temperature to 250 °F (120 °C) for two hours or until dry. At this point, if you wish to roast your crystal malt, follow the roasting instructions detailed earlier.
These methods will allow you to roast malts up to about 80 °L. Roasting malts darker isn’t recommended in a traditional oven as it will cause a tremendous amount of smoke. To roast darker malts the best avenue is using a roaster.