SMaSH Brewing: Single Malt & Single Hop
Most homebrewers begin their brewing hobby using beer kits designed by other brewers. These kits give a brewer a chance to get his or her feet wet, try some new beer styles and learn the basics, but eventually eyes turn to designing recipes of his or her own.
My own first foray into recipe design was a porter. As best I can recall the ingredients included dark extract, chocolate malt, Carafoam®, caramel malt, some black patent malt, and two or three types of English hops added at various increments. The beer was marginally drinkable, but not particularly good. It would be many years and dozens of beers later that I finally learned what I did wrong and also learned of the solution.
Kitchen Sink Syndrome
The problem with my first porter, as well as many of my self designed beers that followed was what I now call “the kitchen sink syndrome.” With a poor understanding of what ingredients are used in a porter, and an even weaker understanding of what each ingredient contributes to the beer, many brewers dive in with both feet and simply put everything but the kitchen sink into their beer.
That thinking goes something like this: “If two malts make a great pale ale, then surely five or six different malts will make a better one!” or, “Why stop with just one or two hop additions when I can add hops every five minutes instead?” or “I’m sure this Bavarian weisse would be even better if I dry hopped it for a few weeks with some Northern Brewer hops.”
This approach is equivalent to maximizing speed but in the wrong direction. Driving 100 miles an hour won’t help if you made a wrong turn way back in Albuquerque. When I suffered from kitchen sink syndrome, I was filled with good intention, but lacked a defined goal or the knowledge to follow through on it.
Why Simplicity Matters
With age and experience comes wisdom, though I was admittedly a slow learner. Over time as I studied some of my favorite beer styles, and looked at award-winning recipes I came to realize that the best recipes used fewer, and not more ingredients. Even more important, I realized that the ingredients that were included in each recipe are tied to a specific purpose. They were not just tossed in casually as an afterthought — but each ingredient was added to achieve a flavor or effect in the finished beer.
Many commercial and craft beers best reflect this philosophy. For a commercial brewer, using extraneous ingredients or processes is costly to the bottom line. Aside from being poor for business there is also the practical consideration of how many varieties of grains or hops a small brewery can reasonably stock.
So if you look at most craft breweries, they typically create a wide variety of beers from a relatively small stock of ingredients. They may use the same pale malt stock for almost every beer, and use a small number of popular specialty malts (caramel malt, chocolate malt, etc.) and hop varieties to brew their stock beers. To take advantage of bulk pricing as well as maximize use of their limited storage space, they can’t afford to stock the wide variety of yeasts or malts you might find in a typical homebrew store.
This is where homebrewers have an advantage. We have easy access to most any malt, hop or yeast variety, and can create beers that may not be affordable or commercially viable. But easy access is a double edge sword — as having access to everything also means we may never be forced to make the tough decisions to simplify when simplicity matters most.
Simplicity to the Extreme
So if many homebrewers go too far in their quest to use every ingredient, and commercial brewers make great beer with relatively few ingredients, how does one determine where the sweet spot is in beer design?
Enter SMaSH brewing. SMaSH stands for Single Malt and Single Hop recipe design. SMaSH takes the idea of simplicity in brewing to its logical extreme — by limiting the brewer to one malt, one hop variety, and one yeast strain. It’s a great technique for brewers looking to simplify their beer, and move beyond the kitchen sink syndrome.
The Advantages of SMaSH Brewing
I don’t advocate SMaSH as necessarily the best method for creating your next blue-ribbon award-winning beer (although there are definitely some award-winners made this way). SMaSH is, however, an important step on the path to understanding how isolated ingredients impact your finished beer. Some of the advantages of SMaSH include:
• Understanding what a single hop variety tastes like in isolation, and what it brings to your beer.
• Understanding how different base malts impact the flavor of your finished beer.
• Highlighting the differences between yeast strains.
• Getting the brewer to think seriously about brewing techniques and what they bring to the beer — including mash techniques, hop additions and timing, water additions, fermentation schedules and finishing your beer.
• Moving towards a philosophy that emphasizes using ingredients and techniques to achieve a specific flavor or effect in the finished beer, and away from the kitchen sink approach to brewing.
• Understanding what flavors you like in your beer, and which ones you don’t.
SMaSH Styles
I know a lot of you reading this are probably thinking, “What kind of beer can I possibly create with just one malt and one hop?” Well, it turns out the list of possible styles is pretty extensive. Here are some of the popular beer styles you can create with just a single hop and single malt: Light lagers, Pilsners of all types, saison, India pale ale, American pale ale, American IPA, Belgian blonde ale, cream ale, tripel, Belgian golden strong ale, old ale, English bitters and milds, barleywine, Oktoberfest, Vienna, altbier, Helles, and Grodziskie.
The key to making all of these different styles is simply using the right selections for your base malt, hop variety and yeast, along with applying the correct techniques and timing.
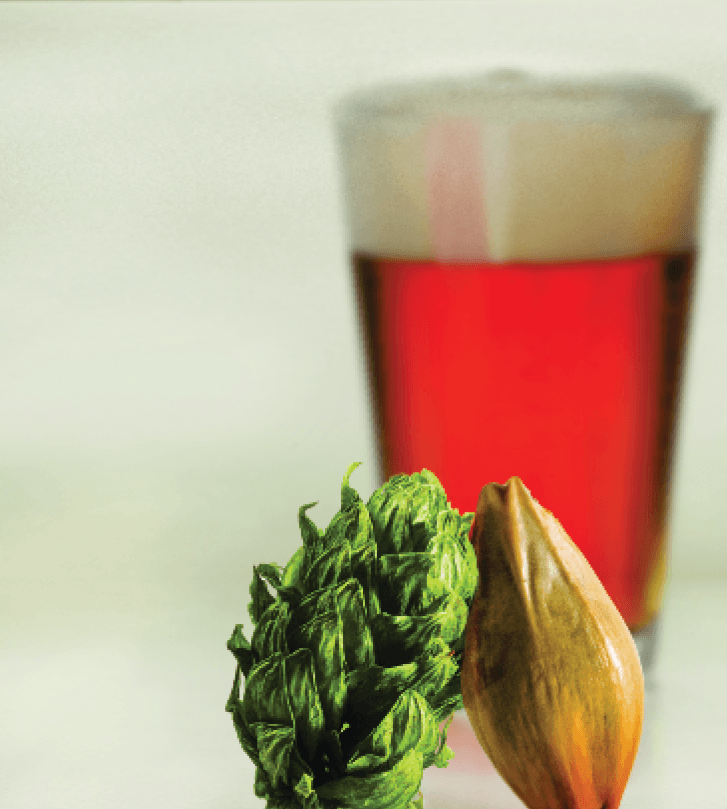
Selecting your Grains
Different grains from different maltsters and areas of the world can have their own distinct flavors. By carefully selecting your base grain to go with your beer style, hop and yeast variety you can achieve some unique effects. I encourage you to sample some of the malt by lightly chewing it — to get an idea of its flavor before brewing.
Extract brewers can join the SMaSH bandwagon here. Select one variety of liquid or dried malt extract that matches your beer style, and brew with that. Obviously your selections are more limited than an all-grain brewer, but you still have options. In addition to the obvious pale malt, many stores offer liquid Munich malt, wheat malts, and other specialty extracts to try.
For all-grain brewers, many of us are familiar with American or British 2-row pale malt, but have not tried 6-row malts. Six-row barley, while it has a slightly lower (2%) overall potential, has more enzymes than 2-row, and higher protein levels that will provide body in the final beer.
Maris Otter, an English 2-row barley has long been a favorite of SMaSH brewers. It imparts a complex, unique flavor particularly to many English styles that has long been favored by home and commercial brewers alike. For example you can make a great SMaSH IPA with just Maris Otter malt or malt extract.
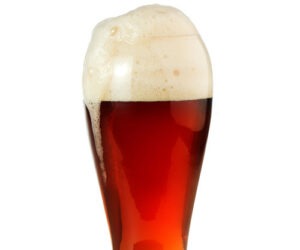
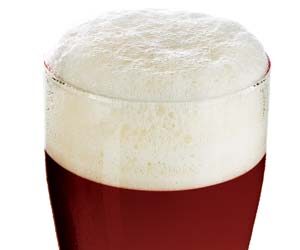
Moving away from pale malts, two other popular SMaSH malts are Munich and Vienna malts. Beers made with 100% Munich develop a strong malty sweetness as well as distinct red-copper color. Lighter Munich varieties work best, provided you balance the maltiness with hops or use it in a malty continental style.
Vienna malt is slightly lighter in color and sweeter than Munich, making it a great base malt for Munich, Oktoberfest or other malty styles.
Beer made from 100% wheat malt is an option. You need to select a wheat malt that has sufficient diastatic power, but most light wheat malts are self-converting. A good example would be Briess’ White Wheat, which has a high diastatic power of 160. When working with 100% wheat you are going to get a thick mash so using a high water/grain ratio or brewing via brew-in-a-bag or with rice hulls might be needed to avoid a stuck mash.
Finally you can consider lightly smoked malts. Using 100% smoked malt requires carefully selecting your malt, so you don’t overwhelm the beer with smoked flavor. An example would be the Polish beer style Grodziskie, which is made from 100% wheat malt smoked over oak. Lightly smoked pale malt can also be used as a base.
Selecting your Hops
Hops have a huge impact on beer flavor, and SMaSH is a great method for isolating and identifying the hops that you prefer most.
When selecting hops, you may want to smell, rub and even lightly sample the hops. With experience you can get a good idea of some of the flavors and aromas a hop brings to beer. Use a hop variety that matches your target style. If brewing a continental beer, use a noble hop variety. For English ales, I like to stick with varieties like East Kent Goldings, and Fuggles. Some great American ales can be brewed from the distinct American
hop styles.
Beyond the style specific choices, SMaSH is a good way to experiment with new varieties. Try a hop you’ve never used before, or one with unique flavors like some of the fruity or piney Pacific flavors. Try some of the new varieties from New Zealand or Australia, or cutting edge varieties developed in the last few years. You may find one you really like.
Selecting a Yeast Strain
One way to increase the complexity of a SMaSH beer is by choice of yeast strain. Select a yeast strain that either adds its own complexity to your finished beer, or one that highlights your selection of malt and yeast.
English ale strains, for example, add esters, bready complexity and malty sweetness. Bavarian wheat yeast can add the distinctive banana-clove flavor to a plain, lightly hopped beer. Other yeasts, like Kölsch will highlight the hop flavor in a light ale. Pacific ale yeast can highlight maltiness, fruity esters as well as hops in beers like IPAs.
At the other end of the spectrum you can select a yeast that is neutral in flavor. American ale yeasts ferment clean, highlighting the flavor and finish of your malt and hop selections. Cream ale yeast leaves a clean lager-like finish with a hint of fruity esters.
SMaSH Brewing Techniques
Just because you are limiting yourself to one hop and one malt does not mean you can’t use the full range of brewing techniques. It’s hard to cover all of the possibilities in limited space, but I’ll provide a few examples.
If you are brewing all-grain, you definitely want to adjust the mash temperature to match the desired body of your beer. Mashing at a higher temperature like 156 °F (69 °C) will result in a more malty beer and an increase in body and final gravity. Mashing at a low temperature around 148 °F (64 °C) results in a cleaner, drier finish to the beer with a lower final gravity.
For a hoppy beer like an IPA, you can use multiple boil additions, whirlpool/steeped hops and dry hopping to maximize your hoppy flavor.
For less hoppy beers, I like to use a first wort hop addition, where you add hops to the boiler as you are lautering, and leave them in for the entire boil. First wort hopping results in a smoother hop perception, an effect that is preferred by most beer drinkers for beers that are not hop-forward.
Adjusting your fermentation temperature and conditions can also have a large impact on your beer. Fermenting a bit cooler can give you a cleaner finish, while fermenting warm can result in extra esters, and in extreme cases fusel alcohol.
Two Malts or Hops
If you find the dozen or so styles encompassed by SMaSH too limiting, you can consider expanding your horizons to Dual Malt and Single Hops (DMaSH). By adding a second malt variety to your recipe you can cover almost every single style of beer.
For example, with two malts you can easily create porters, all of the major stouts, Belgian ales, abbey ales, all of the wheat beers, rauchbier, all of the bocks, Flanders and many more.
Like SMaSH, creating a dual-malt recipe helps you boil a beer style down to its fundamentals. Let’s take the example of a dual-malt stout. For a dry Irish stout I might choose a Maris Otter base to provide some body and complexity and then add roast barley as the second malt. This combination will provide the dry roasted flavor we desire while maintaining good body and complexity in the finished beer.
Contrast this with an English porter. Again, Maris Otter might be a good base malt choice, but the brewer is faced with several possibilities for the second malt. Some options include black patent, chocolate and brown malt. Black patent would provide a more roasted, coffee-like finish, closer to a stout, and chocolate can be a bit bitter in large quantities. I would go with brown malt, which was originally used for porter as it is smooth and clean even in larger quantities.
More importantly, selecting the right proportion of malts, hops, and yeast and then brewing and sampling the beer provides a great education in understanding ingredients. Perfecting your SMaSH or dual-malt recipe through several iterations will give you the equivalent of a graduate education in malt and hop flavors.
You can consider expanding to two hop varieties as well. For example you might want to use one variety for bittering and a second for whirlpool/aroma hops. Isolating the boil from the finishing aroma hops can help distinguish the finished bittering flavor, and provide interesting combinations.
Start SMaSH-ing
SMaSH and dual-malt (or dual-hop) brewing are great tools for expanding your brewing horizons. Simplifying your beer lets you understand what individual malt and hop combinations bring to the beer. This will move you away from the kitchen sink approach to brewing towards a real understanding of ingredients.
I used the bad weather last winter to experiment with some mini-brew-in-a-bag and mini-extract batches on the stovetop, and found it to be a great educational experience. These mini SMaSH or dual-malt batches can be brewed quickly, and you will learn something from every batch, even if the beer is not perfect every time.
I encourage you to give SMaSH or dual-malt brewing a try — it will significantly enhance your understanding of malt, hops and yeast and ultimately improve your brewing experience.
 SMaSH Recipes
Citra SMaSH India Pale Ale
 SMaSH Recipes
(5 gallons/19 L, all-grain)
OG = 1.060 FG = 1.012
IBU = 45 SRM = 5 ABV = 6.4%
Ingredients
12 lbs. (5.4 kg) Maris Otter pale ale malt
12 AAU Citra® hops (60 min.) (1 oz./28 g of 12% alpha acid)
1 oz. (28 g) Citra® hops (0 min.)
1 oz. (28 g) Citra® hops (dry hop)
0.25 tsp. Irish moss (10 min.)
White Labs WLP001 (California Ale), Wyeast 1056 (American Ale) or Fermentis Safale US-05 yeast
Priming sugar (if bottling)
Step by Step
Heat 15 qts. (14 L) of water to 165 °F (74 °C) to achieve a mash temperature of 150 °F (66 °C). Hold the mash at 150 °F (66 °C) for 60 minutes, or until conversion is complete. Sparge slowly with 170 °F (77 °C) water, collecting wort until the pre-boil kettle volume is around 6.5 gallons (24.6 L).
Boil the wort for 75 minutes. Add the first hop addition at 60 minutes left in the boil. Add the second addition of hops at the end of the boil.
Chill the wort to 65 °F (18 °C), let the break material settle, rack to the fermenter, pitch the yeast and aerate thoroughly. Ferment at 68 °F (20 °C). After primary fermentation has died down, add the dry hop addition. After two days of dry hopping, rack the finished beer off the dry hops and bottle or keg.
Citra SMaSH India Pale Ale
(5 gallons/19 L, extract only)
OG = 1.060 FG = 1.012
IBU = 45 SRM = 5 ABV = 6.4%
Ingredients
8.5 lbs. (3.9 kg) Maris Otter liquid malt extract
12 AAU Citra® hops (60 min.) (1 oz./28 g of 12% alpha acid)
1 oz. (28 g) Citra® hops (0 min.)
1 oz. (28 g) Citra® hops (dry hop)
White Labs WLP001 (California Ale), Wyeast 1056 (American Ale) or Fermentis Safale US-05 yeast
Priming sugar (if bottling)
Step by Step
Heat 5 gallons (19 L) of brewing water to boil. Remove the brewpot from the heat to add the liquid malt extract. Stir the wort until the extract is fully dissolved, then return to a boil. Watch the pot and continue to stir to avoid scorching.
Boil the wort for 60 minutes. Add the first hop addition at 60 minutes left in the boil. Add the second addition of hops at the end of the boil.
Chill the wort to 65 °F (18 °C), let the break material settle, rack to the fermenter, pitch the yeast and aerate thoroughly. Ferment at 68 °F (20 °C). After primary fermentation has died down, add the dry hop addition. After two days of dry hopping, rack the finished beer off the dry hops and bottle or keg.
SMaSH Cream Ale
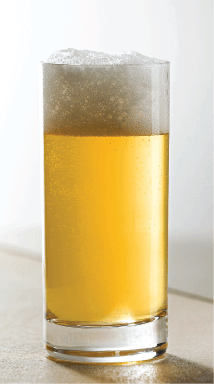 SMaSH Cream Ale
(5 gallons/19 L, all-grain)
OG = 1.047 FG = 1.012
IBU = 18 SRM = 3 ABV = 5.1%
Ingredients
10 lbs. (4.5 kg) US 2-row pale malt
5 AAU Saaz hops (60 min.)
(1.25 oz./35 g of 4% alpha acid)
White Labs WLP080 (Cream Ale) yeast blend
Priming sugar (if bottling)
Step by Step
Heat 12.5 qts. (11.8 L) of water to 165 °F (74 °C) to achieve a mash temperature of 150 °F (66 °C). Hold the mash at 150 °F (66 °C) for 60 minutes, or until conversion is complete. Sparge slowly with 170 °F (77 °C) water, collecting wort until the pre-boil kettle volume is around 6.5 gallons (24.6 L).
Boil the wort 75 minutes. Add the bittering hops addition at 60 minutes left in the boil. Chill the wort to 65 °F (18 °C), let the break material settle, rack to the fermenter, pitch the yeast and aerate thoroughly. Ferment at 68 °F (20 °C).
SMaSH Cream Ale
(5 gallons/19 L, extract only)
OG = 1.047 FG = 1.012
IBU = 18 SRM = 3 ABV = 5.1%
Ingredients
5.25 lbs. (2.4 kg) extra light dried malt extract
5 AAU Saaz hops (60 min.) (1.25 oz./35 g of 4% alpha acid)
White Labs WLP080 (Cream Ale) yeast blend
Priming sugar (if bottling)
Step by Step
Heat 5 gallons (19 L) of brewing water to boil. Remove the brewpot from the heat to add the dried malt extract. Stir the wort until the extract is fully dissolved, then return to a boil. Watch the pot and continue to stir to avoid scorching.
Boil the wort for 60 minutes. Add the hops at the beginning of the boil.
Chill the wort to 65 °F (18 °C), let the break material settle, rack to the fermenter, pitch the yeast and aerate thoroughly. Ferment at 68 °F (20 °C). After primary fermentation is over, bottle or keg.
Tips for Success
Cream ale was historically brewed with ale yeast and subjected to cellaring conditions to give it a lager-like profile. This is because ale breweries tended to not be set up for cold fermentation, so it was probably brewed warm regardless of yeast type, at least until Prohibition. But in modern times cream ale can be brewed with either ale or lager yeast. BYO’s Jamil Zainasheff recommends experimenting with yeast strains such as White Labs WLP001 (California Ale), Wyeast 1056 (American Ale), Fermentis Safale US-05 dry “Chico” ale yeast and White Labs WLP810 (San Francisco Lager) yeast. Try to stick to a fermentation temperature of 65–70 °F (18–21 °C) and a conditioning temperature of approximately 40 °F (5 °C).
SMaSH Saison
 SMaSH Saison
(5 gallons/19 L, all-grain)
OG = 1.052 FG = 1.010
IBU = 22 SRM = 4 ABV = 5.6%
Ingredients
10.5 lbs. (4.8 kg) US 2-row pale malt
6.8 AAU Saaz hops (60 min.) (1.5 oz./43 g of 4.5% alpha acid)
White Labs WLP566 (Belgian Saison II) yeast or Lallemand Belle Saison yeast
Priming sugar (if bottling)
Step by Step
Heat 13 qts. (12.4 L) of water to 165 °F (74 °C) to achieve a mash temperature of 150 °F (66 °C). Hold the mash at 150 °F (66 °C) for 60 minutes, or until conversion is complete. Sparge slowly with 170 °F (77 °C) water, collecting wort until the pre-boil kettle volume is around 6.5 gallons (24.6 L).
Boil the wort 75 minutes. Add the bittering hops addition at 60 minutes left in the boil.
Chill the wort to 72 °F (22 °C), let the break material settle, rack to the fermenter, pitch the yeast and aerate thoroughly. Ferment at 75 °F (24 °C). After primary fermentation is over, bottle or keg.
SMaSH Saison
(5 gallons/19 L, extract only)
OG = 1.052 FG = 1.010
IBU = 22 SRM = 4 ABV = 5.6%
Ingredients
7.5 lbs. (3.4 kg) pale liquid malt extract
6.8 AAU Saaz hops (60 min.) (1.5 oz./43 g of 4.5% alpha acid)
White Labs WLP566 (Belgian Saison II) yeast or Lallemand Belle Saison yeast
Priming sugar (if bottling)
Step by Step
Heat 3 gallons (11.4 L) water in a large pot to boil. Remove from heat and stir in the liquid malt extract. Stir until the extract is fully dissolved then return the pot to a boil. Watch the pot and continue to stir to avoid scorching.
Add the hops and boil the wort for 60 minutes. Add water during the boil to keep the total wort volume near 3 gallons (11.4 L).
Chill the wort to 72 °F (22 °C), let the break material settle, rack to the fermenter and top off to 5 gallons (19 L). Ferment at 75 °F (24 °C). After primary fermentation is over, bottle or keg.
Tips for Success
To hit the standard CO2 level for a typical Belgian beer (about 8 grams per liter or 4 volumes of CO2), this recipe may require a little bit more priming sugar than the typical 3⁄4 cup suggested in most homebrew recipes. If bottling, the thicker Belgian-style bottles are recommended due to the higher CO2 volume inside the bottle. Traditional Belgian yeast requires higher temperatures to condition efficiently, so be sure to bottle condition in a spot that is consistently around 78 °F (25 °C), which is above room temperature.
 Dual-Malt Porter
(5 gallons/19 L, all-grain)
OG = 1.046 FG = 1.012
IBU = 22 SRM = 20 ABV = 4.5%
Ingredients
6 lbs. (2.7 kg) Maris Otter pale ale malt
3.5 lbs. (1.6 kg) brown malt (65 °L)
6.3 AAU East Kent Golding hops (60 min.) (1.25 oz./35 g of 5% alpha acid)
White Labs WLP002 (English Ale) or Wyeast 1968 (London ESB) or Lallemand Windsor Ale yeast
Priming sugar (if bottling)
Step by Step
Heat 11.25 qts. (10.6 L) of water to 165 °F (74 °C) to achieve a mash temperature of 150 °F (66 °C). Hold the mash at 150 °F (66 °C) for 75 minutes. Sparge with 170 °F (77 °C) water, collecting wort until the pre-boil kettle volume is around 6 gallons (23 L). Boil the wort for 60 minutes, adding the hops at the beginning of the boil. Chill the wort to 65 °F (18 °C), let the break material settle, rack to the fermenter, pitch the yeast and aerate thoroughly. Ferment at 66 °F (19 °C). After primary fermentation is over, bottle or keg.