Sparging: Tips from the Pros
Brewer: Kevin Rokke
Brewery: Crane River Brewpub & Cafe, Lincoln, Neb.
Years of experience: 10
Education: BS in biology, University of Nebraska, Lincoln
House Beers: Whooping Wheat, Sodhaus Altbier, Zlate Pivo (pilsner-style ale), Homestead Pale Ale, Platte Valley ESB, Good Life Stout
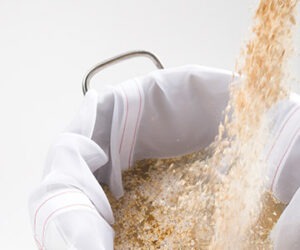
At Crane River we’re careful not to sparge too hard or too fast. We try not to oxygenate the wort too much to avoid tannins and off flavors, although some is inevitable. If you see foam building on top of the grain, that’s a good indication of oxygenation and means you need to slow down the rate of your sparge.
I get the flow started and adjust the speed of the water to get the runoff going at a certain rate. I want the runoff going into the kettle at a good even flow. Once I have the runoff started, my goal is to keep just enough liquid on the grain bed to keep it moist. I watch to see that it doesn’t dry out or doesn’t have a pool of water on top.
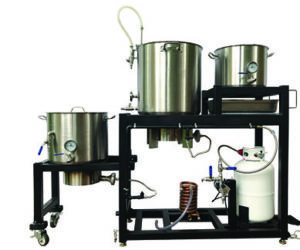
I can’t say exactly how much water we use for sparging. I use enough to fill my kettle to 8.5 barrels (the size of our system).
I begin sparging right after I start running off, watching the temperature so it doesn’t get too hot. When it gets to 168° F, that’s pushing it. Sparging too hot can produce tannins and add to problems with clarity. Check the wort as it goes into the kettle to see if it is clear. We sparge around 165° F. The time it takes varies from 35 to 50 minutes, depending on the beer style. Wheat beers, stouts, and our other heavier beers take 45 to 50 minutes, and lighter beers will run 35 to 40 minutes.
Wheat beers typically run longer, because they require slower sparging to keep from getting a stuck mash. The proteins in the wheat float down a little bit and get a little more sticky.
When brewing our stouts and heavier beers, I have to slow down because the grains almost totally fill the mash tun. To accommodate the grain I need to turn our sparge arm upside down, so the holes are on top and not shooting directly down on the grain. With these big mashes I have to start the sparges slowly and let the grain sink down a little bit so I can turn the arm around again.
Having to turn the sparge arm over to make room for grain isn’t the only problem we’ve run into with our equipment. That sparge arm is theoretically supposed to spin around the top of the grain bed to keep the extraction even. The arm seems like it wasn’t designed really well, like there should be some ball bearings in it so that it spins with the force of the water. The force of the water is suppose to get it rotating, but it just doesn’t do anything.
I spin it around by hand a couple of degrees at a time so that I get coverage over the whole grain bed while we’re sparging.
Crane River has had only one stuck mash, which was right when the brewery got started, before I was here. They simply ran off too fast and didn’t sparge fast enough to keep up with it. The grain bed got stuck at the bottom. They tried to alleviate the problem by underletting some water to break up that bottom grain bed, giving it another good stir, and then recirculating again. This did the trick.
Sparging is probably harder for homebrewers because they tend to tinker with different equipment each time. It’s probably best to try one piece of equipment a few different times to get the feel of it before experimenting with another piece.
The best thing homebrewers can do is to start running off slowly to avoid getting a stuck grain bed. Also, make sure you don’t run off faster than you are sparging in. This helps avoid problems of sticking.
Another tip homebrewers might keep in mind is to be careful that you don’t slosh a lot when sparging. I ran across this when I was homebrewing, but it is easy to control. For example don’t use a bucket to sparge. Use a hose instead so that you can control the rate of the sparge.