Tap into Kegging
One of the most enjoyable ways to serve beer is with a kegging setup using soda canisters. Besides the advantages of kegging, having real draft on tap is a lot of fun. No more washing, handling, and storing bottles; no more worries about too much or too little carbonation; no more yeast sediment in your glass; no more waiting for bottle conditioning before enjoying that latest brew.
Because you’ll pressurize and dispense with carbon dioxide instead of air (as you do with kegs from the party store), your beer will taste great many months after kegging. There’s no need to consume it quickly.
Of course kegging has its tradeoffs. It’ll cost $150 to $200 to get started, and you’ll need a way to keep the beer cold or chill it just before serving. You can’t mail kegs to competitions, and it’s hard to give friends samples to take with them. While it’s easy to keep a wide variety of cold beer on hand in bottles, that could get expensive with kegs. Still, kegging at home is as convenient as it gets.
The most common home setup uses a five-gallon stainless steel soda canister often called a “Corny” keg. The name comes from the Cornelius Co., a major keg manufacturer. Kegs also come in three- and 10-gallon sizes, but those are hard to find and usually cost more than the five-gallon size. Corny kegs are popular because they’re stainless steel, have a convenient capacity, are readily available, and are easy to handle and clean. Also, replacement parts are inexpensive. Used kegs cost in the neighborhood of $35, while new kegs sell for about $90.
How Do Soda Kegs Work?
A Corny keg is a stainless-steel pressure tank with two fittings at the top end, one marked “in,” the other marked “out.” A pressurized CO2 line is connected to the “in” fitting to carbonate and dispense the keg contents. A flexible dispensing line (with picnic or “cobra” tap) is connected to the “out” fitting. Inside the keg a stainless dip tube connects to the “out” fitting and extends to the bottom of the keg. When you pressurize the keg with CO2 and open the picnic tap, beer is forced up the dip tube, through the “out” fitting, into your tap line, then into your glass.
To fill the keg and to clean it after use, the top end has an oval hand hole in it. This opening is sealed with a removable hatch plate held in place with a steel bail. A rubber o-ring is used to seal the inside rim of the hole. (If you purchase a used keg replace the ring; it could smell like soda pop or whatever the keg held previosly.) When the keg is pressurized, the cover plate is pushed outward, squeezing the o-ring between it and the keg.
Carbon dioxide is the heart of the system. High-pressure bottles similar to scuba tanks are filled with CO2 gas at soft-drink distributors and fire extinguisher equipment shops. To get
a lot of gas in a small tank, the CO2 is pressurized at 400 to 800 pounds per square inch (psi) or more, depending on bottle size. Carbonation and dispensing only take 30 psi or less, so tank pressure has to be lowered before it can be introduced into the soda keg.
To reduce the gas pressure a regulator is connected directly to the CO2 tank. This is the same technology found on any barbecue grill. With CO2 you set the desired pressure using a screw on the regulator and read the pressure using the regulator gauge. To dispense beer the pressure is set between 10 and 30 psi. The best setting will depend on the keg’s inside diameter and length of the dispensing tube and the carbonation level of the beer being dispensed.
What Do I Need, What Does It Cost?
For a complete draft homebrew system, you’ll need:
- At least one soda keg (pin or ball lock)
- CO2 tank
- One- or two-gauge regulator
- Gas tubing (three or four feet)
- Gas quick-disconnect (pin or ball lock to match the soda keg)
- Dispense tubing with picnic tap (three or four feet)
- Beverage quick-disconnect (pin or ball lock to match soda keg)
Kegging kits are sold at well-equipped supply shops or by mail from dozens of suppliers. You’ll be given at least four options: tank size, single- or dual-gauge regulator, a regulator cage, and ball- or pin-lock canisters.
First, consider the CO2 tank size, given in pounds. The smallest common size is the 2.5-pound bottle, which is very small, lightweight, and affords mobility. The drawback is that it needs to be refilled often.
Other common tank sizes are five pounds, 10 pounds, and 20 pounds. Because you’ll pay a flat fill charge regardless of bottle size, the larger the bottle, the cheaper the gas. My supplier charges $7 to fill my 2.5-pound tank and about $13 to fill the 10-pound tank: four times the gas for less than twice the price. New five-pound tanks are about $80, 10-pound bottles and refurbished 20-pound ones about $100.
Next, you must choose a single-gauge or dual-gauge regulator. Both display the pressure of the regulated, low-pressure side of the system, but the dual-gauge units also display tank pressure. Without knowing the tank pressure you won’t know when it’s getting empty until it’s too late. Dual gauge regulators aren’t much more, so you may want to pay for the extra convenience. Cost: about $50.
A third option is a regulator cage. This is just a steel wire “rollbar” for your regulator gauges. When your CO2 tank tips over and hits regulator-first, you’re guaranteed some regulator damage. To prevent this either buy a cage or plan to keep your CO2 bottle strapped to something at all times. Cages cost between $10 and $18, depending on quality and source.
Finally, when selecting soda canisters you may have the choice of ball-lock or pin-lock type. A “quick disconnect” is a plastic or metal fitting attached to both the gas and beverage lines used to get CO2 into and beer out of the keg. The quick disconnect just lets you, well, quickly disconnect those lines from the keg. A spring-loaded ring that forces three steel balls into a groove on the keg fitting holds the quick disconnects for ball locks on the keg. This works like the air-hose fittings at service stations.
With the pin-lock canister, small steel pins protrude from the keg fittings. Pin-lock quick disconnects have matching slots in them – you push the quick disconnects onto the keg fittings, then turn them so the pins hold the quick disconnect in place. If you’re familiar with coaxial data cables, it works like a BNC connector. It’s hard to say if one keg type is better than the other, but ball-lock fittings seem to be more common.
The gas-line assembly needed to get CO2 from the regulator into the keg costs about $15, as does the beverage picnic tap and tubing assembly. Total system cost: about $200. Because your soda kegs are stainless steel and will be used under pressure, iodophor sanitizer is recommended over chlorine bleach. A quart of iodophor costs $10 to $15 and should last the busiest brewer a long, long time.
Preparing the Keg
For your first kegged beer brew as you always do, up to the point where you would normally rack to the bottling bucket. Instead, rack into a clean, sanitized Corny keg.
There are as many different procedures here as there are brewers. One very simple kegging method that works well is to prepare the keg well in advance of kegging day, leaving only a final rinse and sanitation to perform at racking time. Here are the preliminary steps:
- Prior to the first use of your keg, remove the lid by pulling up on the bail and allowing the lid to lower into the keg far enough to tip and turn it so it can be removed. The lid’s design allows the internal keg pressure to force the lid outward against the inside rim of the keg opening, squeezing the large o-ring seal tight.
- Remove the o-ring from the lid, and wash the two parts in hot, soapy water. Ensure that the pressure-release valve can be manually opened easily, and when rinsing the cap, let clean water flow through the opened relief valve. The relief valve will open and release internal keg pressure if the pressure gets near the rated working limit of the keg (about 100 psi).
- Using a deep socket wrench, box wrench, or adjustable pliers, remove both the “in” and “out” fitting on the keg. The gas “in” fittings will have a 12-point shoulder on it, the beverage “out” shoulder will look like a normal hex-head nut. Remove the fittings without rounding off the corners or slipping up onto the valve body. Don’t grip the smooth cylindrical portion of the valve body to remove or replace it.
- After the fittings are removed, pull the gas and dip tubes from the keg and clean them. Inspect the seals found under the end lip at the top of each tube for damage. Look for syrup residue, corrosion, and anything you don’t want to contact the beer. Hot, soapy water should be enough to remove anything — don’t use any abrasives on the parts. Damaged seals can be replaced with parts from supply shops or ordered by mail.
- After rinsing the parts, reassemble everything. Put the “in” valve on the “in” side of the keg with the short tube and the “out” valve on the “out” side of the keg with the long tube. Tighten the fittings firmly, but don’t be brutal about it.
- Dissolve two teaspoons of dishwasher detergent in two quarts of very hot tap water, then pour it into the keg and replace the keg cover plate (with o-ring). Shake the keg repeatedly.
- With the keg upright, pull the relief-valve ring on the cover plate, remove the cover, pour out the contents, and add a few quarts of hot rinse water. Replace the cover, thoroughly shake the keg, pour out, and repeat.
Let’s Get Kegging
When the preliminary cleaning is complete, the keg can be stored until needed. When you’re ready to keg your beer, remember: Avoid aeration. Make sure you have a racking cane and enough tubing to reach from the bottom of the fermenter to the bottom of the keg. This will help you avoid splashing. Enough CO2 will come out of the beer to provide a protective blanket during the transfer.
Before starting, sanitize the keg with an iodophor solution mixed according to the directions on the iodophor bottle. You don’t need to fill the five-gallon keg with solution; just mix a quart or two in the keg, seal it, and agitate for a few minutes. Drain the solution into another container for sanitizing the racking cane, tubing, and keg cover. Put the keg upside down in a pan or in the sink to continue draining while you sanitize your racking tube.
When you’re ready to start, set the keg upright on the floor with the fermenter above it on the countertop or on a stool. Begin a siphon from the fermenter as you normally do, and quickly lower the tubing outlet into the bottom of the keg. Once the beer level in the keg is above the end of the tubing, splashing and aeration won’t be a problem.
When the siphon is complete, remove the racking tube from the keg and replace the sanitized keg lid. Before pushing down the bail on the lid, pull upward on the bail lightly with a twisting motion of the wrist. This ensures the lid is seated properly in position. Then close down the bail.
You can now purge the remaining air in the keg headspace by pumping CO2 into the “in” fitting while you hold open the pressure relief valve. Open the CO2 tank valve, and set your regulator pressure to 20 to 30 psi. With ball-lock systems the gas tubing coming off the regulator is fitted with a gray quick disconnect. Lock this fitting onto the “in” valve of your keg by pulling upward on the plastic locking ring at the bottom of the disconnect. Push the disconnect down over the “in” valve and release the locking ring.
If you don’t hear gas flow into the keg, check the valve at the regulator (where the tubing meets the regulator body). The valve is closed if at right angles to the tubing, open if it’s in line with the tubing. Open it.
Immediately open the pressure relief valve on the keg lid and release the pressure. Hold it open, allowing the gas to escape for about 30 to 40 seconds, or longer if you have a lot of headspace in the keg. Release the relief-valve ring, and pressurize the tank. You’ll hear the gas flow into the keg, then eventually stop.
When flow stops, agitate the tank by rocking it. This will force the CO2 into solution, and more CO2 will flow into the keg. Continue this process for a few minutes, then remove the gray gas disconnect from the “in” fitting. Turn off the CO2 tank valve, and put your keg in the fridge or the coldest location you have.
After the keg and contents have cooled, you’ll have to add more CO2. If you can leave the CO2 tank connected to the beer keg while the keg is in the cooler, set your regulator to 15 psi and leave it connected, under pressure, to the keg. Agitation of the keg will speed the process, and after about one to two days you can connect the picnic tap and pull a cold one.
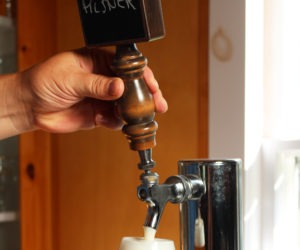
Your dispense tubing will have a picnic tap on one end and a black beverage disconnect on the other. The beverage fitting looks like the gray disconnect but fits over the “out” valve of the keg. Connect it as you did the gas disconnect and with the keg upright, fill a glass. Here’s a mnemonic to help: “Gray = gas, black = beer.”
Fine Tuning
How well the beer dispenses depends on keg pressure, level of carbonation, length and inside diameter of your beer tubing, and so on. Excessive foaming is often due to too much pressure and can be aggravated if you don’t fully depress the picnic-tap lever.
You can reduce the pressure in the keg using the pressure-relief valve, but 15 psi is a good starting point. If you remove the gas (gray) disconnect from the keg while dispensing, the keg pressure will drop rapidly with each glass of beer dispensed. You can leave the gas line off the keg, and recharge it only when the pour is too slow.
There are a couple of tips to getting beautifully clear beer with a keg system. If you allow enough time in the secondary and rack carefully, the beer should already be quite clear. But if you have a spare keg, you can cold condition the ale in the first keg for several weeks, then rack it to a second sanitized dispensing keg. During cold conditioning a lot of yeast will continue to drop out of the beer, leaving it crystal clear.
Another technique is to prepare the keg by removing the “out” fitting and pulling the dip tube from the keg. With a small pipe cutter or hacksaw, remove the bottom 1/2-inch or more of the dip tube. Remove any sharp edges with a file or sander, wash the dip tube, and reassemble the keg. The dip tube will no longer reach to the very bottom of the keg, preventing sediment from getting picked up during dispensing. This works especially well if you use gelatin or isinglass finings prior to cold conditioning. The sediment will “pack” tightly at the bottom of the keg.
Those are the basics. Once you master them you might want to build a draft box so you can serve cold beer from your keg without devoting a refrigerator to the task. The joy of serving real draft beer at home is hard to describe, but with the time savings and convenience, you’ve got an excellent combination.