Testing Dissolved Oxygen
In brewing, dissolved oxygen (DO) is measured for two reasons. The first is to determine that sufficient oxygen is dissolved in wort to initiate a clean, vigorous fermentation. The second is to determine that a low enough level remains in packaged beer to prevent staling. For homebrewers and nanobrewers, the aeration of wort is the primary consideration, which is just as well since measuring the very low level in packaged beer is a much more advanced technique. Measuring oxygenation in wort is far easier. While there is some variability among experts, a dissolved oxygen level of about 8 ppm (mg/L) in chilled, aerated wort is considered about right. If the level is much lower than that, the fermentation may become sluggish or stuck, leaving sweet under-attenuated beer. If wort is oxygenated to much higher levels, there can be so much yeast growth that the resulting biomass of yeast is excessive, leading to loss of usable beer production volume. At a theoretical extreme level, a completely aerated fermentation of brewer’s wort could result in conversion of the sugars into mostly carbon dioxide and water, with little to no alcohol produced at all. While this situation never occurs in real-world brewing, the risk of both under- and over-aerating support the utility of a dissolved oxygen meter.
Practical Use
Large commercial breweries routinely use dissolved oxygen meters. Indeed, many meters are installed with in-line sensors and continuous data records are generated as wort (and, later, finished beer) is pumped through lines. Portable meters are readily available as well, and some craft breweries employ them on a regular basis. For homebrewers, I have seen authors declare that a DO meter is out of reach and possibly unnecessary. But as we see more homebrewers show interest in the finer points of fermentation control, and as the price of DO meters has come down, it is time for another look so that you may keep track of the amount of dissolved oxygen in your wort.
How They Work
Long before my career took a turn toward fermentation, I was a chemist in environmental testing laboratories. My first experience with using a dissolved oxygen meter came about in that line of work. In 1977, I helped edit the third edition of a laboratory procedures manual for the Los Angeles County Sanitation Districts. Procedure 120-B is dissolved oxygen by DO meter and laboratory practices remain essentially the same today. When I started, the only portable DO meters used polarographic principles. Today, those meters have been joined by an entirely different class of meters using optical principles.
Polarography is an analytical technique where a pair of electrodes is placed in solution, a voltage is applied, and a current is generated when a chemical species of interest is oxidized or reduced at the corresponding electrode. For DO measurement, there is usually a silver cathode where oxygen is reduced to oxide, gradually forming a silver oxide coating. To focus specifically on dissolved oxygen and avoid intruding interferences, the electrodes are mounted in a probe filled with potassium chloride solution and capped with a semi-permeable membrane. When the probe is placed in a sample, dissolved oxygen diffuses across the membrane and the steady-state current that results is proportional to the dissolved oxygen concentration in the sample. Because the oxygen is consumed in the process, fresh sample must be presented to the membranecontinuously. In practice, this is achieved by one of several methods. The simplest is simply moving the probe about in the sample, although with the sample in an open vessel exposed to air, stirring it may introduce additional oxygen from the atmosphere. For more control, a bottle specifically designed for the purpose can be used. Called a BOD bottle (for Biochemical Oxygen Demand, a wastewater and environmental analysis parameter), the bottle has a ground-glass neck joint and most DO probes are designed to snugly fit in it. To provide fresh sample to the membrane, there is either a self-stirrer extending from the probe or a magnetic stir bar is placed in the bottle and that in turn is placed on a magnetic stir plate. Because the bottle can be completely filled (and allowed to overflow as the snugly-fitted electrode is inserted), there is no contamination from the surrounding air.
There are some maintenance requirements with polarographic DO systems. The membrane is necessarily thin, which leaves it subject to damage and wear, in addition to fouling by wort components. Spare membranes should be kept on hand if you use one of these meters, in case a membrane change is required. When I first began measuring DO, careful technique of spreading and smoothing the membrane, then capturing it in place with a rubber o-ring, was part of the training. These days, many modern meters have pre-mounted membranes that either screw on or push on to the probe body, simplifying the process. Potassium chloride filling solution will also be needed from time to time. Since the silver electrode will gradually become covered with silver oxide, the instrument manufacturer will specify a periodic electrode cleaning process that may require other proprietary solutions.
Optical DO probes look externally like the polarographic ones, but the operation is quite different. Again, there is often a membrane present to isolate the measurement from the sample at large. Inside the probe, a chamber is filled with a gel containing a dye that produces luminescence (light emission) when stimulated by blue light. There is a photodetector, plus a blue light emitting diode (LED). The intensity and duration of the luminescence from the stimulated dye is inversely proportional to the oxygen concentration in the gel. That is, the presence of oxygen in the gel suppresses the light production in a linear manner. The photodetector measures the emitted light and the meter calculates the result as ppm (mg/L) dissolved oxygen. Because oxygen is not used up, stirring is not required. The probe is simply left in contact with the sample long enough for the concentration to come to equilibrium on both sides of the membrane and a valid reading can be taken.
Calibration
Dissolved oxygen measurements are affected by temperature, barometric pressure (altitude), and salinity of the sample. Most DO meters include a thermistor in the probe to measure the sample temperature and apply a correction for that factor. Look for ATC or automatic temperature compensation when comparing meters. Both DO meter designs require calibration for accurate measurement. Most commonly, single-point calibration at the atmospheric saturation level of dissolved oxygen is carried out. For some meters, provision is made for a second calibration point at zero dissolved oxygen. The saturation method works without the need for a calibrated oxygen source because our atmosphere is uniformly mixed at about 21% oxygen. As long as temperature, altitude, and salinity are accounted for, that value can be used for calibration. As a practical matter, you can calibrate in air that is in contact with water or in oxygen-saturated water that is in contact with air. These substances are in equilibrium and the partial pressure of oxygen is the same in both (although the concentration, as mg/L by weight to volume, is not).
The easiest calibration is in moist air. Using a BOD bottle is very helpful in this instance. Rinse the bottle with distilled water and pour out the excess, leaving the bottle wet. This assures near 100% relative humidity in the airspace. Uncap or uncover your DO probe, rinse it with distilled water, and place it in the bottle. Engage the calibration routine for your instrument. Since you are measuring in air and you have rinsed with distilled water, your salinity level for calibration is effectively zero. At sea level, the saturation reading will be about 9.1 ppm at 68 °F (20 °C). Look up the exact anticipated reading in a table that came with your instrument, or from one like this available on the Internet: http://buzzardsbay.org/bbpreports/oxygen-saturation-table.pdf. Adjust your meter to that reading, including an altitude correction if necessary.
To verify a zero-level calibration, you can remove all of the dissolved oxygen from a distilled water sample by adding sodium or potassium metabisulfite (Campden tablets or granular metabisulfite salts). To prepare the solution, dissolve one gram of sodium or potassium metabisulfite in one liter of distilled water. Stopper the bottle and invert a few times to mix and dissolve the salt. You can also purchase commercially prepared zero-DO sulfite solution. Depending upon the design of your probe, you can insert it directly into the sulfite solution or carefully fill a BOD bottle and measure it there. Set your meter’s zero point according to the instructions that came with it. After you have set the zero point, thoroughly rinse the sulfite solution off of the probe with distilled water. Since you have now completely depleted oxygen from the gel or filling solution on the other side of the membrane, give it 15 minutes or so in moist air to come back into equilibrium with the atmosphere before using it for measurements.
When to Use
The time to measure oxygenation of your wort is just before you pitch your yeast. Accordingly, chill and aerate your wort in your usual fashion. If you splash rack or agitate the carboy, you can expect to achieve about 5 to 6 ppm of dissolved oxygen. If you use a fritted aeration stone with an aquarium pump or compressed air, you can likely achieve levels near atmospheric saturation of 8 or 9 ppm as noted in the table cited earlier. If you use pure oxygen, you can achieve levels of dissolved oxygen well above 10 ppm; this is the method that might lead to a problem of excess oxygen and result in loss of beer volume from excess yeast biomass. The reason you can get results higher than atmospheric saturation level is that it reflects equilibrium between the constant partial pressure of oxygen in air and the water exposed to it. With pure oxygen addition, you are limited only by the oxygen solubility in water at the temperature of your wort. Since the partial pressure of oxygen (in pure oxygen) is about five times as great as in air (ie, 100% oxygen as compared with ~21% oxygen), the maximum theoretical value is about 40 ppm. Left in contact with air, such a solution would eventually return to atmospheric saturation as it equilibrates. That would be much too late as a practical matter, and if you oxygenate in the fermenter, you have displaced the air in the headspace with oxygen as well. Most DO meters have maximum readings of about 20 ppm, so you may not be able to get an accurate reading on wort heavily oxygenated with pure O2.
However you aerate your wort, collect a sample and gently fill a test jar or BOD bottle. Insert your calibrated BOD probe and apply stirring or move the probe around if it is the polarographic type. If your probe is fitted tightly in a full BOD bottle, you will not entrain air with stirring and the reading should be stable and accurate. If you are using an open sample jar and moving the probe, try to minimize air entrainment and make your reading as quickly as a steady value appears on the meter. If you have an optical-type DO probe, stirring is not needed and you can simply leave the sample and probe in contact until a steady reading is achieved.
Choosing A Meter
Now that you know how to calibrate and use a DO meter, you may feel that you would like help choosing one. As noted at the beginning of this article, a number of authors have suggested that these meters are too expensive or too complicated for homebrewing. While that is probably true for in-line meters with continuous data logging, there is no reason a serious homebrewer should shy away from a portable meter if known, consistent oxygenation of wort is one of your goals.
First, a brief disclaimer. In my environmental lab career, we always used YSI DO meters and probes. At that time, they still used the name Yellow Springs Instruments because their headquarters is in Yellow Springs, Ohio. Now a Xylem brand, YSI still manufactures DO equipment and they still have a very good reputation. Other brands and types of meters are readily available and I have used various other instruments from producers like Milwaukee, Oakton, Vinmetrica, Hanna, and more over the years with great success. Here are a few of the meters currently available and their approximate prices:
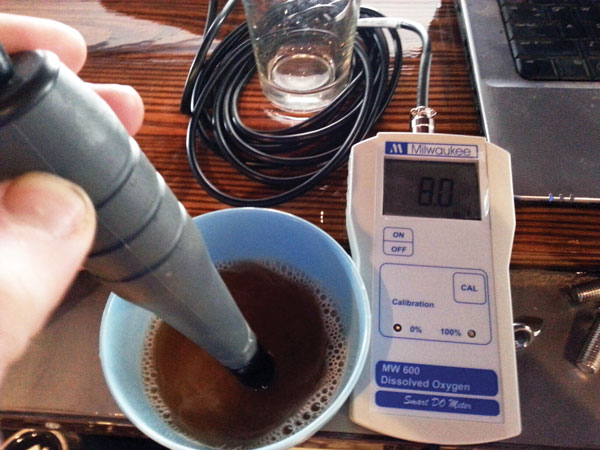
Milwaukee MW600. This is a Milwaukee instrument sometimes described as “student grade,” but I have been happy with other instruments like that for my home fermentation hobbies. It is a polarographic probe, so stirring or agitation is required. It supports two-point calibration. It is available for $159 online from Test Equipment Depot. Consider a pack of spare membranes and a bottle of electrolyte solution at the same time if you buy one.
Hanna HI8043. From Hanna Instruments, this is another polarographic meter that utilizes two-point manual calibration. It uses a screw-cap type membrane and the new meter ships with two spare membranes and a bottle of electrolyte solution. It is $295 from Hanna Instruments.
Vinmetrica Dissolved Oxygen System. This is a polarographic-style probe that represents something of a special case. It is not quite polarographic and is instead galvanic in that Vinmetrica uses a zinc electrode and a silver electrode to set up a natural voltage difference rather than applying a voltage. Then, the measured voltage that is generated is proportional to the rate of oxidation, which in turn is proportional to the dissolved oxygen content, like a polarographic electrode. Additionally, Vinmetrica primarily manufactures and sells instruments to home winemakers for measuring pH, titratable acidity (TA), and sulfites (SO2). If you already have their SC-200 pH/TA meter ($270) or the SC-300 pH/TA/SO2 meter ($495), you can add a DO system for just $160, directly from Vinmetrica or your local stocking dealer. The DO add-on uses the millivolt option on the pH function of your existing Vinmetrica meter. Dual point calibration is required and you must calculate your result applying a formula to the raw data, but it is an economical choice if you have already purchased a Vinmetrica meter.
Oakton DO 450. This is an optical meter that claims excellent long-term stability and the elimination of membrane changes and filling solutions. The meter is in a waterproof housing, so should fit right in with other homebrewing equipment. It is $486 on Amazon.
YSI 626281. I will acknowledge that this is getting a little pricy for most homebrewers, but as noted above, I learned all about DO with YSI instruments to start with. The ones I used were rugged, reliable, and accurate day after day. This one is a pro-level optical instrument and YSI
claims it will hold calibration for up to a year. It has available accessories like a belt clip or a carrying case for the homebrewer who wants to go high-end with dissolved oxygen measurement.
And then, one last item to shop for to make it easier when you calibrate or sample for dissolved oxygen: A BOD bottle. For lab use like I used to practice, they are usually sold in sets of 24 or 36 for hundreds of dollars. However, you can find a single 300 mL borosilicate glass BOD bottle for $19.95 from the Online Science Mall storefront at Amazon. A bargain if your DO probe is designed to fit the standard ground-glass neck!
So now that you know how they work, and which models are within reach for a homebrewer, give one a try! Lots of homebrewers have started experimenting using DO meters, for example, check out Brülosophy’s experiment on evaluating the “low oxygen” brewing method: http://brulosophy.com/2017/04/10/the-lodo-effect-evaluating-the-low-oxygen-brewing-method-exbeeriment-results/.


