Fermentation Timeline
Every time I brew I undoubtedly find myself staring at my fermenter for minutes at a time during peak fermentation when carbon dioxide (CO2) is rhythmically gurgling out of my blow off tube, the foam-like kräusen is bubbling on top of the liquid and particles of yeast, proteins, and hop residue are churning throughout my beer. It is a mesmerizing symphony orchestrated by the yeast’s inherent ability to convert sugar into CO2 and ethanol. While staring at the beauty of an active fermentation I am often amazed at how billions of yeast cells inside my fermenter are all performing various chemical reactions simultaneously in such a way that it keeps my attention like the latest Steven Spielberg movie. Most homebrewers understand the basic concept of beer fermentation; yeast convert wort sugars into CO2 and ethanol. Delving into yeast fermentation further reveals that CO2 and ethanol production only scratches the surface of the chemical reactions and changes that are occurring after the yeast have been added to your fermenter. In fact, there are a multitude of changes happening that we as homebrewers can’t see, but are necessary to fully develop the characteristics of a beer. Since the process of fermentation is conducted by the budding yeast Saccharomyces cerevisiae, the bulk of this article will focus on reactions performed by the yeast in your fermenter. The steps outlined here focus on the details of what is happening during typical ale yeast fermentation.
In the 1700s yeast were first visualized by the Dutch scientist Antonie van Leeuwenhoek but at the time it was not known that yeast were living organisms that facilitated the conversion of sugar to ethanol and CO2. It wasn’t until experiments by French chemist and microbiologist Louis Pasteur described how alcoholic fermentation was performed by yeast in 1856 that this fundamental principle of beer and bread production was attributed to these tiny microscopic organisms. These studies began a human fascination with yeast and its ability to convert sugar to ethanol. Today we know that alcoholic fermentation by yeast is much more complex than just making ethanol and CO2. I have divided the fermentation process into three main steps: primary fermentation, secondary fermentation, and conditioning (also including bottling/kegging). Let’s take a step-by-step look at the major chemical processes that are taking place during ale yeast fermentation to make beer.
Primary Fermentation
The first step in the production of beer is called primary fermentation. The final characteristics of the beer are highly dependent on the environmental conditions during the most active portion of fermentation, so take care in managing the temperature of your fermenter. Since primary fermentation is an exothermic (heat producing) process it can increase the temperature of your wort by as much as 10 °F (6 °C). Keep temperatures within the optimal range for your specific yeast otherwise you will likely produce high levels of fusel alcohols (solvent-like flavors) and/or esters (banana flavors and aromas). Some styles, like Belgian ales, utilize specific yeast strains that produce a particularly high amount of esters that can be enhanced by a primary fermentation temperature at the top of the range. Always keep in the mind the specific characteristics of your yeast and the style you are trying to produce when setting your primary fermentation temperature.
When a yeast population grows, the population is described in three stages: Lag phase, log phase, and stationary phase (see the yeast growth chart in the figure on page 92). Since yeast are dividing and producing new cells throughout the bulk of the fermentation process these three phases of yeast growth do not occur simultaneously or exclusively. Instead, these phases have overlap for any one
set time point during the fermentation process.
Lag phase (3 to 15 hours post yeast pitch)
During the lag phase little to no yeast growth occurs but instead the yeast begins to take in nutrients and use their glycogen reserves (complexes of stored glucose) to prepare for growth. Glycogen stores are one of the most important features of yeast that aid in a healthy fermentation. Glycogen is also one of the cellular components that decreases rapidly while yeast is being stored for re-pitching. Low levels prior to repitching into fresh wort can cause sluggish and incomplete fermentations leading to off flavors and high terminal gravities. While preparing for growth, glycogen stores, wort oxygen, and lipids are used to make unsaturated fatty acids and sterols which are important for building the cell membrane and allowing essential wort elements like amino acids (the building blocks for making proteins), free amino nitrogen (FAN), proteins, nutrients (biotin, riboflavin, inositol), and minerals (zinc, copper, iron, phosphorus, sulfur, sodium, potassium) to quickly and easily be transported into the yeast cell.
The importance of oxygen during this phase cannot be understated. Unfortunately there is some confusion as to the role of oxygen during fermentation, so first, an explanation: Yeast is a diverse organism that can utilize three modes of producing energy and cellular building blocks:
1. Early fermentation (when sugar content is abundant and oxygen is present; byproducts are CO2 and ethanol).
2. Anaerobic fermentation (when sugar content is abundant and no oxygen is present; byproducts are CO2 and ethanol).
3. Aerobic respiration (when there is no sugar available and oxygen is present; byproducts are CO2 and water). As stated earlier, oxygen is used to make sterols and unsaturated fatty acids that help produce a strong cell membrane. Contrary to popular belief, at no point during the production of beer is yeast using aerobic metabolism (i.e., oxygen) to grow. This is largely the case because the high sugar content of the wort requires yeast to use the fermentation pathway instead of the respiratory pathway (this is called the Crabtree effect).
In addition, while in the lag phase yeast consume most of the oxygen in wort (for sterol and fatty acid production) within the first 30 minutes after it is added, and thus when fermentative metabolism begins it must proceed anaerobically.
A healthy lag phase is essential to provide all the necessary nutrients and enzymes so yeast can reproduce, which they do by budding a new cell, called the “daughter cell” off of their cell membrane. Eventually the daughter cell will be pinched off leaving a permanent mark, called a bud scar, on the mother cell. Yeast reproduction is a hallmark of the next step of primary fermentation, called the log phase.
Log phase (12 hours to 6 days post pitch)
Log phase is when the yeast is growing the most rapidly and cells are doubling in number at a defined rate. During this phase, the majority of the tastes and aromas we appreciate in our beer are produced. This step is marked by rapid yeast cell growth, a rapid decrease in the sugar level of the wort, rapid CO2 production, a decrease in pH of the beer, and formation of the kräusen. Fermentation at its most active is called high kräusen. The kräusen most often refers to the foaming, bubbling mass that is seen when alcoholic fermentation is occurring most rapidly. The kräusen is made up of yeast cells, proteins, trub, hop acids, and resins.
During the log phase, the excessive abundance of available wort sugars are consumed releasing the byproducts CO2 and ethanol. Simple sugars will be consumed the quickest and as time goes on and the availability of these simple sugars decreases the yeast cells will transition to consuming the more complex sugars. Glucose, the most simple sugar, makes up approximately 15% of wort sugars and is consumed first followed by fructose, then sucrose. Next, the maltose, which provides the majority of the flavors and sugar content (approximately 60%), is brought into the yeast cell and broken down into two glucose molecules for fermentation. Lastly, a sugar composed of three glucose molecules called maltotriose is brought into the yeast cell and broken down for fermentation. The ability of yeast strains to utilize maltotriose can vary depending on the yeast strain and the breakdown of maltotriose is generally what determines a yeast strain’s level of attenuation. Another wort factor that aids in a healthy fermentation is free amino nitrogen (FAN). FAN is provided by the mash as long as a high proportion of adjuncts like rice, brewing sugars or corn are not used in your mash. FAN, primarily amino acids, is used by yeast to synthesize proteins and enzymes required for cell growth.
During log phase growth when wort sugars are consumed by yeast, they absorb bases like ammonium ions from the wort and excrete organic acids like lactic, pyruvic, and acetic acid in order to decrease the pH of the wort. The importance of a lower pH after fermentation (ideally below 4.4) is that this acidic environment improves yeast absorption of diacetyl, promotes yeast flocculation, increases the stability of the beer over time, and can also decrease the likelihood of bacterial growth. Unfortunately, if your final beer pH isn’t below 4.4 there isn’t much you can do after the fact. Instead, review your fermentation conditions since a high final pH is one of the signs of poor fermentation conditions (i.e. poor yeast health, low pitch rate).
Secondary fermentation (1 to 3 weeks)
At this point, the yeast have consumed most of the sugars, growth decreases, the kräusen falls back into the beer, the CO2 gurgling from your airlock slows dramatically, and the visual spectacle of churning proteins and yeast reduces to a lull. Fermentation may appear to be over but that is far from the truth. If you were to bottle your beer at this point it would most likely contain very high levels of unwanted compounds such as diacetyl and acetaldehyde. The main function of secondary fermentation is maturation of the beer. The yeast performs this by cleaning up unwanted byproducts produced during primary fermentation that can cause the beer to taste imbalanced. Since the majority of the flavors and aromas from fermentation have already been produced during primary fermentation, a rest can be used where the temperature is increased slightly above the optimal temperature of the particular yeast strain. This increase in temperature will allow the yeast to become more active and reduce unwanted compounds more quickly. These temperature rests are particularly important for lagers since the fermentation temperatures are usually much lower than ales and reduction of byproducts is much slower at these colder temperatures. A temperature rest should be done when the fermentation is mostly complete (approximately 2–5 points from terminal gravity).
Stationary phase (3 to 10 days post pitch)
The hallmark of the stationary phase is a halt in yeast reproduction due to lack of nutrients. During the stationary phase they begin storing up glycogen and trehalose, a modified version of two sugars linked together that is thought to help them prepare for conditions with little nutrients. Yeast begins to settle to the bottom of the fermenter (flocculate) towards the end of the stationary phase.
Flocculation rates vary depending on the strain of yeast you use. Yeast can be categorized into three groups: Early (3–5 days), middle (6–14 days) and late (15+ days). In general, early flocculating yeast tend to be less attenuating with higher levels of diacetyl and esters while late flocculating yeast have increased levels of attenuation and lower levels of these fermentation byproducts. English yeast strains are usually early flocculators and thus will provide a maltier and higher ester profile for the end beer. If you have an unusually short primary fermentation and your gravity is not as low as you think it should be, then your strain may have flocculated too early. If this happens gently shake the fermenter to rouse the yeast and get them active again.
Yeast produce many unwanted byproducts during primary fermentation, the most notorious of which is diacetyl. Diacetyl is produced outside the yeast cell by a chemical reaction on the yeast metabolite, alpha-acetolactate. Even if the beer doesn’t taste like it has high levels of diacetyl, there might be amounts of the precursor alpha-acetolactate that can be converted to diacetyl after primary fermentation. Although yeast cannot metabolize alpha-acetolactate they have the ability to breakdown diacetyl during secondary fermentation as long as the conditions are right. Ideal conditions are a pH between 4.2–4.4 and a temperature in the range of 65–70 °F (18–21 °C) for one to two days. If diacetyl levels are a problem in your beer you can perform a forced diacetyl test where you take two samples of your beer and heat one of them to 140 °F (60 °C) for 30 minutes and allow it to cool. Compare both samples for differences in diacetyl levels. The point of this experiment is to speed the conversion of alpha-acetolactate to diacetyl, a process that is increased by higher temperatures. If you notice a difference in your heated sample then you have high amounts of alpha-acetolactate in your beer and you should allow it to sit longer so the yeast has a chance to reduce these levels. Other compounds like fusel alcohols can be metabolized by the yeast into fruity esters, which enhance the flavor of the beer, this is especially common with beers that require long aging periods (i.e. barleywines). Additional compounds produced during primary that are metabolized by yeast in secondary fermentation are acetaldehyde (green apple flavor) and dimethyl sulfide (cabbage smell). The reduction of these off flavors during secondary fermentation is an important step to a clean, well-balanced beer. In addition to yeast metabolism during secondary fermentation, sulfur compounds escape from the fermenter, which reduces any sulfur flavors and aromas in the beer. At this point your final gravity should have been reached and you can check this using a forced fermentation test.
Conditioning (1 to 2 days)
The goal of the conditioning phase is very similar to that of secondary fermentation, continued flocculation of yeast and degradation of primary fermentation byproducts like sulfur, diacetyl, and acetaldehyde. The main difference is that the conditioning step is done at much colder temperatures (31–38 °F, 0–3 °C) and can increase stabilization of taste and beer clarity by enhanced flocculation of yeast, tannins, and proteins. If brilliantly clear homebrew is your goal then fining agents like isinglass (collagen from fish bladders) or gelatin (collagen from other animal sources) can be used to enhance flocculation just prior to bottling. Other fining agents like Irish moss (seaweed) and Whirlfloc (blend of Irish moss and carrageenan) are typically used during the boil and can be used either separately or in combination with pre-bottling fining agents. In general these compounds work because they are positively charged and bind to negatively charged molecules in your beer like yeast cells and proteins. When this occurs, it promotes settling of the whole complex to the bottom of the fermenter.
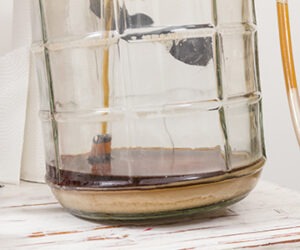
Following secondary fermentation, trub has accumulated in the bottom of the fermenter and although this is not required, it can be separated from the beer prior to cold conditioning by moving it off the yeast to another fermentation vessel. Be advised that extended periods of time in contact with the trub can cause the yeast to ferment trub proteins or autolyse, both of which will produce off flavors. On the other hand, exposure to oxygen must be kept to a minimum if transferring since high levels of oxygen can produce papery or cardboard-like off flavors from oxidation. With that said, over the past few years I have almost completely done away with transferring my beer to a new vessel following secondary fermentation because I feel that it is not worth the risk of contamination or oxygen exposure. There are instances where I have left my beer in primary for up to three to four weeks without ill effects but these beers were generally high gravity (>9% ABV), dark or extremely hoppy beers. If you do decide to cold condition your ale it should be kept to only 1–2 days. Short cold condition time for ales is especially important when bottle conditioning since extended cold conditioning can cause suspended yeast to settle out and leave very little to carbonate in the bottle.
Bottling/kegging
Most homebrewers bottle condition their homebrew due to the simplicity and cost effectiveness. This process is basically a small fermentation that results in the production of CO2 that dissolves into the beer and provides carbonation. Since bottle conditioning results in a mini fermentation it also means that small amounts of off-flavor compounds have a chance to be metabolized by the yeast. If you have ever tasted a beer shortly after bottling (less than one week) it may have diacetyl or other off flavors that eventually disappear a few weeks later. You can thank the yeast for that! This is an advantage to bottle conditioning compared to force carbonating.
After fermentation is complete there is residual carbonation in your beer and it is important to account for this when determining how much priming sugar to add. Residual carbonation levels are dependent on fermentation temperature, but typically you can count on at least 1.5 volumes of CO2 being present. There are handy sets of charts to determine how many volumes of CO2 you already have in your beer and how much priming sugar to add (check out byo.com/resources/carbonation for a carbonation chart). When I bottle condition my beers I prefer to use a simple sugar like corn sugar. This will be less likely to stress the yeast, decreasing the chance of off flavors developing during bottle conditioning.
If you force carbonate your beer in kegs the end result is still the same as bottle conditioning, although one difference that is often noted is that the bubbles from bottle conditioning are smaller and provide a different mouthfeel as compared to forced carbonation. One major advantage to force carbonating homebrew in kegs is that it is less time consuming to fill one large keg compared to 50
small bottles.
Final thoughts
I hope with the help of this article you have learned that there is much more going on in your fermenter after pitching yeast than just the conversion of wort sugars to CO2 and ethanol. One resource I’ve seen suggests there may be as many as 500 compounds produced during the yeast fermentation process! Although the processes outlined earlier refer to ale fermentations, the majority of these reactions also occur with lager yeast, Brettanomyces and wild Saccharomyces strains, albeit often at much slower speeds. Another major difference when using lager yeast is the extended cold conditioning step following fermentation, which refines the flavors of the beer. With an understanding of the major reactions that are occurring in your fermentation vessel from start to finish you now have the knowledge to better understand how to correct problems that may arise in your homebrew. If nothing else, I hope you now have more of an appreciation for the yeast that transform your sweet, hazy, protein-packed wort into the greatest beverage on the planet.
references
Tracy Aquilla, “The Biochemistry of Yeast — Debunking the Myth of Yeast Respiration and Putting Oxygen in Its Proper Place,” BrewingTechniques 5(2), pp. 50–57 (March/April 1997)

YEAST GROWTH PHASES
Illustration by Victoria Macht