Build a Budget Big Fermenter
You can reuse yeast multiple times, go in on a group purchase with other local brewers for hops or grain, or even consider lowering the target starting gravity on your recipes. With a little modification work and about $25, you can have a high-volume fermenter for increased batch sizes, reduced time requirements and even lower costs in some cases.
One of the biggest limiting factors for anyone who brews as a hobby is time and attention needed to do things right. Setup and cleanup on brewday can take a considerable chunk of time, especially for all-grain brewing (which can be cheaper per batch than using extract — after the extra equipment costs have been amortized over a few batches). One of the best ways to brew more beer but keep the time requirements the same is to increase the batch size. Setup and cleanup for a 10-gallon (38-L) batch is only slightly more effort than a 5-gallon (19-L) batch, but you end up with twice the amount of beer.
The normal line of thinking is to get a bigger kettle and split the batch over multiple 5- or 6-gallon (19- or 23-L) carboys. If you’ve priced a large-enough kettle to do 10-gallon (38-L) batches, you no doubt already know that they aren’t cheap. So instead of doubling up on the kettle size, we’re going to increase the size of the fermenter. With a smaller kettle and a larger fermenter, you may spend an extra hour on a second boil, but you save time sanitizing only one carboy and then later on racking and primary fermentation cleanup of just one carboy. It ends up pretty much breaking even time-wise, and you still end up with double the beer of a 5-gallon (19-L) batch with only a little more time and effort than you would’ve put in for the smaller batch. And hey, if you already have a huge kettle, then you’ll save even more time!
Another big advantage to having a large fermenter is that batch size begins to become less of a consideration. There’s no rule saying you have to standardize your brewing on 5 gallons (19 L) or 10 gallons (38-L) or any other round number. If your budget has room for larger batches, but maybe not as big as 10 gallons (38-L), you could easily do 7 or 7.5 or 9 gallons (26, 28 or 34 L) instead. And with a big enough fermenter, you can even do 12- or 15-gallon (45- or 57-L) batches as well.
To cover all the bases, I suggest using a Rubbermaid Brute container. Yes, technically these are trash cans, and they are not impermeable to gas transfer and therefore not recommended for aging, but they are also rated to NSF/ANSI Standard 2 for food storage and also are USDA Meat & Poultry Equipment Group Listed (ie: they are food grade and safe for brewing) and are very popular in the food service industry. Additionally, they are extremely sturdy, have reinforced handles, and can hold a considerable amount of weight without deforming (that is, they can be moved when full of beer without changing shape or buckling). The lids are also sturdy and lock down securely.
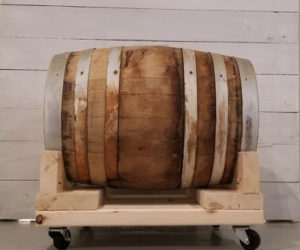
Brutes are priced similarly to other plastic containers, but the build quality is among the best available to consumers. My local big-box hardware store had Brutes available in both 20-gallon (76-L) and 32-gallon (121-L) sizes, for $20 and $30, respectively. Rubbermaid also makes a 10-gallon (38-L) Brute, which would be a good size for 5- to 8-gallon (19- to 30-L) batches. Additionally, there is a dolly available that locks into the bottom of the container to make it easy to move your new fermenter without any lifting (Figure 1). The dolly costs as much as the container, but I think it’s a worthwhile investment as it fits all Brute containers from10 gallons (38 L) up to 44 gallons (167 L).
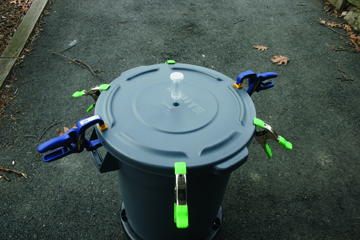
One other thing I like about the Brute containers is that they have a deeply recessed ring at the bottom, which makes a fantastic trub and flocculated yeast receptacle. This aids in clean racking, as well as facilitates yeast harvesting (Figure 2). It’s almost as though the good folks at Rubbermaid anticipated brewing applications.
Making the Brute brew-ready
So, now our high-grade rubbish-bin-turned-fermenter just needs a few small modifications to make it ready for production. The first step is to add a hole and grommet for an airlock. Drill a 1⁄2-inch hole in the center of the lid and work a rubber grommet into place in the hole. You can get the grommet from an existing brewing bucket lid or purchase one from your local homebrew shop (you can also order online). Most hardware stores also carry the right type of grommet. Attach an airlock and the lid is ready for action.
Like most plastic containers — including the typical brew bucket — your Brute fermenter will never be 100% airtight. This isn’t a big deal as far as I’m concerned, as I’ve had 3- and 4-week primary ferments in buckets with no oxidation whatsoever. But there are steps we can take to make the Brute fermenter a bit more airtight than a stock unit.
The easiest way to improve the seal of the lid is to apply a medium coat of food-grade lubricant (ie: “keg lube”) to the rim of the fermenter itself. Couple this with some wood clamps to hold the lid down tighter, and you can get a pretty darn tight seal. A set of belt clamps can also be used to tighten down the lid. A lot of homebrewers will already have at least a few types of clamps in their tool set, but those that do not could use this opportunity to stock up the tool chest. Clamps are handy for a myriad of uses and are a key component in many home-improvement and repair projects, so if you need to buy them for this project, they’ll pay for themselves in no time.
Another thing you’ll likely want to do is apply a stick-on thermometer to the exterior of the fermenter. The type generally used for glass carboys or plastic buckets will work just fine on the Brute fermenter. These types of thermometers are available from almost all homebrew suppliers for just a couple dollars each. You could also use the thermometers designed for aquarium use, but my experience is that only a few models are available that adequately cover the range used in brewing. But if you shop around, you can find one that will work.
One thing to note is that given the extremely thick and sturdy construction of the Brute, stick-on type exterior thermometers will change readings more slowly than glass or standard brew buckets. However, given the wide opening of the fermenter, it’s actually quite trivial to remove the lid and drop in a floating thermometer or a floating hydrometer-thermometer combo. It’s also easy to take samples in this same way.
Now that you have it assembled, take your Brute and get to brewing some big-ole batches of tasty, high-quality and economical homebrew!