Successful Mash Conversion: Tips from the Pros
Brewer: Artie Tafoya
Brewery: Appalachian Brewing Co., Harrisburg, Pa.
Years of experience: 10 years professional, five years homebrewing
House Beers: Water Gap Wheat, Purist Pale Ale, Jolly Scot Scottish Ale, Susquehanna Stout, Happy Trails IPA, Mountain Lager, River Side Red Ale, Hibernation Ale
Sitting around a mash vessel waiting for an hour to an hour and a half miracle mash conversion, wondering what is actually going on? There is nothing to watch. You can’t hear anything. All you smell is the sweet aroma of the mash. At least during fermentation, the production of carbon dioxide gives an air lock or blow-off tube activity you can observe. How do you know if your mash is converting? How do you know when your conversion is complete?
Starches are long chains of simple sugars, including maltose, maltotriose, glucose, sucrose, and fructose. I compare this chain of sugars to a pearl necklace. The enzymes (which occur naturally in well-modified barley malt) act as scissors, cutting the pearl necklace into beads. These enzymes include beta-amylase.
Yeast is a single-cell organism that can’t metabolize starches like humans can. This is the purpose for the breakdown of starches to simple sugars during the brewing process. There are a few key steps you can follow to ensure a great conversion.

When mashing in, make sure the mash-in water is the proper temperature so that when mixed with the grist (grains), they will combine to reach the target “rest” or conversion temperature for the style of beer you are brewing. If you miss your target temperature, you will most likely have to add water to the mash to adjust the temperature. With the limited volume of most mash vessels, adding extra water to the mash will fill the vessel too high and prohibit hitting other rests and conversion temperatures throughout the mash schedule.
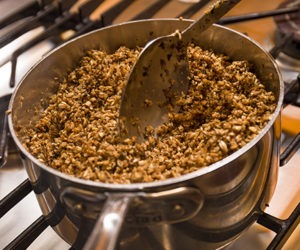
Second, check the temperature at different depths and different areas of the mash to ensure it is consistent throughout. Make sure the mash is mixed well, but do not oxidize the mash by overstirring. Ideally, the mash should be the consistency of a perfect bowl of oatmeal. It should be thin enough to stir but thick enough to step infuse hot water (add hot water to increase the mash temperature) without creating barley soup.
After 45 minutes to one hour, determine visually that the conversion is complete by checking the clarity of any liquid resting above the mash bed. If your mash is a bit dry, you can create a small divot in the mash bed to get a puddle to form. If the liquid is clear, a complete conversion is near. If the liquid appears cloudy, you might want to wait a bit for additional clarification prior to further testing.
The iodine test is one way to determine whether there is any residual starch that lacks conversion. Just head to the local pharmacy and pick up a “tincture of iodine.” This is a small bottle that will last you about 10 years if you do not knock it over while performing the test.
It comes with a small dropper attached to the cap that allows you to lay a drop or two into a shallow sample of cool mash on a white dish. Be sure no grain material is present; this will yield a false positive. If the iodine color ranges from yellow to amber, conversion is complete. If the iodine turns dark purple to black, give the mash another 15 minutes and repeat the test. If a conversion is not reached after two hours, check your mash temperature. You may have undershot the target conversion-rest temperature.
When producing ales, I like to perform a two-step infusion mash schedule. Because most domestic pale malts are highly modified, a two-step infusion will suffice for most beer styles. I mash in to a strike temperature of 149° to 151° F for approximately one hour. Once I reach visual clarity and obtain the desired iodine reading, I infuse 194° F water into the mash, raising the mash-out temperature to 158° F. This mash-out rest should be performed for 30 minutes, at which time you can start recirculating or running off depending on your system.
For German wheat ales, Belgium wits, and delicate lagers I use a four-step infusion. The four-step infusion includes a very thick strike for 20 minutes at 118° F, a quick infusion for another 20 minutes at 126° F, then a stop at a conversion temperature of 147° F. The complete conversion usually occurs in 30 to 45 minutes due to the beta-enzymes’ jump-start during the protein rests. Then I mash out upon completion of conversion by infusing hot water to a strike temperature between 154° and 158° F. Normally the mash is pretty soupy at this point, so be careful not to add too much water and jeopardize the run-off.
If your mash conversion temperature exceeds 153° F, a higher percentage of unfermentable sugars, called dextrins, will be produced. A higher level of dextrins occurs if your grain bill contains a good amount of caramel and caramalts, which are inherently high in these dextrins (14 percent to 18 percent). These dextrins are unfermentable and therefore will raise the final gravity and lower the alcohol percentage of the beer.
I like to use a slightly higher mash conversion temperature when producing maltier styles of beer to utilize the dextrins that add body and mouthfeel to the beer.
Although mash conversion might seem like a miracle, you can be in control of every aspect. Consistently hitting your strike temperature and completely finishing your starch conversions will improve your efficiency and your beer.