Master the Action: Carbonation

Under-carbonated beer is not called “flat” for nothing! You want your beer to sparkle, but without carbonation it tastes thin, watery, dull, and lifeless. It’s hardly beer unless you can feel the bubbles dancing on your tongue. Perhaps it has the slow, graceful, waltzing tingle of a brown ale or the hyperactive, cleated tap-dance of an effervescent wheat beer, but bubbles there must be.
You want carbonation, but how to get it? Your fermented wort is full of wonderful head-building proteins, but the airlock is idle. You’ve got to get the gas into the beer and pump up those bubbles, but how?
Introducing the equilibrium table. Carbon dioxide (CO2) is the gas produced by fermentation that makes your beer bubble. The table below tells you how much CO2 will be in your beer at equilibrium (the point at which CO2 can no longer be absorbed) for a given pressure and temperature. The amount of CO2 is given in “volumes.” A volume is the space that the CO2 would take up at a pressure of one atmosphere (about 15 pounds per square inch) and at a temperature of 0 °C (32 °F) — that’s Standard Temperature and Pressure (STP). In other words, if five gallons (19 L) of beer contained three volumes of CO2, the CO2 by itself would occupy three times the space the beer takes up, or 15 gallons (57 L). An average carbonation level is 2.5 volumes of CO2.

Beer holds more CO2 when it is cooler or under greater pressure. When you drink a beer, there’s usually more CO2 in the beer than the equilibrium value because you took it out of the fridge and released the pressure by opening the bottle. Violà! The gas comes out of solution and bubbles form.
Forced Carbonation
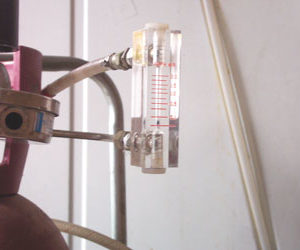
One way to carbonate is to reverse this process: Cool the beer and apply pressure. This is easiest to do with kegs. Say you’re aiming for an average carbonation level of 2.5 volumes and the keg is sitting in a cool place at 45 °F (7 °C). The table says that you’ll get that amount of carbonation if you keep 15 psi of CO2 on the beer. This carbonating with top pressure could take a few days.
One way to speed it up is to put a higher pressure on the beer until you get close to the desired carbonation and then lower the pressure to the equilibrium value to keep it just right. It’s also easier to carbonate if the beer is colder or if you can push fine bubbles of CO2 through an aerating stone into the bottom of your keg. Shaking can help to a point, but you’ll probably have to let the beer settle down afterward. You can leave your CO2 line hooked up to your keg, but as insurance against leaks, you might want to top up the pressure periodically and disconnect the gas each time.
If you’ve been dreaming of a draft system for years but Santa hasn’t delivered, you can still use top pressure to carbonate. You need special reusable caps with a fitting to connect to a CO2 line and bottles that will accept those caps. These caps are commercially available. You can also build your own by finding some tire valves that you can clean and sanitize and installing them in some caps. Either way, you’re likely restricted to using bottles, such as PETs, that will accept screw caps.
Using this method you’d want to give each bottle a shot of gas, then open it a crack to try to purge the headspace of air, then apply an initial dose of gas above equilibrium. As the CO2 dissolves into the beer, the headspace pressure goes down. You need to top up the bottles with periodic squirts of gas until equilibrium is reached and no more gas goes into the bottle.
Bottle Conditioning Basics
While kegs can spare you the effort of bottling, bottles still have advantages. Some people simply prefer beer in a glass bottle with a regular crown cap. Bottles are certainly cheaper than draft equipment, and it’s easier to put a few bottles in the fridge than to keep a keg cold. Plus, bottles are more portable. All in all the most widely used method of carbonating homebrew is bottle conditioning. This means creating carbonation with a small amount of fermentation in the bottle. It’s called conditioning because the beer also matures and ages during this fermentation, but “conditioning” often means simply “carbonation.” Bottle conditioning is done by fermenting the beer out completely until it is flat, priming the beer with a small amount of sugar, bottling, and then waiting a couple of weeks for the fermentation to take place.
It’s hard to be precise about the amount of priming sugar to use. Many factors affect bottle conditioning, and once you take them into consideration, you’ll probably end up back at the tried-and-true formula of one-half to one cup of sugar per five-gallon (19-L) carboy of beer, depending upon the level of carbonation you’re after. Try three-fourths cup to start. The best method of being more precise is to keep notes on how you’ve carbonated, and keep track of the results. Record temperatures, handling involved in the process, what you used to prime and how much of it, and any other factors that could affect carbonation. Here are some of the factors that affect conditioning:
CO2 in Flat Beer. Depending upon the temperature of your beer and how much it has been shaken around, you’ll have varying amounts of CO2 in your “flat” beer. The more you start with, the less you need to add with the bottle fermentation. Bottlers often overlook the fact that there is quite a bit of CO2 in solution in so-called “flat” beer after fermentation. If you fermented at 60 °F (15 °C), you already have one volume of CO2 in your beer. If you lagered near 32 °F (0 °C), you could have as much as 1.7 volumes of CO2 — that’s two-thirds of the final amount of CO2 you’re after! This dissolved CO2 is one reason airlocks might continue to bubble after the fermentation is done. The residual carbonatino table found on our Carbonation Priming page can be useful when bottle conditioning to let you know how much CO2 is in your beer before you add the priming sugar.
Agitation. And here’s another quirk of carbonation. In addition to temperature and pressure, agitation also affects carbonation. Say you take a bottle of beer to the paint store and coerce its employees into putting the beer on their mixing machine for a few minutes. (Do not try this at home!) Any experienced beer drinker with the slightest presence of mind will not open the bottle right away unless he wants a shower with beer shampoo! But if you let the bottle sit and settle down, it will once again be safe to open, even if the temperature and pressure have remained the same. So what happened? CO2 forms weak inter-molecular attractions with the rest of the solution. When you shake a bottle, these weak bonds are broken and the gas comes out of solution more easily, which is the cause of the beer geyser. When you let it sit, the bonds reform.
Mechanical agitation is one reason bubbles can appear seemingly out of nowhere in your siphon hose. The agitation is knocking residual CO2 out of the beer. This makes it harder to be sure of the amount of CO2 in your beer after fermentation because the temperature-pressure equilibrium isn’t the only factor at work.
Headspace. Another factor that will affect the level of carbonation in your bottle-conditioned beer is the amount of headspace you allow in the neck of the bottle above the beer. The CO2 from the bottle fermentation fills the headspace as well as going into the beer, so the more headspace you leave, the more CO2 ends up there. For a given amount of priming sugar, the greater the headspace, the lower the carbonation.
The ideal fill height is a matter of preference. High fills help to eliminate air from the headspace, helping you avoid oxidation. Lower fill levels give some protection against gushing and allow some leeway in carbonating. Sometimes over-carbonating can be corrected by cooling the beer as much as possible, gently prying the cap to release the pressure in the headspace, and then resealing the cap. This won’t work if there is no headspace.
Method of Measurement. When trying to judge the amount of priming sugar to add, measuring the sugar by weight rather than by volume usually gives more accurate results, but it isn’t foolproof.
If the priming sugar absorbs moisture from the air, the weight increases, but the amount of sugar stays the same. Using the same weight of sugar then gives varying amounts of carbonation. Dried extract is especially prone to sucking up moisture from the air. Since volume is less affected by moisture pickup, volume might be better for measuring dried extract. And of course, weighing is only as good as the machine used, but you already have a skookum scale for your hops, right?
When Sugar Is Not Sugar
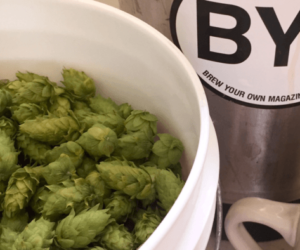
What are you going to use to prime? The sugar you use can be a refined sugar such as dextrose, or it can come from dried or liquid malt extract, honey, or even fruit juice. Since dried malt extract is less fermentable than dextrose, you should use more of it. If you figure your extract is 80 percent fermentable, then you’d have to use 25 percent more dried extract than you would sugar (80% x 125% = 1).
Craft brewing and homebrewing often stress the use of natural ingredients. When it comes to carbonation, that means that artificial carbonation using CO2 from a tank is often looked down upon as inferior to the “natural” carbonation of bottle-conditioning. This is wrong. Carbon dioxide from a tank is probably the purest of any ingredient you can put in your beer and CO2 is CO2 no matter where it came from.
Forced carbonation can give different results than bottle conditioning, but the carbonation itself will be the same. For example, any difference in the head that beers form will be the result of differences in the head-building properties of the beers, not in the source of the CO2. Priming with honey might improve the head on your beer, but it will be because of the other ingredients that you added when you added the honey. Fermenting out the honey and carbonating artificially would give the same result. But as always, it’s important to feel good about how you make your beer. Bottle conditioning can have some secondary benefits, such as reducing the butterscotch flavor of diacetyl or decreasing the oxygen dissolved in the beer.
Since aromas are often scrubbed out of beer during fermentation, priming offers a good opportunity to add aromatics to your beer. Adding fruit juice at priming would be a great way to get a good nose on a fruit beer, though you might have difficulty determining how much sugar you were adding. An approximate method of determining the sugar content of juice would be to take its specific gravity.
Say you’re adding four cups of juice with a gravity of 1.080. The four cups equal one liter, which means that your juice is 80 grams per liter more dense than water. (One liter of water weighs 1,000 grams. Gotta love it!) If you make the big assumption that fermentable sugars are responsible for the difference in density, you know you’ve got 80 grams of sugar or 2.8 oz.
How To Add the Sugar
You could add a small amount of sugar to each of your bottles and then rack your flat beer into them. But accurately measuring the amount of sugar is harder. It’s also harder to eliminate any microbugs from your sugar, and you might even end up with too much foaming when you fill the bottles. This method might still be worth while if, for some reason, you don’t know how much beer you’re bottling or if you are not bottling the entire batch.
A popular alternative method is to boil your sugar with a cup or so of water and then mix this into the entire batch. The boiling kills any bugs and you measure the sugar only once. Naturally, it is important to have this sugar water well mixed into your beer so each bottle will get the same amount of sugar and end up with the same carbonation.
Since you also want to leave as much of the yeast as possible behind in the fermenter, a good method is to put your prepared priming liquid into a container and then rack your beer into it. As the bottling container fills, the priming sugar should get mixed in quite well. You then siphon your beer into your bottles and cap them.
Kegged or draft beer can also be carbonated by priming. All you really need is a container that will hold pressure.
Carbonation isn’t exactly a flavor. It’s part of the overall sensation of drinking beer. Along with temperature, carbonation determines how the flavors in your beer will present themselves. Next time you’re tasting your homebrew after fermentation, don’t be disappointed if it isn’t yet all you had hoped for. Reserve judgment until you’ve added that magical touch of carbonation.
If You Really Need To Know
Many brewers are perfectly happy to start with the three-quarters-cup-sugar-per-five-gallons-of-beer rule of thumb and then experiment until the right level of carbonation is reached. But if you need to be more precise, here is the scientific side to choosing the right amount of priming sugar.
Carbon dioxide has a density at STP (Standard Temperature and Pressure) of 0.122 pounds per cubic foot, or 1.96 grams per liter.
Sometimes the level of carbonation of beer is given by weight rather than by volume. The conversion factor from volumes of CO2 to CO2 by weight (g/L) is 1.96. For example: 2.5 volumes x 1.96 = 4.9 g/l. To convert back to volumes, multiply by 0.51 (the inverse of 1.96).
Carbon dioxide has a molecular weight of 44.01 and glucose has a molecular weight of 180.16. During fermentation each molecule of glucose creates two molecules of ethyl alcohol and two molecules of CO2. A mole is the number of molecules that has a weight in grams equal to the molecular weight of the molecule. That means that one mole of glucose weighs 180.16 grams and ferments to produce two moles of carbon dioxide weighing 2 x 44 g = 88 g.
Say you want your five gallons (18.93 liters) of beer to have 2.5 volumes of CO2. That’s 18.93 liters x 2.5 volumes = 47.32 liters of CO2.
Since a mole of CO2 occupies 22.4 liters (STP), we need 47.32 / 22.4 = 2.11 moles of CO2. This will be produced by half that many moles of glucose, or 1.056 moles. Multiply by the molecular weight of glucose and you find that you need 190.2 grams of glucose or 6.71 ounces.
If your fermentation ended at 50 °F (10 °C), you might have 1.2 volumes of CO2 in your beer already. That means that you need 1.3 volumes more CO2 to end up with 2.5 volumes. You could get that by adding (1.3 / 2.5) x 190.2 = 98.9 grams of glucose, or 3.5 ounces.
You can make similar adjustments if you have a different amount of beer or if you’re aiming for a different level of carbonation. If you want to carbonate to 2.8 volumes instead of 2.5, multiply by 2.8 / 2.5. If you have four gallons of beer instead of five, multiply by 4 / 5.
For example if you have 10 gallons of ale that you figure has 0.9 volumes of CO2 already and you’re aiming for 2.0 volumes, you need 1.1 volumes more. You calculate: (190.2 g glucose)(10 gal./ 5 gal.)(1.1 vol./ 2.5 vol.) = 167.4 g glucose (or 5.9 oz.).
When you’re adjusting to add more sugar (e.g. more beer), put the big number on top; when you’re adjusting for less sugar (e.g. less carbonation) put the smaller number on top.
Standard Carbonation Levels
While beer averages around 2.5 volumes of CO2, there’s quite a bit of variation. Beers that are traditionally low in carbonation might be under two volumes, but they will taste flat. Carbonation at three volumes of CO2 is quite high, but exceptionally spritzy beers could reach up to five volumes of CO2. Here are some values for the carbonation level of different styles of beer, in volumes of CO2:
Cask ales and barleywines: 1.5 to 2.0 volumes
Draft porters and stouts: 1.5 to 2.2
Bottled ales: 2.3 to 2.6
European lagers: 2.4 to 2.6
North American beer: 2.5 to 2.6
Wheat beers: 3.0 to 5.0
If you are planning to enter your beer in a competition, you’ll be obliged to match your carbonation to the style guideline for the category you’ve entered. Otherwise, creativity and personal preference are your playing field.