Retractable CO2 Lines

I’ve been driving my brewery design for many years now. The push for convenience, storage organization, ease of use, and aesthetics are all considered as I design, build, and implement. My cold room, malt mill, kegerator, and digital tap handles have all been presented in previous BYO articles (links provided later, if you’re interested). The project in this article came from the inconvenience of having to carry my recently filled kegs into the cold room to pressurize and purge with carbon dioxide (CO2).
One of the keystones of my cold room design was to have an external gas cylinder plumbed in from outside (stowed in my attic). This concept allowed me to maximize space and organization in my cold room, distributing CO2 via various tees, manifolds, isolation valves, and ball-lock connections. This worked great until I grew tired of lugging unpressurized kegs into the cold room after filling . . . not to mention bringing the kegs in prior to filling to purge out any oxygen. Having a small, portable tank to carry around my brewery wouldn’t suit my (admittedly, high) standards.
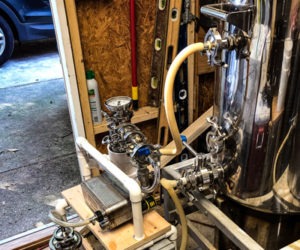
I elected to tee off my source tank in the attic and plumb my gas lines over to where my fermenting fridge and conical fermenter are located. Note that I keep my main lines’ primary regulator at 3 bar (44 psi), which is my max desired carbonation level for my annual batch of Cedric’s Rhubarb Sparkle, and regulate down with secondary regulators for all my kegs. I have two lines from this point in the ceiling, one to a precision low-pressure regulator for my Blichmann Fermenator V4. The other line is a retractable coiled tube for purging and filling kegs. It remains at the main pressure, as a little extra oomph is welcome when purging kegs or over-pressurizing a new batch with minimal headspace.
The total cost of this build I estimate is under $150, with the bulk of the cost being the retractable line
and tubing.
If you’re interested in the other builds of mine featured in BYO, here are the links:
Cold Room: www.byo.com/article/building-a-cold-room/
Malt Mill: www.byo.com/article/build-a-better-grain-mill/
Kegerator: www.byo.com/project/kegerator-tower-cooling-an-alternative-chilling-system/
Digital Tap Handles: www.byo.com/project/e-ink-faucet-handles/
Tools & Materials
• Polyurethane 3⁄8-in. tubing (100-ft/30-m bag)
• Polyurethane 1⁄4-in. tubing (100-ft/30-m bag)
• Polyurethane 1⁄4-in. coiled tubing
• Push-to-connect 3⁄8-in. tee
• Push-to-connect 3⁄8-in. to 1⁄4-in. plug adapter
• Push-to-connect 1⁄4-in. tee
• Push-to-connect 1⁄4-in. wye
• Push-to-connect 1⁄4-in. check valve
• Push-to-connect 3⁄8-in. bulkhead fitting
• 2 barbed 1⁄8-in. to SAE45 1⁄4-in. flared fittings
• 4 Oetiker clamps 5.8–7 mm
• Ball valve 1⁄4-in. tube
• Ball-lock gas connector
• Ball-lock liquid connector
• 2 socket head cap screws M4x0.7×15
• 2 nuts M4x0.7
• Rectangular magnet
• Retractable laundry line
• Shaft collar for 1⁄16-in. cable


