All-Grain Troubleshooting
General all-grain
Going All-Grain
I have read that certain grains can only be mashed while others can be both mashed and steeped. I have found various charts of grain and adjuncts, but none of which explain how the grains must be utilized. I would also like to know how to tell the difference between base malts and specialty malts, and what percentage of the grain bill needs to be a base malt. Is there a comprehensive chart or resource that I’m missing?
This question reminds me of my own questions before I did my first all-grain brew. I don’t know why all-grain brewing seems so intimidating. One reason may be all the hype that all-grain brewers generate by so many technical nuances of what happens and what can go wrong when conducting a mash. Then you throw in one of the flow charts about which grains can be used as base malts and how much crystal malt, for example, can be used before you end up with the world’s least drinkable beer and mashing just seems so intimidating that it’s a wonder any brewer who reads all of these things ever musters enough courage to conduct a mash.
Luckily, there is no giant master chart attempting to present every combination of possibilities that a brewer may want to attempt when mashing. What you do have at your fingertips is an enormous collection of recipes assembled in BYO, books, and posted online. For a brewer just getting into mashing, I suggest using proven recipes because you can focus on getting the mashing technique down before you begin improvising. This may seem boring, but brewing is like any other art that requires technique. Jimi Hendrix didn’t play “Voodoo Chile” the first time he picked up a guitar and you (hopefully) won’t be using some bizarre grist bill requiring a complete chart of what can and cannot be done in the mash tun.
When you start to formulate your own recipes you can learn an awful lot about your ingredients by reading their analytical specifications. In order for these to make sense you will need a basic understanding of what goes on during mashing. Again, this information is stuff you need to know once you throw away the sheet music and begin writing your own songs. Basically you need a mixture of starch, which must be gelatinized before it is broken down by enzymes to conduct a mash. Some special malts have little to no enzymes because they are destroyed during kilning. In the category of specialty malts with no enzymes, some contain starch, some contain caramelized sugars and some mainly contain what amounts to either burnt starch or burnt sugar. The latter two types of grains are typically not used at rates above about 15% because any more doesn’t taste all that great and they can be used without mashing. Specialty malts that contain starch but no enzymes need to be used alongside a malt that does contain enzymes.

The backbone of most beers is what is generically known as pale malt. There are many different pale malts used by brewers, for example pale two-row malt, pale six-row malt, ale malt, Pilsner malt, etc. A few things these grains have in common are sufficient enzymes to convert their starch into fermentable sugars and low-to-medium toasted flavors from kilning.
Brewers wanting to enhance these base malts use specialty malts for color and flavor. Specialty malts usually make up less than about 25% of the total grist bill. Some specialty malts like Munich malt do contain enzymes and these can sometimes, depending on the color and enzyme level, make up the entire grist bill for a brew. German rauchmalz is a special type of Munich malt and rauchbier from Bamberg is about 95% rauchmalz.
Brewers wanting to lighten the body, color and flavor intensity of beer often use starchy adjuncts, mainly corn or rice, to dilute the flavor of malt. As with specialty malts, adjuncts usually account for less than 25% of the grist bill. The reason for this is that adjuncts and most specialty malts do not contain enzymes and dilute the enzyme concentration of the mash. By the way, brewers from the United Kingdom often refer to specialty malts as adjuncts, since they supplement the main ingredient or pale malt and that, in simple terms, is what the term adjunct literally means.
Now if you really want to push the limit with using specialty malts and adjuncts you may need to boost the enzyme content of your mash. You can do this in large part by selecting pale malts that have a very high content of amylase enzymes. Six-row malt is the most notable example, but brewers need to remember that wheat malt is also usually very enzyme rich. You can also reach for the bottle and augment the enzymatic content of your base malt with exogenous enzymes that are usually the product of fungal fermentation. Some brewers unaffectionately use the term “industrial enzymes” to describe these products, probably because it reminds one of the stuff added to laundry detergents to remove really nasty stains. Another way to add adjuncts without worrying about enzymes is using sugar or special syrups formulated for brewing.
I do suggest checking out the websites of various maltsters for product specifications on various specialty malts, recommendations on usage rates and insight into what beer styles the grains may work with.
Calculating Efficiency
How do you calculate your “brewhouse efficiency?”
The easiest way to calculate brewhouse efficiency is to go metric! You need four pieces of information to perform this straightforward calculation. The data you need is: post-boil wort volume in liters (there are 3.785 liters per gallon), post-boil specific gravity (for example, 1.056 kg/L), post-boil wort density in °Plato (to approximate, divide the number behind the decimal of the specific gravity by four — e.g. 56/4 = 14 °Plato) and the weight of grains used in recipe (in kg).
Once you have this information the calculation is easy. The first thing that is calculated is the weight of extract in the wort. Extract = (volume) x (specific gravity) x (°Plato — expressed in decimal form). For example, (20 liters) x (1.056 kg wort/liter wort) x (0.14 kg extract/kg wort) (Plato is a weight/weight measure) equals 2.96 kilograms of extract. This is how much stuff you extracted from the grain during mashing and lautering.
The efficiency number is determined by comparing what was extracted to what was used. For example, if 4.5 kilograms (9.9 pounds) of malt was used to produce 20 liters of 1.056 wort, the efficiency is 2.96 kg extract/4.5 kg malt or 0.658. This number can be multiplied by 100 and expressed as a percentage — like 66%.
Without going into the nitty gritty details of the “problem” with this number, I do want to point out that this number is pretty crude. The reason is that not all grains used in brewing have the same potential. In technical circles, brewers talk about laboratory or theoretical yields of different ingredients. Some ingredients like pale malt have a laboratory yield of around 78% and most specialty grains have laboratory yields ranging from 55–65%. This means that a pale beer without specialty malts has a better efficiency than beers made using specialty malts.
Since brewers, especially commercial brewers, want to get as much out of the grain as possible, it makes it difficult to examine efficiency. A low yield calculated the way I showed earlier may be due to the type of beer being made or a problem in the brewing process. The solution to this dilemma is to compare the yield of a particular mash to its theoretical yield.
Malt specification sheets give the lab yield number and a theoretical yield can be estimated. If your brew contains 8.8 pounds (4 kg) pale malt with a lab yield of 78% and 1.1 pounds (0.5 kg) of crystal malt with a lab yield of 65%, you can estimate the combined lab yield of these grains using a weighted average. Estimated combined yield = (4 kg pale/4.5 kg total malt x 78%) + (0.5 kg crystal/4.5 kg total malt x 65%) = 76.5%.
This number can then be used as something to gauge the performance of your equipment against. If you got a yield of 66% and the lab yield is 76.5%, you can calculate what is known as the brewhouse yield. In this case, it is 66 divided by 76.5 or 86%. Most homebrewers do not calculate brewhouse yield because malt specification sheets are not always available.
Milling
Grain Mills
What do you think would be the best gap setting on a home mill when milling malt for an all-grain brew?
Running a test mill with rice is helpful because it indicates that your mill works to reduce particle size. When using a mill of any type, the best way to determine the gap setting for various grains is to run test crushes. This is a very common practice in most commercial breweries.
As with most things in a brewery the “best” assortment is determined empirically. In general, a coarse grist works well for homebrewing since more specialized wort separation devices, such as lauter tuns with rakes or mash filters, are not used at home; lauter tuns and mash filters typically use finer grist and they produce better extract yield than infusion mash tuns.
A good starting point for malt milling is to use a roller gap of about 0.040-inch or a hair greater than 1-mm. When malt is milled you want to see intact husk pieces because the husk is what comprises the filter bed that is so important for wort clarification. But there is a balance between too coarse and too fine — after all, you do want to mill the grain. So in addition to nice pieces of intact husk you also want to see little chunks of white endosperm, or the starchy middle of the malt kernels. The endosperm is the source of starch that is converted into fermentable sugars during mashing. You will also see smaller pieces of endosperm along with yet finer flour particles mixed in with the grist. This is all to be expected and the only way to know that you got it right is to use your grist for test batches of homebrew.
If the grist is too fine the most likely problem you will encounter is difficulty with wort separation. If the grist is too coarse you will have a lower yield than expected. Over time you will be able to tune your mill to provide a reasonable extract yield using grist that does not give you headaches with wort collection.
Mashing
Mashing Malts
If I wanted to make a big barleywine and didn’t have enough mash space for the needed grain, would mixing malt extract into my strike water allow mash enzymes to break down some of the more complex sugars, or are they chemically “locked”?
I love this idea for a number of reasons. The first reason is that many malt extracts seem to be less fermentable than the preference of my palate. If you open a can of malt extract that you know to have a relatively low wort fermentability based on past experience, you can certainly change this wort property by further enzymatic action. It is true that some of the dextrins in wort react with proteins and amino acids during wort boiling, or concentration into extract, and are changed into compounds that will not be hydrolyzed by amylases when you add extract to your mash. But the majority of dextrins in pale malt extract that can be acted on by alpha amylase will be available for the enzymes from the malt in the mash.
I can create a hypothetical argument explaining why this method probably will result in a decrease in extract yield, but the truth is I really don’t believe this will be an issue if you don’t make the mash too thick. Thick mashes result in higher wort gravity and require more sparging. One way to brew strong beers is to curtail sparging to limit wort dilution prior to the boil. But the volume of extract retained in the grain bed will be no more by the method you suggest and I don’t believe the method will have a negative influence on yield.
If the extract you add to your mash needs no further enzymatic activity, the argument can easily be made that this is probably more trouble than it is worth, but one never knows. I have had some really great extract beers that I did not know were brewed from extracts until being told, and I have had many extract beers that are so obviously made from extracts that the extract flavor is a distraction to the overall flavor. This method may be a way of diminishing the extract flavor contributed by some, likely old, malt extracts.
More Mash Space
I am upgrading my homebrewery and I want to be able to brew bigger beers. How do I determine the grain capacity of any given mash tun of a certain volume?
Sizing brewing vessels is part of my job with the Paul Mueller Company. When I am sizing mash mixers for brewing applications where the mash is conducted in a stirred and heated vessel and wort separation is conducted in a separate lauter tun I focus on two primary parameters. The first is the range of grist weights used in the mash and the second is the typical mash thickness (liters of water/kg malt), which is usually between 3.0–3.5 in stirred mashes. The mash thickness that you are using is equal to 2.6 when you convert everything to weight. All of the routine brewing calculations I perform are done using metric units. If I want to switch to English units I do this after my primary calculations because metric calculations are much clearer to me.
Mash volume can be calculated by the following:
Mash Volume (liters) = (Mash thickness + 0.7) x kg malt
The 0.7 in the above equation accounts for the gain in volume that happens when 1 kg of malt is added to water and is empirically derived. Using an example based on your set up I will assume the mash thickness is 2.6 and the maximum grist weight is 14 pounds or 5.9 kg. The calculated mash volume is (2.6+0.7) x 5.9 or 19.5 liters (5.15 gallons).
Sizing a lauter tun is a different problem. The best way to think of a lauter tun or an infusion mash tun is like a filter. Filters are sized based on area and so are wort separation devices. The critical process parameter to consider is the grist load on the false bottom. This value varies from about 150 kg/m2 on the low end up to about 300 kg/m2 on the high end when brewing big beers with lauter tuns designed for normal strength (12 °Plato) lager beers. The grist load is used to determine the diameter of a mash tun or a lauter tun.
Let’s look at an infusion mash tun that will be built with a false bottom design (as opposed to a copper pipe manifold), and target a grist load of 250 kg/m2, a relatively normal load for this type of design (infusion mash tuns have higher grist loading than lauter tuns). I want to determine the diameter of this vessel and will begin by calculating the required area based on a maximum grist bill of 5.9 kg. To calculate area, simply divide 5.9 kg by 250 kg/m2 and the result is 0.024 m2 (0.25 ft2). This corresponds to a circle with a diameter of less than 7 inches (A=πr2). And this makes absolutely no sense in the eyes of the homebrewer. Why?
Commercial mash tuns and lauter tuns have grain beds that are considerably deeper than what is used at home. In the commercial world of really
high-speed lauter tuns, grain beds are rarely any thinner than about 9 inches (23 cm), and most craft brewers using lauter tuns have grain bed depths ranging from 12–24 inches (30–60 cm). Infusion mash tuns have deeper grain beds ranging from 24–36 inches (61–91 cm). So when it comes to designing the homebrew mash tun looking at the commercial world is not as helpful because the design would lead one to build a very odd looking vessel that is tall and skinny. Although the vessel would function, it would be something that could not be purchased off the shelf and would be expensive.
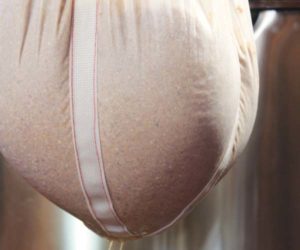
The good news is that designing the mash tun with a thinner grain bed is not a problem, as long as the bed is no thinner than about 6 inches (15 cm) deep. This corresponds to a grist load of about 80 kg/m2 or a diameter of about 12 inches (30 cm). This is more what one would expect and is in-line with the typical 5-gallon (19 L), round water cooler (see photo above).
This means that when you upgrade your system you have a few options. You can either scale up using a grist load of 80 kg/m2, or you can scale up using a higher grist load. The advantage of scaling up using a higher grist load is that you may be able to find something readily available that meets your needs rather than staying with the lower grist load value.
Mash Out Methods
I use single infusion mashing with a modified picnic cooler. When attempting to mash out I use a good deal of near-boiling water just to raise the temperature from the mash to 170 °F (77 °C). Not having the ability to apply direct heat to the mash tun, I was wondering if I could, like in decoction mashing, remove the thick portion of the mash, boil it and return it to raise the temperature to mash out, thus not having to add additional water. Would this extract tannins and “grainy” flavors since the beer was made via the infusion method? If this is feasible how much would I pull off of the main mash to boil in order to achieve the mash out temperature?
The easiest way to go about solving this problem is to not mash out. Breweries who have infusion mash tuns have no way of doing a decoction and do not add a bunch of hot water to the mash to increase its temperature. Instead, infusion mash brewers usually start collecting wort and sparge with water that is around 168 °F (76 °C) and allow the temperature to slowly rise during wort collection. While mashing out does stop enzyme activity and “fixes” the carbohydrate profile of the wort, the main reason for mashing-out is to reduce wort viscosity and improve wort flow through the grain bed. This is more important when doing stirred, multi-temperature mashes because the mash bed becomes denser. Infusion mashes on the other hand are usually easy to run-off and this is not so much of an issue.
You can do a single decoction to increase mash temperature if you really want to mash out. A little extra malty or grainy flavor is typically associated with beer made with decoction. How much mash to boil is a weighted average calculation. In this case you want 100% of the mash to be at 170 °F and have (100 – x)% at 155 °F, for example, and (x)% at 212 °F. The equation to solve is: (1) x (170 °F) = [(1 – x) x 212 °F] + [(x) x 155 °F]. Solving this equation for x results in 0.74, meaning that 74% of the mash should be left in the mash tun and 26% of the mash should be boiled.
You probably will find that this will undershoot the desired temperature of 170 °F (77 °C) because some heat is lost when the two portions are mixed. This can be accounted for by deflating the decoction temperature used in the calculation based on empirical data. You can solve the equation in reverse to determine what temperature to use in the future. If the temperature only increased to 165 °F (74 °C), solving the equation (1) x (165 °F) = [(0.26) x (y °F)] + (0.74 x 155 °F) indicates that 193 °F (89 °C) was the effective decoction temperature. Using this value for future brews suggests boiling 39% of the mash.
For the sake of simplicity, I have assumed that there is no difference in the thermal properties between the thin and thick mashes because there is no easy way to measure the mash thickness in the portion of the mash removed for boiling. I apologize to those readers who wish to consider every possible variable in brewing calculation and am sure those who wish to make my simple algebra more complex will figure a way to do so!
Mash pH
How important is mash pH? Is it a fine point in tweaking your beer? Does it improve efficiency or fermentability?
Mash pH is extremely important. Enzyme activity is a function of pH and all enzymes are only active in a relatively narrow range around their optimum pH. In the case of mashing, there are two enzymes of particular importance; alpha and beta amylase. The optimal range for alpha amylase is pH 5.6–5.8 and the optimal range for beta amylase is pH 5.4–5.6. If mash pH is much higher than 5.6 beta amylase activity begins to drops off and, more importantly, the pH is approaching pH 5.8, or the point where tannins really start to be extracted from malt husks. If the pH is much lower than 5.6 alpha amylase activity drops off. Lower pH levels are favored to these higher levels and most brewers like to see the mash pH in the 5.2–5.4 range. This provides good enzyme activity and does not flirt with tannin extraction.
Mash pH is principally affected by the mineral content of the brewing water and by the grains used in mashing. In general terms, dark and roasted malts tend to lower mash pH. So it is possible that mash pH can be too low when brewing dark beers like stouts, porters, dark lagers, etc. Historically, dark beers were brewed in regions where the water contained significant levels of carbonate, and it is the carbonate in the water that balances the acidity of the roasted grains. If pale beer is brewed with carbonate water, the pH can be too high. In these cases, breweries use a variety of methods to either remove carbonate from water or add acid to the mash.
Mash can be acidified by using acidulated malt, adding soured mash as a natural source of lactic acid, or by simply adding commercially available food-grade acids like lactic or phosphoric. Adding calcium, either in the form of calcium sulfate (gypsum) or calcium chloride is another way to reduce mash pH. Calcium reacts with phosphates from malt and the result is the release of hydrogen ions and a reduction in pH. Classic pale lagers and pale ales of the world were brewed in areas that either had extremely soft water, like Pilsen in today’s Czech Republic, or areas that had water rich in minerals and dominated by calcium, like Burton, England.
Mash pH and water chemistry can quickly become very confusing without a strong understanding of chemistry, especially the concept of buffering. Buffers are weak acids that resist pH changes in the region around the buffer’s pKa. (pKa is a quantitative measure of the strength of an acid in solution). As it happens, the brewer’s mash is rich in buffering acids, primarily from malt proteins, and these buffering compounds make the system much more complex than water. And to really make any sense of this a method of pH measurement better than litmus paper is required. For these reasons there are many brewers like you who don’t measure mash pH or do anything to really control it other than adding water salts in approximate quantities specified by recipes.
So the question you pose is relevant to a lot of homebrewers. Here is the simple version of mash pH. When malt is mixed with water the mash pH is normally right around pH 5.6, which just so happens to be right where we as brewers like it. Is this a coincidence? I have always supposed that since the enzymes being used in the mash are also active in the growing barley seed when the seed is hydrated, that the pH of the environment of hydrated barley and the pH of the mash should be pretty similar. Whether or not this explanation is correct is really not relevant; the bottom line is that the mash pH normally falls right in the optimum zone.
Rarely is the pH so far outside of this zone to cause real problems. This is why there are many brewers like you who have brewed great beers with good extract yield for many years without ever measuring pH. But fine-tuning pH does have real benefits. Improved extract yield and beer flavor are the two most common reasons for adjusting mash pH. If you are interested in adjusting mash pH I suggest buying a temperature compensated, hand-held pH meter and using diluted lactic acid or acidulated malt to lower pH and baking soda, or sodium bicarbonate, to raise pH. The million-dollar question is what works best, and this, like so many other things related to brewing, depends on what you are doing. If you are in search of some fun experiments, you have arrived at the right location.
Single vs. Step Mashing
Instead of doing a single infusion, is it better to do a step mash at 140 °F (60 °C) and a step at 158 °F (70 °C) for a total of one hour, with the understanding that the amount of time spent during the hour at 140 °F and 158 °F will change depending on the brew you’re making?
The topic of mashing technology and mashing biochemistry is a topic of deep personal interest and is one that I have written much about over the years in my column. I advocate using certain brewing implements and brewing techniques when needed. Mashing is certainly an area where different options abound. A brewer can choose from infusion mash tuns, stirred mash mixers (heated pot and spoon for the homebrewer), double mash set-ups for either decoction or adjunct mashes and then a whole sub-set of options for the type of wort separation method. When it comes to the mash profile itself, the options are wide open since the mash profile is a combination of temperatures held for various times to accomplish the brewer’s goal.
The brewer’s goal is where I keep my attention glued. There are many new brewing technologies springing up in the world of commercial brewing that attract many brewers because the methods are new, and this attraction to technique often takes the focus off of the most critical element — namely the brewer’s goal!
The brewer’s goal in mashing grains is two-fold. The primary goal is to convert starch from the variety of starchy ingredients into fermentable sugars so that yeast may gobble them up and transform wort into beer. This goal is crude and we can accomplish our primary goal and produce beers with a very high residual extract as well as those with virtually no remaining carbohydrates.
The secondary goal of mashing grains, and arguably a much more important one, is to take control of the transformation of starch. In order to control these reactions it is critical to understand the reactions themselves and this means boning up on mashing biochemistry — aka enzymes. I will avoid covering this topic in depth because I want to cover new ideas, but here’s a quick rundown on enzymes in the mash.
Enzymes are most active when their “temperature optimum” and “pH optimum” are both met. If the mash temperature exceeds the optimum temperature of a specific enzyme, say beta-amylase, the enzyme irreversibly denatures and permanently loses activity. The various relevant enzymes active in malt have a range of temperature optima from 104 °F (40 °C) to 158 °F (70 °C).
The rate of enzymatic reactions is highest when the concentration of enzyme and substrate are high. This means that reaction rates drop off as time passes and there becomes a point of diminishing return where extending the mash time does not have any real affect on the mash. It also means that if the concentration of a certain enzyme group is very low in malt, for example proteolytic enzymes, there will not be much change in the wort attribute by the enzyme group. In other words, if they’re not at the party, they can’t contribute to the fun!
Most all-grain brewers are fluent in the material above and many can recite the various temperatures and enzymes active over these ranges as easily as their own birthdays. The real question is picking the appropriate tool for a particular brew. This requires defining the finished brew and choosing a strategy to get there.
At the 2012 Craft Brewers Convention in San Diego, Dr. Michael Lewis and Dr. Charlie Bamforth (past and present brewing science gurus at UC-Davis) gave a wonderful presentation where they challenged brewing practice and demanded us as brewers to defend why we do what we do.
To rephrase the thought, they challenged the audience to think about the brewer’s goal and to critically evaluate their methods selected to strive towards this goal.
One of the many topics covered was mashing time and temperature. Many big brewers got side tracked in the inexplicable pursuit of low-carb beers during that trend. Anheuser-Busch, the company many believe to have accidentally created this monster, had gone after the South Beach Diet because this diet has incorrectly labeled beer as high in carbohydrates, specifically the disaccharide maltose. It seems that the author of this diet never studied microbiology and fails to recognize the fact that yeast consume maltose to transform wort to beer.
Before we had low-carb beers, we had light beers and for a brief flash of US beer we had dry beers, which continue to remain very popular in Japan where the style first began with Asahi Super Dry. All of these beer styles require long, multi-temperature mash profiles unless the brewer decides to use exogenous enzymes (enzymes from a bottle). The result with these commercial trends is that many brewers have felt the need to use multi-temperature mashing because other brewers do it. This is not the best reason for the choice of method.
Further back in beer history, German brewers used decoction mashing and, more recently, step mashing to produce wonderfully delicious lagers. The conclusion by many is that these mash profiles are required to produce great lagers.
The Lewis and Bamforth talk had a take-home message that was so refreshing in the obvious Homer Simpson “Doh!” sense . . . malt today is not the same malt we read about in text books. Modern malt is powerfully enzymatic and usually very evenly modified. It is also much paler than malts of yesteryear. The suggested mashing strategy was to minimize mash time in an effort to get the good things from the malt and to minimize the extraction of the unwanted compounds, such as the flavors from the husk that can give a gold brew astringent or grainy characters. Measuring yield, which you are doing, is a
good measure of success when it comes to mashing.
Another key variable to consider is fermentability. If your goal is a dry beer and you are not going as low as you like, you may need to add some lower temperature rests; 140 °F (60 °C) is a good rest for this purpose.
In this case, if a simple infusion mash is not providing the flexibility in wort profile required to brew the beers you desire, change it. If your beers taste great and your goal is to be more efficient, be careful. Increasing efficiency usually comes at a price. That price may be buying a better mouse trap, inventing a better mouse trap or sacrificing flavor for efficiency. My advice is to brew the same beer with your old and new methods. Compare the two methods by measuring initial and final gravity, calculating your efficiencies and tasting the finished brews.
SPARGING/LAUTERING
Batch Sparging
When batch sparging, to get the grain bed to 168 °F (76 °C) you need to heat your sparge water to 180–195 °F (82–91 °C) depending on the volume of grain. I read that the mash out isn’t really necessary as the boil stops enzymatic activity. Do you see any problems with only heating my sparge water to 168 °F (76 °C) to eliminate any possible tannin extraction from the hot liquid on the grain?
I remember when I first began homebrewing back in 1986 and almost immediately wanted to start brewing all-grain. At that time the information related to homebrewing was a little more difficult to find and my quest for information quickly landed me in the stacks of McKeldin Library on the University of Maryland campus in College Park. There I found a bunch of texts that seemed so confusing to my young mind. Luckily I later found some homebrew books that helped demystify mashing.
The mashing method I cut my teeth on was the “simple” infusion mash. One mash temperature followed by sparging with hot water and onto the kettle wort flowed. Only later did I pay much mind to step mashing and decoction mashing. These days it seems that many homebrewers have thrown out the KISS philosophy (“keep it simple, stupid”) and have replaced simplicity with complexity.
OK, so now that I have set the stage, onto the answer. You are describing the dilemma of an infusion masher, that’s you, who is peeking over the fence at what step mashers do. Step mashers tend to “mash-off” at the end of the mash before they move their mash to the lauter tun. Infusion mashers go straight from mashing to sparging and skip the mash-off step. So what’s the difference and why?
When mash is stirred in a mash mixer and pumped to a lauter tun it behaves differently than an infusion mash. As it turns out, wort separation is easier when the mash is heated or “mashed-off” before the transfer. This also serves to inactivate enzymes and allows the brewer to control mashing, stop the mash, then get on with wort separation. This is not necessarily a better method from infusion mashing, it’s just different. Most commercially brewed beer in the world uses some sort of stirred mash and lauter tun or mash filter for wort separation. Decoction mashing and the American double-mash used for dealing with solid adjuncts like rice and corn are both variants of stirred mashing.
In the infusion method there is no mash-off and hot sparge water, usually around 168 °F (76 °F), is sprayed directly on the mash bed after mashing. Since infusion mashing usually is conducted at 149–158 °F (60–70 °C), enzyme activity continues as wort flows from the mash tun to the kettle. Even when hot sparge water is sprayed on the mash bed the wort temperature in the kettle is never much hotter than the mash temperature due to heat loss. This method works very, very well and is the traditional method the British use to brew ale.
Discussions of yield improvement may include increasing the sparge temperature of infusion mashes to reduce wort viscosity and eek out as much extract as possible from the grain bed. There has been a lot of research related to tannin/polyphenol extraction associated with high sparge temperatures and some of the studies conducted in the mid-1990s convinced me that high temperature sparging is not the recipe for disaster that many believe. Most of this research also included milling methods, especially hammer milling, that have dramatic improvements on extract yield when combined with modern mash filter technologies. The take home message is that “hot sparging” can be used to produce
high quality wort as long as the variables effecting tannin/polyphenol extraction, mainly pH, are controlled during sparging.
In practice, most brewers these days continue to sparge with water that is about 168 °F (76 °C) because it works well and brewers tend to be a fairly traditional lot. The old adage stating “if it ain’t broke, don’t fix it” is alive and well in the modern brewery.
Sparge Temperatures
When batch sparging, is it the sparge water that should be at mash out temperature, or the grain bed that needs to be at mash out temperature?
This question is a bit more about semantics than any real issues with sparge temperature, in my view of things. Bear with me while I explain how commercial brewers normally mash out and sparge. Most commercial brewers use stirred mash mixers for mashing and raise the mash temperature to about 168 °F (76 °C) before pumping the mash to the lauter tun. When sparging ensues, the water temperature is normally controlled to about 168 °F (76 °C). These procedures vary among breweries, but in general this is how things are done.
The practical reason for controlling sparge water temperature instead of monitoring the grain bed temperature is because measuring and controlling water temperature is easy and reliable, whereas measuring and attempting to change the grain bed temperature by changing the sparge water temperature is neither easy nor reliable. Commercial lauter tuns have raking machines that cut the grain bed and rarely have temperature probes installed to monitor grain temperature because there really is little use for measuring the grain bed temperature during this relatively short process.
OK, let’s move into the homebrewing realm and discuss infusion mashing for a moment. In the infusion mash tun there is no practical way to stir the mash and increase the mash temperature as with a mash mixer. This is why the name “infusion mashing” is often more completely described as “single-temperature, infusion mashing.” Brewers who use infusion mashing often times use the same basic brewing rules as those who use stirred mashing and sparge with 168 °F (76 °C) water because they do not want to run the risk of extracting tannins from the malt husk with hotter water. The truth is that hotter sparge water can be used since it is the temperature of the whole that is important when it comes to solubility.
When you perform a batch sparge you don’t control sparge flow rate like the typical continuous sparging setup, but the temperature control methods are the same; sparge water is heated in a single hot water tank to the desired temperature or very hot water and ambient water are blended in-line as the water flows into the sparge line. If you are an infusion masher (no mash off used) and would like to add a few levels of complexity to your rig, you could measure the wort temperature as it exits your mash tun and use hotter water to bring the wort temperature up to 168 °F (76 °C). After this temperature is hit, you would then want to finish the sparge with 168 °F (76 °C) sparge water.