It’s In the Bag
Meeting a stranger from the internet can be a scary thing. And yet I found myself driving an hour and half to meet up with someone I barely knew to teach them a different way to brew beer than they were accustomed to. Luckily this guy wasn’t a serial killer, he was a YouTuber who goes by “CH” from Homebrew 4 Life. And while he had a lot of experience brewing beer, he had never tried brew-in-a bag, or BIAB, as people call it. CH had seen my small YouTube channel and noticed I used BIAB often and was hoping I could share my knowledge to teach him the way. I was more than happy to, as BIAB greatly improved my brewing experience and completely changed the way I brewed beer just a few years earlier.
I got my start brewing beer like many others; a beer kit that turned out horribly, but nevertheless I was bit by the brewing bug. I began reading every beer book I could get my hands on and watching hours of BrewingTV videos on YouTube, trying to absorb as much as I could so that I could make better beer. However, at the time it seemed like in order to make better beer you needed to brew all-grain and that required a three-vessel system with all kinds of fancy stainless gear. All of which would never fit in my one-bedroom apartment in Chicago. But the more reading and watching I did, I eventually stumbled upon a different technique called brew-in-a-bag.
In this new (to me) method, you don’t need three vessels, you just need one. Thanks to a mesh bag, you can mash all-grain batches in this single kettle, remove the grains by pulling out the bag, and then bring it to a boil. This revelation helped open the door to all-grain brewing without breaking the bank and without compromising space. I was sold and I immediately dove in on more research.
Brew-in-a-bag’s origins trace back to Australia, pioneered by Patrick Hollingdale, amongst a few others about 20 years ago. Hollingdale did years of research and trials to develop the process. He is also the one that really helped spread the word of BIAB and it didn’t take too much convincing for many homebrewers that were looking for a simplified way to make beer, myself being one.
The simplicity is what really drew me in. When you take a step back and look at BIAB it’s very much like making a giant batch of tea. You put the grains into a bag and steep them at a certain temperature for a certain amount of time, and then pull that “teabag” out (similar to all-in-one brew systems like the Grainfather, BrewZilla, and others, except instead of a bag they use a basket). The rest of the BIAB brew day is the same as any other brewing method beginning with the boil. All-grain brewing seemed unattainable to me but all of a sudden it made sense and I could start making high-quality wort; I just needed a few pieces of equipment to get started.
BIAB Equipment

The first piece of equipment you need is the kettle. The kettle size is dependent on the size of the batch you want to make. If you’re looking to make the typical 5-gallon (19-L) homebrew batch, a 10-gallon (38-L) kettle is perfect. But BIAB is also great for small experimental batches, so something like a 2-gallon (8-L) kettle is ideal for 1-gallon (3.8-L) small-batch beers. The reason you need a kettle about twice the size of the batch is because you’ll be adding in all the grains and water at once, so you’ll want plenty of space to avoid an overflow. You can get away with using smaller kettles, and I’ll share some tips on that later, but if you’re in the market for a new kettle, spend the few extra dollars for the bigger size.
Next, and probably most importantly, is the brew bag. These days there are companies that make brew bags specifically designed for your kettle dimensions, but when I started brewing with this technique the only thing I needed to worry about was not getting one too small. Too big is no problem; many of these mesh strainer bags have strings that you can cinch to keep them tight on the kettle. Or you can always use some binder clips or a bungee cord on the lip of the kettle to keep the extra fabric tucked away. The bags can either be made from cotton or food-safe polyesters and, thanks to the power of the internet, they’re very easy to find. The important thing is that it’s reusable and can hold the weight of the crushed grain when wet without it ripping. I personally never concerned myself with “microns” or how small the holes in the bag are. If it works, it works!
That’s all you need to get started, but some other useful things are a thermometer to check the temperature and a spoon or something to stir the mash. And of course, you need some way to heat the kettle. Electric heat works, as does a propane burner for large batches. Smaller batches can even be done on a stovetop in the kitchen. If you’ve brewed a beer before you likely already have everything required for BIAB besides the bag.
BIAB Techniques
From the first beer that I made with BIAB I knew I was onto something. The quality of wort I was able to get was beyond the extract and partial mashes I was used to. And the brew day was so simple I felt like I had put in some cheat codes or something to make brewing easier. All without sacrificing taste, it was just as good as what my friends were making on their big systems. So I kept on brewing in a bag, learning little quirks and tricks along the way and eventually started making videos all about BIAB on YouTube. That’s how my fellow YouTuber CH found out about the technique and decided to reach out.

CH had for the most part been a three-vessel brewer, usually utilizing homemade systems. While he has dabbled in some of the all-in-one systems that have become popular more recently, I think he was still looking for an easier way to brew. A lot of the brewers I’ve talked with over the years that have given up or slowed their brewing down often cite time being the thing that kept them from brewing. Whether that was the time it took to set up to brew, the time it took to clean up, or just the investment time in maintaining their system. And to me BIAB is the ultimate timesaver because you’re only setting up, cleaning, and maintaining that one pot. The bag may get worn with time, but they are inexpensive enough to replace when needed.
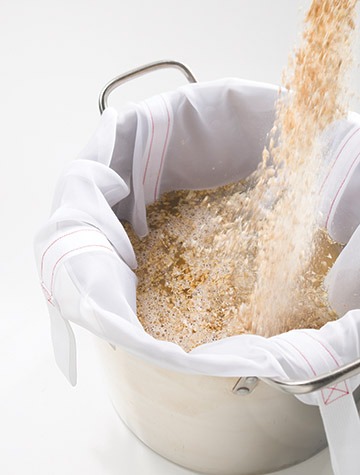
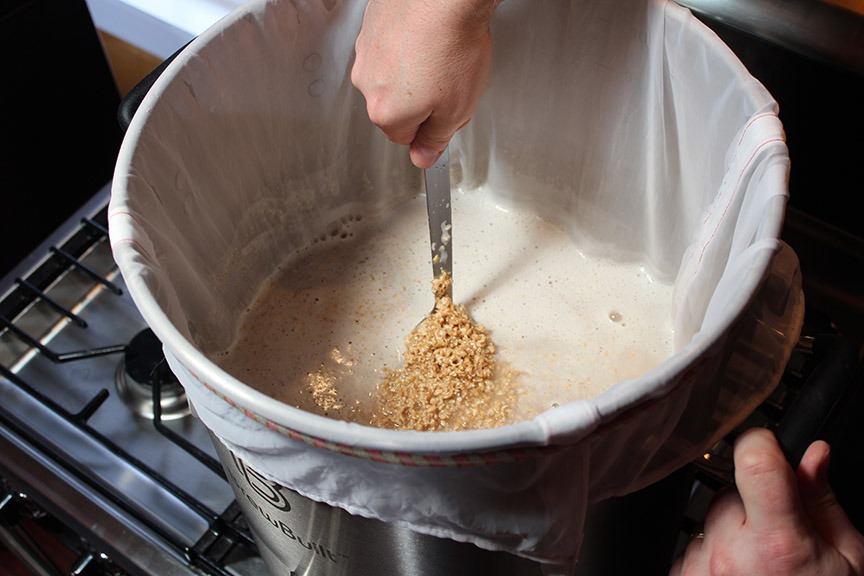
Luckily, CH had all the tools needed and just had to shop for a new bag. We started our brew day like every brew day — we heated some water up in our kettle to strike mash temperature. For this, you want to be a few degrees above your desired mash temperature as the grains will lower the temperature a bit. Once we were in the right range, we killed the heat and stirred in the crushed grains, little by little to avoid any clumps or dough balls. After making sure it was well mixed, we placed the kettle lid on top.
One negative of BIAB is that unlike other methods that might use a cooler to help insulate and regulate temperatures, the quality of your kettle will greatly impact how well it holds the mash temperature. Cheaper kettles in some cases might drop about 10 °F (5 °C) over an hour mash. To combat this you have a few options.
You can do what I did for many years and turn the burner back on when the temperature dips too low. Just be careful to stir the mash during this to help disperse the heat evenly. There is also a concern of scorching the brew bag if you have the burner on while the bag is in the kettle. I’ve never had that issue in all my time, but I’ve heard of it happening so just keep the burner on for a short time to be safe or lift the bag off of the bottom of the kettle while the flame is on. For this method it might be a matter of turning on the burner for a minute or two every 15 minutes if you have a thin-walled kettle.
The other method is to try and insulate the kettle. Sleeping bags or blankets held in place using bungee cords is an option that doesn’t involve an investment. Obviously make sure the heat is off and that whatever you are using to wrap the kettle won’t burn if it touches anything hot, but the idea is to wrap up the kettle tight to keep the heat in. It’s not a perfect solution but it works surprisingly well. Reflectix or other rolled insulation is another option homebrewers often use. Another creative insulation option was detailed in BYO back in 2015 and uses expanding spray foam to form a mold. Plans for building this are found online at www.byo.com/project/keep-mash-tun-insulated/
The best options of all are to invest in a quality brewing kettle with thicker walls or a temperature-controlled all-in-one system, but we’re trying to keep it cheap and easy here!
After the mash timer is up it’s time to remove the grains. In other systems you’d likely be removing the wort from the grains and transferring it into a boil kettle. Here we’re doing the opposite. At this point you’ll need some way to remove the bag safely. A pulley makes easy work of it, especially if you have difficulties lifting 11+ pounds (5+ kg) of grain plus any water that’s holding on (which will bring the weight to above 30 lbs./13 kg). When I started, I opted for some heat-resistant gloves, like the ones people use for grilling, and a strong cookie rack. This allowed me to pull up the bag without scorching my hands, then slide in the cookie rack so that it rested on the lip of the kettle, giving me the perfect spot to rest the dripping bag right above the kettle. With some practice you’ll get good at it, so you don’t have to lift the heavy bag so high. This also gives me the chance to squeeze the bag and get every last drop of wort out that I can.
That’s exactly the trick I taught CH on our brew day together. I remember he didn’t have a cookie rack but I looked around his brewery and saw he had an empty metal storage shelf. He popped it off and we made it work.
Speaking of squeezing the bag, you might have heard it releases tannins if you do this. From my experience I’ve never had that happen and I tend to squeeze the living heck out of the bag. I want to get as much wort out as I can because of probably the biggest downfall for BIAB — efficiency.
Mash efficiency takes a major hit when it comes to brew-in-a-bag. Trying to hit 90%+ efficiency is a goal for many homebrewers I know, who may scoff when I tell them that I’m often hitting 65-70%. I am willing to sacrifice this numbers game for the overall simplicity. I can usually make up the difference and still hit my desired original gravity by adding a few more pounds of grain, which is a few more dollars worth of ingredients. I have noticed that when I am on my A-game, keeping the mash temperature right where I want it and even extending the mash for an extra 30 minutes, I can boost that efficiency up to 75%. But at that point I’m adding time, and time is money. These decisions come down to personal preference, but must be considered when building out recipes and planning brew days.
Speaking of which, I can’t say enough about how thankful I am for recipe calculators and apps. Talk about simplifying the process! These days all the major beer recipe apps have BIAB equipment profiles that automatically help determine how much water and grain you’ll need to hit a desired gravity.
After wrapping up my BIAB brew day with CH I knew he was hooked. He was reiterating all the things I loved about it: The simple setup, the laidback brew day, and the quick cleanup. And for a while after, he too was brewing in a bag. Anything to simplify the brew day, especially if you are simultaneously filming the brew day, is a win. It also meant he could pair down his setup a bit, get rid of old coolers and gear that he wasn’t using anymore, and free up some space.
Maybe you’re a homebrewer looking for a way to ease the work required on a brew day. Or maybe you’re more like me when I started, looking for a way to upgrade to all-grain with minimal equipment. BIAB is really an easy and inexpensive way to make beer. There are a few cons to work out, but for the most part the pros greatly outweigh them. And as long as it means it gets you into the brewery and you can keep making amazing beer to share, then it’s absolutely worth giving BIAB a try.
Common BIAB Questions
Having made a few videos on the topic of brew-in-a-bag, I get a lot of questions. So I thought I might share some of the most common ones I get in case you are wondering the same things.
What if I have a smaller kettle (8-gallon/30-L), can I still make a full 5-gallon (19-L) batch?
Absolutely, you’ll just need to do a “pseudo-sparge” when you pull the grain bag. The way I like to think about it is to build my recipe for the full batch using brewing software to see how much total water I need. Then I’ll use about ¾ of that amount in the main mash, or however much you can use without overflowing the kettle. Then at the end of the mash I pull the bag out, resting it on a cookie rack over the kettle, and pour the remaining water over the bag slowly. This rinses the grains, dripping into the kettle, and helps get any trapped sugars from the grains into your wort while simultaneously raising the volume to the right pre-boil volume for the full batch. If you’re one to check mash gravity it will be a bit higher since it’s a more concentrated mash, but once you add the water you should be back on track!
What about grain crush size?
You can crush the grain as finely as possible with BIAB. In fact, this is another way to help with the general low efficiency of BIAB. I tend to set my mill gap as tight as it can go and while it might take longer to mill the grain you should end up with super fine particles. This would be an issue in other systems that can lead to a stuck mash or sparge but in BIAB it’s no issue since we are manually pulling out the whole bag. And if you want you can try double crushing; I haven’t seen a drastic improvement if your first crush is already quite fine, but it may help boost efficiency slightly. As Denny Conn says: “Crush until you’re scared!”
How do I clean up a BIAB setup?
Once I pull the grains and have squeezed the bag like it owed me money, I set the bag aside to cool for a little bit. Once it’s cool enough to handle I’ll dump out the grains into the compost and then give the bag a wash down with a hose. I like to hang my bag up outside to air dry and once it’s dry give it a good shake to get any remaining grain bits off. That’s pretty much all I do with the bag unless it’s looking a bit nasty or I let it sit too long with the grains, then I might give it a PBW soak. But don’t be afraid to replace the bag if it’s really looking weathered or has holes in it.
For the kettle it’s like any other brew kettle — give it a soak and a scrub with PBW and it’s ready for the next brew day. All-in-all, BIAB gear is pretty low maintenance.