Big Club Brews
Every February, the PA Alers Homebrew Club based in Pennsylvania’s Susquehanna Valley, holds its annual Big Brew. This is our club’s marquee event — a gathering to brew a single recipe and celebrate the fellowship of homebrewing. We’ve held the Big Brew for a dozen years, which predates our club’s existence. In that time, we learned how to brew big beers on a big scale. We learned what to do and, especially, what not to do. It’s not as difficult as one might think — and with a little planning, your club or group can do it, too.
Choose A Recipe
Big brew events demand a special homebrew recipe, usually something high octane. In deciding what to brew, the club needs to choose a style that has both mass appeal, accessibility to ingredients, and a wide enough guideline range that it can be duplicated by either all-grain or extract brewers.
Brewing a tripel, for example, may present problems for the extract folks since it needs to be ultra pale in color and bone dry. IPAs (or even double IPAs) are wonderful, but they require massive late hop additions. This would be expensive, plus a large amount of wort would be lost to absorption by the hop material.

Location and season also play a role in the decision. It is better to work with Mother Nature rather than against her. Brew lagers, such as doppelbock, during the winter, and warm-fermenting saisons during the summer.
Styles such as Scotch ale, Baltic porter, and Russian imperial stout have worked well for our club. These beers can be easily brewed by either all-grain or extract brewers. Some sweetness is allowable and proper color is not problematic. Adjuncts, like table sugar and molasses, can be added to keep the cost reasonable. Most of the bittering is done through a single dose of hops that can be delivered by a relatively low amount of the high alpha varieties. Lastly, it’s easy to maintain their fermentation temperatures in February.
Russian imperial stout, in fact, has become the Alers signature style. We always brew an extra batch that’s kegged and served a few months later at a local beer festival. Surprisingly, fest goers will form a line that extends across an entire street to get a taste of a thick alcoholic stout on a sweltering July day.
The final decision of what to brew is best decided by a club vote, but don’t supply too many choices. The decision can’t get bogged down. While democracy must rule the process, remember that it’s impossible to please everyone.
Plan the Event
Pick a date for the event, knowing full well that not everyone will be available. Clubs should keep a back-up date in mind for weather cancellations. The Weather Channel would be wise to consult the Alers when plotting a forecast. Our Big Brews inevitably coincide with a Nor’easter storm.
Choose a location that’s close to the geographic center for the club. Outdoors is fine during warmer months, providing that water and tents for cover are available. A garage is the best solution for all seasons. Be sure that there’s access to water and adequate space for brewing. Strangely, some people choose to store cars in garages rather than homebrew gear. To each his or her own.
Logistics
The next decision is deciding your club’s brewing capacity. We ferment the individual batches together to reconcile any irregularities in gravity, color, etc., so fermenter size is the limiting factor for us. (I’ll discuss fermenter options later in the article.)
Whatever that number of gallons is, determine how many four- to five- gallon (15- to 19-L) batches (shares) can be brewed, and email announcements to members that shares are available on a first-come-first-serve basis. Let the new brewers know this is for them, too. Sometimes there’s reticence among the newbies that they’re stepping on the toes of the established members. New members are the lifeblood of any organization. While new people are sometimes short on knowledge, they always provide an infusion of unbridled enthusiasm. Accommodate them.
Devise a recipe, keeping it simple for convenience’s sake. Brewing software, such as BeerSmith, makes it easy to design a recipe, as well as to convert all-grain to extract. High gravity brewing is part art, part science; so it’s difficult to predict efficiency. Be sure to have malt extract on hand in case the all-grain folks need to boost their gravity. Use high-alpha hops in the recipe to keep the amount of vegetal matter in the kettles to a minimum and hop socks to corral the mess further. Choose a well-attenuating yeast that can tolerate a wide temperature range. In its early stages, fermentation temperature can be an unruly and difficult beast to tame.
The PA Alers Big Brew
Our 2014 Russian Imperial Stout recipe was constructed with a base of Maris Otter and Munich malts for a strong backbone. Wheat was added for head retention. We kept the specialty malts simple: roasted barley, chocolate malt, Special B, and Carafa® III (see the recipe on page 41).
The Alers were aiming for a 10% ABV beer to commemorate our 10th anniversary. We knew we’d have to supplement the all-grain recipe with malt extract to hit our target gravity of 1.115 (although we would have settled for 1.105) and decided upon adding Muntons extra light dried malt extract for its fermentablity. We also added table sugar to the extract recipe to further enhance the wort fermentability and to keep the cost reasonable.
We used Galena hops for bittering because of their clean flavor profile and high alpha acid level, although any similar hop, like Magnum, would work well. Simcoe® was selected as the flavor/aroma hop for its beloved piney and citrusy qualities.
White Labs WLP007 (Dry English Ale) was our yeast of choice for its flavor, attenuation, and wide temperature tolerance. We also had White Labs WLP099 (Super High Gravity Ale) yeast waiting in the wings to clean up any final gravity points.
In Practice
Once the number of shares is totaled, procure the ingredients as soon as possible. Canvass the club for those wishing to donate grain or extract. We recommend shopping at your local homebrew store (LHBS). For a large order, the LHBS will often give a discount or even donate a few items for a local club project. Purchase the ingredients in bag or case quantities for the best discount. Leftovers, like extract, can be repackaged and sold to members at cost.
Order well in advance so everything’s on hand at least a week ahead of the brew date. This allows for the inevitable disappearance of an ingredient from the local homebrew shop inventory, plus it provides time to mill the grains.
The amount of yeast cells needed for a single 5-gallon (19-L) batch of high gravity beer is huge. That number increases exponentially for 50 gallons (189 L). Yeast is available in larger pro sizes. A few years ago, our club bought a 500-g. brick of Safale US-05 for our wee heavy, but it was expensive — about $65.00. A local brewpub can be a much cheaper source. Sometimes a slurry of yeast can be procured only for the asking.
Our club uses an alternate solution. The Big Brew always falls on a Saturday. We make a 1.5-L starter on the preceding Saturday and step it up a few days later. On Wednesday, we brew a 5-gallon (19-L) batch that is, in essence, the starter. On Friday, another batch is brewed and combined with the first. By Saturday afternoon there’s a 10-gallon (38-L) “starter” rip roaring at high kräusen. This has always worked well for our club — and there’s no beating the cost. An added advantage is that two shares are already brewed, which frees up those members to help others — or go on a pizza run.
Synchronize everything for the brew day, with participants arriving as early as possible. The object is to have the homebrewing well underway — or done — before the nonparticipants arrive in the afternoon. This gives the brewers an opportunity to relax with a few beverages afterward and prevents the nonessential personnel from becoming a safety hazard.
With a big brew, there’s a chance the total grain bill will weigh close to 200 pounds. Most homebrew systems don’t have that capacity. The solution is to break the all-grain folks into groups of three or four. Usually clubs have several members with large mash tun coolers and 15–20-gallon (57–75-L) kettles. The club can also purchase large coolers during summer clearance sales and convert them to mash tuns for events such as this.
Group brewing is more efficient from a time-space standpoint and much less cumbersome than having a dozen people brewing simultaneously. Set up the all-grain stations around the perimeter of the space, leaving the central area free for traffic. Sparge water can be handled by piggy-backing two smaller kettles, and remember, pumps are your friend for moving large volumes of hot liquid.
The extract brewers have it easy. They can arrive later, brew individually if they’d like, and get their shares into the fermenter. At that point, they can either relax with a homebrew or assist at an all-grain station.
One advantage of brewing in February in Pennsylvania is that the chilling water from the tap is ice-cold. Counterflow or plate chillers hooked up in a series can easily handle the larger boil volumes. It’s a good idea to use a hose splitter so that two groups can chill simultaneously. The cooled wort can then be either pumped into the fermenter or carried by bucket.
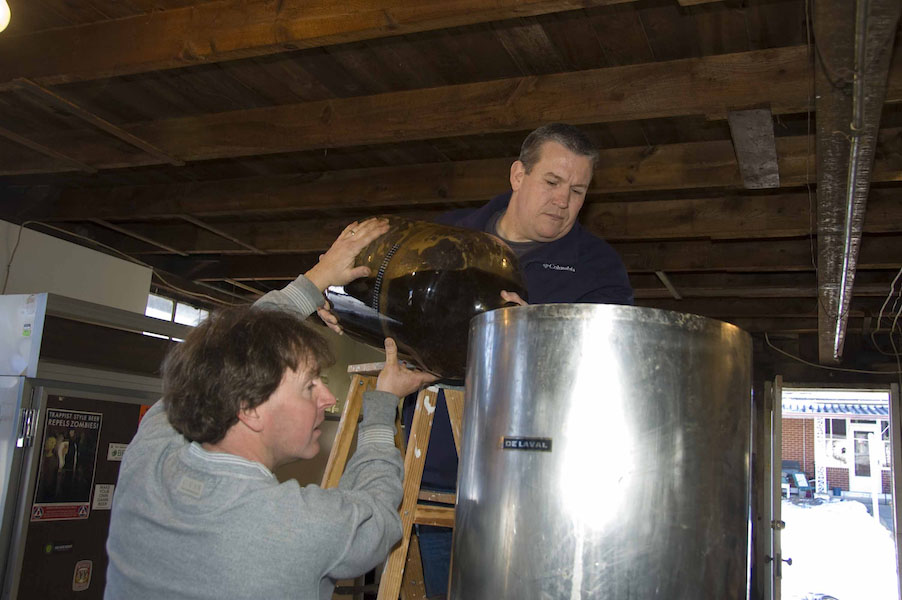
The spirit of the big brew is that all the batches go into one fermenter — everyone’s beer becomes one. The Alers use a converted a 60-gallon (227-L) dairy tank as a fermenter. Allowing 10 gallons (38 L) for headspace (Fermcap-S will keep the kräusen to a manageable level), gave us the capacity for a dozen shares. Plastic bin wine fermenters are another solution. They’re reasonably priced and can be purchased as a club buy. For the do-it-yourselfers, 32-gallon (121-L) fermenters can also be built from food-safe Rubbermaid Brute trash cans. (See the article in the May/June 2009 Brew Your Own for details.)
Maintaining the proper fermentation temperature requires a little ingenuity. During February, the ambient temperature in the garage hovers in the 30s °F (~1 °C) during the day and plunges into the teens (-10 °C) during the night. We wrap a waterbed heater around the dairy tank, and the entire vessel is covered with insulation. A Ranco temperature probe is inserted into a thermowell that’s threaded through the top of the fermenter and into the wort. This allows us to accurately monitor and hold the fermentation temperature at a steady 70 °F (21 °C).
Once final gravity is reached, condition the beer in a sealed fermenter as long as ambient temperatures are amenable. However, neither the plastic bin wine fermenters, nor the food-grade trash cans are air tight. If those options are used, divide the beer as soon as possible among the participants when fermentation has finished.
Another conditioning option is a bourbon barrel. These can be obtained through homebrew shops or directly through distilleries by ordering a freshly dumped #1 select barrel. For this purpose, the spirit doesn’t have to be of the premium variety. Barrels aren’t expensive per se. Shipping’s the killer. Partner with another club or a brewpub to get a better deal on freight.
How long to barrel condition is a matter of individual taste. Our club likes a full bourbon flavor, so we age the beer for several months. We don’t worry about temperature. The barrel’s alive, and varying temperatures allow the wood to expand and contract, imparting those wonderful oak and bourbon flavors.
Peristaltic pumps, which don’t have to be primed, are great for emptying a barrel. The desired volume can be set, and kegs or carboys can be lined up for filling. Afterwards, the barrel can be re-used. Most of the bourbon character will be gone, but those oaky notes will still be there. The barrel can also be re-used almost indefinitely for making sour beers.
Our efficiency this year was a little better than expected. Our original gravity (O.G.) ended up at 1.120. However, the WLP007 (Dry English Ale) stalled at 1.040. We added the WLP099 (Super High Gravity) yeast to bring the final gravity down to 1.035 — an ABV of 11.2%. It was then finally time for tasting — the ultimate test.
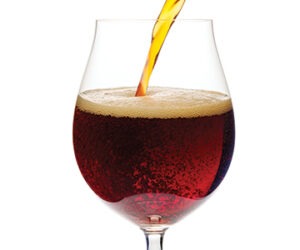
We filled a pitcher and poured it into tasting glasses. For having only four specialty malts, the flavor profile was complex: lots of roast, coffee, chocolate, and dark fruit — although I suspect the initial fermentation temperature, which was in the mid 70s °F (~24 °C), may have contributed to the fruitiness. The alcohol was barely noticeable for such a big beer. We deemed it one of our best big brews.
And your club’s big brew can be a winner, too, by following the Alers’ method for making large batches of high-gravity homebrew.
Recipe
10th Anniversary Russian Imperial Stout
(5 gallons/19 L, all-grain)OG = 1.115 FG = 1.035 IBU = 84 SRM = 45 ABV = 12%
Ingredients
13 lbs. (5.9 kg) Maris Otter pale ale malt (3 °L)
3.4 lbs. (1.5 kg) light Munich malt (10 °L)
1.1 lbs. (0.51 kg) wheat malt (2 °L)
9 oz. (0.26 kg) Weyermann Carafa® III malt (525 °L)
9 oz. (0.26 kg) chocolate malt (350 °L)
9 oz. (0.26 kg) roasted barley (300 °L)
9 oz. (0.26 kg) Special B malt (135 °L)
2.4 lbs. (1.1 kg) Muntons extra light dried malt extract (3 °L)
20.7 AAU Galena hops (60 min.) (1.8 oz./51 g at 11.5% alpha acid)
19 AAU Simcoe® hops (10 min.) (1.5 oz./42 g at 12.7% alpha acid)
Whirlfloc (15 min.)
Yeast nutrient (15 min.)
White Labs WLP007 (Dry English Ale) yeast (1.5 L/1.6 qt. yeast starter)
White Labs WLP099 (Super High Gravity Ale) yeast (1L/1 qt. yeast starter)
¾ Cup corn sugar (for priming)
Step by Step
One week before brew day, get a WLP007 yeast starter going. When starter activity slows, decant the spent wort and add fresh wort.On brew day, mill the grains and dough-in with 28 quarts (26.5 L) hot water, targeting a mash at 154 °F (68 °C). Hold until enzymatic conversion is complete. If your system allows, raise the mash temperature to 168 °F (76 °C) and recirculate the wort until clear. Sparge with 170 °F (77 °C) water to collect 6.5 gallons (25 L) of wort. Take a specific gravity reading and add the dried malt extract until the specific gravity is 1.088. Boil for 90 minutes, adding the Galena and Simcoe® hops at 60 and 10 minutes respectively. Add Whirlfloc and yeast nutrient with 15 minutes remaining in boil. Chill the wort to 70 °F (21 °C), aerate, and add WLP007 starter (decanting the spent wort first). When fermentation slows, take a gravity reading and add the WLP099 starter (if needed) to achieve a final specific gravity of 1.035. Keg or bottle carbonate, aiming for a carbonation level of 2.0–2.2 volumes of CO2. Once carbonated, condition at cellar temperature for several months. Flavor should peak at about one year and remain there for at least another year.
10th Anniversary Russian Imperial Stout
(5 gallons/19 L, extract with grains)OG = 1.115 FG = 1.035 IBU = 84 SRM = 45 ABV = 12%
Ingredients
10 lbs. (4.5 kg) Muntons extra light dried malt extract (3 °L)
1.7 lbs. (0.8 kg) table sugar (sucrose) (0 °L)
9 oz. (0.26 kg) Weyermann Carafa® III malt (525 °L)
9 oz. (0.26 kg) chocolate malt (350 °L)
9 oz. (0.26 kg) roasted barley (300 °L)
9 oz. (0.26 kg) Special B malt (135 °L)
20.7 AAU Galena hops (60 min.) (1.8 oz./51 g at 11.5% alpha acid)
19 AAU Simcoe® hops (10 min.) (1.5 oz./42 g at 12.7% alpha acid)
Whirlfloc (15 min.)
Yeast nutrient (15 min.)
White Labs WLP007 (Dry English Ale) yeast (1.5 L/1.6 qt. yeast starter)
White Labs WLP099 (Super High Gravity Ale) yeast (1L/1 qt. yeast starter)
3⁄4 Cup corn sugar (for priming)
Step by Step
One week before brew day, get a WLP007 yeast starter going. When starter activity slows, decant the spent wort and add fresh wort.On brew day, crush the grains and place in two steeping bags. Steep the bags at 155 °F (68 °C) in 16 quarts (15 L) of water for 20 minutes. Rinse the grains with 2 quarts (2 L) of 170 °F (77 °C) hot water. Add dried malt extract (DME) and table sugar. Boil for 60 minutes, adding the hops at the specified times. Chill the wort to
70 °F (21 °C) and add water to achieve 5 gallons (19 L) of wort. Aerate the wort and add WLP007 starter (decanting the spent wort first). When fermentation slows, take a gravity reading and add WLP099 starter (if needed) to achieve a final specific gravity of 1.035. Keg or bottle carbonate, aiming for a carbonation level of 2.0–2.2 volumes of CO2. Once carbonated, condition at cellar temperature for several months. Flavor should peak at about one year and remain there for at least another year.
Tips for Success:
Pitching plenty of healthy yeast is paramount for a high gravity brew. When in doubt, pitch more. Be patient with the fermentation and conditioning process. Beer doesn’t have a schedule. For bottle carbonation, pitch fresh yeast at bottling time if the WLP099 wasn’t needed during the brew day. Give the bottles adequate time to carbonate. This beer needs to age, anyway. You’ll thank me later for saving it until its peak. If you would like, try aging this beer in a bourbon barrel. How long to barrel condition is a matter of individual taste. Our club likes a full bourbon flavor, so we age the beer for several months. We don’t worry about temperature. The barrel’s alive, and varying temperatures allow the wood to expand and contract, imparting those wonderful oak and bourbon flavors.