Bottle-Condition Like A Champ, Over-Carbonation Issues and Hop Creep
Q
I recently enjoyed a champagne-style bottle of bottle-conditioned Affligem Blonde, and I noticed this bottle was without residue from the second fermenting. I assume a second fermentation with fresh yeast and sugar is how they manage to create the higher carbonating pressure these beers have. But how do they get the beer in the bottle without creating any residue? Does This mean that the second fermentation occurs somewhere other than in the bottle?
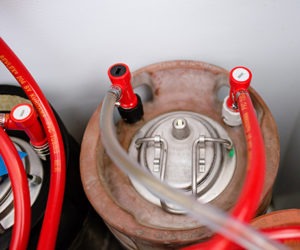
I am now brewing a clone. I planned to rack from the secondary fermenter to a keg, and add fresh yeast and sugar. Then use a pressure gauge/spunding valve to regulate the carbonation before bottling from the keg. I just wonder if this method could work or do you have any other suggestions? I’m also bottling some normal bottles with the yeast and sugar to check any differences. Looking forward to hearing your comments.
Robert Aveling
Slimminge, Sweden
A
I am not sure how Affligem goes about bottling their beers, but your question generally applies to bottle-conditioned beers, especially those that have very little yeast sediment in the bottle. There are a few unrelated topics that address your question, so I will cover this topic in two short vignettes.
Producing clear, bottle-conditioned brews
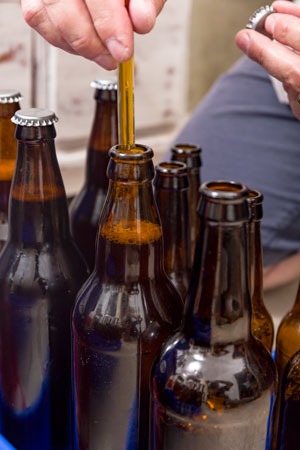
This may seem like an oxymoron as yeast is required to bottle condition, but it is relatively easy to produce clear, bottle-conditioned beer without having an excess amount of sediment in the bottom of your bottles. The first step is to forget about what is going to happen in bottle, and to focus on producing clear beer. This means considering all of the clear-beer tools and methods available to the homebrewer; thorough mashing using the appropriate temperature rests to match your grist bill, vigorous wort boil, kettle finings, flocculent yeast strain for primary fermentation, complete fermentation (no residual fermentable extract is wanted), finings to remove yeast and haze proteins, cold aging, and perhaps filtration. The objective is to produce clear beer.

Once you have produced clear beer, you now need to prepare for bottle-conditioning. This is a separate process and is independent from what has been done up to this point. The three variables that require definition at this point are: 1) beer volume, 2) carbon dioxide content, and 3) fermentable extract remaining in your beer (should be zero to make this process easiest and most consistent). This information is used to calculate the amount of priming sugar required. You also need a small amount of yeast for the process; 500,000 to 1,500,000 cells/mL is all that is needed to condition most beers (high-alcohol and/or low-pH beers may require more yeast). I suggest using a special strain intended for this purpose, such as Fermentis SafAle F-2 or Lallemand CBC-1 that are flavor-neutral, robust, and tend to stick to the bottle surface upon settling. Assuming that you have 4.75 gal. (18 L) of beer with 4.4 g/L of residual carbon dioxide, and you want to have 8 g/L after conditioning is complete, you need to add 133 grams of priming sugar and about 1 gram of yeast before bottling.
Minimize oxygen in your bottles
Proper bottling is critical to excellent beer. Brewers often jest that the best beer from the brewery is messed up by the packaging department. Throwing stones is never a great idea when you live in a glass house, but there is truth to this parable. Seemingly minor errors during packaging can cause major problems with beer quality. Purging empty bottles with carbon dioxide and capping beer on foam are the two most important steps a brewer can take to minimize beer degradation in the bottle. This is as true for bottle-conditioned beers as it is of beers that are fully carbonated and devoid of yeast when bottled. Capping on foam requires sufficient carbonation for the beer being bottled to actually foam. A nice carbonation level at the time of bottling is somewhere between 2–2.5 volumes or 4–5 g/L; enough carbonation to make foaming before capping easy, but not so much to make for difficult filling.
Purging empty bottles with carbon dioxide and capping beer on foam are the two most important steps a brewer can take to minimize beer degradation in the bottle.
This discussion may seem out of place in an answer about bottle conditioning. After all, bottle-conditioning replaces carbonation prior to packaging, right? While it is true that “flat beer” can be completely carbonated using bottle-conditioning, this method does not prevent beer oxidation because the damage caused by oxygen usually occurs before the yeast in the beer has a chance to help. This is especially true when very low cell counts are used for conditioning. So why should brewers bottle-condition if they are going to bottle beer using methods that also work for fully carbonated beer? Simple; highly carbonated beer, like Affligem Blonde, is nearly impossible to bottle. The practical carbonation limit to bottling carbonated beer is about 3 volumes or 6 g/L, because the fill tube must be removed from the bottle and anything other than extremely slow bottle de-pressurization results in gushing bottles. The method you describe is a perfect fit for this process, and you can certainly jump start the process in your keg and bottle when your carbonation is high enough to cap
on foam.
In short, bottle-conditioning is a specialist’s tool allowing the brewer to easily and consistently produce highly-carbonated, Champagne-like bottles of exquisite beer. And if you begin with very clear, even filtered, beer, the yeast in the bottle can go almost completely unnoticed.
Q
I seem to be having trouble with my beer when I bottle and leave the bottles for a while. They froth when I open them and keep slowly frothing after until half the bottle is finished. What can I do about this?
Greg Hutchinson
Essendon, Australia
A
This general phenomenon is loosely referred to as gushing and has numerous causes in beer. Typically there is a primary culprit in a case of gushing, but it is not unusual for a single case of gushing to be caused by multiple factors. In order to keep this answer from becoming jumbled, I will address each cause separately.
Common causes of over-carbonation
Excessive carbon dioxide is the most common cause of gushing in homebrewed beer. This normally happens when too much priming sugar is added before bottling, but can also be caused by bottling beer with residual, fermentable extract. Most commercial beers that are bottle conditioned have been tested using the forced fermentation method to determine the final gravity while the batch is being fermented. This is an easy method where the test sample of wort is pitched with a very high concentration of yeast to accelerate fermentation; kind of a crystal ball approach that helps to see into the future. Although this method can be used at home (see page 82), it requires the brewer to sacrifice a bit of beer. Brewers can comfortably omit this method provided sufficient fermentation time and a stable hydrometer reading on 2–3 samples tested over 3–5 days at the end of fermentation.
Over-carbonation can easily be avoided by paying attention to the common causes. Here are a few tips on how to prevent this pesky problem:
- Always measure your beer volume before adding priming sugar. All too often, homebrew recipes prescribe the amount of priming sugar to be added to a batch. For example, add 2⁄3 cup priming sugar to your 5-gallon (19-L) batch. This sort of instruction is prone to error. A more precise and accurate instruction is to dose based on sugar weight and beer volume, for example adding 5.7 grams of priming sugar per liter of beer. The reason this is a better way of defining priming sugar additions is that granulated solids, like priming sugar, are compressible and should be measured by weight instead of volume, and a batch of beer does not magically yield a pre-determined beer volume to the bottling bucket.
- Use a carbonation calculator that takes into account the approximate amount of carbon dioxide in the beer you are bottling and the target carbonation level after conditioning has occurred. I am a bit old-school and like to grind through calculations using chemistry, paper, pencil, and a calculator. 1 mole of glucose (180 grams) yields 2 moles of carbon dioxide (88 grams), most beers after fermentation contain about 3 g of carbon dioxide per liter of beer, and most bottled beers contain between 5–6 g carbon dioxide/liter. Whatever the method, it should be robust.
- Unless you are an advanced brewer and really want to brew completely in accordance with the Reinheitsgebot, don’t use wort or “speise” as your priming sugar. This method requires the brewer to know how much fermentable sugar is present in the speise and requires a forced fermentation test and more math.
- Make sure your beer has stopped fermenting before cold crashing (if this is done) and bottling. Although this sounds like simple advice, there are many brewers who rely on airlock observations to determine when fermentation is complete. A stuck fermentation may appear to be complete, but add a bit of fresh bottling yeast, or simply rouse, and the fermentation may resume. This is why it is important to check your batch with a hydrometer; not only will this simple method indicate if the terminal gravity is stable, it also prompts the brewer to consider of the actual gravity is aligned with the expected gravity.
Over-carbonation associated with debranching enzymes
Most beers contain dextrins (branched carbohydrates) that cannot be hydrolyzed by alpha or beta amylase during the mashing process. Dextrins contribute body, some flavor, and calories to beer. Amyloglucosidase (Amylo for short) is a debranching enzyme that can be added to the mash and/or in fermentation to reduce or eliminate dextrins. Light beers and brut IPAs are produced using this type of enzyme. However, debranching enzymes have multiple exogenous sources; like the Amylo used for light beer, or found in hops, as well as diastatic yeast.
Diastatic yeast strains do not normally cause problems in beer when they are used as the primary fermenting strain . . .
So what about those funky yeast? Diastatic yeast strains do not normally cause problems in beer when they are used as the primary fermenting strain, for example in the production of saisons or funky Brett beers, they do contribute to increasing levels of carbon dioxide during bottle storage if added late in the game. Some beers, such as Orval, are dosed with Brettanomyces shortly before bottling and others are inadvertently contaminated with diastatic yeast strains. Over time, diastatic yeast strains will lead to increased levels of carbon dioxide in the package. Extreme gushing and even exploding bottles can result from the inadvertent inclusion of diastatic yeast in packaged beer. Diastatic yeast are almost always phenolic-off-flavor positive, or POF+; these yeast strains produce phenolic aromas during fermentation and are fairly easy to smell when present.
Beer gushing
Some beers gush, and the cause has nothing to do with over-carbonation. The term “gush” when applied to beer means that carbon dioxide uncontrollably escapes from a bottle or can when opened, oftentimes resulting in the entire contents of the package turning to foam. Gushing in beer is typically caused by one of two factors; oxalates and hydrophobin proteins. Malt contains oxalates that can survive into finished beer, where they precipitate as crystals. These oxalate crystals act as nucleation sites for carbon dioxide release, and can cause gushing. Oxalate is normally precipitated with calcium during wort boiling, and the most common method of oxalate removal is a vigorous boil in the presence of sufficient calcium.
Hydrophobin proteins are produced by certain fungi and, like oxalate crystals, act as nucleation sites for carbon dioxide release. When found in beer, hydrophobin proteins come from grain that has been infected with Fusarium in the field. Because Fusarium produces mycotoxins, unmalted adjuncts and malted cereals are tested for mycotoxins by suppliers. Even so, Fusarium-induced gushing is not uncommon. Grains can mold when stored in humid conditions, or when grain is accidentally wetted before or during storage. It is important for homebrewers to take note of any changes that occur during storage of grains at home, and to discard any suspect ingredients.
In summary, foaming bottles of beer can be caused by numerous factors. The good news is that good brewing practices will minimize this type of problem from occurring at home.
Q
I was reading the Mr. Wizard answer titled “Hop Creep Explained” and have had the issue of overcarbonation with a couple IPA batches that I dry hopped. I thought that I had made a mistake with the priming sugar, but after reading that article, I believe hop creep was the problem. Would it make any sense to adjust the amount of priming sugar to compensate for the hop creep? I did a little more research and read about lowering the wort pH in order to compensate for hop creep. Do you have any suggestions on how to measure and adjust pH to compensate for hop creep?
Greg Stoner
Elizabethtown, Pennsylvania
A
I rarely answer similar questions in a single column, but this question pairs well with Greg Hutchinson’s question (previous question) about over-carbonation and is a good follow-up to my “Hop Creep Explained” answer from January-February 2019 issue. This is kind of like beer and food pairing, but it is rather a topical pairing!
OK, so you are thinking about adjusting your priming dose for beers that have been dry-hopped. There are several challenges with this proposition. The first is that not all hops have the enzymes that cause hop creep. Research into this phenomenon is limited and there seems to be little known about what hops contain active, debranching enzymes that lead to the production of fermentable sugars from dextrins. If you don’t know whether your hops contain debranching enzymes, you cannot adjust priming rates because not all hops contribute these enzymes to beer. And even if you knew that your hops did contain debranching enzymes, you cannot determine how much carbon dioxide will be added to beer as a result of the enzymes without running a trial test, and then using this information to determine how much priming sugar is needed to achieve your target carbonation level.
Although enzymatic rates are influenced by pH, it is not practical to change the pH of the wort/beer system enough to prevent the activity of this enzyme group without causing major changes to overall flavor and character of the beer.
In practice, you need to allow sufficient time after dry hopping for any enzymes from the hops to do their thing and for the yeast in the fermenter to metabolize any boost in fermentable sugars that may come late in fermentation. How do you know that things are complete? This is where your handy hydrometer comes to use; monitor your beer gravity and consider fermentation complete when the gravity is stable for about 5–7 days after dry hopping. This does not mean that you must keep beer in contact with hops for 5–7 days, it just means that you need to keep your beer at fermentation temperature with yeast for long enough to confirm final gravity has been achieved. If you like to clarify beer before packaging by cold-crashing, hold off on this step until your gravity is constant.
The idea of manipulating wort or beer pH to affect enzyme activity is interesting, but is not a method I would advocate. Although enzymatic rates are influenced by pH, it is not practical to change the pH of the wort/beer system enough to prevent the activity of this enzyme group without causing major changes to overall flavor and character of the beer. A similar method to pH manipulation is the use of heat to thermally denature enzymes. Although beer pasteurization is not considered cool in certain beer circles, it does work well to kill bacteria and yeast, and to denature enzymes in beer. This method is not practical at home, and does not make sense for control of hop creep in bottle-conditioned beer unless pasteurization is performed when proper carbonation is achieved.


