Carbonation Issues, Excess Foaming, and Mash Thickness
Q I have a red ale in a corny keg at 40 °F (4 °C) under 18 lbs. (124 kPa) CO2 pressure. After a week, I pulled a sample and The beer foamed a lot, but the head settled down relatively quickly. The problem is the ale was flat as a pancake; no carbonation in it at all! I like my beers a little on the fizzy side so I’m duly disappointed. Any suggestions to help me get this ale carbonated?
Bob Allen
Dayton, Ohio
A The two most likely causes of your observation is that your beer is not carbonated to your liking or that the aggressive pour knocked enough carbon dioxide out of your beer that the perception of carbonation dropped. My bet is on a combination of the two, with the first explanation accounting for the lion’s share of the problem.
If I am reading this correctly, you are relying on the transfer of carbon dioxide into your beer through the headspace surface area. There is nothing wrong with this method, but it is slow. Your combination of temperature and pressure will eventually result in 3.0 volumes of carbon dioxide. Although this is higher than the approximate 2.5 volumes for most styles, it’s not a bad strategy because the transfer of gas from the keg headspace to the beer slows down as solubility approaches the maximum allowed by the temperature and pressure combination.
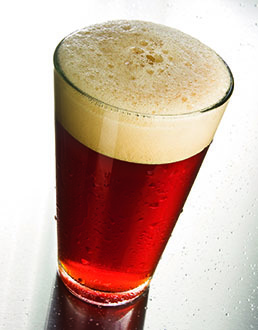
Because carbon dioxide quickly moves into flat liquids, your beer probably has a bit more dissolved carbon dioxide than it may seem. Certainly not suggesting your flat-tasting beer is OK, but the foaming you see upon pouring is likely associated with some gas flowing out of the beer as it falls into the glass. And if you are pouring with 18 pounds (124 kPa) of head pressure, the flow velocity may be a wee fast, knocking even more gas out of the beer than a quiet pour, or even whipping some air into the beer as it tumbles into your glass. Indeed, one of the arguments in favor of pouring beer into a glass for consumption, versus drinking from a bottle or can, is knocking some of the gas out of the beer and reducing the bloating feel that often accompanies rapid consumption of beer.
My view on carbonation technique has changed over the last few years and I have warmed up to an accelerated method I previously derided as the “crank and shake” approach. This method has been a longtime favorite because it’s lightning fast and does a fine job of getting the beer carbonation level close enough for routine enjoyment.
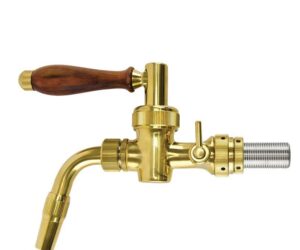
My rendition of this technique begins by chilling my keg down to serving temperature under about 15 lbs. (103 kPa) of CO2 pressure; the purpose of the pressure is simply to keep the lid sealed so that no air is sucked into the keg as the beer and gas headspace cool. After cooling the beer, I move my keg to a work table, lay it on its side, and connect my CO2 to the keg’s gas inlet. It’s best to locate the CO2 cylinder above the keg to prevent beer from flowing into the gas line and it’s also best to sanitize the gas line before carbonation.
My view on carbonation technique has changed over the last few years and I have warmed up to an accelerated method I previously derided as the “crank and shake” approach.
This is where the method becomes approximate and prone to issues if performed with too much vigor. I usually start off by cranking my gas regulator up to 25 psig (172 kPa) before starting gas flow into my beer. With the keg on its side, gas will bubble into the beer and pressurize the thin headspace that is now located along the length of the keg. Gently rocking the keg back and forth helps increase the rate of gas solubility into the beer. And as gas flows into the beer, the sound of bubbling gas can be heard. After about a minute, I reduce the pressure to about 20 psig (138 kPa) and continue slowly rocking the keg for a couple of minutes before reducing the pressure to 15 psig (103 kPa). Slow, rhythmic rocking continues until the sound of gas flowing through the regulator can barely be heard.
The last adjustment brings the gas pressure to 13 psig (90 kPa), or whatever your final set-point pressure happens to be, and keg rocking continues until the sound of gas flow all but stops. The total time for this process is less than 10 minutes and within about 15 minutes of the last rocking of the keg, a trouble-free and carbonated pint of beer can be poured. Is this method elegant and controlled? Heck no! Does it get the job done? Absolutely.
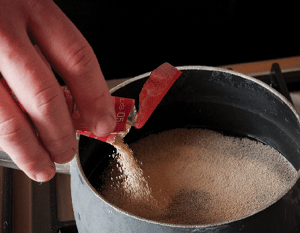
If this is not your idea of a proper process, another method to consider using is keg-conditioning using an adjustable pressure relief valve, aka a spunding valve. The awesome thing about keg conditioning with a spunding valve is that your priming sugar dose does not dictate carbonation level, provided that the priming dose is sufficient. Any excess pressure from excess priming sugar is simply vented from the spunding valve. I am not suggesting that it’s good practice to simply prime with reckless abandon but adding a bit more than required is the plan. I’ve covered this in previous columns and on BYO+ videos and will skip the process details.
Variations on the spunding theme include pressurized fermentation, transferring from primary to a secondary with residual extract, and capping off a unitank fermentation with residual extract. But when push comes to shove and a keg is not carbonated when the party is about to start, the crank and shake method does work quite well.
Q I’m kegging my ales and storing in a walk-in. I try to get the temperature as low as possible, but that’s just a bit above 40 °F (4 °C). some of the beers pour fine but some are super foamy. I’m assuming it’s probably the temperature (and need to revise my cooling system) but wondering if it is something else because with the problem kegs, they are foaming like crazy when I use the pressure relief valve. An example is as I release pressure with the split ring, gas is released, then nothing for a couple seconds then foam, and more foam, and more . . . I’ll leave the keg alone for a few hours (without gassing) and repeat the process. Eventually it will stop but it’s difficult to serve until it does. Any suggestions?
Cal Humrich
St. Thomas, Virgin Islands
A I agree with your suspicion that this problem may be related to temperature, especially if your walk-in cooler temperature swings up and down. A great start to troubleshooting would be to place a glass of water in the cooler and check the water temperature periodically over the course of a few days to determine the average along with the highs and lows. Because beer in a keg takes time to change, the glass of water should give you a good idea of the average temperature. Your system should be balanced based on your cooler temperature and you may discover that increasing your serving pressure and increasing the length of draft line solves the issue. But there are other things that can cause the foaming you describe.
One possibility is that your beer is slowly fermenting in the keg, becoming over-carbonated, and then foaming upon dispense. This is a simple explanation and one that is often rejected if it’s known that fermentation was complete before kegging. However, beer may referment in the presence of diastatic enzymes that slowly degrade unfermentable dextrins into fermentable sugars. Diastatic brewing yeast, like some saison yeast and Brettanomyces, are commonly associated with slow refermentation and can contaminate beer brewed with non-diastatic yeast through cleaning and sanitation failures.
The good news about diastatic yeast is that these critters are positive for the phenolic off-flavor gene, so-called POF+ yeast, and produce phenolic aromas that are easily detected simply by smelling. If you suspect POF+ yeast, the best thing to do is thoroughly clean your kegs and replace your draft lines. Brettanomyces is known to form biofilms; elbow grease and cleaning brushes help to remove biofilms and rid these unwanted yeasts from kegs and draft systems.
Late dry-hop additions can lead to hop creep where diastatic enzymes from hops cause similar problems as diastatic yeast. Hop creep may also show up in your beer’s aroma in the form of diacetyl. While there are different strategies used to prevent hop creep in dry-hopped beers, an extended rest after dry hopping is the most common method.
Diastatic yeast and hop creep cause overcarbonation. However, beer can uncontrollably foam when beer with a normal carbonation level is exposed to nucleation sites. Beer stone on keg spears, dirty draft lines, dirty beer faucets, and rough glassware are examples of surfaces that may cause beer to foam. Nucleation sites can also be present in beer.
The most extreme examples of gushing are associated with gushing proteins from malt. This is not a common problem and shows up when mold-contaminated barley, usually from Fusarium, is malted and later used in beer. The reason that this is not very common is that farmers and maltsters use measures to identify mold-contaminated barley and malt because there are legal limits on the amount of deoxynivalenol (DON), a specific mycotoxin, permitted in malt. However, gushing can occur even when DON levels are less than the 1 mg/L legal limit.
Calcium oxalate crystals are another example of a beer deposit that is associated with uncontrollable foaming. Calcium is present in wort and oxalate is present in malt. During the brewing process, most of the oxalate binds with calcium and is either retained in the spent grains or is precipitated as beer stone during wort boiling. If wort calcium levels are low, beer oxalate levels may rise and lead to the formation of oxalate crystal in packaged beer.
These crystals form slowly, and it may take several weeks for oxalate crystals to appear in unstable beers. While gushing proteins cannot be seen under a microscope, oxalate crystals are large and easy to identify because they have a distinctive shape and appearance. When oxalate crystals are observed in packaged beer the easiest way to reduce the concentration in future batches is to increase calcium additions during wort production, either by adding more calcium to the mash and/or adding calcium to the wort prior to boiling.
Beer haze may be the most vexing of brewing issues to cope with but dealing with uncontrollable foaming can also be quite the beast. Hope you quickly nip this issue in the bud!
Q Thanks for your recent BYO+ video on mash thickness. According to some German brewing literature the question of mash thickness is treated differently for pale and dark beers, where a thicker mash and more sparge water are recommended for dark beers and vice versa. The underlying idea is that a thorough sparge with more water aids to extract more body and “graininess” from the grist. Is that more of a German myth?
Harry Mittermaier
Baden bei Wien, Austria
A Nice to know that our readers are also watching our video content online. Mash thickness is one of those things that many a brewer takes for granted because it simply lacks many obvious brewing implications. In the world of commercial brewing, it’s important to have a mash thin enough to mix and pump. And it’s also important to maintain some degree of thickness to help preserve enzymatic activity that can falter in thin mashes. So, why not just choose a happy middle ground for all brews and not worry?
I want to begin this discussion by referencing two texts. My favorite German brewing text is Wolfgang Kunze’s Technology Malting and Brewing. The newest book in my library, The Comprehensive Guide to Brewing (Basarava, Savel, Basar, Basarova, and Lejsek), has quickly become a stellar reference. While both references make mention of mash thickness, neither text leaves the reader with much substance to really consider. My takeaway from these texts is that mash thickness is more of an engineering concern than anything. That’s not surprising because brewing texts have a hard time covering a topic, the art of brewing, that is not universally agreed upon.
Let’s think about what happens when a very thin mash with a first gravity of about 12 °Plato (1.048 SG) is produced and its wort is run to the brew kettle with no sparging. Not exactly the paradigm for brewing efficiency, but also not unheard of in the commercial world. Kirin Ichiban, as the name suggests, is made using just the first wort runnings from the grain bed. Besides a cool name, sort of like first press, the wort used to produce beer like Kirin Ichiban is indeed different from sparged worts because the grain is only bathed in first wort liquid. For all of you BIAB (brew-in-a-bag) and no-sparge brewers reading this, feel good about your brewing choices! Only surrounding grist with first wort, that is the wort that first is made when liquor and grist meet, means that only part of the grist solids are extracted into wort.
When a mash bed is partially or totally drained of first wort and sparge water is sprayed upon the grain bed, the environment around the grain solids quickly changes. Liquid density drops, pH begins to increase, enzymes are washed away with first wort, polyphenols/tannins continue to leach into the sparge water like tea-leaf tannins in second and third steeps of tea brewing, and undissolved starches are extracted.
This is a whole lot to unpack. Suffice to say, mash thickness is more than an engineering concern. Let’s go back to the first wort example. Whether brewing something like a Pilsner, helles, golden ale, or a pale North American lager, it makes sense that thin mashes would be appealing. On the other hand, if a brewery is producing dark and bold beers known for a bit of snark, starting with a thicker mash that relies upon sparging to pull attitude from malt makes perfect sense. And what about decoctions? The thick mashes pulled into the decoction kettle are malt heavy and leave behind the relatively enzyme-rich thin mashes to quench their heat upon returning from the cooker. All these topics relate to mash thickness.
The short answer to your question is no; I personally do not believe that the relationship between mash thickness and beer flavor is a German brewing myth.
I attended a great presentation about decoction delivered by Klaus Zastrow. At the time, Klaus was the Brewmaster of the Anheuser-Busch Brewery in St. Louis, Missouri, and a brewer with lots of street credentials. I was just a 26-year-old brewer with lots of questions. During Klaus’ Q&A session, I mustered up the nerve to stand up and ask what decoction mashing contributed to beer flavor. I have always thought that a slow response is a sign of a good question and was excited when Klaus briefly fumbled and quietly mumbled something unintelligible in German. “I am not sure how to say this in English, but decoction mashing imparts a certain astringency and depth. Yes, it gives beer [gusto].”
Mash thickness, sparging, decoction mashing, and gusto are all intermingled. And there is little argument in my mind that mash thickness does indeed play an important role in shaping the flavor of beer.