DIY Water Filter
 As homebrewers we strive for perfection in our brews. There is a lot going on to get that water flowing into your home and more that a homebrewer can do to control the quality of the largest ingredient in the brewing process.
Mineral content, particulate matter, pH, hardness, alkalinity levels, salts, chlorine, microbes and temperature levels. Water can seem overwhelming if you try and address everything at once, so start with the basics and work your way up into more advanced chemistry constructs.
Once water reaches the tap in your home you as a brewer have a choice: trust the water from the magical source or add some insurance to the next batch of brew with a simple DIY filtration system.
A simple filter set at a proper flow rate can help remove contaminants (scale, sediment, and rust particulate) that your water picked up in the pipes from the treatment plant to the homebrewery. Filtration is also recommended for those using well water.
Chlorine, chloramines and pollutants have also got to go. When brewing beer with treated water, chlorine and chloramines can combine with malt phenols in the wort to create a compound called chlorophenol, which can give the beer a medicinal taste. Also, cleaning your brewing gear with unfiltered water and not allowing it to dry properly will leave chlorine on the surface and lead to the same production of chlorophenols. So, cleaning with filtered water is suggested.
Activated carbon filtration will also remove chlorinated compounds including Trihalomethanes (THMs) and organic pollutants such as pesticides.
Cartridge carbon filtration is inexpensive and requires no presoaking, sterilization or backwashing. The filters can be replaced quickly once the flow rates start to diminish due to accumulation of suspended solids on the filter.
Filters, filter housings and copper, brass or stainless fittings can be found at your local big box hardware store. You may need a dual filtration or a reverse osmosis system in extreme cases of ion imbalance or contaminants in your water, so it’s a good idea to get a water analysis report from your city or town before you start.
Tools and Materials
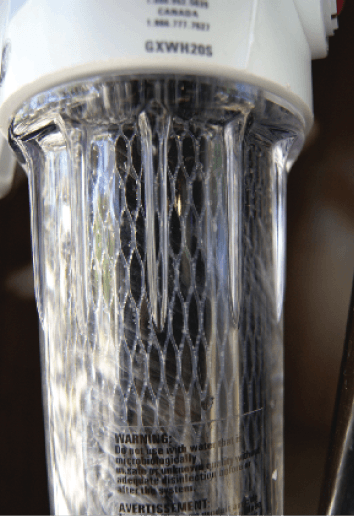
•GE Household Pre-Filtration System – Model # GXWH20S
• GE FXWTC Carbon Water Filter
• 3⁄4-inch MPT to 1⁄2-inch FPT bushings
• 1⁄2-inch MPT to 1⁄2-inch FPT elbow
• 1⁄2-inch MPT adaptor
• Copper pipe
• 3⁄4-inch MPT to 3⁄4-inch FPT Shutoff valve
•3⁄4-inch MPT Quick disconnect
• Filter wrench
• Teflon tape
• Adjustable wrench
• Welding Torch, tinning flux & lead-free solder
• Propane striker
 1. GET FITTED
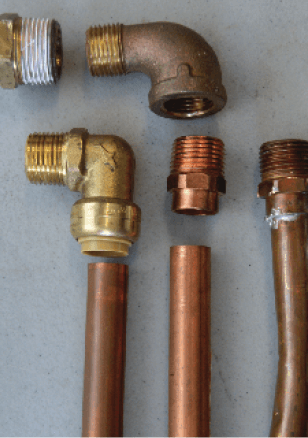 1. GET FITTED
Incorporating a standard hose quick disconnect, shutoff valve and bent elbow on the water outlet can help shave time off the brew day, so think about your filter design and modify it to fit your specific needs. There are many different materials and fittings you can choose for the water outlet. I have seen PVC and silicone tube setups, but on this design I chose a copper pipe elbow. To make this fitting you can either use instant push fittings which do not require any welding, but check to make sure it is food grade and safe for drinkable water sources. Another component of the filter that you can modify to your needs is the cutoff valve. You can go for extreme control using automated ball valves. These can be controlled by a computer system or float sensor, but manual quick cutoff valves work great too.
2. WRAP and HEAT
 2. WRAP and HEAT
Clean and Teflon wrap all MPT fittings. Make a clean, burr-free cut on your copper pipe with a pipe cutter. Brush the joints with a pipe brush before fluxing. Assemble pipe and adaptor, apply heat and solder the joint together. If you are going to weld please use caution when operating the torch. Read up on safety standards and precautions when doing any welding or plumbing. Put on your safety glasses and high heat resistant gloves. Keep a bucket of water within reach and have a fire extinguisher
on hand.
 3. ALL TOGETHER NOW
Once you have decided on your elbow and cutoff valve designs gather up all the parts and lay them out. Thoroughly clean the water filter housing. On the inlet side of the filter screw on your cutoff valve 1⁄2-inch MPT to 1⁄2-inch FPT bushing and the elbow and copper pipe fitting. You can cut your copper pipe to fit the length of your kettle. The copper pipe will also act as a hanging arm and allow you to add water to a HLT or boil kettle hands free.
 4. FILTER IS IN THE HOUSE
To install the filter unscrew the housing and wash inside the housing with warm soapy water and lubricate o-ring gasket. Remove the shrinkwrap and install the new filter. Reassemble the housing and turn on your water supply. Run water through the filter for 5 minutes to flush the system. The filter will remove particulate from 1-5 micron and will last around three months (15,000 gallons/
56,781 L) depending on usage. The filter has a spiral wound carbon paper construction and reduces chlorine taste and odor, sand, soil, silt, sediment and rust.
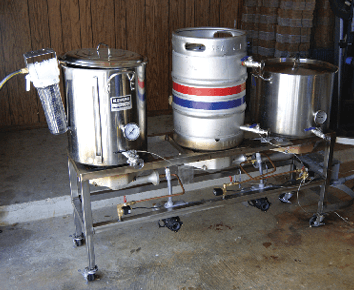
 5. HANG’N OUT
Click in your water source/hose and you are ready to dispense some purified water. You can easily hang the filter on the side of a hot liquor tank and fill to the desired level. This design adds another level of safety with its cutoff valve by allowing the operator to cut the water off locally instead of from a distant wall faucet. Leaving any brew system unattended is never advised especially if you are using open flames.
 6. FUTURE UPGRADES
A final upgrade for this filter was an added automated ball valve with float sensor, which could be set to a certain water level. Design inspiration was from Randy Mosher’s “automate everything” mantra.


