Drool Page
Featuring some of the latest drool worthy features found in our Homebrew Nation section of BYO.
Homebrew Drool Setup — JR Renna • Pen Argyl, Pennsylvania
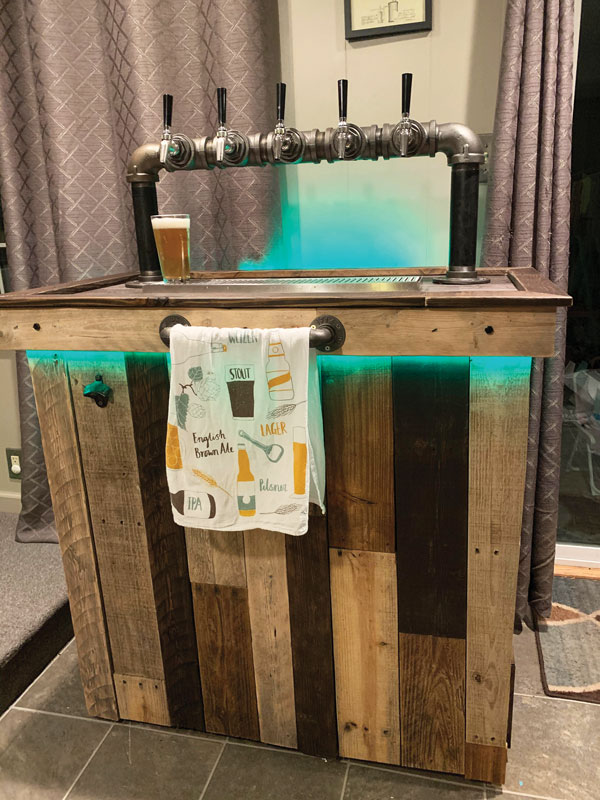
Many of us have fun names for our homebrew operation. My homebrewery name is “Pallet Fort Brewing,” based on a fond childhood memory of a fort I constructed made out of pallets my father had lying around. So when I set out to build my keezer, I figured I should incorporate pallet wood/industrial aesthetic into the build. I drew inspiration from posts on Facebook groups Home Brew Network and Kegerators, Keezers, & Brewers Group. I learned that with the right combination of pipes, bushings, and flanges you could mount beer shanks and run lines through steel pipe mounted on the top of the lid. This not only looked cool, but solved for the challenge of curious toddlers pulling any lever within their reach (and then laughing at the mess).
I built a luon skirt around the front three sides of the chest freezer with a 1×4 board serving as an air gap between the wood and the keezer. The load of the skirt is supported with screws into the 2×10 collar, and liquid nails along the bottom. I painted the skirt black before attaching pallet boards to hide any gaps that show through. I used a metal grate panel near the compressor for airflow. The top of the lid is covered by vinyl plank flooring to make wiping up spills easy.

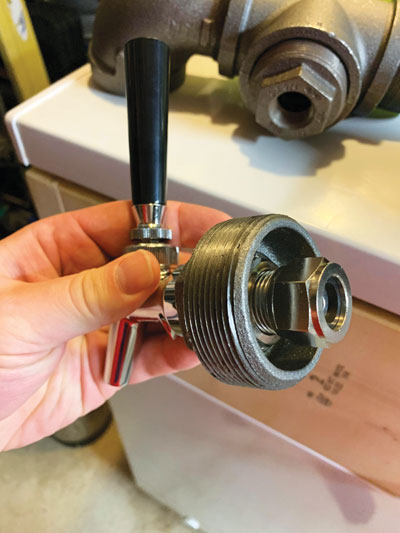
The pipe collar is 2-in. (5-cm) iron pipe. The part that interfaces to accept the beer shanks is a 2-in. (5-cm) to ¾-in. (2-cm) reducer bushing. I wiped the pipes clean and sprayed them with clear coat to protect against rust. You can use tower cooling fan kits with this much diameter, but without insulation inside the pipe you’ll likely get condensation outside the pipe. If I built it again I would go the insulation route.

As you can see in the photos, I installed LED underlighting as well. Also, I’m planning to add hydraulic lifts because the lid is HEAVY!
More photos of the build can be found at: https://bit.ly/3mTWybQ
Homebrew Drool Setup — Matt Giovanisci • Longmont, Colorado

Since 2005, I dreamt of having a state-of-the-art electric home brewery. But for most of my adult life, I lived in smaller homes with little room to brew. Fast forward 15 years, I finally saved up enough money to buy a home with an extra unfinished garage to build a dedicated brewing space. And that was the first thing I did when I moved in!
I’m a sucker for organization and precision. And because I was starting with a blank slate, I could design the perfect brewing workflow. The goal was to control every variable to brew perfect, repeatable batches and to optimize the process from start-to-finish. The first step was to insulate the garage and install a mini-split to heat and cool the space to an exact temperature. I also added a condensate hood with a 600 CFM fan to remove steam and control humidity. This allows for a consistent boil-off rate and more.
The beginning of the workflow starts on the left with two workbenches. I call this the “Preparation Station.” It’s where I build my recipes on a dedicated iPad using Brewfather software, create yeast starters with an induction cooktop and stir plate, and store all my brewing tools and supplies.
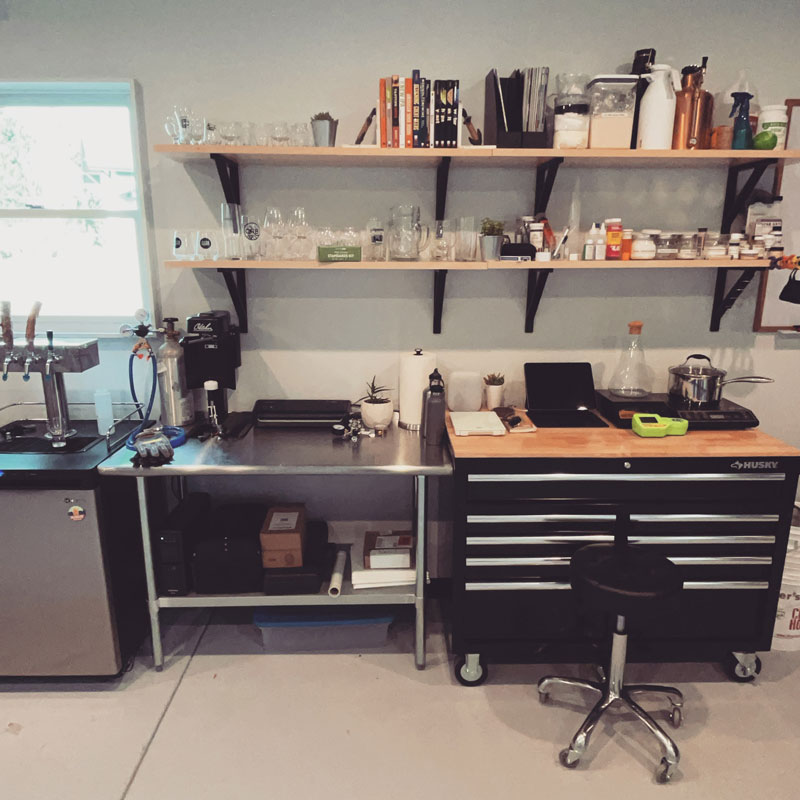
We move right to the utility sink and drain tray supplied with hot and cold water and powered by a Drainosaur. All the pipes are exposed because the walls were too thin to hide them, but it also makes it easier for long-term maintenance and potential future modifications. I installed a reverse osmosis (RO) system with a pot filler above the kettles for easy filling. With RO, I can build any water profile from scratch. I keep all my brewing salts above my workbench on the shelves.
Next is the “Wort Production” area, which includes a 3-vessel electric system with a hot liquor tank, mash/lauter tun, recirculating infusion mash system (RIMS), and boil kettle. This provides temperature precision across the board. I also added two pumps and thanks to plumbing plans published in BYO, I can move liquid using valves. I know the exact amount of losses in my system to dial in my recipes with Brewfather.
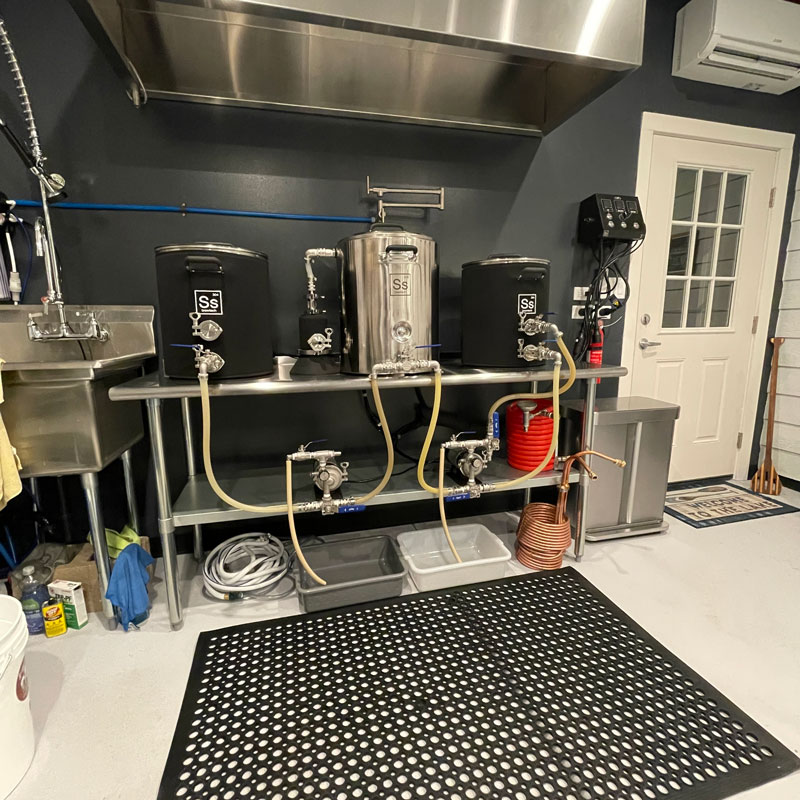
And finally, it ends with the “Fermentation Station.” This includes a few different fermenters on wheels to move under the boil kettle. It also includes a glycol chiller to control fermentation temperature.
As for the rest of the brewing space, I added lights, shelving, and a taproom complete with a temperature-controlled beer can fridge set to 39 °F (4 °C), bomber fridge set to 50 °F (10 °C) for aging, and a three-tap kegerator set to 38 °F (3 °C).

This truly is a perfect homebrewery for my process. And we find ourselves spending most of our free time just hanging out there when I’m not brewing. Even with people who don’t drink beer! To make it more inviting, I’ve added soundproofing panels to minimize echo from all the stainless steel. And added more comfortable seating. I’m always making tweaks here and there to improve its function. And will continue to find new ways to optimize my brewing process and control every variable for near-perfect batches of homebrew.

Featured in the May-June 2021
Homebrew Drool Setup — Adrian Febre • Sherman Oaks, California
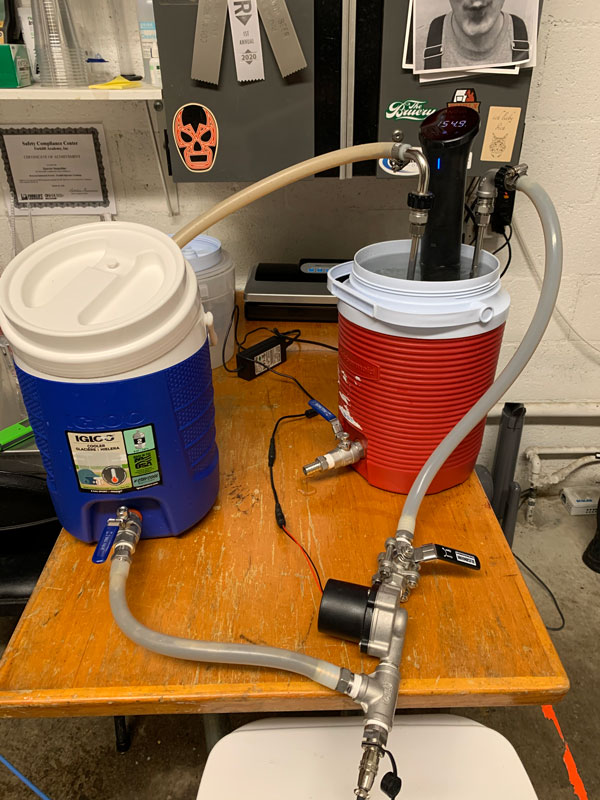
Small-batch brewing has been around for a while in part because of low-effort and low-tech homebrewing techniques. Thanks to brew-in-a-bag (BIAB) and, more recently kveik-driven fermentations, brewing a single-gallon (3.8-L) batch of beer is pretty painless and, dare I say, enjoyable. While I brewed like that for several years, at a certain point I wanted better beer and more control over the brewing process, but refused to brew big batches. So I bought a 2-gallon (7.6 L) cooler with the intention of sparging these tiny batches. The rest is probably a familiar story: The thrill of succeeding in this project begat another, which begat another, and soon enough I decided that I wanted commercial brewery-level control over my setup.
Early on, I realized that temperature control was the central, and perhaps only, Achilles’ heel of small setups. Fermentation control was an easy fix. I bought a few thermowells, picked up an Inkbird thermostat, a couple fridges, and I had control as tight as the pros. But mash temperature control proved far thornier for a few reasons. First, tiny mashes bleed a lot of heat; your post-strike mash temperature may be several degrees off your target and your mash bed may have huge internal temperature variations due to the heat bleed.
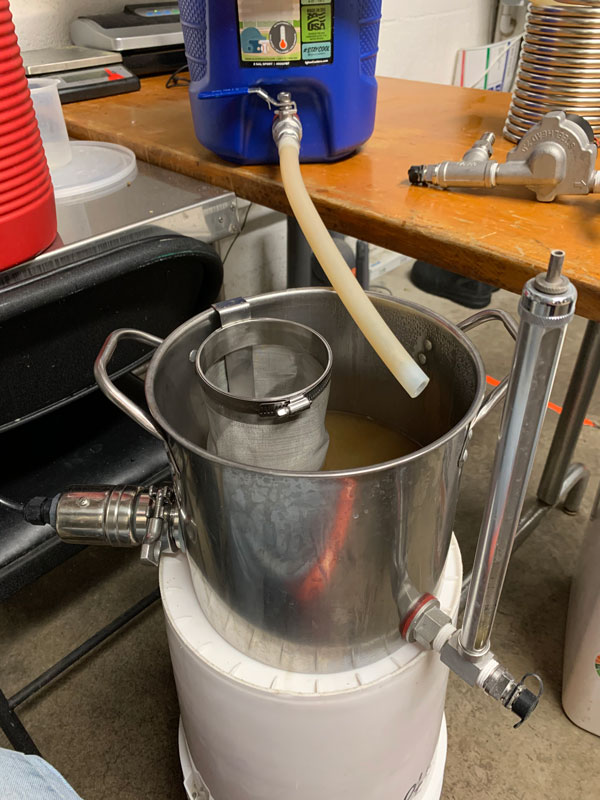
The solution, I discovered to my deep chagrin, was simple: I built a recirculating infusion mash system (RIMS) tube. This led fairly naturally to the electrification of my entire setup, since using a RIMS tube entailed designing and building an EZboil-based RIMS/kettle control box. Some time after completing what I lovingly call the “idiot box,” with the RIMS tube proving cumbersome, I decided to switch over to a heat exchange recirculating mash system (HERMS) setup, which is heated by an Anova Sous Vide Heater. Finally, the electrification of my kettle brought with it welcome upgrades: A sight gauge, and more recently, the tri-clampification of my heating element (so I could swap it into a 5-gallon/19-L setup).
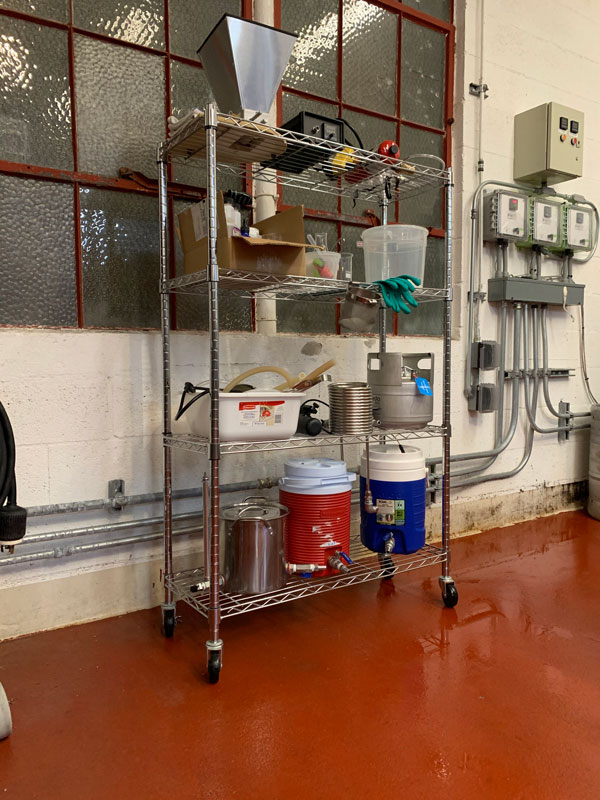
Beyond this, much of my gear may be surprisingly familiar: An oxygenation kit, 1.5-gallon (5.7-L) Torpedo kegs, a grain mill, a box of brewing chemicals, a flow-control Perlick tap set into a scrap wood manifold, etc. For fermentation I use a mini-fridge and a thermoelectric wine fridge, plus a few heat blankets and Inkbird controllers. Since my homebrewing actually occurs within a craft brewery, it comes with a big perk: Access to a way-out-of-my-budget Hanna Instruments pH meter.
So while brewing on a small-scale may at first seem like an inefficient use of time, the real barrier is that nobody sells a one-gallon (3.8-L) stainless conical, or a tricked-out kettle, or a pre-built tiny mash tun, meaning that brewing seriously requires a large tool set and free time, time which you’ll use not only building things, but scouring as many as ten or more online homebrewing stores in the pursuit of a super-specific lock nut, tri-clamp adaptor, or heating element. Though therein lies the charm of this setup: If, like me, you’d like to really understand every element of brewing control and equipment design, there exists no better, or more occasionally frustrating, master class.
Featured in the January-February 2021
Homebrew Drool Setup — Fred Loucks • Houston, Texas

My newly finished system is a 100% electric brewing system that is controlled by BCS-462. Key features include the fact that the vessels are each suspended, allowing them bowl-shaped bottoms with 2-in. (5-cm), centered, butterfly drain valves, which means it is a true clean-in-place brewhouse. Also I have built stay-in-place, hinged lids; direct ventilation port; thermowells for each vessel; and 1-in. (2.5-cm) bottom-drain outlets. Under the vessels is a stainless steel washdown tray that acts like an huge sink and has a large garbage disposal unit. All three vessels can be moved despite being hung by brackets. I’ll give a quick highlight of each of the three main vessels.

Hot Liquor Tank (HLT)

It all starts with my HLT, which has a 26-gallon capacity (98-L) and a 30-ft. (9-m) heat-exchange recirculation mash system (HERMS) coil. A low-level indicator float avoids dry-firing the electric elements (which could destroy them). Two 5500W ripple heating elements bring the strike and sparge water up to temperature. The HLT has a back hung bracket with roller bearing trolley allowing it to roll horizontally.
Mash Lauter Tun (MLT)
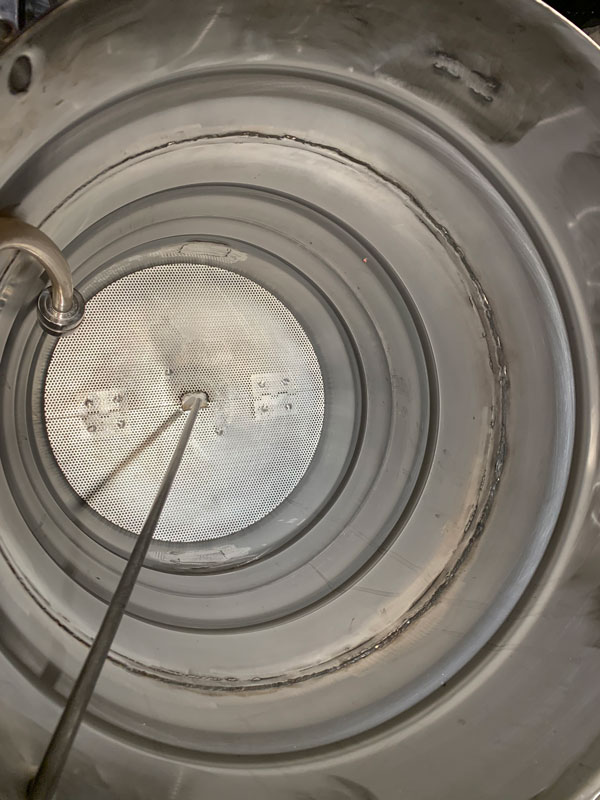
Next up is my MLT with a 20-gallon (76-L) capacity and a variable position thermowell. The sparge is set with a stainless steel float valve. It has an adjustable double ball float to manage sparge water-to-runoff rate. The MLT hangs on a bracketed pivot point, allowing it to tip forward when released.
Boil Kettle (BK)

The 20-gallon (76-L) capacity BK has a fixed position thermowell and bottom resting racking cane with a port for the mash-out. A 1-in. (2.5-cm) return line allows me to whirlpool up to 17 gallons per minute (64 L/min.). The BK has two 5500W ripple heating elements and a low-level indicator float, just like the HLT, but also sports an adjustable high-level float indicator, which helps avoid over-sparging and prevents boil-overs . . . in most cases.

Personal Design Concept Objectives
- Top priority: Simple sanitary brewing with super easy cleanup. Achieved well!
- Keep the brewer in the driver’s seat. Equip the brewer with an accurate control interface. Achieved
- Provide repeatability with built-in times, logs, and temperature control within 1°F (0.5 °C). Achieved
- Ability to remotely begin a batch and oversee progress. Achieved
- Utilize commonplace, open-source controller to not limit end user. Achieved
- Limit consumable parts/pieces and use as much hard piping as possible. Achieved
- Build it for less than $10,000. Failed
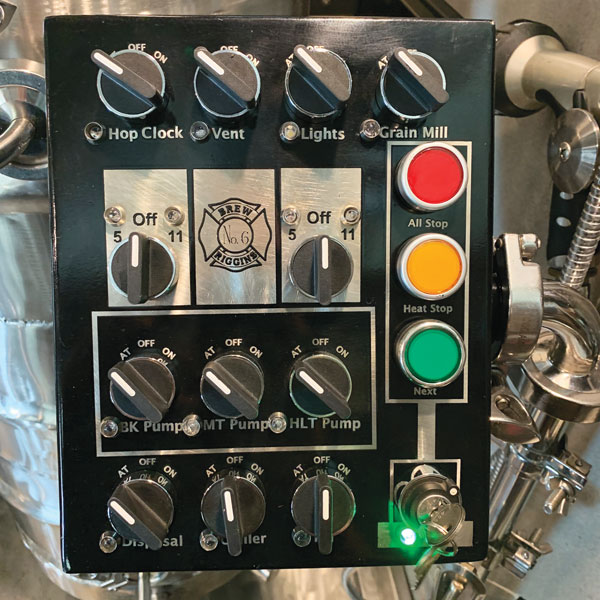
Featured in the December 2020
Homebrew Drool Setup — Paul Shüssler • Wiesbaden, Germany

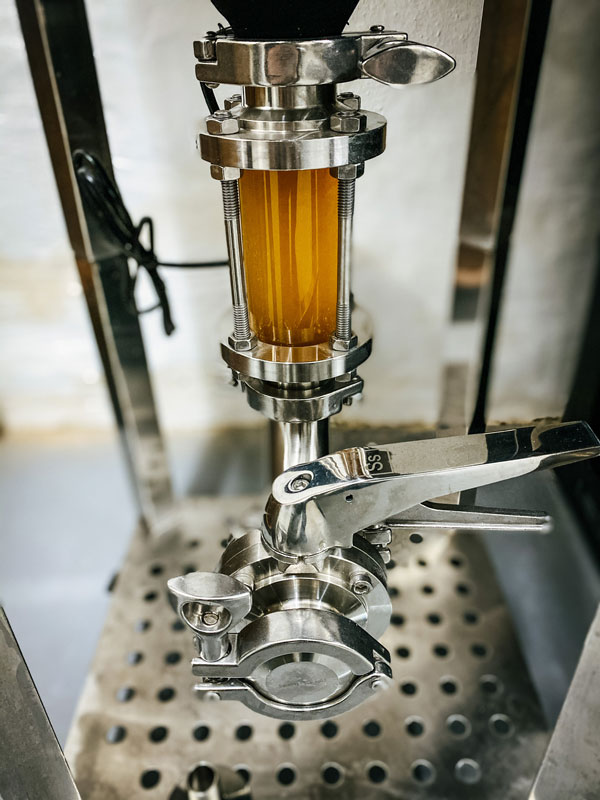
My brewing system is a custom heat exchange recirculating mash system (HERMS) planned and designed with the guidance of Craft Hardware. Recently I was finally able to break it in. So thought I’d take everyone on a virtual brew day!

Today, I’m brewing a Maibock and it begins with filling my hot liquor tank (HLT). For this recipe I needed 55 L (14.5 gal.) of water in total, including some buffer and lactic acid. I had already entered the recipe into my controller based on craftbeerpi the day before. I weighed and milled the malt. For the Maibock I used Vienna malt, Pilsner malt, and some Carahell®. After the strike water temperature was reached, 33 L (8.7 gal.) were pumped from the HLT into the mash tun. The mash temperature landed at the planned 52 °C (126 °F) and I started the recirculation.
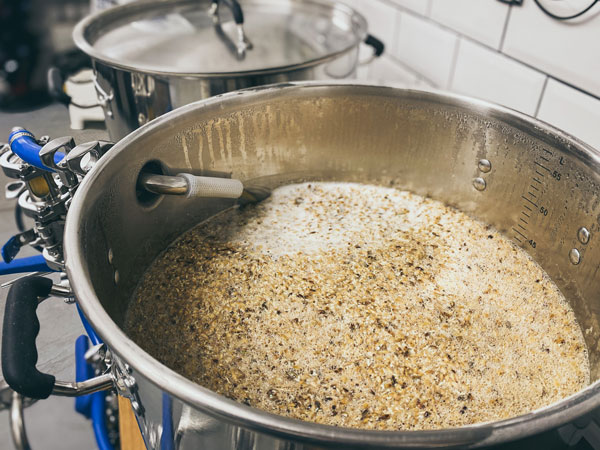
For this brew I have chosen a classic step-mashing method. After a low mash-in, I ramp the temperature up to 64 °C (147 °F), followed by a short “Narziss rest” at 67 °C (153 °F), and a final rest at 72 °C (162 °F). With a recirculating mash system the malt bed is already compacted and set at the end of the mash, so runoff to the kettle begins by flipping the valves at the pump outlet and rate is set at ~1 L/min (1 qt./min).

The remaining water in the HLT is now used as sparge water. This water is pumped through the HERMS coil inside and onto the top of the grain bed. A nice side effect: The wort is rinsed out of the heat exchanger leaving the coil clean. To keep an eye on the original gravity during lautering, a sample valve was installed between the pump outlet and the kettle’s inlet.

As soon as the heating element in the boil kettle is covered, I begin heating the wort in order to achieve a boil promptly at the end of lautering. As soon as the wort boils, the steam condenser is activated to minimize vapor creation. During the boil traditional Perle hops are used.

Next the wort is recirculated through the counterflow cooler back into the kettle’s whirlpool inlet. The wort was chilled to 78 °C (172 °F) within 3 minutes. My whirlpool hops, Pacific Crest, are added to the kettle. The wort continues to circulate without chilling water to start a proper whirlpool. I let the wort spin for 20 minutes and then, with chilling water on, pump it through the chiller again and into my Unitank. The wort temperature was now at 20 °C (68 °F). The final cooling is done by my glycol chiller.
To see my Maibock recipe check out: www.byo.com/recipe/omb-oh-my-bock

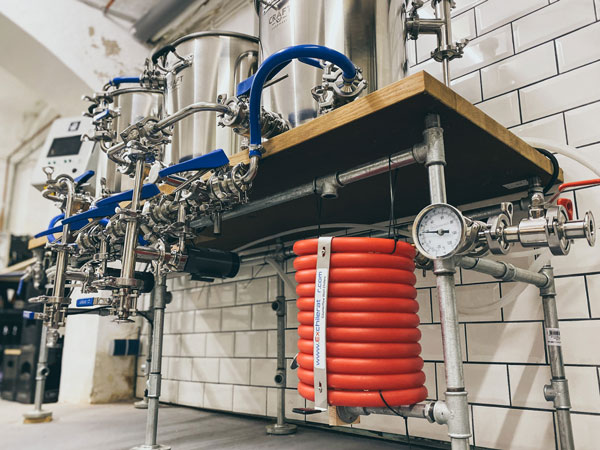
Featured in the November 2020
Homebrew Drool Setup — Doug Patterson • Pataskala, Ohio
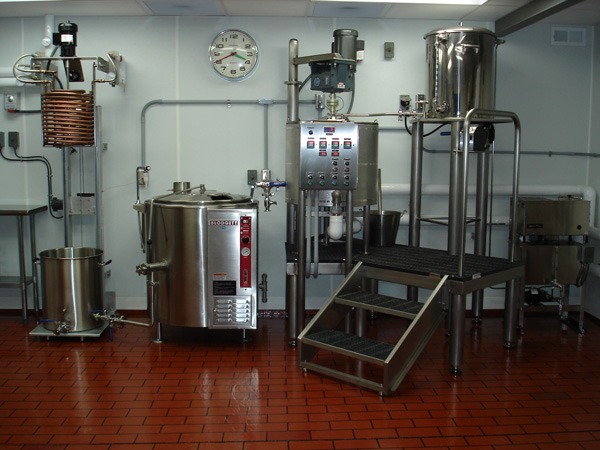
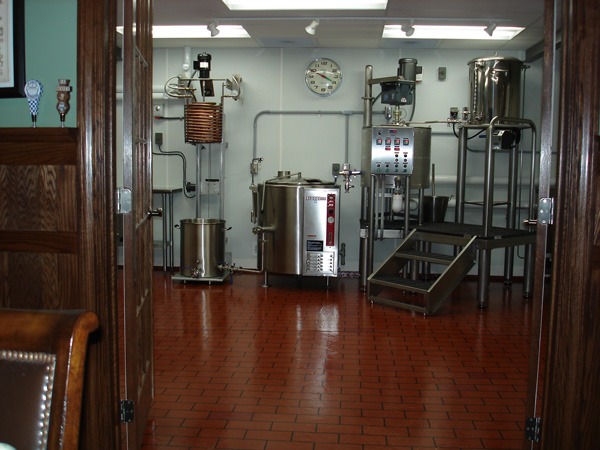
This is the third homebrewery I have constructed. Like many, I started out with 5-gallon (19-L) plastic buckets and have progressed from there. As a union pipefitter by trade, I was able to design, fabricate, and install all of the piping, support steel, electrical, lighting, controls, and specialties myself.
My 385 sq. ft. (36 m2) brewery consists of a completely gravity-fed system that yields ½ BBL per batch. My brew day starts with filling the 30-gallon (114-L) hot liquor tank with water produced from the Durastill distiller.

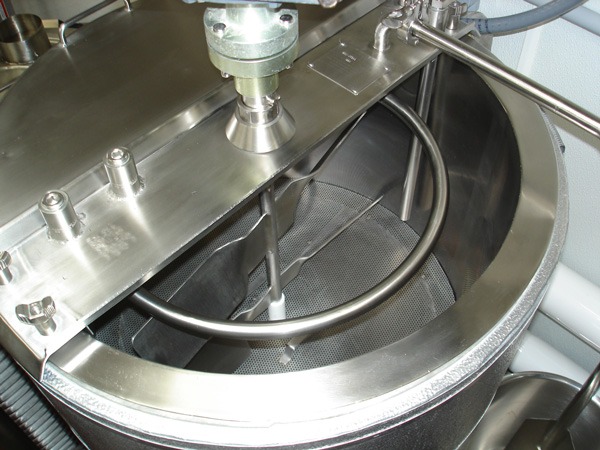
nce dosed with water additions to match the desired profile, it is heated using a Blichmann 220V BoilCoil™ and controller. Strike water is underlet into the mash tun, a 30-gallon (114-L) insulated hot water jacketed RenoTech vessel with false bottom and agitation paddle. A wall-hung 5,500 BTU Navien hot water boiler recirculates heating water. Most any step mashing profile is easily accomplished. Wort is drained into the Blodgett gas-fired steam kettle.

Post-boil wort is drained to a transfer kettle, which is hoisted vertically to encapsulate the twin immersion coils. The wort is first cooled using our
52 °F (11 °C) ground water in the outer coil. Tempered exchange water is re-used for initial equipment cleaning. When wort temperature falls to
100 °F (38 °C), chilled glycol is recirculated through the inner coil bringing the wort to final pitching temperature. The cooled wort is transferred into a 17-gallon (64-L) conical fermenter where the prepared yeast starter is pitched followed by pure O2 via diffusion stone.

The filled conical is wheeled into the 1st stage walk-in cooler. After primary fermentation the 1st stage is either reduced in temperature via modulating dampers or the conical is wheeled into the 2nd stage lager box for a second fermentation, lagering, or aging. Finished carbonated kegs are stored in the 2nd stage lager box, which is a constant 32 °F (0 °C).

My wife jokes, “If we sell this house, we’re listing it in BYO.”
Featured in the March-April 2020 issue
Homebrew Drool Setup — Patric Leuschke • Eagan, Minnesota
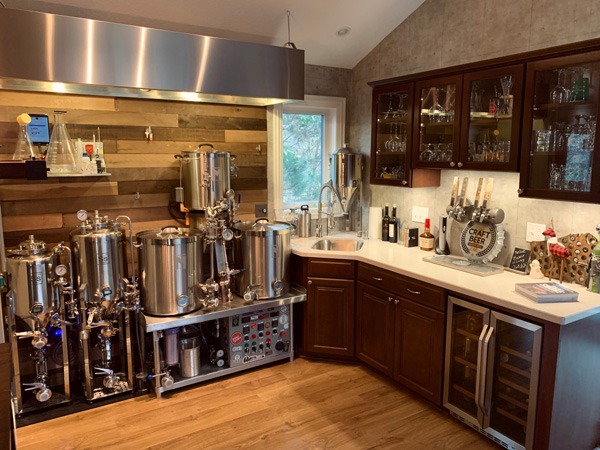
This brew space has been my pet project for the last eight years. I built the brewing rig five years ago but it wasn’t until two years ago that we built an addition on our house to really showcase the brewery. The setup is built on the standard e-HERMS (electric-heat exchange recirculated mash system) principles. I decided to go with a 3-tier, pump-driven system for space savings. For the HLT (hot liquor tank) I repurposed my original 10-gallon (38-L) MegaPot kettle. I have recirculation ports to prevent stratification around the stainless HERMS coil and the water is heated using a Blichmann BoilCoil. This HLT is sized perfectly for 13-gallon (50-L) batches but we are looking at going up to a 15-gallon (57-L) kettle to allow for triple batches. We have a 20-gallon (76-L) mash tun with a Titan false bottom that in my opinion has the best edge seal and pickup, designed for minimal waste and grain disturbance.

For recirculation we use an Ss Brewtech manifold, which does a great job creating a uniform temperature while mashing. For sparge we utilize a three-way valve connected to an Ss Brewtech sparge arm, I built a custom mount that is bolted onto the back of the kettle. This not only provides a more secure adjustable mounting solution, it also doubles as a hook in the kettle for getting the mash manifold out of the way while doughing in. The boil kettle also has a 20-gallon (76-L) capacity, utilizing another BoilCoil for heat and a secondary port for recirculation and whirlpool. On the way to the fermenter the wort passes through a custom-made plate chiller that has a bypass port to prevent clogging. After chilling we have an inline O2 system in which we use a flow meter to reintroduce oxygen. Finally, for the bulk of our fermenting we use one of two appropriately-sized Ss Uni Tanks.

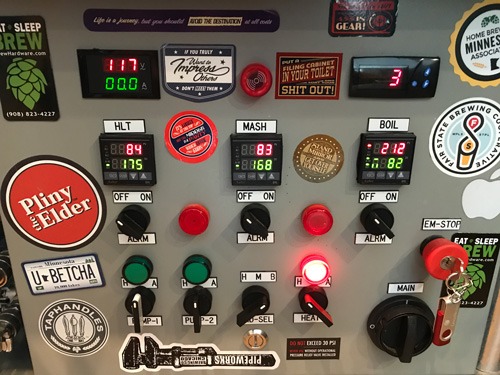
For the controller I was lucky to be able to fall back on my dad who happens to be an electrical contractor. The panel is scratch-built and has an added layer of complexity as it had to be childproof. Building out the space for the brewery opened up options that really allowed us to streamline the brewing process. We brought both hot soft water and cold RO water to a hose under the sink to make cleaning and filling the brewery a breeze.
The next challenge was brewing over a wood floor. Our solution was to plumb all brewery components to a drain manifold in the floor so we could CIP (clean-in-place) without getting the floor wet. The hood is also fully functional, it was built by Fast Hoods and connects to a 450 CFM (cubic feet per minute) fan mounted on the side of the house. All non-stainless-steel items such as the glycol chiller, keg fridge, and ingredients are forced to live in the closet adjacent to the brewery. We have videos on the build and brewing process at 8th Hour Brewing on Facebook and YouTube.
Featured in the January-February 2020 issue
Homebrew Drool Setup — Shawn Ishler • State College, Pennsylvania

About 10 years ago, a friend of mine asked if I’d be interested in brewing a batch of beer with him on a chilly January morning. Who would have known that saying yes to that one question would take me down a brewing rabbit hole that still hasn’t hit bottom?

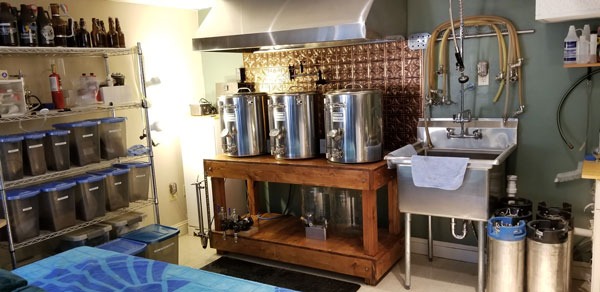
After brewing in my garage on a propane turkey fryer rig for a couple of years, I designed and built my dream brewery, Pine Grove Brew Works, which I designed on a RIMS platform with 20-gallon (76-L) Blichmann kettles capable of brewing 12-gallon (45-L) batches.
The system takes inspiration from various successful electric brewery designs along with a few creative twists of my own. My favorite feature might be the pot filler faucet mounted directly behind the system, which bypasses our water softener and allows direct filling of the hot liquor tank on brew day. Fermentation is controlled to within 1 °F (0.5 °C) in two 14-gallon (53-L) MoreBeer! heated and cooled conicals I’ve named Betty and Veronica. Beer is transferred to kegs using a closed pressure system, eliminating any exposure to oxygen. Beer is served through a keezer, with a nitro tap providing magic for English bitters and stouts.
My palate changes with the seasons, so in the spring you’ll find plenty of Munich helles, Maibock, and saison on tap. As the weather warms up, it’s New England IPA and Belgian tripel all day. As the fall and winter approach, you’ll find Baltic porter, Russian imperial stout, and Belgian dark strong ale keeping us toasty by the fire.

I tell my friends that a rig like this doesn’t necessarily make better beer, but brewing is much more consistent, temperature is perfectly controlled, and I get to brew in shorts and a t-shirt instead of a parka. (www.pinegrovebrewworks.com)
Featured in the December 2019 issue
Homebrew Drool Setup — Jesper Clemensen • Aarhus, Denmark

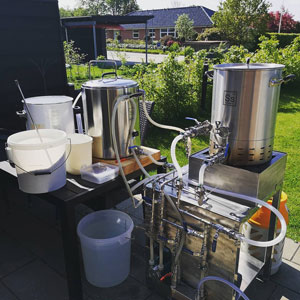
I had three goals when I started designing my new brewing system: Less hassle, small set-up, and no entangled hoses lying around. It has been a fun, challenging, and also, at times, somewhat frustrating process to build this system . . . but in a weird way isn’t that part of the fun? I am now extremely excited to see it all come to fruition and the system has been working perfectly since the first test run (which wasn’t perfect).

Personally I’m more into the professional three-kettle brewing set-ups, where you have your hot liquor tank (HLT), mash/lauter tun (MLT), and a boil kettle (BK). But since a small footprint was a must, I opted for a small brewstand with moveable HLT and MLT. Next I wanted the system to be aesthetically pleasing, but still engineered in a way that wort is easily moved from one phase in the brew to another. This is done with the help of a pump, and a series of valves and pipes that are mainly hard-plumbed.
Despite the engineering, I have tried to keep the brew process as manual as possible. I’m not much for the electronic one-pot systems, where you preset time and temperature. I like to get a good feel of my brew and the process by manually keeping track of these aspects.
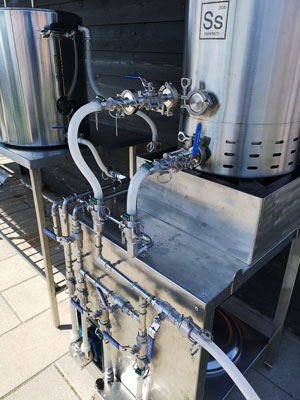
Cleanliness was another important feature in my design process, and not just aesthetically. I have kept much of the material that contacts the wort stainless steel. This allows me to easily wash down the stand, while the inner workings can withstand caustic cleaners, and the pipes can easily be rinsed with the residual cooling water.
If I had to mention three of my favorite features it would probably be that all wort remains enclosed at all times, minimizing cleaning afterwards and there are no accidental spills/splashes. Next I like that the system is designed with almost zero dead space thanks to the Ss Brewtech pots and my own engineering. Finally, I love that I can step infusion mash by simply opening a few handles. Skål!
Featured in the November 2019 issue
Homebrew Drool Setup — Mathieu Audette • Bellefeuille, Québec


I named my brewery Garage 12 Brewing because I am also a garage guy and my racing number has always been 12. As a race car driver/mechanic I found the same characteristics that guide my brewing passion are also found in my racing passion: It takes good organization, you need to be well prepared, you need to know your tools, and it takes good friends to help you reach your goals!
I have been brewing for about six years now. Like most everyone else, I started with two buckets and a kit that came out of a cardboard box. I remember how nervous I was the first time I brewed. When I first opened the bucket lid to see what was going on during the fermentation I was shocked by the look of the yeast cake floating . . . “what is that?!” I thought it was ruined. But once the beer was in the secondary it started to look better and when I drank my first bottle . . . I was hooked. It was one of my favorite beers I ever had!
After I brewed a few kits and got some confidence, a friend and I started to look to go all-grain. I found a mash tun and we tried to make a sparging setup. It wasn’t perfect but the first beer we made was a double IPA and I must say that it turned out really well. So we brewed using the same mash tun setup and my propane burner for about a year.
With my passion growing, I then got a gift from my brother-in-law to go into a beer brewing class put on by a well-known Québec brewer. I was quite curious to see he was using a brewing ‘’machine” in the class. Turns out it was a Braumeister system and one of the beautiful things was that it’s easy to transport. Impressed by the system’s performance, I ordered my own Braumeister 20L brew kit after the class.
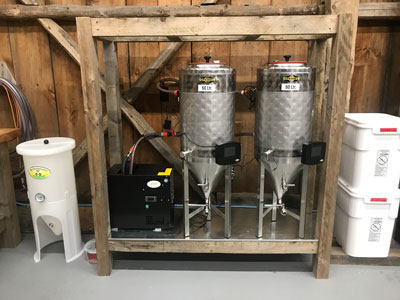
Just like many using this 20-L (5-gallon) setup, it quickly became too small so I ordered up a complete Braumeister kit with chiller, two conical fermenters with temperature control, and the bigger 50L Braumeister unit. I also now use the Braumeister pumps to transfer the wort into the fermenters so I don’t need to clean a secondary pump. I find that the risk of infection is minimal and also I can get a complete brewing day done in about five hours. My future plans are to brew bigger beer with my system and do some barrel-aged beer. This setup is limited to about 28 lbs. (13 kg) of grain so my maximum OG is about 1.065 if I use the full water volume of 55 L (14.5 gallons) and get about 48 L (12.7 gallons) of wort in the fermenter. So I need to be creative to find solutions to create bigger beers. Still the convenience of the system is a big pro.
Featured in the September 2019 issue
Homebrew Drool Setup — Jacob Burnham • Bremerton, Washington

Like many of us, I have seen videos of the, dare I call it “typical” keezer build project, whereby the lid is temporarily removed, a wooden collar fastened in its place (for mounting faucets), and then the lid is re-assembled on top of the pre-mentioned collar. The simplicity of this concept is great, and is something that serves as a perfect foundation off of which to create more specialized designs.
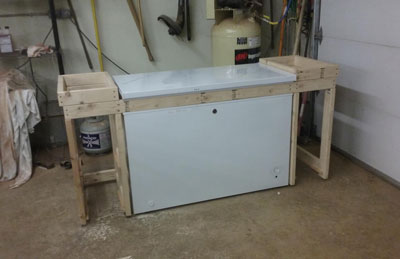
After purchasing a chest freezer (that could comfortably house 6 corny kegs) to establish dimensional constraints, I began with simple concept sketches by hand, and from there produced design drawings using Autocad drafting software. My father is a woodworker and I knew this would be right up our alley, a union of two hobbies if you will. After walking the aisles of a lumber store with various exotic wood species, I decided to use black walnut with accents of African padouk. We expanded the concept of the “collar” to create an enclosure around the freezer unit (seen in Photo 3), which would allow for fastening of vertical panel faces, side surfaces on which to set one’s drink, as well as provide space for shelving/a cabinet/a drawer. Instead of mounting the faucets to the collar, we chose to build two towers (with three faucets each) on top of the freezer lid, through which beer lines would be fed from the kegs to the faucets. The towers (seen in Photo 2) were framed, enclosed with wood, their inside surfaces covered with rigid insulation, and a removable back piece installed for tough, but manageable access to the faucet shanks.

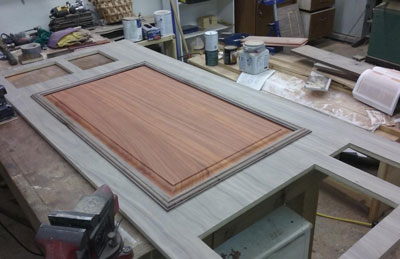
After all the fun was complete, the unenviable task of staining/finishing presented itself. For high real estate panel surfaces, black walnut veneer plywood was used (equivalent amounts of sawn lumber are super expensive), however the veneer was noticeably lighter in color than the non-veneer pieces (seen in Photo 4). Luckily we chose the perfect stain (Minwax Special Walnut 224) to match the true walnut pieces, followed by a coat of Zinsser wax-free shellac on the Padouk, and finally a coat of Minwax Helmsman spar Urethane over every surface (seen in Photo 1). Six taps/kegs, two drip trays, a CO2 tank later, and a $2,500 total equipment/materials bill later, pouring beer never looked so good!


