Get the Most from Your Yeast
What we know about yeast and how we manage fermentation has changed dramatically since the early days of brewing, and even in recent decades. Advances in microbiology have gotten us closer to the fungus among us than ever before. Now more than ever, new liquid and dry yeast strains are coming to market faster with reliable cell counts and packaging of liquid yeast continues to evolve.
These advancements are in support of the brewer’s true best friend; a single-celled microorganism that makes this beautiful hobby of homebrewing possible and the flavor profile of our beer up to us. Let us dig in deeper and look at how we can get great fermentations from our yeast every time.
By-products and a Bit of Basic Yeast Biology
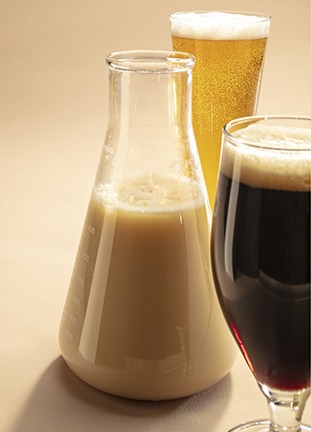
In simple terms we usually think of yeast as consuming sugar and producing ethanol and carbon dioxide (CO2). These are the two major by-products of fermentation. More specifically, yeast absorbs sugar, and enzymatically breaks these sugars down through fermentation into energy, while simultaneously producing myriad biochemical intermediates used to build cell mass. As important as ethanol and CO2 production are to brewers, yeast also produces a wide variety of esters, higher alcohols, aldehydes, sulfur-containing compounds, and phenols. These other compounds are ultimately very influential to how your beer is going to taste. For example, Belgian ales, German wheat beers, English bitters, and Bohemian Pilsners all require very different yeast strains to drive the defining character and flavor of each.
There are many different varieties of yeast, and these varieties are often associated with specific styles. Sometimes we want to enhance phenols and esters based on the beer style, and sometimes we try to keep these in check, or make a clean beer. There are yeast strains capable of providing high phenols, others that are perfectly clean fermenters, and others that fall somewhere in between.

There are many other characteristics we look for in yeast, such as how vigorous it ferments, how quickly it ferments, what sort of alcohol tolerance it has, ideal fermentation temperature, propensity to leave behind diacetyl, what sort of attenuation it has, and flocculation. Understanding these properties can be important to understand the yeast’s limits. To manage flavor though, start by following the manufacturer’s instructions and use the appropriate yeast to the style you’re brewing, and those statistics can be inconsequential as long as the flavor attributes it creates match what you’re looking for.
Ultimately the best flavors will come from treating your yeast right. The goal is keeping the yeast in the environment in which they thrive to get the best from them. Think of them as living creatures with needs, and you will find that the better you treat them the more they will love you (and your beer) back. Proper treatment creates the expected flavor profile and the right balance of yeast flavor against the other major flavor contributors like malt and hops for the style you’re trying to brew. It’s as important as any other ingredient whether it’s to create a clean profile that can showcase hops or create phenols with clove-like flavors as expected in a German weissbier. Brewing a beer that meets your expectations can be achieved by:
1. Selecting the right yeast.
2. Fermenting within the recommended temperature range.
3. Keeping the yeast healthy and fed properly.
4. Making sure the yeast quantity used is correct.
It may sound like a lot, but it’s quite achievable for anyone brewing beer. Let’s look closer at these four topics, and in combination, they will give us the best practices for getting the most out of our yeast.

Choose the Right Yeast
It can be fun to experiment with yeast, but nothing can send your beer in the wrong direction when you’re trying to brew a specific style like an odd choice of yeast. You might be tempted, maybe you have a sachet or vial tucked away in the back of your fridge for a Belgian ale, but are brewing up an American pale ale. “What could go wrong?” you think. Don’t treat yeast like a Swiss army knife. A Belgian ale strain will quickly overwhelm the hop character of a pale ale.
Yeast is typically categorized into ale and lager yeast, with some unique strains like Kölsch, kveik, and California lager pushing the boundaries of these traditional categorizations. Ales are usually top fermenting, at warmer (think room) temperature, 66–72 °F (19–22 °C). Lager yeast are bottom fermenting, at cooler (think cellar) temperature, 48–54 °F (8–12 °C). If you want to brew a hazy IPA, don’t expect any yeast to work, though many are quite capable. Brewing a Czech Pilsner? Forget about going near an ale yeast for anything authentic.
When it comes to selecting a yeast the hard work has been done for you. Yeast companies do a good job cataloging and marketing their yeast by beer style. The name may not speak specifically to the style, but it may speak to the region the style is associated with. London Ale yeast strains, as you might suspect, are great in bitters and other English styles. Then again, London Ale yeast is very popular to ferment New England IPA, so not everything can be learned from a name. Reading the recommendations and characteristics of each strain provided by the manufacturer will prove beneficial. With a general understanding of beer style characteristics, and how yeast influences their flavor, you will soon be able to understand what differentiates a “clean” strain from a “phenolic” strain.
This sort of yeast diversity keeps beer interesting and, when factoring in different malts, hops, adjuncts, beer gravities, and water profiles, allows for a nearly unlimited number of flavor combinations.
So how does one go about picking the right yeast once you’ve decided on a beer style to brew? First, find out what’s available to you online or at your local homebrew store and use the yeast lab’s website for more information. As mentioned before, there are a wide variety of statistics available, but if you’re brewing the beer “to style” using something like the Beer Judge Certification Program (BJCP) guidelines, the yeasts that are recommended to you for the style you are brewing should all be good candidates. This means you can let flavor dictate your decision. Using Chart 1, below, let’s look at an American stout as an example and compare just a few yeasts that are recommended by their yeast lab for the style.

American stout can be very roasty, somewhat bitter, and hoppy. With that in mind, we know we want something that can really focus on the malt and hops. Most of these yeasts mention being clean or neutral, which will allow these roasted and hoppy flavors to come through. What would you choose for the style? It really comes down to personal preference to hit your taste preferences.
Control Your Fermentation

Controlling the rate of fermentation through temperature control is probably the most challenging factor for many homebrewers. Homebrewers put off focusing on this mostly because it can be expensive and take up a lot of space. To really have control you will likely need some sort of cooling (refrigeration), heating directly attached to the fermenter or indirectly creating ambient heat in your fermentation space, plus a thermostat to control these devices. It can get even more expensive if you invest in a professional unit like a glycol chiller paired with a fermenter that can be connected.
One thing that can be hard to quantify is the effect of temperature fluctuation on yeast. It has been proven that this can stress the yeast and create variability in the yeast produced during fermentation.1 Is this always a bad thing? Maybe not. But temperature stability and control offer expected results, without it you can get what can sometimes be described as odd, complex, or fuzzy flavors.
So, what should you do? First and foremost, always ferment in the recommended range for the yeast. If you can do that you have won half the battle. The other half of that battle is to be able to keep the temperature stable. Some cooling systems also offer some sort of heating options. A dual thermostat can have a single temperature you can set it to, and a place to plug in both a heater (say a heating pad) and cooling device (this might be the fridge your fermenter lives in). This sort of control ultimately goes further in controlling flavor development than nearly any other part of the brewing process. Of course, low-budget options are also available. If you have a temperature-stable space in your home, fermenting there is the easiest option.
There are a few other things around temperature that will ultimately lead to a better beer. Be sure not to pitch too warm. Some yeast like it warm and will kick off fermentation quickly and create a bunch of phenols and esters you don’t want. On top of this, fermentation is exothermic — it creates heat. This alone can send the yeast out of its ideal temperature range. If you don’t have a way to control fermentation based on a thermostat that measures the temperature of the beer, you may want to check it and see if you can cool it down a few degrees further once fermentation starts. A water bath or wet towel or t-shirt draped over the fermenter can help provide this. If fermentation temperatures get too cold it can slow the yeast down or pause fermentation, but a bit of additional heat will typically get them kicked off again.
Make Sure The Yeast Have Nutrition
Just like we need to eat a well-balanced diet to stay healthy, so do yeast. If yeasts do not have a proper nutrient balance from wort, beer flavor can be negatively affected.
Luckily, barley and other malted grains are also filled with fatty and amino acids that yeast love and is quite nutritious. Compounds like nitrogen and phosphates are required for yeast to be able to build strong cell walls, absorb sugar, and reproduce. Brewers wort really is a pretty solid yeast nutrient when all-malt beers are being brewed. The one micronutrient that is often lacking in wort is zinc, and this is one reason why nutrient blends are commonly used. Nutrient blends are also very helpful when brewing with adjuncts or higher gravity worts because the amino balance can be less than ideal, resulting in sluggish fermentations that may not completely finish.
Many homebrewers skip adding nutrients, however there are a few reasons skipping a pretty simple step toward better beer isn’t a great idea. For one, things like zinc are not readily available and can really help fermentation. Two, higher gravity, stronger beers, take much longer to ferment, requiring the yeast to reproduce for a much longer time. This requires much more nutrition to complete fermentation. Another reason is that healthy yeast can complete fermentation faster, which means less time in the fermenter, less generations of yeast that can mutate or grow weak, and less time worrying about temperature control. Also, if you are brewing with a lot of unmalted adjuncts such as corn, rice, or just plain sugar, yeast nutrition may be lacking from just your grain bill and nutrition should be considered.
There are many good yeast nutrient blends out there, and most include similar ingredients. Something like diammonium phosphate is a common yeast nutrient either on its own or in a blend. It is a good source of nitrogen for yeast, which helps yeast metabolize and multiply. Most blends contain zinc and other trace minerals. Without something like zinc, yeast can end up working much slower, as it helps with synthesis and absorption of sugars.
In general the nutrition provided by yeast nutrients available to the homebrewer are to help the yeast build healthier bodies (cell walls), help them absorb sugar, process that sugar, and reproduce. If any of these is compromised the fermentation process can fall apart. Sometimes that just looks like a sluggish fermentation, other times it means a completely stuck fermentation. Should you ever need to restart or need help finishing a fermentation, pitching both new yeast and nutrients will be more effective than pitching yeast alone.
Yeast Need Oxygen (Initially)
Another major consideration in keeping yeast healthy is oxygenation. Multiplying yeast need oxygen to synthesize sterols and unsaturated fatty acid because these compounds are part of cell membranes. Yeast initially need to grow and reproduce before fermentation actually occurs. Without oxygen there may be a long lag time in the start of your fermentation. This lag can affect the flavor by creating excessive esters (might be good in some styles), and can also contribute to whether fermentation completes or not. If you don’t have the means to add pure oxygen when using liquid yeast, brewers can add oxygen to wort through aeration, which is simply an atmospheric air addition as opposed to pure oxygen from a bottle.
Note that dried yeasts are propagated such that the cells are rich in membrane building blocks and glycogen. For this reason, dried yeasts do not require oxygen from wort and no aeration step is required. Some brewers feel unsure about skipping this step and it’s no problem to pitch dried yeast into aerated wort.
Air is 21% oxygen, and an aeration system consisting of an inline air filter, tubing, gas diffusion stone, and pump can be effective for getting oxygen into beer. The cooler the wort the easier it is to get oxygen to dissolve in the solution.
Other methods include simply agitating or shaking your fermenter. Splashing cooled wort while you transfer into your fermenter works as well. Anything you can do to provide the yeast a bit more oxygen during this very critical first stage of fermentation (the “lag phase”) will only help you get the flavor profile and fast fermentation you’re after.
The Importance of Pitch Rate
We may not use the metric system in the U.S. as our primary unit of measurement, but one of the best ways to think about pitching dry yeast is by making sure you pitch between 0.5 and 1 gram per liter. For liquid yeast different manufacturers have different cell counts (cells/mL), which are listed on the package or are available from the company. For harvested yeast, 10 mL of a thick slurry per liter works well (so a 5-gallon/19-L batch would require about 190 mL of thick slurry from a previous batch). These guidelines can be doubled for lagers and high-gravity ales (over 1.065), and slightly less for low-gravity ales (under 1.040). It’s always a good idea to follow the supplier’s instructions when choosing how much yeast to pitch. Under-pitching, and to a lesser extent over-pitching, can affect the flavor of your beer by putting a strain on the yeast.
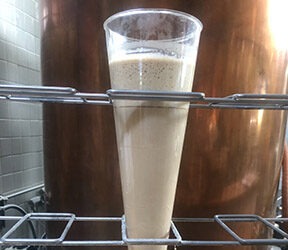
Now put some of what we’ve talked about to work with my Wheat Beer Two Ways recipe example below that you can split into two fermenters to really learn more about yeast strains.
Reference:
1 White, Chris, and Zainasheff, Jamil. Yeast: The Practical Guide to Beer Fermentation. Brewers Publications, 2010.
Wheat Beer Two Ways – American Wheat Beer & German Weissbier
(6 gallons/23 L, all-grain)
OG = 1.051 FG = 1.011–1.1014
IBU = 15 SRM = 4 ABV = 5.3%
You’ll be brewing one batch but need two fermenters as you’ll be pitching two different yeasts. The American wheat will use an American ale yeast like SafAle US-05, where the weissbier will require a German wheat strain like Mangrove Jack’s M20.
Ingredients
5.5 lbs. (2.5 kg) Pilsner malt
7 lbs. (3.2 kg) light wheat malt
4 oz. (113 grams) rice hulls (optional, but recommended)
3.5 AAU Perle hops (30 min.) (0.5 oz./14 g at 7% alpha acids)
1 oz. (28 g) Cascade hops (0 min.)
1 tsp. yeast nutrient (5 min.)
Clean American ale strain like SafAle US-05 yeast
Banana/clove weiss strain like Mangrove Jack’s M20 yeast
6 oz. corn sugar (3 oz. per fermenter, if priming)
Step by Step
Mill the grains and dough-in, targeting a mash of around 1.5 quarts of water per pound of grain (3.1 L/kg) and a temperature of 153 °F (68 °C). Hold the mash at 153 °F (68 °C) for 60 minutes. Sparge based on your system, but with enough water to yield a volume of 6 gallons (23 L) of post-boil wort, following a 30-minute boil.
Bring to a boil and add the hops and yeast nutrient as indicated. After the boil, add the Cascade hops and give the wort a long stir. Let settle for 10 minutes then chill the wort to 70 °F (21 °C) and transfer the wort evenly distributed between two sanitized 5-gallon (19-L) fermenters.
Pitch a full package of yeast into each fermenter and ferment both at 70 °F (21 °C) until activity has ceased. The fermenters may finish at different gravities. If bottling, dissolve priming sugar in ¾ cup water and add evenly to both fermenters just prior to bottling for natural carbonation. If force carbonating in a keg, target 2.5 volumes CO2.
Extract option:
The recipe can be brewed with just extract quite easily, completely skipping the mash. Replace the Pilsner and wheat malts with 7 lbs. (3.2 kg) of Bavarian wheat dried malt extract (DME). Add 3.5 lbs. (1.6 kg) of DME to a kettle filled with 3 gallons (11.5 L) of warm water. Bring to a boil adding hops and nutrient as per the schedule. Just before the end of the boil stir in an additional 3.5 lbs. (1.6 kg) of DME along with the Cascade hops. Stir to create a whirlpool and let settle for 10 minutes. Cool, and evenly divide wort into two separate 5-gallon (19-L) fermenters. Top up fermenters with water so both contain 3 gallons (11.5 L) wort. Continue to ferment and carbonate based on the all-grain instructions.
Notes:
You’ll notice the German weissbier style has little to no hop character, with almost all of the flavors being driven by the yeast esters and phenols, combined with some wheat malt character. You may get little to no hop aroma, which will be obstructed by the yeast.
With the American wheat style, you’ll notice more hop aroma, more distinctive grain-derived wheat flavors, possibly even a bit bready, and a much cleaner finish with few phenols and esters.
You can run similar tests and change other variables. Using one strain of yeast, pitch into two fermenters and ferment one at the high end of its fermentation range, and one at the low end. These types of experiments will improve your understanding of how yeast and fermentation environment variables affect beer flavors.