Hop Shelf Life, Keg-Conditioning Beer and Planning a Nano’s Cellar
Q
I often find myself buying hops by the pound . . . of last year’s crop. I find these hops still to have plenty of aroma and character and often can find them discounted. I vacuum seal my hops and will use for another year, sometimes two. Is there a reason I should be buying the new crops or are last year’s crops “good nuff” in your opinion? Also, how long can properly stored hops remain fairly fresh?
Liz Park
Boston, Massachusetts
A
This is a great question and brings up several things that need to be considered because hops do age when stored, and using hops that are past their prime for brewing is not the best plan for brewing great beer. Let’s start with when hops are harvested and what the date on the package really means. Northern hemisphere hops are generally harvested in the month of September and Southern Hemisphere hops are generally harvested in March. When hops are harvested, they are quickly kiln-dried, baled, and put into storage. Most hop processors these days store hops cold to slow the aging process. Some brewers use these whole, compressed cones, but most use pelletized hops in the brewing process.
Hop processors typically want to process the current year’s crop while the weather is cool, meaning that Northern Hemisphere hops harvested in 2018, for example, will all be pelletized by about March of 2019. In an effort of continual improvement, many newer processing plants are designed to shorten the pelletizing window to 3 months. Suffice to say, the freshest pellets available from the Northern Hemisphere start to debut in the early part of the year following harvest, and the freshest pellets from the Southern Hemisphere come into the market in late summer to early fall of the year they are harvested. This can be a little confusing, and it may seem like the freshest hops are “old” because the harvest date for Northern Hemisphere hops are always at least one year behind the brewing date.
What happens during hop processing is critical for hop freshness. Bales of cones are unpacked, put through a machine called a bale breaker, milled into a coarse grist, blended for consistency, pelletized into little cylinders, cooled, and then packaged into a bag. The goal in this process is to minimize heat during the pelletizing process and to pack the little pellets in a bag containing as little air as possible. Some processors use vacuum sealers and others use bags that are flushed with nitrogen gas. Barrier films, made using metal foils, are used for the bags because oxygen will gradually migrate from the atmosphere into the bag if the packaging film has no oxygen barrier properties. If you can see the hops in the bags on the shelves or in your home freezer, you are not looking at a barrier film. Look for hops packaged in foil bags if you want maximum shelf life.
One thing to note about packaging is how the package feels when massaged. At one time, nearly all pellets were vacuum packed and the packages were very hard, and a soft bag was a sign of a leaking seal or a punctured bag. However, vacuum-packed bags are more prone to damage because their firmness makes them relatively easy to puncture. Nitrogen-flushed bags are soft to the touch and are not as easy to damage. The point is that soft bags have become the norm.
All of this discussion is building up to the elephant in the room; shelf life. Hop processing facilities are geared to produce pellets for commercial breweries and most of this production goes into 5-kg, 10-kg, and 20-kg (11-lb., 22-lb., and 44-lb.) bags. Using the best modern processing methods and barrier-film bags, hops can be stored for 3–5 years without substantial losses in brewing value. But most of the hops sold to the homebrewing market have either been repackaged into smaller bags, often times with no barrier properties, or they have been packed into smaller bags at the processing plants using fillers that do not have all the bells and whistles of the high-capacity lines. In other words, hops sold into the homebrewing market are best used before the next crop of hops become available. And if you have the choice between buying repackaged hops that are sold in clear bags or hops packed by the processor in foil bags, opt for the latter.
Homebrewing is a hobby, and most homebrewers strive to brew the best beers possible. Most of us can buy beer for less than it costs to brew at home when all costs, including the value of free time, are considered. Buying last year’s crop from the value aisle and repackaging using a home vacuum sealer seems like a thrifty option, but may not be the best place to reduce the cost of brewing. Thanks for the great question and hoppy brewing!
Q
I was wondering how long I should be leaving my beer in the keg before I drink it. I know some people force carbonate and drink within 24 hours but surely, they must be drinking green beer. When bottling, I usually allow two weeks in the fermenter then at least two weeks in the bottle before tasting. Should the same rule apply to kegging and would the beer condition better if the keg was left at cellar temperature rather than being kept in the fridge?
Anthony Hoskins
Stavanger, Norway
A
Anthony, the short answer to your question is that it depends on when the beer was filled into your keg. In order to answer this question, a bit of background is required, so hang tight for a bit of review. There are many ways to go about managing the fermentation and aging process, but all methods share the same basic phases. Primary fermentation is generally quick, a bit raucous, especially when fermenting ales, and aromatic. This is when wort gravity falls from its original value at the onset of fermentation to a few ticks above the final gravity, yeast cells multiply and sometimes flow out of the fermenter along with carbon dioxide gas, hop and yeast aromatics, and bits of cold-break trub, and fermentation flavor compounds are synthesized. The young, sometimes rough, beer present in the fermenter at the end of primary is “green beer.”
Prior to the ubiquitous use of the uni-tank process, green beer was racked into some sort of vessel for aging. Lager brewers typically would rack beer from the primary into a lagering vessel for flavor maturation, clarification, and carbonation. One of the most reliable methods to accomplish these various goals was to blend green beer from primary with a bit of actively fermenting beer, so-called kräusen named after the high kräusen stage of fermentation, and allowing this mixture to age in a closed vessel for a period of weeks to months. Kräusening is still used today to produce traditionally brewed lagers by brewers small and large.
Traditional ale brewers did not kräusen their cask-conditioned ales, but the process is similar in many respects. Green ale, priming sugar, finings, and oftentimes hops, go into casks where the mixture rests and matures. During a 1–2 week rest, the cask comes into condition as the priming sugar is consumed by yeast, yeast and haze material settle to the bottom of the cask with the aid of finings, and hop aromas from the dry hop addition infuse into the maturing ale.
At the end of both of these aging periods, the result was beer in a ready-to-drink state. Although these traditional methods are still used, a substantial volume of beer these days is fermented and aged in a single vessel, and the processes used for ale and lager brewing are often indistinguishable aside from the yeast strains employed for fermentation and the times and temperatures used for the process. This means that beer can be fermented, carbonated, and aged in a single vessel, then transferred to a keg or bottle for easy storage and transport to the point of use. Not all brewers carbonate their beers in the fermenter, and a common variation on the uni-tank process is to move beer from the fermenter into a second vessel where the beer can quickly be carbonated before packing.
The point is that a quick carbonation process in a keg followed by immediate consumption is not necessarily synonymous with drinking green beer. If 3-day-old ale was racked into a keg before final gravity were achieved and before the beer had a proper diacetyl rest, immediately chilled, forced carbonated, and put on draft, then a pint of green beer would indeed be served; the missing portion of this abbreviated brewing process is beer maturation.
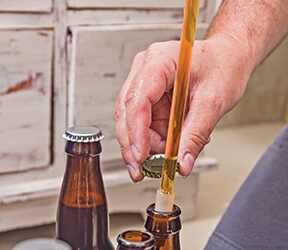
The old-school homebrewing norm is to ferment, age, and bottle with priming sugars for bottle conditioning. This method is greatly aided when flocculent yeast with good settling properties are used, and the maturation period can be conducted in the bottle provided sufficient aging times, healthy yeast, and moderate temperatures. Bottle conditioning is really just a variant of kräusening and cask conditioning. And of course, if your bottle is a bit larger in size, made of stainless steel, and referred to as a keg, this same process is named keg-conditioning.
If the keg in question, the one you just filled and are contemplating the merits of aging for a week or two versus tapping today, contains beer that was fermented to dryness, given a proper diacetyl rest, cooled to near 32 °F/0 °C and held for several days to improve beer clarity (or not if you are not after clear beer), and carbonated to the desired level, it can be consumed whenever. But if the keg in question was filled with green beer as soon as primary fermentation finished and is being held at moderate temperatures to allow for in-package maturation, then it should be treated like your bottle-conditioned beers.
Q
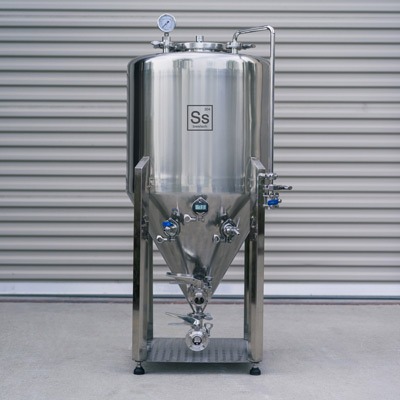
I am planning to open an all-organic nano brewery, Mutt Lab Brewing. The system I’m envisioning is economical, relatively simple and portable. I’m envisioning brewing 6 BBLs of wort, splitting into two different 3-BBL batches of wort, and fermenting in non-jacketed, portable 3-BBL uni-tanks. I’ll roll these into the cool box for fermentation, then to the cold box for conditioning and serving.
The divided cold/cool box idea you introduced in the January-February 2018 issue’s “Nanobrewing” column seems incredibly flexible and very appealing to me. I want to ask you about fermenting in non-jacketed 3-BBL tanks (without coils) ambiently in the cool box. I’m really hoping the small volume allows for sufficient temperature regulation but I just don’t know. Could you lend me some of your insight on this?
John Hoover
Mutt Lab Brewing
San Gabriel, California
A

A fairly extreme example of large, non-jacketed fermenters are the shallow, 100-BBL, open fermentation vessels used by Anchor Brewing for their Steam Beer fermentation. The wort for this beer is cooled below the maximum fermentation temperature and the fermentation allowed to rise in temperature over time. The peak fermentation temperature for beer fermented in non-jacketed vessels is a function of initial wort temperature, vessel shape, cellar air temperature, wort original gravity, and yeast strain. Although this method takes some time to dial in the process, reproducibility among successive fermentations can be achieved once a procedure is established.
There are a few key things to consider when using non-jacketed fermenters because you are giving up individual control over your fermentations. Here are a few pointers that I hope will be helpful for your nanobrewery:
Tip #1: Set your cellar temperature around the yeast you are using for the beer(s) currently being fermented. For example, if the goal is to keep the peak temperature less than 75 °F/24 °C, your cellar temperature should be set to a cooler temperature, probably around 68 °F/20 °C, and the wort should be cooled to about 61 °F/16 °C to achieve the fermentation temperature curve that works for the style(s) of beer being brewed. Beer styles like saisons benefit from warmer peak fermentation temperatures than do Scottish ales, so plan your brews accordingly and change the cellar temperature as required.
Tip #2: Buy a hygienic temperature probe and measure the temperature at different points within your fermenter. Uni-tank fermenters have short thermowells with an insertion length into the tank ranging from 6-12 inches, so most brewers really have no idea how warm their fermentations become during peak activity. This data gap and general lack of appreciation about the limitations of short thermowells, leads many brewers who use uni-tanks to believe that they have very consistent temperatures during fermentation; the fact is that there are temperature gradients within tanks from top to bottom and from the perimeter to the center. This means that using a probe to get a feel for what is happening within your tanks may lead you to believe your fermentation temperatures are too variable because much of the data about fermentation temperature is limited to where probes in uni-tanks are located. Judge the outcome of your ferments by time, attenuation, and beer flavor before getting too caught up in comparing your brews to textbook graphs.
Tip #3: Yeast management is important in all types of fermenters, but is especially important when fermenting in non-jacketed vessels. Minimizing flavors associated with yeast autolysis by periodically removing settled yeast from cone bottoms is a technique that definitely should be considered when using tanks without cooling. Yeast skimming is another method that could benefit these fermentations, especially when using top-cropping ale strains in open fermenters.
Tip #4: Don’t force this technique on all beer styles. Beers fermented in non-jacketed vessels are likely to have different ester profiles than beers fermented in temperature-controlled tanks. So enjoy the cost savings of this method by knowing when to back off of certain styles. And you may find that some styles simply don’t work well with this method.
Tip #5: Design beers around your brewery and let people know what you are doing. There is a marketing story about this method that may resonate with your pro-organic consumers; all beer was fermented in non-jacketed fermenters prior to modern times and this method has a throw-back feel to it. In an increasingly crowded market space, this sort of differentiation is terrific when the method adds its own notes to the beer. Own it and market it!
Have you got a question or are you looking for advice in your homebrewery or nanobrewery? Send an email to [email protected] and maybe it will appear in the next issue of BYO.


