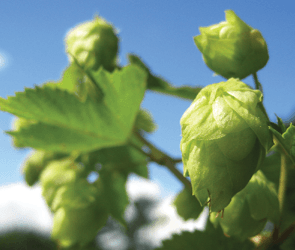
Hopping Help for Extract Brewers
 All forms of homebrewing – whether all-grain, partial mash or extract – share many similarities. However, each it has its own set of challenges as well. One of the biggest complaints of beginning extract brewers is that their beers do not turn out hoppy enough. Many homebrewers became interested in homebrewing after tasting hoppy pale ales or IPAs. However, their attempts to replicate these hoppy beers on their stovetop often end in disappointment. Stovetop extract and partial mash brewers can, however, make bitter beers if they understand a few facts about hops and bitterness.
Limits to Bitterness
Alpha acids are compounds in hops that, upon boiling, lend bitterness to beer. When you buy hops, their strength (measured in the percentage of alpha acids) should be given on the package. In the boil, alpha acids are extracted from the hops and the heat of the boil alters their chemical conformation (isomerizes them). These isomerized alpha acids are primarily what adds bitterness to beer, although similar compounds called beta acids also play a role. The amount of bitterness in extract beer is primarily limited by two factors. The first is the inherent solubility limit of bittering compounds in wort – in short, there is only so much bitterness you can achieve by boiling hops.Estimates of maximum hop bitterness range from 100-120 International Bittering Units (IBUs). Above this level, adding more hops in the boil does not result in more bitter beer. However, more bitterness could theoretically be obtained by adding hop extracts.
The solubility of (isomerized) alpha acids also varies with wort density – the denser the wort, the less alpha acids will dissolve into it. For example, if you boiled 2.5 gallons of wort at 1.048 and 2.5 gallons of wort at 1.096, and added the same amount of hops to both brewpots, the weaker wort would yield a more bitter beer. Given that most stovetop brewers boil a concentrated wort, wort density (measured by most homebrewers as specific gravity) frequently limits the amount of bitterness in their beers.
The second variable influencing bitterness in extract beers is the dilution factor. When stovetop brewers are done boiling their wort, they dilute it with water in their fermenter. The water dilutes not only the sugars in the wort (lowering the specific gravity to its target), but the alpha acids as well. So, if you want to brew 5 gallons (19 L) of beer with 30 IBUs and your post-boil volume is 2.5 gallons (9.5 L), your boiled wort will need to measure 60 IBUs.
When you combine boiling a high gravity wort with a sizeable dilution – as commonly instructed in many homebrew recipes – you are severely limiting the amount of bitterness in your beer. There are, however, a number of ways to compensate for – or eliminate – these problems.
The Best Solution
The best solution to increasing the amount of hop bitterness in a stovetop beer is to boil a larger volume of wort. With regards to hopping, there are two benefits to doing this:
First, with a larger volume, you add less dilution water – and consequently experience less dilution of the bittering compounds. (The best case scenario would be to boil your full wort, eliminating the need for any dilution water.) Secondly, boiling the extract in more water results in a “weaker” wort. With a lower-density wort, you extract more bitterness from your hops. Other factors, such as boil vigor and if the hops are bagged or not also influence hop bitterness, but not to the degree that wort volume does.
If your limitation to boiling a larger volume is brewpot size, there are a couple options to consider. As you boil, the volume of your wort decreases as water evaporates. If you are already dealing with a small amount of wort, you should consider topping up with boiling water as you boil. Keep a smaller pot of boiling water next to your brewpot and add water to the wort to replace any water lost to evaporation every 10 minutes or so.
Two better options are to boil your wort in more than one pot, thus boiling a larger volume, or make your wort in stages – for example by splitting your wort preparation into two separate boils. If you boil in multiple pots, spread the hops amongst the pots evenly, taking into consideration the size of the pots.
One method of splitting the boil into two pots is the Texas Two-Step. In this method, you boil half of your wort – made with half of your grains, extract and hops – on the first brewday and pitch your yeast to 2.5 gallons of chilled wort. Sixteen to twenty four hours later, you boil the second half of your wort, with the second half of your hops, chill it and add it to the fermeting wort. The primary advantages is that you boil all of your wort and thus can get as much bitterness into your beer as any all-grain brewer could. Minor advantages include not having to make a yeast starter, the ability to make very light colored beers and not needing a wort chiller for wort chilling. (It’s fairly easy to chill 2.5 gallons of wort in your sink.) The big disadvantage is that you need to schedule time two days in a row for brewing. (However, if you usually make yeast starters for your beer, the “extra” time required to do the Two-Step is really fairly small.)
Boiling a larger volume of wort has other benefits as well, most notably limiting the amount of wort darkening that occurs during the boil. The only drawbacks to boiling a larger wort volume are that you need to cool more wort (and you have less dilution water to help you) and you may have trouble maintaining a good rolling boil.
It’s fairly easy to cool up to 2.5 gallons (9.5 L) of wort in a sink. Just put the lid on your brewpot after the boil and place the pot in a sink of cold water. Change the water several times, then add ice when the side of the pot feels neither hot nor cold (i.e. when it’s around body temperature). A bathtub can be a convenient water bath for holding multiple pots.
If you’re boiling 3 gallons (11 L) or more, you’ll probably want to invest in a copper immersion chiller (about $35 at most homebrew shops.)
If you buy a larger brewpot, but your stove can’t bring the full volume to a rolling boil, experiment with the placement of the lid on the pot. Although you don’t want to boil wort in a closed pot, leaving the lid mostly on can help your boil vigor and still provide an outlet for steam. If you still can’t bring the full volume to a rolling boil, reduce the wort volume to the point that a rolling boil is possible.
Better Late than Early
If your stove can’t bring the full volume of wort to a rolling boil, you still have options to help with your bittering. One practice is adding some of your malt extract late in the boil. The basic idea is to boil your wort, made up of the “grain tea” from your steeping grains (or wort from partial mashing) and half or less of your malt extract, for the full boil time. For the last 15 minutes of the boil, the remaining malt extract can be stirred in. (Alternately, the “late extract” can be added at the very end of the boil, then left to steep for 15 minutes before you begin to chill your wort.) Brewery-grade malt extract has already been boiled, so you only need to heat it enough to sanitize it. Adding half (or more) of your extract late in the boil means you are boiling your hops at a lower gravity. (If you’re making 5 gallons (19 L) of beer, adding half of the total fermentables at the beginning of the boil, and yielding 2.5 gallons at the end of the boil, you are boiling your hops at the wort density they would encounter with a full wort boil. Many BYO recipes are formulated this way.) Another benefit of this procedure is your wort will not darken as much during the boil, allowing you to brew lighter-colored brews than “regular” extract beers.
Estimating Bitterness
Of course, it’s been known for a long time that boiling a larger volume of wort leads to better hop utilization – but how big is the effect? To get some idea, see the table on page XX. The table shows the maximum level of bitterness (in IBUs) you can achieve in an extract wort, given your wort volume at the end of the boil.
Estimates for maximum IBUs in both extract late beers and “standard method” beers are given. For the extract late beers, it is assumed that you boil your wort (whatever its volume) with a boil gravity of less than SG 1.050, then add the remainder of your malt extract at the end of the boil. At that boiling gravity, the wort could contain up to 100 IBUs. The maximum IBUs achievable for 5 gallons (19 L) would then depend only on how much you diluted the wort.
For example, lets say you boiled 3 gallons (11 L) of wort down to 2.5 gallons (9.5 L). If the boil gravity was 1.050 or less, and you added enough hops, you should end up with 2.5 gallons (9.5 L) of wort at 100 IBUs. After dilution, you would have 5 gallons (19 L) of wort at 50 IBUs.
The values in the standard method column are calculated in a similar manner, but also figuring in that the boil gravity will be higher at smaller wort volumes. It’s important to note that the values in the table are estimates based on the calculations I just described; they “make sense” – and mesh with my brewing experience – but they have not been experimentally verified. Also, note that the table applies to moderate-gravity beers (around OG 1.048); for bigger beers the values would be lower as the higher gravities would result in lower hop utilization.
Style Follows Size
So what do the numbers mean? Essentially, they mean that the volume of wort you boil determines the styles of beer you can brew successfully. For example, if you are following the “standard” extract instructions of boiling all your malt extract in 1.5 gallons (5.7 L) of water, then diluting to 5 gallons (19 L) after the boil, you can only get about 17 IBUs of bitterness in your beer. With this limitation, your choice of possible beer styles isn’t very wide. Two good candidates for this method are British mild ales or Scottish 60-shilling ales. Both of these styles are lightly hopped (target IBUs less than 20), low gravity (original gravity less than 1.040) ales and are dark enough (SRM values of 20-30 are fine) that moderate amounts of wort caramelization won’t detract from the beer’s look.
By increasing the amount of wort you boil to 2.5 gallons (9.5 L) and switching to the extract late method, you can brew beers with up to 50 IBUs. This will allow you to brew almost any classic beer style, including most pale ales, porters and stouts.
To brew the newer, hoppier styles of American ales – such as American pale ales, ambers, IPAs and double IPAs – you will need to boil at least 3.5 gallons (13 L) of wort.
Other Considerations
There are a few other ways to boost the amount of hop bitterness, or the perception of bitterness, in a beer.
• Extract brewers should add their hops loose in kettle. Hop bags are convenient, but they limit the degree of hop utilization.
• Adding some gypsum in the boil – up to 2 tsp. per 5 gallons (19 L) in soft or distilled water – accentuates hop bitterness. Likewise, adding hop aroma by dry hopping increases the perception of hop bitterness slightly. Use up to 2 oz. (57 g) of dry hops per 5 gallons (19 L).
• Finally, hop bitterness is more pronounced in drier beers, so always add enough yeast to properly attenuate your beer – yet another reason for making a yeast starter.
In the end, the amount of hop bitterness in your beer needs to be confirmed by your taste buds. If the numbers say your beer is fine, but your tongue says it still isn’t hoppy enough, add more hops and boil more wort until you arrive at the taste you want.
 Groom Lake IPA
 Groom Lake IPA
(5 gallons/19 L, extract with grains)
OG = 1.056 FG = 1.014
IBU = 51 SRM = 8 ABV = 5.4%
Here’s an American IPA especially formulated by top BYO scientists for stovetop extract brewers, not reverse engineered from an all-grain recipe. Follow the instructions as closely as possible – especially with regards to boil volume – for the best results.
Ingredients
1.5 lbs. (0.68 kg) US 2-row pale malt
0.5 lb. (0.23 kg) crystal malt (30 °L)
2 lb. 2 oz. (0.96 kg) light dried malt extract
4 lb. 2 oz. (1.9 kg) light liquid malt extract (late addition)
6 AAU Magnum hops (60 mins)
(0.43 oz./12 g of 14% alpha acids)
3.5 AAU Simcoe hops (60 mins)
(0.27 oz./7.6 g of 13% alpha acids)
7.5 AAU Centennial hops (15 mins)
(0.75 oz./14 g of 10% alpha acids)
0.75 oz. (21 g) Cascade hops (5 mins)
1.5 oz. (43 g) Cascade hops (dry hops)
1 tsp. Irish moss (15 mins)
Wyeast 1056 (American Ale), White Labs WLP001 (California Ale) or US05 (formerly US-56 dried) yeast
(1.5 qt./~1.5 L yeast starter)
1.0 cup corn sugar (for priming)
Step by Step
Place crushed grains in a steeping bag. In a large kitchen pot, heat 3.0 qts. (2.8 L) of water to 163 °F (73 °C). Submerge grain bag in this water and let steep at 152 °F (67 °C) for 45 minutes. (If the temperature drops below 148 °F (64 °C), heat to 152 °F (67 °C) again.) While grains are steeping, heat 1.5 qts. (~1.5 L) of water to 170 °F (77 °C) in a soup pan. Also, begin heating 2 gallons (7.6 L) of water to a boil in your brewpot. When steeping is done, place a colander over your brewpot and lift the grain bag into it. Pour the “grain tea” through the bag (which will strain out most of the grain bits), then rinse the bag with the 1.5 qts. (~1.5 L) of 170 °F (77 °C) water.
Heat the (roughly) 3 gallons (11 L) of wort in your brewpot to a boil, then stir in dried malt extract. (It will foam a bit, so don’t pour all the extract in at once.) Bring the wort back to a boil, add the 60-minute hops and boil for 60 minutes, adding late hops at times indicated. Stir in liquid malt extract and add Irish moss with 15 minutes left in boil.
During the boil, scrape any hops clinging to the side of the brewpot back into the wort. Also, do not let the wort volume drop below 2.5 gallons (9.5 L). Keep a small pot of boiling water handy to top up boil, if needed.
After the boil, put a lid on your brewpot and cool the wort (either in a cold-water bath in your sink or with a wort chiller). Cool until the side of the brewpot no longer feels warm, then let it sit for about an hour (with the lid on) to let the hop debris settle. With a racking cane, transfer the wort above the hop “sludge” to your fermenter. Pour the remaining wort/sludge slowly through a sanitized strainer. Top wort up to 5 gallons (19 L) with cool water, aerate wort and pitch the yeast from your starter. Ferment at 70 °F (21 °F). When fermentation slows to a halt, rack to secondary. Add the dry hops a few days later, then bottle or keg after beer has been in contact with dry hops for 3-4 days.
Groom Lake IPA
(5 gallons/19 L, countertop partial mash)
OG = 1.056 FG = 1.012
IBU = 51 SRM = 8 ABV = 5.7%
This version of Groom Lake IPA is more highly-attenuated than the extract with grains version and shows a little more malt aroma. Follow the instructions closely and the light color, high attenuation, alluring aroma and firm bitterness of this beer will render it unidentifiable as a stovetop beer.
Ingredients
3.5 lbs. (1.6 kg) US 2-row pale malt
0.5 lbs. (0.23 kg) crystal malt (30 °L)
1 lb. 12 oz. (0.79 kg) light dried malt extract
3 lb. 4 oz. (1.5 kg) light liquid malt extract (late addition)
6 AAU Magnum hops (60 mins)
(0.43 oz./12 g of 14% alpha acids)
3.5 AAU Simcoe hops (60 mins)
(0.27 oz./7.6 g of 13% alpha acids)
7.5 AAU Centennial hops (15 mins)
(0.75 oz./14 g of 10% alpha acids)
0.75 oz. (21 g) Cascade hops (5 mins)
1.5 oz. (43 g) Cascade hops (dry hops)
1 tsp. Irish moss (15 mins)
Wyeast 1056 (American Ale), White Labs WLP001 (California Ale) or US05 (formerly US-56 dried) yeast
(1.5 qt./~1.5 L yeast starter)
1.0 cup corn sugar (for priming)
Step by Step
Put crushed grains in a large nylon steeping bag. Heat 5.5 qts. (5.2 L) of water to 163 °F (73 °C) and pour into your 2-gallon (7.6-L) cooler. Slowly submerge grain bag, then open the bag and use a large brewing spoon to ensure that grain mixes completely with the water. Let mash rest, starting at 152 °F (67 °C) for 45 minutes. While mash is resting, heat 0.75 gallons (2.8 L) of water to 152 °F (67 °C) in your brewpot and stir in dried malt extract. Hold the dissolved malt extract at 152 °F (67 °C). Also heat 5.5 qts. (5.2 L) of water to 180 °F (82 °C) in a large kitchen pot.
Recirculate your partial mash wort by drawing off a pint or two of wort from the cooler and returning it to the top of the mash. Repeat until wort is clear or 3 quarts (~3 L) have been recirculated. Next, run off entire first wort and add to the hot wort in your kettle. Continue holding wort in brewpot around 152 °F (67 °C) while you prepare to draw off the second wort.
Add 180 °F (82 °C) water to cooler until liquid level is the same as during the first mash. Let rest for 5 minutes, then recirculate and run off wort as before. Bring wort to a boil, add bittering hops and boil for 60 minutes. Add other hops at times indicated in ingredient list. Stir in liquid malt extract and add Irish moss with 15 minutes left in boil.
During the boil, scrape any hops clinging to the side of the brewpot back into the wort. Also, do not let wort volume drop below 3.0 gallons (11 L). Keep a small pot of boiling water handy to top up boil.
After the boil, put a lid on your brewpot and cool the wort (either in a cold-water bath in your sink or with a wort chiller). Cool until the side of the brewpot no longer feels warm, then let it sit for about an hour (with the lid on) to let the hop debris settle. With a racking cane, transfer the wort above the hop “sludge” to your fermenter. Pour the remaining wort/sludge slowly through a sanitized strainer. Top wort up to 5 gallons (19 L) with cool water, aerate wort and pitch the yeast from your starter. Ferment at 70 °F (21 °F). When fermentation slows to a halt, rack to secondary. Add the dry hops a few days later, then bottle or keg after beer has been in contact with dry hops for 3-4 days.