Keep it Simple — It’s a SMaSH!
The availability of amazing brewing ingredients gives us brewers the chance to brew any beer style we can think of. While our access to great resources is a fantastic thing, today I want to take a step back from traditional recipes and look at SMaSH brewing and give you the top three reasons I think it should be incorporated into your regular brewing schedule. Let’s get right to it!
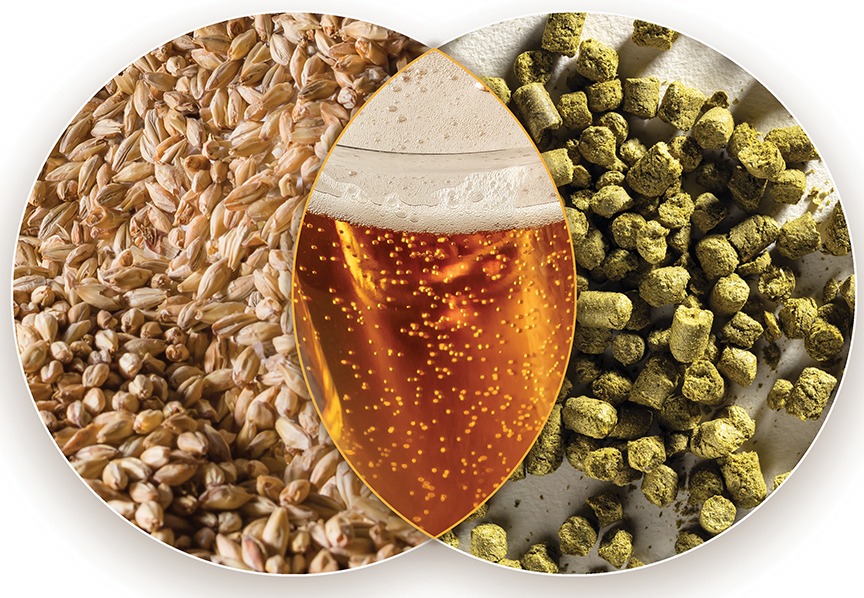
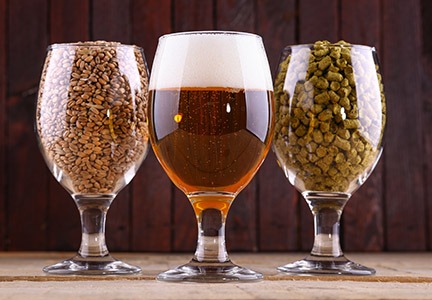
SMaSH stands for “single malt and single hop.” This could be a combination of any single base malt and any single hop variety used for the whole brewing session. The primary benefits I believe SMaSH brewing provides are:
1. The ability to learn the taste of specific ingredients.
2. It allows for simple brew days.

3. It helps clear out ingredients that may be languishing in the back of your brewery storage shelves.
I will discuss how SMaSH brewing provides these benefits throughout this story, along with providing some recipe ideas, but let’s start from the beginning with a discussion on ingredient selection.
Learn Your Ingredients
Every good chef knows each ingredient in a recipe as an ingredient first, and how that ingredient will behave when introduced to different cooking techniques and how it will interact with the other ingredients in the dish. This is the same idea in brewing: If I know what a specific malt or hop is like in a simple brew, I will be better prepared to predict how it will perform in other recipes. An example would be that I can look at a recipe and “brain taste” the difference between a recipe with a base malt of pale 2-row vs. a recipe relying heavily on Vienna malt. The only way to be able to do that is to taste beers with these ingredients repeatedly — SMaSH brews allow us to do exactly this without any confusion that can be caused by multiple grains in a recipe where you may not be sure which is responsible for a particular characteristic. In the specific example of pale 2-row vs. Vienna malt we’d make two brews using the same hop variety, hop schedule, and fermentation parameters, substituting only the malt. Once they’re fermented and carbonated we get to taste how different they are and note the individual flavors the two malts bring to the brew.
Before we dive into some things that may apply more for all-grain brewers, it needs to be stressed that SMaSH brewing is a technique that can be used by extract brewers as well. It’s just as easy (in fact, much easier) to brew a SMaSH extract batch as all-grain. Note that some malt extracts are a combination of multiple base grains, however, you can also find examples that are only one. (And even if you use an extract that is a combination, we’re not going to fault you as the same benefits you get from SMaSH brewing will apply as it is still a single ingredient.)
The idea of SMaSH isn’t beholden to the strict rules of a single malt or hop, but the idea behind simplicity. With a simple online calculator you can convert all-grain recipes to find out how much dried or liquid malt extract you’d need for the same recipe. The upside is that you only have to convert a single malt when talking about SMaSH recipes! Easy peasy.
Single Malt
When I’m creating my own SMaSH recipe, the place I start is selecting my malt. For newer brewers looking for much more detail on what base malts are I’d recommend reading the BYO article “Understanding Base Malt” online at https://byo.com/article/understanding-base-malt/. In short, the base malt will be pale malt, pale ale malt, Pilsner, Vienna, or Munich malt. Keep in mind that malt with the same name from one maltster may not be the same as from another, so taking note of the specific brand and even lot is important to track. The beer style you’re targeting will help pick which malt is the best for you, but don’t feel constrained by style guides when it comes to SMaSH recipes! Just because it’s not a specific style does not mean you can’t brew it. In fact, I’ve had some really good beers that were random combinations of things that don’t fit a specific style. Go crazy with it and you may discover something new that you really love. Got a bunch of Vienna malt left over that needs to be used soon? Make a recipe with it and some classic West Coast IPA hops and see what happens!
Single Hop
Next we move to the hop selection. The style of beer you’re going for will likely dictate what hop you select, but again, use whatever you want and experiment with it. Generally, the same hops you find yourself reaching for in combination for a style are the same ones you can use individually in SMaSH beers. Checking the Beer Judge Certification Program (BJCP) guidelines for different styles will help guide you on hop selection, but it’s also perfectly fine (and encouraged!) to try new hops you’re not familiar with so that you can get to know how they are in finished beer. In fact, I think SMaSH beers are the best platform for testing out new hop releases and varieties you haven’t brewed with before.
The second decision to make when it comes to hops is the amount to use and when to add them during the brew day or fermentation. The options here range from mash hops, first wort, throughout the boil, hopstands/whirlpool additions, and at varying times during the fermentation and beyond, so you get to play with balancing bitterness with aroma by choosing your addition schedule. I highly recommend using software like BrewFather or BeerSmith to tweak the recipe’s hop schedule because you’ll see real time updates on estimated IBUs as you put in your numbers. We will look at some example recipes later that will be good starting points for your SMaSH adventures — adjusting from the baseline recipes is another good way to start as long as you’re taking notes on what you’re doing.
Yeast & Water
Yeast selection may be dependent on the style you’re aiming for as well as your goals. Yeast has a huge influence on the outcome of beer and is sometimes overlooked with SMaSH beers. When I was first starting brewing I wanted to soak in as much information about each ingredient as I could. SMaSH beers provided a perfect opportunity to split batches and test two different kinds of yeast, say SafLager W-34/70 German Lager yeast vs. SafLager S-189 Lager yeast. Split fermentations will result in two different beers and you can pick which version you like more, or just note their differences. If you’re trying to learn about the malts or hops in a particular recipe, then keep the yeast selection the same batch-over-batch so you’re not changing more than one variable at a time. In this case, a more neutral yeast is a good option.
I don’t think anything out of the ordinary is required for SMaSH beers when it comes to water. Treat your water the same way you would when brewing the style you’ve selected for your SMaSH beer.
Recipe Formulation
So, you’ve picked your three primary ingredients, now what? As you prepare for brew day, you’ll need to decide the target original gravity, IBUs, and timing of aroma additions. My go-to method for deciding how much malt to use is to simply target the ABV for the style I’m making and then use brewing software to back into how much grain to use. For example, if I’m making a pale ale and targeting about 5% ABV using Simpson’s Pale Ale Golden Promise malt I’ll add that as the fermentable into the software starting with 10 lbs. (0.45 kg) for a 5-gallon (19 L) batch and see what that tells me the expected ABV will be, and then adjust the quantity until I hit my target. This will vary from one brewing system to another, so make sure your equipment profile is accurate when doing this. Each base malt, and each brand of malt, will have different diastatic powers, which is its capacity to convert starches into fermentable sugars during the mash, so don’t assume each batch will require the same amount of malt when changing the grist.
Nerdy note: The diastatic power of malts is recorded using the Lintner scale, using the symbol °L. Pay attention when looking at that because the same symbol is used for the Lovibond scale, which indicates the color of the malt.
Your brewing software likely has the information for the common brands and malts, so you usually don’t really need to know the diastatic power if relying on brewing software.
The second reason I stated in the beginning for embracing SMaSH brewing is that it offers super simple brew days. Having helped a number of new homebrewers getting into the hobby, I always cringe a little when I hear first-time brewers explain their plans for their first brew day, which is often something intensely complicated and challenging. It’s always something like an English smoked Porter with six malts, four hops, mash steps, and a marshmallow dry hop. Look, I get it! I was excited my first brew too, going with a Pliny the Elder clone with multiple grains and a combination of whole cone hops, pellet hops, a hop shot, and dry hopping. It did not turn out well. Fortunately, I stuck with the hobby and learned over time that focusing on the fundamentals is far more important than fitting more things into a recipe.
SMaSH brewing allows for very simple brew day prep because you’re only weighing out one kind of grain and accounting for a single hop to work with. Of course, just because you’re doing a SMaSH brew day doesn’t mean that you can skip the basic steps for sanitizing, using good water, minding mash temperatures, and monitoring your fermentations. For consistency over time, you’ll want to keep good notes and attempt to duplicate the brew days as closely as possible so you can keep the tasting baseline equal, allowing you to evaluate the new ingredient you’re testing.
One final idea for SMaSH brewing is the homebrew club group project approach: By joining forces with other brewers you get to save money by buying ingredients in bulk, but you can test multiple variables and do side-by-side tastings once everyone’s beers are ready to serve. The scenario could look like this: Everyone agrees on one factor they’d like to differentiate in their brews, let’s say hops for this example. They then agree on a malt to use and pitch in to buy a 55-lb. (25-kg) sack to split between five brewers. Next, everyone chooses a different hop to use: Cascade, Centennial, Citra®, Chinook, and Columbus, for example. The yeast should remain the same for everyone so that this experiment can highlight the hops being used. Once everyone has brewed their batches, fermented, and carbonated all the beers it’s time to gather and have a tasting together so you can experience and discuss the different qualities of each hop on the same beers.
Another exercise that can be done with these final beers is to try to do blind tastings where the taster attempts to identify which hop was used in each beer. I’ve done this along with a group of homebrewers with the different hops in front of the taster so each person could smell each of the pellet hop varieties in different cups while tasting the beers to see if they could identify which beer used which. This is far more challenging than one may think! This is a learned skill so the more practice and reps you put in, the easier it will come, and more importantly, the more you will benefit in your future recipe formulation. Doing this kind of exercise as a group has always proven beneficial for me and the fellow brewers participating.
SMaSH Combos
Choosing ingredients sounds easy as there are so few of them in SMaSH beers, yet with so many ingredients to choose from it can still be daunting for new brewers. If you’re new to this, start with the basics:
Pilsner malt + lager hop + lager yeast
Pale ale malt + UK hop + UK ale strain
Munich malt + lager hop + lager yeast
North American 2-row malt + New World hop + neutral ale strain
Every once in a while I’ll do an inventory of the ingredients I have on hand and find that I have leftover hops that are starting to get older, and as long as they’ve been properly stored in airtight packaging and cold temperatures I’ll see if there’s a good SMaSH option for them so I can use them and get a refresher on what that particular hop tastes like when it’s used all on its own. This helps me clear out aging inventory and gives my palate a refresher course — it’s a win-win!
When it all comes down to it, SMaSH brewing is a great technique for testing and learning about grains, hops, and yeast. It allows for simple recipe creation and easy brew days, helps clear out aging ingredients, and can bring a homebrew club together for a group project. SMaSH brewing may have a reputation as a technique for beginners, but it is certainly more powerful than that. Advanced brewers can benefit from SMaSH brewing and as we can see with some of the big commercial brewers (Stone Brewing Co., for example) you can make really great beers by keeping it simple. If you haven’t done a SMaSH brew recently, perhaps it’s time to give it a go!
Not sure about where to begin with your SMaSH brewing? Following are some of my favorite SMaSH recipes I’ve brewed for simple versions of IPA, Kölsch, and pale ale.
Simcoe® SMaSH IPA
(5-gallons/19-L all-grain)
OG = 1.058 FG = 1.012
IBU = 65 SRM = 4 ABV = 6%
Ingredients
12 lbs. (5.4 kg) North American 2-row pale malt
12 AAU Simcoe® hops (60 min.) (1 oz./28 g at 12% alpha acids)
12 AAU Simcoe® hops (15 min.) (1 oz./28 g at 12% alpha acids)
1 oz. (28 g) Simcoe® hops (hopstand)
2 oz. (56 g) Simcoe® hops (dry hop)
Imperial Yeast A07 (Flagship), LalBrew BRY-97, or SafAle US-05 yeast
¾ cup corn sugar (if priming)
Step by Step
With the goal of creating a moderately dextrinous wort, mash in with 3.75 gallons (12.5 L) of 166 °F (74 °C) strike water to achieve a single-infusion rest temperature of 155 °F (68 °C). Hold at this temperature for 45 minutes.
With sparge water at 170 °F (77 °C), collect about 6.5 gallons (24.6 L) of wort. Boil for 60 minutes adding hops at the times indicated. At end of boil, chill wort to 170 °F (77 °C) then add hopstand addition hops. Create a whirlpool then let settle for 15 minutes.
Chill wort to slightly below fermentation temperature, around 66 °F (19 °C), then transfer to fermenter. Pitch yeast and ferment at 68 °F (20 °C). Allow fermentation to finish. Add dry-hop addition after reaching terminal gravity. Wait 3–4 days before packaging.
Transfer beer to keg and force carbonate to 2.5 v/v or add priming sugar and bottle.
Extract-only version: Replace the pale malt with 6.75 lbs. (3.1 kg) extra light dried malt extract. Heat 5 gallons (19 L) water to about 180 °F (82 °C), turn off heat and stir in the extract, making sure it is fully dissolved. Bring to boil and boil for 60 minutes following hopping schedule of the all-grain recipe. After the hopstand is complete, chill wort to 66 °F (19 °C) then transfer to fermenter and top up to 5.25 gallons (20 L) with water. Pitch yeast and ferment at 68 °F (20 °C). Follow the remainder of the instructions in the all-grain recipe.
Tettnang SMaSH Kölsch
(5-gallons/19-L all-grain)
OG = 1.040 FG = 1.008
IBU = 20 SRM = 3 ABV = 4.1%
Ingredients
8 lbs. (3.6 kg) continental Pilsner malt
4 AAU Tettnang hops (60 min.) (1 oz./28 g at 4% alpha acids)
4 AAU Tettnang hops (10 min.) (1 oz./28 g at 4% alpha acids)
White Labs WLP029 (Kölsch Ale), Omega Yeast OYL-044 (Kölsch II), or SafAle K-97 yeast
¾ cup corn sugar (if priming)
Step by Step
With the goal of creating a medium- to medium-low-bodied Kölsch, mash in with 3 gallons (11.4 L) of 164 °F (74 °C) strike water to achieve a single-infusion rest temperature of 152 °F (68 °C). Hold at this temperature for 60 minutes.
With sparge water at 170 °F (77 °C), collect about 6.5 gallons (24.6 L) of wort. Boil for 60 minutes adding hops at the times indicated. At end of boil, create a whirlpool then let settle for 10 minutes.
Chill wort to slightly below fermentation temperature, around 64 °F (18 °C) then transfer to fermenter. Pitch yeast and ferment at 66 °F (19 °C). Hold at this temperature until fermentation is complete. Consider a short lagering at slightly above freezing temperature if possible. If not, wait 3–4 days before packaging.
Transfer beer to keg and force carbonate to 2.5 v/v or add priming sugar and bottle.
Extract-only version: Replace the Pilsner malt with 4.7 lbs. (2.1 kg) Pilsen dried malt extract. Heat 5 gallons (19 L) water to about 180 °F (82 °C), turn off heat and stir in the extract, making sure it is fully dissolved. Bring to boil and boil for 60 minutes, following hopping schedule of the all-grain recipe. After the boil is complete, whirlpool for 10 minutes and then chill wort to 64 °F (18 °C). Transfer to fermenter and top up to 5.25 gallons (20 L) with water. Pitch yeast and ferment at 66 °F (19 °C). Follow the remainder of the instructions in the all-grain recipe.
Cascade SMaSH Pale Ale

(5-gallons/19-L all-grain)
OG = 1.048 FG = 1.010
IBU = 42 SRM = 4 ABV = 5%
Ingredients
10 lbs. (4.5 kg) North American 2-row pale malt
6.5 AAU Cascade hops (60 min.) (1 oz./28 g at 6.5% alpha acids)
6.5 AAU Cascade hops (30 min.) (1 oz./28 g at 6.5% alpha acids)
1 oz. (28 g) Cascade hops (hopstand)
1 oz. (28 g) Cascade hops (dry hop)
Wyeast 1056 (American Ale), White Labs WLP001 (California Ale), or SafAle US-05 yeast
Step by Step
With the goal of creating a moderately dextrinous wort, mash in with 3.75 gallons (12.5 L) of 166 °F (74 °C) strike water to achieve a single-infusion rest temperature of 155 °F (68 °C). Hold at this temperature for 45 minutes.
With sparge water at 170 °F (77 °C), collect about 6.5 gallons (24.6 L) of wort. Boil for 60 minutes adding hops at the times indicated. At end of boil, chill wort down to 170 °F (77 °C) then add hopstand addition hops. Create a whirlpool then let settle for 15 minutes.
Chill wort to slightly below fermentation temperature, around 66 °F (19 °C) then transfer to fermenter. Pitch yeast and ferment at 68 °F (20 °C). Allow fermentation to finish. Add dry-hop addition after reaching terminal gravity. Wait 3–4 days before packaging.
Transfer beer to keg and force carbonate to 2.5 v/v or add priming sugar and bottle.
Extract-only version: Replace the pale malt with 5.7 lbs. (2.6 kg) extra light dried malt extract. Heat 5 gallons (19 L) water to about 180 °F (82 °C), turn off heat and stir in the extract, making sure it is fully dissolved. Bring to boil and boil for 60 minutes following hopping schedule of the all-grain recipe. After the hopstand is complete, chill wort to 66 °F (19 °C) then transfer to fermenter and top up to 5.25 gallons (20 L) with water. Pitch yeast and ferment at 68 °F (20 °C). Follow the remainder of the instructions in the all-grain recipe.