Freezing Glasses, Yeast Cultures & Priming Brett Beer: Mr. Wizard
Q
I have found that reusing a previously used beer glass affects how much foam comes from pouring more beer into said glass. Typically I place my used glass back into my freezer to re-chill it. So I am seeing a small amount of foam freeze on the inner glass surface. Once I pour more beer into this re-chilled glass the foam in the head increases, by twice as much each time the glass is reused. After three beers I have to wash the glass or it’s almost all foam. So my thought process is how does this affect my keg lines that supply my homebrewed beers? Any thoughts because I feel they too are giving me a similar result?
Gregory Blank
Manchester, Maryland
A
Placing glasses in the freezer is one of those practices that almost certainly began to further cool beer that was borderline cool when poured into a really heavy mug that was warm. Sticking this heavy mug in the freezer not only solved the warming problem, but it actually cooled the beer. Of course if the glass is wet when placed in the freezer, ice forms on the surface of the glass. Ice, when viewed under a microscope, is very jagged and is like thousands of tiny daggers. These small, irregular features act as nucleation sites for carbon dioxide bubbles. This is why carbonated beverages foam when poured over ice with a dry surface.
One geeky trick when pouring soda pop over ice plucked from the freezer is to polish the surface of the ice with water. Simply fill an empty glass with ice, pour water over the ice and pour out the water before pouring in your soda pop, and voila, no foam! Did I mention this is really geeky?
Bars that store beer mugs in those special mug freezers usually pour their beer slowly to deal with foaming caused by the ice layer or they end up pouring foam down the drain and wasting beer during dispense. This is caused by the nucleation sites on the glass surface.

Fast forward to beer drinking. When you take drinks from a beer glass that is topped with foam, the foam adheres to the glass as the glass is emptied. Beer foam dries over time and the protein-rich foam becomes like an egg meringue hanging to the surface. This dried beer foam is much more coarse than ice.
In your case you are coating the surfaces of your mug with dried beer foam, that is if you drink slow enough for the foam to dry, and you are probably leaving a little residual beer in the bottom of your glass before you stick the whole thing back in the freezer for another cooling off period. When you pour your second beer in this glass there are more nucleation sites and your second beer foams more. More foam means more dried beer foam adhering to the glass at the end of your second beer. You now repeat this cycle once again, only your third beer is being poured into a glass absolutely teaming with nucleation sites … poor beer!
I am not a big fan of frozen mugs for a few reasons. One is that super cold beer has suppressed beer aroma and flavor. I prefer pouring flavorful beer into a clean, room temperature glass with a wet surface. The wet surface is like the ice polishing trick and you get a smoother pour with a wet glass as compared to a dry glass. Another reason to steer clear of frozen mugs in bars is that the liquid frozen in the mug is often the cleaning water from a triple sink. Most states require the third sink to be filled with a sanitizer solution, usually dilute bleach or quats. This means the frozen liquid in the beer glass is something that you really would rather not mix with your fine beer, let alone actually drink. This is the same reason that stacked glasses are kind of gross … the liquid from the third sink does not drain from the glass and is trapped in the stack of glasses. This ensures a tasty shot of sanitizer with every pour. And the third, as if another reason is really required, is that frozen mugs cause beer foaming.
If you don’t want to wash your beer glass between uses, I suggest thoroughly rinsing with water to remove dried foam. And if you like keeping your glass cold, try filling it with cold water from the refrigerator to chill after rinsing.
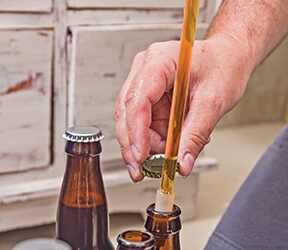
So you are concerned that pouring beer through a draft line may have the same sort of effect of building up nucleation sites on the wall of the beer line as using the same mug a few times between cleanings. This is really not much of a concern in my book if the beer line is kept full of beer, which is the norm, since there is no foam in the line to dry. On the other hand, if you dip the end of a beer tap into beer foam when pouring, a practice I strongly discourage because it is just not proper, the foam can dry within the tap and could cause foaming issues. Beer lines do need to be periodically cleaned. Most bars clean draft lines once every two weeks and this is frequent enough for most beer types.
I wouldn’t worry too much about the draft line issue with respect to beer foaming, but you may want to rethink your frozen beer mug practice, especially after you have used your mug for a beer!
Q
In using dried frozen hops from your own vines, is it necessary to crush the hops prior to boiling? Is it alright to boil the hops separately in a small pot and then add the filtered hop broth to the wort afterwards, thus eliminating a filter bag?
Terry Roszatycki
Port Angeles, Washington
A
Whole cone hops are generally added to the brew kettle in a compressed form because hops are dried and compressed into large bales after harvest and stored like this until use. Brewers who use whole hops cut open the bales and weigh out the amount needed for brewing. It is typical to see large clumps of whole hops being dumped into big brew kettles. When added to boiling wort, the hop clumps break apart into individual hop cones and the bittering and aromatic compounds are extracted during the boil. Whole hops are traditionally removed from wort with a hop back, a strainer resembling a mash tun prior to wort cooling.
When brewing smaller batches, whole hops can be placed in a hop bag or tossed in loose and strained out at the end of the boil. There is really no need to crush hops prior to boiling, although turning the whole cone into a powder does increase the yield of bittering compounds. When pellet hops are made, the first step of the process is to turn whole cones into hop powder and the second step is pelletizing. Pelletized hops typically have better hop utilization than whole cone hops, but the difference is only about 5–10% so doing this at home may be more trouble than it is worth.
You should be careful about boiling hops in a small wort volume, however. The maximum solubility of iso-alpha acids in wort is about 100 mg/L or about 100 IBU. Let’s assume you are brewing a 5-gallon (19-L) batch and want to boil your hops in a half-gallon (2 L) of wort. If your target for the whole 5-gallon (19-L) batch is 10 IBU, a very low bitterness level, you will be OK since the half-gallon (2 L) of 100 IBU wort when diluted with the 4.5 gallons (17 L) of wort without hops comes out to 10 IBU. But if you want to brew a beer with more bitterness, which pretty much means any style other than American-style lagers and wheat beers, you are not going to hit your target bitterness. Your best bet is to boil your whole hops with all of your wort. Hop bags are easy to use and inexpensive, or you can use a strainer. Whatever method you choose, enjoy those homegrown hops!
Q
I just brewed a doppelbock (my first lager) with a target original gravity (OG) of 1.095. Knowing pitching rates are super important for lagers, I made a robust starter. I used two packs of Wyeast Munich Lager II (Wyeast 2352-PC) in a 2 L (2 qt.) starter of 1.040 OG wort. Once the 2-L (2-Qt.) starter was finished, I cold crashed my starter, then created another 2-L (2 qt.) starter of 1.050 OG wort. By my calculations, after the second starter I should have had about 820 billion cells. After transferring the wort to my carboy for primary fermentation, I oxygenated the wort with pure oxygen. I pitched the yeast and transferred the carboy to my controlled fermentation chamber set at 55 °F (13 °C).
After two weeks in primary the gravity was at 1.050 and stayed at 1.050 for the next three days. Fearing a stuck fermentation, I read various ways to fix it and continually came across using amylase enzyme. Would amylase enzyme help? Should I make another starter and re-pitch?
Keith Bachman
Ozark, Missouri
A
At first glance, wort fermentability could be the problem with this brew. It seems that plenty of healthy yeast was used, the wort was well oxygenated and fermentation conducted at a very comfortable range for this yeast strain. One would expect a healthy fermentation from 1.095 to about 1.025–1.030 in two to three weeks. Having fermentation stop at 1.050 could certainly be an indicator that something is unusual with wort fermentability. And adding amylase enzymes could remedy this sort of issue. But my gut feeling is that this is not a wort fermentability issue.
The enzymatic power of most malts these days, including the Munich and Vienna malt types typically used in doppelbocks, is consistently where brewers have little worries about mashes not converting or mashes not producing fermentable wort. This is especially true when using a two-step mash at the temperatures used in your brew. My gut feeling is you have a yeast issue.
The rule of thumb pitching rate for lagers is 1 billion cells per Plato per liter. Assuming you brewed 5 gallons
or 18.9 liters you need 435 billion cells (18.9 liters x 23 Plato x 1 billion), which is half the amount you calculated. OK, so you may have been a bit conservative in your target and aimed to overpitch. That is typically not the cause of a stuck fermentation.
I am not sure that you grew this many cells, however.
There is another rule of thumb that I am going to recall here and that is the 10x rule when propagating yeast. The 10x rule means that yeast is moved up in volume by 10-fold increases. Assume that you grow up yeast in a 100 mL starter. At the end of a fairly normal growth cycle the cell density usually grows to about 100 million cells/mL. This assumes the culture is exposed to air through a cotton plug or the growing yeast is intermittently aerated during growth. The 10x rule means that the culture density is diluted to 10 million cells/mL after the transfer. When using this rule the batch size is usually 10 times larger than the last jump in the step when the gravity of the wort is around 1.040 (10 °Plato). In the case of high gravity beers the final pitch volume may change, but the propagation steps are about the same.
So what does this rule have to do with the price of doppelbock in Ozark? When yeast is put into a growth media and the idea is to grow cells, it is key that there is sufficient cellular building blocks for cells to actually reproduce.
If yeast is grossly overpitched, reproduction may never occur and if cells do divide the daughter cells may not be healthy. To put this into animal terms, it’s a similar concept to underfeeding a large population of deer.
Too many deer on a plot of land may very effectively devour all of the edible food in sight, but the individual health of the population may well be very poor.
Your starting point was a smack pack of yeast. Dilute this yeast slurry in 2 liters (2 qts.) of wort and you have a good starting point for healthy yeast growth. Using the 10x rule your next step should have been 20 liters
(5.3 gallons) of wort, or a normal batch size of average strength wort. Instead you fed this slurry with another 2 liters (2 qts.) of wort and likely put your healthy culture into an environment that did more harm than good.
On top of that, you crashed your culture to help separate yeast from beer produced in the first propagation step. Unfortunately most lager yeast strains are really not very flocculent, and this is a dicey method to use.
After your first step of propagation you had yeast that was healthy, vital and ready to munch on maltose . . . and then you stuck it in the cooler, putting the yeast in a quiet place. When you pitched this yeast into 2 liters (2 qts.) of wort it probably perked up very quickly because of the high cell density, metabolized all of the nutrients in the wort, increased in cell number to some degree by producing daughter cells that were most likely not very healthy. And when you pitched this culture into your delicious sounding doppelbock wort the stage was set for a stalled fermentation.
Kräusening your brew with about 2 liters/2 qts. (10% of the batch size) of a new culture of yeast in high kräusen may be the best thing to do. High kräusen occurs about 24–36 hours after pitching and is noted by the high crown of foam that grows above the fermenting wort. This is the stage of fermentation when yeast growth is maximal and is the best time to jump-start a stuck fermentation, or simply
to carbonate a finished batch by kräusening. If your fermentation is stuck, you should see things pick up and the gravity begin to drive down towards your expected completion. If fermentation does not resume you
may be playing around with adding enzymes, but I am betting heavily against that happening.
Q
Do the same priming sugar calculations apply when bottling a 100% Brett fermented beer? Should I expect it to take longer for the bottles to prime since Brett tends to ferment slower?
Peter Kraemer
Madison, Wisconsin
A
Brettanomyces yeast strains are so-called super attenuators because they secrete enzymes that break down carbohydrate dextrins that remain in wort following mashing. The products of these enzymatic reactions are fermentable. So in a Brett fermentation the beer is either very dry at the time of bottling or will become very dry after bottling.
The most important thing you can never forget about Brett beers is that you can quickly end up with bottle bombs if you are not very careful. Most homebrewers have limited laboratory and pre-bottling testing ability. The best deterrent of the bottle bomb problem is complete fermentation prior to bottling. This may take a couple of months to occur, but beats bottling beer and ending up with a problem. On the other hand, if you are brewing a beer like Orval that is expected to morph during bottle aging, you need to use Champagne bottles.
Assuming the fermentation is complete the priming rules are the same. If you want faster conditioning you may want to use fresh Saccharomyces yeast when bottling. But you always must be aware that Brett will dry beers out over time and lead to increased carbonation levels if the beer is bottled with residual dextrins floating about. I recently had a bottle of Green Flash Rayon Vert that was a couple of years old; this beer had a massive level of carbonation that developed in the bottle and accompanying level of Brett assertiveness. This beer was also bottled in glass intended to withstand the pressure developed during aging. Best of luck with your Brett brew!