Yeast Starters, Nitro Gas & Stainless Care: Mr. Wizard
Q
I’ve been doing a lot of research on making yeast starters and my question that I can’t seem to find the answer to is whether there is an upper limit to how much starter can be made from a single vial of yeast? Also, is there an upper limit to how big a starter step can be? Meaning, should you never make more than say 2 quarts (2 L) of starter at a time? I’m making a starter for a cider pressing for my homebrew club in a few weeks and just want to make sure I’m not over-extending my initial vial.
Brian Jameson
Poughkeepsie, New York
A
There are a few generalities that may make this topic easier to understand, so let me cover a few things that may not seem relevant right away. The first general rule is that the density of yeast cells growing in a flask without any gas supply other than the oxygen that diffuses through a cotton stopper fitted to the flask is about 100 million cells per milliliter. Shaker tables and stir plates help gas transfer, especially when the flask is simply fitted with a cotton plug, and the rate of cell growth and cell density can be enhanced with these tools. The upper limit to cell density using these methods is about 150 million cells per milliliter. When I think about cell density I cannot engage my brain with gallons because microbiologists always measure cell density in metric units, so gallons, even to folks who use that volume of measurement on a daily basis, simply make things very confusing to follow. So this answer will not contain any conversions from liters to gallons, except this one . . . 5 gallons is roughly 20 liters and for the purpose of this discussion I will assume that the nominal homebrew batch size is 20 liters.
Another general rule is the rule of 10; that is starter cultures are stepped up tenfold per jump. In a yeast lab most starters begin by selecting a single colony from a Petri dish and inoculating a 20 mL starter. After a couple days of growth this starter is moved up to 200 mL, then 2 liters and then 20 liters. This last step is where many homebrewers end up for pitching. If you begin with a vial of yeast and perform a starter step you can inoculate the 2 liter starter and pitch your 20 liter batch after a couple of days.

The rule of ten makes perfect sense because the cell density of the culture is diluted from 100-150 million cells/mL to 10-15 million cells/mL and that is a perfect pitching rate . . . for most lager beers. Like many
brewing methods adopted by commercial breweries, yeast propagation rules are usually applied to lager
brewing because that is the most common beer type brewed in the world. Many ale brewers pitch at about half the rate of lager brewers meaning that you could use a smaller starter for ale brews and have a healthy fermentation.
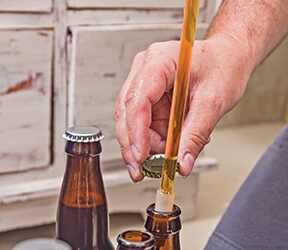
You ask about how large a starter can be made from a single vial and that depends on the number of cells contained by the vial. The goal should be about 10 million cells/mL of starter when you begin the propagation step. Since thick yeast slurry contains about 1 billion cells/mL you want to increase the volume of the vial by a factor of 100. So if your vial contains 20 mL of thick yeast at 1 billion cells/mL, you will have about 10 million cells per mL when this is added to 2,000 mL (2 liters) of wort.
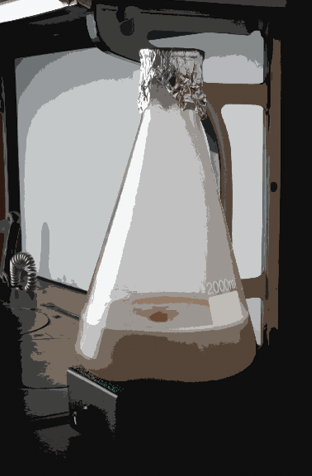
The answer to your first question is that there is really no limit to how much yeast can be produced from a single starter. A few years ago I visited the yeast culture facility at Anheuser-Busch in St. Louis, Missouri where all of the yeast used for their beers is produced. When I saw their labs I was pretty amazed because the setup looked identical to how I was taught to grow yeast in the UC Davis brewing labs. I saw many small Erlenmeyer flasks with little cotton plugs stuffed in the tops and was told that their cultures were grown by transferring the culture from a smaller flask to a larger flask containing sterile wort until the culture was too large to grow in glass. I was also told that a small amount of culture was “moved backwards” so that a small volume of yeast cells was always growing in the smaller flasks that are required for this method to stay in motion.
The Anheuser-Busch yeast lab has a door that leads to the part of the lab that grows their yeast in stainless steel tanks and what I saw was pretty surprising; a room full of fermenters that vary in size from about 66 gallons to 33,800 gallons (250 to 128,000 L). When we first walked into this part of the lab I thought we had stepped into one of their very large cellars, but was told that we were still in the lab! I believe they jump their volumes by a factor of eight and it takes three jumps to go from 66 gallons to 33,800 gallons (250 L to 128,000 L). This slurry is then transferred to kegs and shipped out to Anheuser-Busch breweries as fresh slurry.
If your plan is to be the yeast source for your homebrew club’s cider day and want to grow a bunch of slurry that can be distributed to the entire club, you will not be over-extending the yeast you purchase as long as you follow the rule of ten. The most important part of this whole process is keeping things in a commercially sterile condition (code language for pretty darn clean, but technically not sterile). That is the subject for another day and about a question that you did not ask. I am assuming you know to keep it clean for the overall success of your endeavor and the happiness of your fellow brewers.
Q
My question is whether there are specific guidelines on force-carbonating (force-nitroing?) kegs that are different when using nitrogen compared to CO2 gas? Do your suggested carbonation levels for CO2 cross over to nitro as well (i.e. 2.2–3.0 volume for American ales, 2.4–2.6 volumes for European lagers, etc.)?
Eric Tomme
Fort Worth, Texas
A
Using a blend of nitrogen and carbon dioxide, or “nitrogenating” was perfected and popularized by the Guinness Brewery in Dublin, Ireland several decades ago. The origins of the method began by investigating why cask ales have a different foam structure than carbonated beers dispensed without addition of air and the scientists at Guinness developed a very good understanding of the significance of nitrogen to beer foam. The main reason for this research had to do with oxidation and how to develop a method for pouring Guinness’ famous stout that resulted in better shelf life and also retained the type of foam they wanted. The result was nitrogenated stout. Although the early dispense methods used for this new type of beer were far different than today’s nitro taps, the basic method was the same. Today, nitro beers are popular across the globe, brewed by brewers large and small, and for commercial sale as well as enjoyment at home.
The method does have some very key differences from those used to carbonate beer. One of the key differences has to do with the carbonation level in the beer. Nitro beers contain between 1.2 to 1.8 volumes of carbon dioxide (2.4 to 3.6 grams per liter). Without diving into the gritty details of gas tables, this very low level of carbonation is actually a bit hard to achieve in a commercial brewery when normal practices involving carbon dioxide blanketing and cold temperature are used. For example, many breweries add a very slight carbon dioxide overpressure at the end of fermentation so that as the beer tank is chilled to near-freezing temperatures the tank headspace does not dip into vacuum pressures. Although this pressure is very low, it is sufficient to cause the beer to have too much carbon dioxide at temperatures below about 42 °F (6 °C). I will get back to this topic shortly.
The other key difference between nitro beers and conventionally carbonated beers is the presence of nitrogen. Call me Mr. Obvious, but this is important! The concentration of nitrogen is actually quite low and is somewhere around 20 mg/liter. And if the concentration is much higher than this the beer becomes “wild” upon dispense and foams like mad. This is not the idea. What all brewers who produce nitro beers desire is that wonderful dance of tiny bubbles that lasts for about a minute after pouring and results in a perfect, thick, creamy foam that lays atop the beer like a smooth mousse.
There are several ways to go about getting the proper blend of nitrogen and carbon dioxide into beer. Commercial breweries tend to implement in-line methods when vessels are too large to allow for batch-type processes and this is especially true with nitro beers because nitrogen is difficult to dissolve in beer. But for small commercial brewers and homebrewers, it is very easy to batch nitrogenate in a keg. I first began playing around with this technique when I was a graduate student at UCDavis over 20 years ago and continue using the same method today for 15-barrel batches of nitro beer at Springfield Brewing Company.
I believe the key to producing great nitro beer begins with warm beer in a non-pressurized fermenter. This is the norm for most homebrewers. Step one is to rack your beer into a keg. Step two is applying about 30 psig of pressure to the keg using a blend of nitrogen and carbon dioxide. The blend is critical because the blend — along with beer temperature and pressure — directly affects the solubility of carbon dioxide and nitrogen. The blend commonly used for nitro beers is 75% nitrogen and 25% carbon dioxide. Step three is to cool your
keg to about 34 °F (1 °C). Allow at least 12 hours for the beer temperature to drop, switch your gas supply
to the dip tube of your keg and shake the keg as aggressively as possible for about one minute. Allow the keg to rest for about 10 minutes and repeat this step five times followed by an hour rest before pulling a sample from your nitro tap.
A properly nitrogenated beer will display the dance of the bubbles and a rich creamy foam that should be about 1⁄2-inch (1.25 cm) thick. If the dance is weak or the foam too thin there is insufficient nitrogen. More shaking or a slight increase in keg pressure will help dissolve more gas.
If nitrogen and carbon dioxide content set the stage for this great dance, the nitro tap starts the music. The nitro tap contains a plate designed to cause gas breakout when the beer is pushed from the keg at 30 psig pressure. If breakout does not occur during dispense no magic happens. But if you follow these easy steps and have the right tap you will be good to go!
If you are wondering what makes a nitro tap special, read on. The simple description of a nitro tap is a syringe with a plate attached to the end of it with tiny holes. I am not making this up! The early nitro beers developed by Guinness used a syringe to induce what foam researchers call gas nucleation and break-out in the beer. Can you imagine buying beer with a syringe banded to the side of the bottle? Nitrogen is an interesting gas because it is somewhat difficult to get it into beer, and it’s also a bit of a challenge to get it out.
The modern nitro tap has a smooth bore inside of the tap that accelerates the beer’s velocity on its way to the orifice or restrictor plate. This plate, at least on a Guinness faucet, has five holes that generate a significant pressure drop when beer at a certain velocity flows through the plate. It’s the pressure drop that causes gas breakout and the proper velocity through the tap is directly related to the pressure applied to the keg. After the nitro beer is pushed through the restrictor plate it flows through a device called a flow straightener that neatly directs the flow of beer and gas bubbles down into the end of the faucet where it exits this contraption and enters your beer glass. I have always admired the details required to dispense this type of beer. Sláinte!
Q
I recently used a new sanitizer recommended by the local homebrew shop proprietor. About a week after cleaning and sanitizing my keg I opened it and saw a patina of rust. Clearly I didn’t fully rinse the sanitizer and something reacted with the stainless steel. Most of the rust seemed to come off easily with a scouring pad. But there were several spots, particularly around the welds at the bottom, where I could not remove all of the rust. Now what? Have I permanently damaged the keg by scoring its surface? Will surface rust ruin the beer? Most importantly, are there any health issues? I have visions of tetanus.
Brad Seibert
Oakton, Virginia
A
I used to work for Paul Mueller Company, one of the largest stainless steel fabricators in the United States. Unfortunately there are many things that cause damage to stainless steel and many owners of this alloy find out the hard way that stainless steel is not stainless in all situations. The good news is that certain types of damage to stainless steel can be repaired, especially when the damage is identified soon after it occurs and that remedial actions soon follow.
There are two general causes of rust on stainless steel; iron contamination on the surface of the steel and embedded iron. Surface contamination can come from dust, water, tools and any other things that can cause free iron to settle on the surface (stainless steel is mainly comprised of iron, but since the iron is part of the alloy’s crystalline structure it does not rust). The other type of iron contamination is when iron is embedded in the steel. This can happen from deep tool marks or when iron is somehow accidentally made to be part of the vessel. Although the latter is not common it can occur, for example, when the incorrect weld wire is used to build a piece of equipment.
Another type of rusting that occurs is when the area around a weld is affected by heat during welding. The so-called heat-affected zone around a weld is typically more prone to corrosion because the chromium content is not as high as the parent metal. This problem is more pronounced when too much heat is applied during a weld and is why weld color is used to judge the quality of a weld.
In all of these cases rusting often appears when certain chemicals are applied. And one of the things often seen is that the rusting does not affect all of the metal, just parts. The most likely cause for this spotty rusting is localized failure in the passive layer that makes stainless resistant to corrosion and oxidation.
One common method to repair the damage in the passive film is a cleaning method referred to as passivation. This type of cleaning uses an oxidizing acid to remove free iron from the surface of the steel and to remove embedded iron that is very close to the surface.
The most effective passivating acid is hot nitric acid used at relatively high concentrations (sometimes as high as 50%). The problem with this method is that it is dangerous and generates a waste stream that cannot simply be flushed down the drain. Nitric acid also damages elastomers and the normal method is to replace all valve seats, O-rings and other items made from these materials following passivation with nitric acid. The only reason I mention this method is that it is very effective and is the preferred method for industrial users of stainless steel. What this means is that if you Google “stainless steel passivation” you will see all sorts of stuff about this method. Please DO NOT use this method at home.
Another method that is much more safe is citric acid passivation using EDTA as a chelating additive to bind iron. Although this technique is not as aggressive and not as effective as nitric acid passivation, it is much more safe, does not have the disposal challenges and does not damage elastomers. For these reasons citric acid passivation is commonly used as an alternate method.
Both of these methods help to restore the passive layer by cleaning the surface of the steel and oxidizing chromium to form chromium oxide. While this film spontaneously forms on the surface of clean stainless
steel without the aid of oxidizing liquids, passivation does help to repair damaged surfaces.
Grinding and polishing are mechanical methods to remove free and embedded iron and in larger vessels and process systems these methods are usually not the first choice of remediation because they are labor intensive and often times difficult because damaged areas are frequently hard to access. However, they are very effective methods to use and when the affected area is easy to access should be considered before the use of passivating acids. The easiest way to grind and polish at home is by hand using a red (150–180 grit) polishing pad or wheel. Make sure to polish with the stainless steel grain so that the resulting finish is smooth. After you polish the affected area you should clean the surface with a degreaser followed by an alkaline detergent and thorough rinse. Allow the cleaned steel to air-dry and the chromium oxide film will reform.
I may have missed the mark with your problem, but I am pretty confident that you have not done severe damage to your keg and that a more aggressive mechanical cleaning with a polish pad or citric acid passivation will take care of the problem.