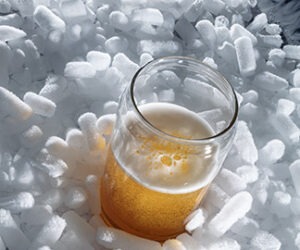
Brewing NEIPA – Tips from the Pros
The current darling of the craft beer (and homebrew) world, New England IPA (NEIPA) requires copious amounts of late hop additions, but there is a lot more to making a world class example. The right brewing water, unmalted grains, the exclusion of oxygen, and other finer points are what makes some examples stand out. Don’t take it from us — these three brewers are churning out some of the finest examples available.
Neil Fisher, Co-Founder & Head Brewer of WeldWerks in Greeley, Colorado

For most of our New England-style IPAs our water profile targets are around 175–200 ppm chloride, 75–100 ppm sulfate, and less than 150 ppm calcium. Depending on your base ion profile, strictly using calcium chloride and calcium sulfate to achieve those targets can result in too high a concentration of calcium, which may affect yeast behavior, specifically flocculation, so consider magnesium sulfate as an alternative for your sulfate additions.
We use a fair amount of flaked wheat and flaked oats in a lot of our IPAs, mainly for their contributions to the mouthfeel and body of the beer. But we’ve found that more than 15% of flaked wheat or flaked oats can lend a bit more sharp “starchiness” to the beer, and if the grist exceeds more than 20% high-protein grains, it can be difficult to maintain colloidal stability.
We utilize a very small (5–8 IBUs) first wort hop addition in nearly every beer we brew, mostly to give us a softer baseline bitterness to build from and to help combat boil-overs in the kettle. But beyond that, all of our other hop additions for NEIPAs take place in the whirlpool. We typically stagger our whirlpool additions over 20–30 minutes, just to bring out more complexity and unique expressions from the hops given the varying time and temperature of those additions. For homebrewers, simplifying it to a larger flameout addition or even utilizing a hop stand would likely produce similar results. We are always trying to find the perfect balance between hop flavor, hop aroma, and hop bitterness, so diversifying the whirlpool schedule has worked well for us.
When it comes to dry hopping, we’ve found leaving the hops in contact 8 or 9 days to be the sweet spot for most of our beers, but we’ve had great results with as few as 5 days. As for total hop loads, one of our most popular beers, Extra Extra Juicy Bits, is dry hopped at nearly 10 lbs./bbl (5 oz. per gallon/37 grams per L) and it’s a surprisingly balanced and drinkable beer despite the extreme dry hop rate. But extended cold conditioning times are a must for heavily dry hopped beers, otherwise hop burn becomes a real issue.
When selecting hops for this style, I think Citra®, Mosaic®, and El Dorado® is a tough combination to beat (Juicy Bits is 1:1:1 of each). When we go to Yakima every year for hop selection and harvest, we’re specifically looking for the complex citrus and tropical fruit expressions of those specific varietals. Our Citra® lots are usually characterized by ripe tangerine and Valencia orange juice, while our Mosaic® lot is a pineapple bomb, and our El Dorado® selection is a tropical fruit medley of candied mango, passion fruit, and papaya.
We use London Ale III almost exclusively for IPAs because we’ve found it’s been the most reliable and consistent in terms of ester production, attenuation, and flocculation. We slightly underpitch so that the added stress promotes ester development, but we also want a somewhat clean, healthy fermentation to ensure proper attenuation and to avoid any phenolics. London Ale III fermented with the right conditions throws delicate stone fruit esters, which are a perfect complement to the citrus and tropical fruit character from most of our hops. Our fermentations stay steady in the 66–69 °F (19–21 °C) range for most IPAs, which has worked well for our fermentation and the start of dry hopping. Oxygen is probably the single most influential factor in brewing New England-style IPAs, so finding ways to keep dissolved oxygen as low as possible would improve your beer more than the quality of your ingredients, equipment, or ANYTHING else that goes into brewing. Every system and setup is different, but purging with CO2 is a must when racking, packaging, and you could even try blanketing with CO2 while dry hopping to minimize the oxygen pick-up.
Jean-Claude Tetreault, Co-Founder of Trillium Brewing in Massachusetts

We are lucky to have relatively low mineral content water in our local watershed, which allows us to dial in the total mineral content. Our chloride and sulfates ratio to roughly 2:1, but maintain low levels of total dissolved solids and sufficient calcium for yeast health.
Our recipe design process has changed over the years. Our earliest hoppy beers contained very little unmalted or flaked grain. Since early days, we have explored this quite a bit and we have found great success with them primarily in higher gravity beers. We also lean on lots of other ways to enhance body and mouthfeel, such as through the mash schedule and temperatures. We also used to have approximate 30% of our total hop charges go in hot-side, but now we are closer to 90–95% on the cold-side. Given the massive hop bills in these beers and measured IBUs and perceived bitterness impact from dry hop charges paired with disproportionately high aroma and flavor impact from cold-side additions, we shifted these additions to the dry hop over the years.
We tend to get these dry hop additions in at the tail end of fermentation to ensure the best balance of being able to harvest healthy yeast and getting intense and reliable bioconversion of flavor and aromatic compounds. We have a sliding scale of maximum dry hop charges based on gravity . . . but we’ve got well over 10 lbs./bbl (5 oz. per gallon/37 grams per L) on some triple and quadruple IPAs and we definitely see a commensurate impact of intensity of character.
GalaxyTM, Citra®, and Mosaic® are the far and away favorite hop varieties for now. There are some (i.e. Sabro® and Strata®) that are distinctively unique and have both the quality and intensity that we value. There are also incredible new experimental varieties in the pipeline that will stand shoulder to shoulder or even exceed the current favorites.
When it comes to yeast there are many strains from different yeast houses that can provide varying levels of bioconversion, clarity of hop strain, and reliability. We’ve explored the vast majority of them and there is no perfect option, so we will use different strains for different beers to achieve the desired impact. Given the range, start with the recommendation from experienced homebrewers in your club or internet forum and go from there. I wouldn’t recommend underpitching, so I’d say to closely follow the pitching rates based on gravity. We stick to the range of fermentation temperatures the lab recommends and sometimes will ramp up the tail end if necessary for a higher gravity beer.
Oxidation is probably the #1 killer for homebrewed NEIPAs! I’d be hard pressed to recommend someone attempt the style if they don’t have a kegging setup as oxidation will quickly destroy these beers and you’ll end up disappointed. Fully CO2 purging vessels (or filling with sanitizer/water and pushing out with CO2) will ensure acceptable oxygen levels. None of that matters though if you can’t keep these beers cold post dry hop. We’ve done some extensive accelerated aging tests with our quality team that shows that warmer temperatures are markedly more detrimental than oxygen levels just above the specification on our packaging quality parameters than if they were stored cold.
Dave Bombard, Co-Founder and Brewer of Green Empire Brewing in Colchester, Vermont

On most of our hoppy beers, we tend to favor a water profile that falls in the 0.6–0.8 SO4/Cl range. To achieve this, we usually use gypsum (CaSO4) and a house-made CaCl2 solution but we pay close attention to calcium (keeping levels under 110 ppm) to maintain softness on the profile. While I don’t think general water chemistry will overall make or break a beer, it is one of those elements that when dialed in, can turn a good beer into a great beer.
We love using flaked oats, flaked barley, and flaked wheat in many of our IPAs. We find they are all great for increasing our head retention and creating nice creamy character that we find desirable in most of our beers. The biggest drawback of these, especially in larger amounts, is lautering ability. We’ve definitely stuck a few sparges when exceeding 20% of these flaked additions in our mash, but using rice hulls can make these sparges go much smoother.
We go back and forth on boil vs. post-boil hop additions depending on the beer. While we love a lot of these low-IBU NEIPAs and do make a few of them, we often prefer a degree of balanced bitterness. Most of our hoppy beers tend to fall in the 50–80 IBU range, which seems higher than a lot of other NEIPAs nowadays. We do employ a lot of heavy whirlpool hop additions, but we are fans of kettle hopping. For every beer we make, we utilize hop additions at the beginning of our boil to create a foundation of bitterness that we enjoy in our beer. We also often add small additions in the last 5–20 minutes of our boil to help layer the complexity of the hop flavors, and to achieve higher levels of bitterness than we could achieve from whirlpool hopping alone.
The majority of our hop additions are added in the fermenter. We’ve experimented with quite a range from 1 lb./bbl to 7.5 lbs./bbl (0.5.–3.75 oz. per gallon/3.7–28 g per L) of total dry hop additions. We often add dry hops during the tail end of primary fermentation, and again at fermentation temperatures after fermentation completes to minimize some of the more vegetal flavors that can come from adding hops at lower temperatures. We have also experimented with varied methods of dry hop contact ranging from pouring in the top of our fermenter and resting for a few days, to recirculating hops. At this time, we really enjoy a “continual rousing” method, as pumps seem vulnerable to loose seals and the risk of picking up oxygen during recirculation terrifies me. When we dry hop, we will add hops through the top of our fermenter, then over 2–3 days we will usually rouse the tank with CO2 directly through our racking arm several times a day to ensure as much contact with the liquid as possible.
I find dry hopping rates to be ABV-dependent. For instance, if brewing a 4–5% session beer, we have definitely found that “double dry hopping” or even dry hopping over 3 lbs./bbl (1.5 oz. per gallon/11 g per L) can lend to really undesirable green and vegetal flavors that are extremely difficult to tame even after extended conditioning time in the tank. With that being said, we’ve gone as high as 7.5 lbs./bbl (3.75 oz. per gallon/28 g per L) on batches of double IPA with extremely pleasing results. At the end of the day, it really depends on the beer you have in the tank. As a rule, we never try to rush our beer to fit a schedule. We are always happy to let a beer crash out in a tank a few extra days to let it reach prime drinkability when packaged.
Generally speaking, we favor hops that fall into the tropical fruit spectrum with bits of dankness and pine included. We try to avoid lots and varietals that fall more into the realm of deep earthy, spicy, oniony characteristics, although occasionally we do desire some of these notes in the balance. We also really enjoy using Cryo® hops on the hot- and cold-side due to the decreased plant matter. Also, we usually favor looser packed T-90 pellets vs. the tighter packed pellets as we find them to disperse more effectively into our beer during whirlpool and dry hopping. In regards to hop combinations, you’d have to be crazy to not love Citra®, Mosaic®, Simcoe®, etc. but we’ve really grown in love with Sabro®, El Dorado®, Strata®, and Idaho 7® specifically over the last year. We’ve also really enjoyed a number of the Southern Hemisphere varietals we’ve gotten our hands on, Motueka being an absolute favorite.
Don’t be afraid to play around with different hops, and don’t get caught up in idea of bittering vs. aroma hops. Everyone loves to use Citra®, GalaxyTM, and Mosaic®. But don’t limit yourself to these. There are a growing number of varietals, including experimentals available to homebrewers. Embrace this, and don’t be afraid to use them where you think they will best be expressed in your finished beer.
In my opinion, yeast is one of the major drivers that make the style what it is. We’ve used several strains in our IPAs, but you can never go wrong with Wyeast 1318 (London Ale III), or any of the other mirrored strains from other suppliers. I enjoy the fact that these strains have the perfect level of attenuation for the style, leaving behind just the right touch of sweetness. Often times we will also blend in some more traditional American ale strains for increased attenuation. We always raise our fermentation temperature from 69 °F (20.5 °C) to 71–72 °F (22 °C) after day three to minimize diacetyl.
I’ve debated this with brewer friends, but I’m also convinced that strain selection is a major contributor in the visual intrigue (haze) that people tend to gravitate toward in today’s IPA. We’ve definitely noticed that strains can express themselves differently and make varied contributions to how the end product appears in the glass. To test this, we’ve taken the same beer, pitched different strains of “IPA branded” yeast, and have noticed very different expressions of flavors, aromas, mouthfeel, and visual appearances. At the end of the day, I don’t believe hazy beer necessarily equals great beer by any means. I think its way more important to find a strain, or handful of strains, that will provide the expressions in the finished product that you, as the brewer, ultimately desire. Another suggestion for homebrewers is to always make a starter. As a homebrewer, pitches can often be stored in a variety of conditions and have some age behind them. Creating a starter prior to brewing really ensures that you will have the cell count and viability needed for a nice healthy fermentation. Wort oxygenation is huge in yeast health also. While harmful post-fermentation, adding oxygen pre-pitching is hugely important for fermentation and allowing the yeast to express itself properly in the finished beer!
As a former homebrewer, minimizing oxygen was my biggest weakness, and a major headache. I believe the biggest influx of oxygen for homebrewers is when transferring to a keg from the fermenter for force carbonation. Finding a way to devise a closed transfer is the best way to resolve this issue and maximize stability. For instance, before we were Green Empire, my partner and I used to ferment in 15.5-gallon (59-L) stainless steel sanke kegs. We eventually were able to devise a custom cap that we could attach to the opening of the keg via tri-clamp, and would allow us to siphon out of the keg into the “beer out” port on smaller pre-purged 5-gallon (19-L) Corny kegs via CO2 transfer. This was huge for creating longer stability for our brews, and as one friend called it, making them taste “less homebrewy.” I’m sure with some craftiness you could even devise a similar setup through the cover of a 6-gallon (23-L) pale. Prior to this, we were siphoning through the top opening of the Corny kegs, and as the weeks went on, we’d notice gradual development of off-flavors and discoloration. After tightening up this process, small things like purging the CO2 hose prior to connecting it for force carbonation, and purging growlers/kegs/bottles before filling them with beer are steps that can be easily forgotten but can be problematic for stability in homebrewed beer.