No-Sparge Brewing
A quest of mine to brew a flavorful but quaffable session ale was coming up short. I was getting wonderfully high extract efficiencies, near 90%, but my ordinary bitters, milds and Scottish ales were coming out watery and bland. Then I had a homebrew-life-changing experience with an ordinary bitter I judged in the first round of the National Homebrew Competition (NHC). The depth of malt character far surpassed anything I had been able to achieve, while the beer remained dry and highly drinkable. It was clear this was not just crammed with crystal malt. There was something I was missing.
I later found out that the beer won first place and was brewed by none other than Jamil Zainasheff (BYO’s “Style Profile” columnist.) This was extremely fortunate because I had brewed his exact recipe several times, so it meant there was either something different with his technique or ingredient sources. Ultimately, through an email exchange, I narrowed it down to a significant efficiency difference. Zainasheff did not just pick a 70% efficiency target to provide a common standard; he felt the beers were noticeably better compared to those brewed with extract efficiencies in the mid-80% range and higher.
In the following year I researched, experimented with, and refined my technique to consistently hit around 70% efficiency. Ultimately I settled on no-sparge lautering as the key. Everything came together for NHC 2009 when I entered my vastly improved ordinary bitter and won first place in the Southwest region. Since then I have used this technique on nearly all my beers and seen a significant increase in malt aroma and flavor complexity.
What Is No-Sparge Lautering?
Lautering is simply the process of separating the wort from the grains after mashing. Historically, commercial brewers discovered that if they sparged (rinsed) the grain bed with additional water during the lauter, they were able to get a higher yield of fermentable sugar from the same amount of grains. This increased efficiency improved profits and so became standard practice for the vast majority of breweries.
Fast-forward to recent times and you will see that homebrewers commonly use either continuous or batch sparging when brewing all-grain beers. Continuous sparging directly scales down the commercial practice of adding water to the top of the grain bed while simultaneously draining wort from the bottom. It can be tricky to do consistently as matching flow rates, avoiding channeling and repeating the process identically batch after batch requires practice and/or specialized equipment. The pragmatic alternative of batch sparging instead involves adding water and draining the grain bed two or more times in sequence.
No-sparge brewing is just what it sounds like. You skip the sparging step and just drain the wort from the mash into the boil kettle. While that sounds simple — perhaps even lazy — the benefits can be numerous.
Why No-Sparge?
The primary reason I switched to no-sparge lautering was because of the flavor difference, especially lower-gravity beers. When compared side by side, I perceive a greater intensity of fresh malt character from beers I brew without sparging. By that I mean that the beer has an aroma and flavor that matches the aroma you experience when you open a new sack of malted grain. Surprisingly, this comes without the beer being perceptibly sweeter or more viscous, as you would get from adding lots of specialty grains.
I have yet to see a good explanation for why this is the case. Perhaps the uniformly higher gravity of the wort prevents some level of tannin extraction that comes from sparging. Maybe there is some difference about the first compounds that are extracted compared to those extracted during the tail end of rinsing. I just know what my taste buds and other drinkers tell me they perceive in the finished beer. Despite the added ingredient cost, there is at least one commercial beer produced this way — Kirin Ichiban.
Beyond the improvements to the beer, there are several practical benefits to no-sparge brewing. No-sparge brewing is simpler — you don’t need to worry about matching the inflow rate of your sparge water with the outflow rate of your wort. No-sparge brewing also requires less equipment — you don’t need a separate hot liquor tank (or HLT) or a sparge arm to deliver the sparge water.
This approach can save time too. While there are ways to speed up continuous sparging, it often takes 30–60 minutes depending on your target volume. With batch sparging you need to add water, stir and recirculate for each “batch” (usually there are two). No-sparge lautering skips all of this in that you simply recirculate (vorlauf) and then drain as quickly as you possibly can without sticking the mash. Of course, if your burner takes a while to heat up your runoff to boiling, this time saving may be moot.
In terms of difficulty, no-sparge is easy to do consistently and correctly. When I first started brewing all-grain, I was overwhelmed with all the variables in the process. Did I miss my gravity because I was having channeling? Was I sparging too quickly? With no-sparge brewing there is one less step to go wrong. With fewer variables in the process, there is subsequently less variability in the output. I consistently get 68–72% efficiency with beers in the 1.032 to 1.050 SG range. As the gravity goes up, the efficiency drops in a very predictable way.
From an equipment standpoint, no-sparge brewing means that you can skip the hot liquor tank and associated burner. Because you do not need to store sparge liquor while draining from the mash, the boil kettle is the only heatable vessel you really need. Additionally, the fluid mechanics of no-sparge brewing mean that, as with batch sparging, you can use a simple slotted manifold or braided hose rather than a more costly false bottom. In fact, an ideal setup is a large cooler with hose braid or manifold, a boil kettle and a burner. Set up the vessels on two levels so you can use gravity to transfer the wort.
Step by Step
Applying the no-sparge technique couldn’t be easier. Start off by calculating how much water you need. While some homebrew sources warn against using a thin mash, there are actually some benefits. My experience matches what Kai Troester’s experiments (seen at braukaiser.com) have shown: A thinner mash of 2.5 quarts of water per pound of grain (5.2 L/kg) or higher results in better conversion with no real drawbacks. In the interest of simplifying the process, add all your brewing liquor up front during the dough in.
There is no mystery or magic in figuring out how much water you need. Water added to the mash tun ends up in one of three places: in the boil kettle, pooled in the dead space in the tun or absorbed in the grain. To determine your total, you simply add up each part. My target pre-boil volume for a sixty-minute boil is 7.25 gallons (27 L). My mash tun has a dead space of about 1 quart (~1 L). That just leaves the water absorbed by the grain bed. An approximation that has served me well is that one pound of grain absorbs one half of a quart of water (roughly one liter of water per kilogram of grain.) So, for a beer recipe with 12 pounds (5.4 kg) of grain, I expect 6 quarts (5.7 L) of water to be absorbed and lost. Adding that all up for the theoretical batch on my system totals 9 gallons (34 L) of water.
Heat the entire volume of water to the desired strike temperature and transfer to your mash tun (or heat directly in your mash tun if possible.) Dough in and mash as usual. For my setup, I mash in a stainless steel kettle and so I need to heat and stir a few times to maintain my desired temperature, regardless of mashing technique. Doing this has the side effect of evenly dissolving the sugars throughout the brewing liquor. If you do not normally stir your mash, you will want to do so at least once at the end of the mash to get the sugars mixed evenly. Recirculate a few quarts as usual until the wort runs clear.
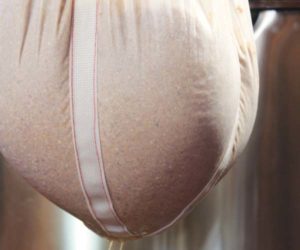
Now comes the easiest part. Simply open the drain valve on your mash tun and let it transfer as fast as you want without getting a stuck mash. Just as in batch sparging, the actual speed is irrelevant because you are not rinsing, you are simply separating the wort from the spent grains.
At this point, you should have the desired pre-boil volume and you can proceed with the rest of your process as usual.
Since your entire pre-boil wort volume is in the mash tun, you can easily check to see if you hit your target specific gravity by sampling wort from the mash tun. Once you get a negative iodine test, stir the mash and let it sit for a minute (to let the grain solids settle out a bit), then take a specific gravity reading. Your pre-boil gravity should be Cp=(CtVt)/Vp (where Cp is pre-boil specific gravity, Ct is target specific gravity, Vt is target post-boil volume, and Vp is pre-boil volume). If you have not reached your pre-boil gravity, let the mash sit and sample again after 5 minutes. You may be able to save extra time by not needing to mash for a typical 60 minutes.
One variant on this procedure is to retain enough water from your total water volume to perform a mash out. Before running off the wort, transfer the last bit of (boiling) water from your kettle to the mash tun. Stir the mash, then recirculate (vorlauf) after about five minutes. In addition to the usual benefits of a mashout, this can save you even more time, as you will be heating your wort from 170 °F (77 °C) to boiling instead of mash temperature to boiling.
The Drawbacks
Of course, if no-sparge brewing had no downside, brewers would never have developed the techniques and equipment to sparge, nor would they invest the time and energy on each batch. The obvious drawback is lowered extract efficiency. On a commercial scale, a 70% efficiency would be a big hit to profitability in what is a very competitive industry. A jump to 90% efficiency means a brewer can use roughly 1⁄4 less grain. This is true on the homebrew scale as well, but in the grand scheme of things our costs are often less critical.
Since you need to use more grain and because you will put all your brewing liquor into the mash tun up front, your mash tun capacity can be an issue. A 10-gallon (38-L) cooler at 70% efficiency is able to make a 6-gallon (23-L) batch at 1.052 gravity when filled to its maximum. To increase the gravity, you can decrease your batch size to 5 gallons (19 L) and get closer to a 1.076 batch. Or, if you upgrade to a 15-gallon (57-L) mash tun, your possibilities are practically limitless for 6-gallon (23-L) batch sizes.
Another problem with having all the water in your mash up front is that if you like to do step mashes you have got more thermal mass to deal with (read more about step mashing on page 68 of this issue). This will require either more heat or time to bring the mash up to the next step. I personally do not do step mashes, so this has not slowed me down.
The final drawback is a bit more subjective. Brewers typically fine tune recipes without the effects of no-sparge brewing in mind. Skipping the sparge can lead to a beer that is out of balance. For example, I have had trouble getting that slightly tannic roasty character that I like in dry stouts. Instead, the subtly nutty and biscuit-like Maris Otter base malt masks. The solution is to adjust the amounts or types of grains. Consider switching some or all of your Maris Otter base malt for a domestic two-row, perhaps. Dial back crystal malts. Or, simply brew these beers using either continuous or batch sparging.
Keep No-Sparge on the List
Whether or not you decide to switch all your homebrews over to no-sparge lautering, this can be a useful trick to have in your brewing repertoire. Consider pulling this technique out for the times when you want to make a tasty beer that doesn’t knock you over with an alcohol punch or weigh you down with excess calories. Or, you can also try using no-sparge to save time and simplify your process.
Efficiency Estimation
Estimating your efficiency when brewing with no-sparge lautering involves a straightforward calculation.
First, how well do the starches in your grain bed convert to sugars and go into solution? If you follow a similar process from batch to batch this tends to be a fairly consistent number. One way to measure this directly is to measure the gravity of your wort in the mash tun at the end of the mash after stirring well and multiply that by the total volume of water in the mash tun at that time. That gives you the total number of gravity points and you can divide by the theoretical maximum number of points. This percentage is the conversion efficiency.
The second step is how well you get that sugar out of the mash tun during lautering. Since you have stirred up the grain bed to equally distribute the sugar in all of the brewing liquor your lautering efficiency is a simple percentage of how much you drain off compared to the total water.
You can also measure this lautering efficiency directly by multiplying the gravity of your wort in the kettle times the volume of wort in the kettle to get the total gravity points you have extracted. Compare this to the total gravity points you measured in the conversion step in the mash tun.
Your overall efficiency is then the combination of the conversion efficiency and the lautering efficiency.
The biggest change when increasing the gravity of your beer is an increase in the amount of grain you need and therefore an increase in the water retained by the grain. If I had a batch that required 18 pounds of grain then I would have 3 more quarts of water in the mash tied up in the extra 6 pounds of grain. I would be draining the same 29 quarts from those 39 quarts, translating into a 74% lautering efficiency and a 85% x 74% = 63% overall efficiency. So an increase in gravity requires an increase in malt and an associated increase in mash water, resulting in a lower overall efficiency.