Pouring Nitro Beer, Dip Hopping & Lagering Temperatures
Q. I am having an issue with a stout in which I used 75% nitrogen/25% carbon dioxide beer gas mix. It’s been kegged for six weeks at 33 PSI and held between 36–37 °F (2–3 °C). The beer barely cascades (basically nothing) pouring from a stout faucet. I’m new to using nitro, but have been brewing for 15 years and have no issues with my other beers. I’m starting to question if the stout tap is good.
Ken Schretlen
via email
A. When it comes to pouring stout, there is a clear gold standard to match: That’s Guinness. A brief review of a few key things known about Guinness draft stout helps troubleshooting. According to numerous references, Guinness contains a paltry 1.2 volumes or 2.4 g/L of carbon dioxide and about 55 ppm of nitrogen (level reported from a brewing scientist in England with knowledge about this specification). These gas specifications align with beer equilibrated with a 75% nitrogen/25% carbon dioxide gas blend at 33 PSI and 36 °F (2 °C).
Although U.S. nitro brewers use the gas mix and conditions you used, Guinness specifies in their Draught Quality Standards publication a 70% nitrogen/30% carbon dioxide gas blend at 32–40 PSI for kegs stored at 46–50 °F (8–10 °C) and chilled in-line to the faucet to 39-43 °F (4–6 °C). This reflects differences in beer handling practices in the different parts of the world selling Guinness.
If low nitrogen content is your problem, one cause is insufficient headspace in your keg. An easy thing to try is to simply pour off some beer, let your beer rest to re-equilibrate or lay your keg on its side and do some shaking to speed things along, and check to see if you have more cascading. If you do, it’s an indicator that this strategy is working. Either keep rocking your keg until you hear gas flow stopping or let your beer sit for several days to allow gas transfer between the headspace and beer to occur.

Another possible cause of no cascading is insufficient velocity flowing through the faucet. The classic Guinness faucet requires turbulent flow occurring as beer is forced through the five tiny holes in the restriction plate or so-called jet disk. Some brewers make the mistake of reducing the keg pressure to “normal” beer pressure before serving or make the mistake of trying to balance the draft system by using the line diameter and length rules used for normal carbonated beer. Both mistakes result in low velocity and little to no gas breakout as beer flows through the jet disk. Guinness provides a 12 second target for the first part of their classic two-part pour. This translates to 1.25 ounces (37 mL) per second. If your flow rate is too slow and your keg pressure is about 33 PSI using a 75/25 gas blend, you have too much line restriction or your restriction plate is clogged. Start by checking the restriction plate; if clear, it’s time to do some line replacing using a minimal line length between keg and faucet.
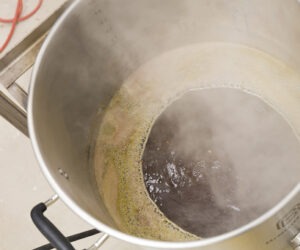
In my experience, poor cascading and foam formation in nitro beers is typically caused by inadequate dissolved nitrogen. Although high gas pressures can be used to increase the gas transfer rate using what I call the crank and shake method, gas control is approximate at best. The most reliable way to quickly nitrogenate your beer is to lay the keg on its side, position your gas cylinder above the keg to prevent beer from flowing into your gas line, pressurize the gas line, connect it to the keg with the gas line positioned at 12 o’clock to prevent excessive foaming, and allow the headspace to pressurize.
Once the keg is pressurized to ~33 PSI, begin rolling the keg back and forth. As gas dissolves into the beer, pressure in the line drops, and the regulator allows gas to flow. This is audible and is a direct indicator of gas flow into the beer. As dissolved gas content approaches the equilibrium condition and gas flow slows, you should hear a change to the sound of the operation. When you can no longer hear gas flowing, you are close to being done. I find it works well to allow the keg to settle for about 15 minutes and repeat the rocking step. When no gas flow can be heard when rocking your rested keg, it’s time to let the keg rest upright for an hour or so before pouring a pint. If you don’t like this idea, simply connect your keg to your gas cylinder, set the regulator pressure to ~33 PSI and let the system sit for a week.
Q. I have been reading the articles on “dip hopping” in the recent issues, which has me interested in the technique, but I have a few questions. Do you leave the dip hops in the fermenter during the entire fermentation, or do you dump the dip hops after some time? If left in during the entire fermentation, will the beer develop grassy notes? And won’t the active fermentation drive off the hop aroma the dip hopping is trying to achieve?
Ed Chovanec
Schaumburg, Illinois
A. Much of what is known about dip hopping comes from the brewers at Kirin Brewing who developed the method. The method adds hop pellets before fermentation where the hop matter remains in contact with beer over the course of fermentation. Kirin does not provide details beyond that, but we can make some educated guesses about the process following hop addition.
Most commercially brewed beers these days, whether fermented using lager or ale yeast, typically finish fermenting within a week and are quickly chilled after a short diacetyl rest. Dip hopping, although predominately used by craft brewers for ales, was developed by this famous lager brewery at their Spring Valley Brewery in Tokyo, Japan, on the grounds of the original Kirin Brewery built in 1869. Today, the Spring Valley Brewery serves as a playground for Kirin’s innovative brewing team with multiple locations.
Spring Valley’s Toyojun 496 India Pale Lager is the brewery’s flagship beer and the one that introduced the dip hopping method. According to Kirin’s website, “Spring Valley Toyojun 496 uses the ‘dip hop method,’ in which hops are steeped in the beer for seven days. By carefully and thoroughly extracting the aroma from hops, also known as the ‘soul of beer,’ we have achieved both a rich aroma and a smooth aftertaste, resulting in the beer’s characteristic rich flavor and clean aftertaste.”
Grassy hop characters can be caused by several factors, including hopping rate, beer pH, and hop quality. I have not included time in this list because research related to extraction rate of hop compounds from pellet hops conducted by Peter Wolfe, a PhD student at the time in Tom Shellhammer’s group at Oregon State University, showed that hop pellets quickly give up their goods when added to beer. In any case, dip-hopped beers do remain in contact with hops during fermentation and grassy characters are not found in 496. The typical practice these days is to either rack beer from the fermenter into a lagering vessel after fermentation or to remove yeast and hop sediment from the cone of unitank fermentation vessels following cooling.
Your question about aroma losses during fermentation has been specifically addressed in several studies conducted by Kirin. Interestingly, hop pellets act as carbon dioxide nucleation sites and reduce the concentration of dissolved carbon dioxide in beer during fermentation, leading to scrubbing of undesirable volatiles. Data from beers brewed with and without dip hopping show less of the sulfur-
containing, onion-like compound 2-mercapto-3-methyl-1-butanol (2M3MB) and less myrcene, a hop terpene known for earthy, musky, and dank aromas, with dip hopping. The same study shows the retention of linalool, with its pleasantly fruity and floral aromas, to be similar when beers are either dry hopped or dip hopped.
I recently visited Japan on a business trip and did learn something new about dip hopping. I have speculated in the past that this method was developed by innovative brewers simply experimenting with different ways to use hops. It turns out that Japanese tax law is the real reason behind dip hopping. Happoshu is a category of beer and beer-like beverages defined by ingredients and processes used for production. Beers brewed with less than 67% malt are classified as happoshu. Because the tax rate on happoshu is less than beer, some breweries developed happoshus brewed with very little malt to serve the low-cost market. Changes to the tax code have recently closed the tax rate difference between beer and happoshu and brewers are using more malt in their beers. Malt usage, however, is not the only thing distinguishing happoshu from beer. A beverage is also classified as happoshu when ingredients are added to beer after yeast pitching. This means that many imports from Belgium and the U.S., for example, are classified as happoshu because of dry hopping or fruit additions. To avoid the happoshu classification and consumer biases that come with it, Kirin developed dip hopping, and the rest is history.
Q. How do I best lager after fermentation if I don’t have multiple fridges (nor do I have room for them)? I have tried outdoors during winter, but the temperature changes a lot. Do temperature changes damage the beer? Can I lager them at basement temperature around 52 °F (11 °C)? If so, will it affect the lagering time? Also, should I carbonate them before or after lagering? And should I lager them in kegs or bottles if I plan to bottle them?
Børre Aursnes
Drøbak, Norway
A. The textbook answer to a question about the traditional lagering method is that lager beers are fermented at temperatures ranging from 46–54 °F (8–12 °C), often in open fermenters, until beer is about 2 °Plato (8 gravity points) above the anticipated end point, racked to a lagering vessel equipped with a spunding valve to allow control of pressure developed during the end of fermentation, and allowed to slowly cool to about 32 °F (0 °C). A general rule for the duration of lagering is one week per degree Plato (4 gravity points) based on wort strength prior to fermentation. In the past, standard strength Pilsners at 12 °Plato (1.048 SG) lagered for three months and bock beers at 16 °Plato (1.065 SG) received the four-month treatment.
Closed fermentation vessels, the advent of commercial refrigeration, the development of the unitank process, better understanding of brewing biochemistry, beer filtration, the widespread use of chill-proofing brewing aids, and brewing economics are some of the things that led to changes in today’s approach to lagering. A key part of any process change is to understand the objectives of the process. In the case of traditional lagering, I believe there are three primary changes that must be preserved by alternate methods: 1) flavor maturation, 2) beer clarification and haze stabilization, and 3) carbonation. Traditional lagering, and cask ale production as a related topic, accomplishes these objectives.
A common change among lager brewers is to allow the fermentation to naturally warm towards the end of fermentation to accelerate the conversion of alpha acetolactate excreted from cells during fermentation into diacetyl. Yeast cells then absorb diacetyl and acetaldehyde and reduce these aromatic, “green beer” compounds into flavor-neutral acetoin and ethanol. This simple process change speeds up flavor maturation and is used to reduce the total time required for lagering. Although there are other flavor changes that occur during lagering, like reduction in volatile sulfur aromas and bitterness accompanying beer clarification, diacetyl and acetaldehyde reduction are the most significant and tend to dominate what brewers think about in terms of flavor maturation.
Extended aging, especially in relatively shallow horizontal lagering tanks, results in naturally clear beer. For whatever reason, the use of isinglass finings was not widely used by lager brewers, and lager brewers relied on time and cold temperatures to clarify beer. The cold temperature part of the equation is important because chill haze particles formed upon beer cooling do eventually settle. Lager brewers did, however, use other tools, like tannin powder from oak galls, to help clarify beer. In fact, Anheuser-Busch used oak gall tannin powder in so-called schoene (pronounced shay-na) tanks up until the turn of this century. Commonly used chill-proofing agents today include a variety of silica gels, PVPP, and the enzyme Aspergillus niger prolyl endoprotease (AN PEP), often referred to by the trade name Brewers Clarex®. Silica gels and AN PEP work by removing haze-active proteins and PVPP does its thing by removing haze-active polyphenols. These tools all shorten process time. And AN PEP allows brewers to chill-proof beers without having to chill it, saving time and energy.
Beer can be chill-proofed without being clarified. Commercial lagers brewed by large breweries are typically clarified by centrifugation and/or filtration, while smaller breweries without clarification equipment often rely on silicic acid fining solutions, such as Kieselsol or Biofine Clear, to quickly settle yeast from beer upon chilling to ~32 °F (0 °C). Filtration was first used by breweries in the late 1800s to produce brilliantly clear beer without the added costs of extended storage.
Carbon dioxide is “free” to brewers who naturally carbonate, and large breweries continue to take advantage of carbon dioxide produced by yeast for beer carbonation. None of the time-saving methods discussed thus far interfere with natural carbonation. To capture this gas, lagering tanks must be pressure-rated for the combination of pressure and temperature required to produce beer containing about 5.4 grams or 2.7 volumes of carbon dioxide. Because lager yeast function well at cool temperatures, fully carbonated lager beer can be produced at pressures less than 1 atmosphere, aka 1 bar or 14.7 PSI, of gas pressure. Ale yeast, however, typically have difficulty fermenting when the temperature drops below 60 °F (16 °C) and require at least 1.7 bar/25 PSI pressure for carbonation. This is a big deal to commercial breweries because most countries have very different design codes for vessels designed and rated for use at pressures above 1 bar. In practical terms, this means most ales carbonated to lager-like levels are carbonated by bubbling carbon dioxide into beer.
OK, time to wrap this information into a homebrewing solution. You don’t need to cold age your beer for long if you adopt these modern methods and use your chilly basement to your advantage. Start by cooling your wort down to about 50 °F (10 °C) because I do want to maintain some aspects of traditional lager production with this recommendation. Fermenting lager at 52 °F (14 °C) is relatively normal, so just use your basement environment for fermentation. If it’s relatively easy to move your fermenter into a warmer room, consider moving it towards the end of fermentation to speed up diacetyl and acetaldehyde reduction. I am a fan of aging under pressure developed by fermenting yeast and suggest spunding your fermenter or racking your beer into a keg if fermenting in a vessel not rated to hold pressure (read this issue’s “Techniques” found here).
It’s now time to allow for carbonation to develop and for your beer to gravity sediment. It’s perfectly acceptable to bottle your beer at this point and finish lagering in the bottle. One major downside to this is that you may end up with more sulfur notes in your beer than if you lager in a keg. I’ll just leave this topic for you to ponder and will continue this discussion from a bulk-lagering perspective.
Your basement is the perfect lager cellar for the carbonation step. Make sure to locate your unitank/pressure fermenter or lagering tank/keg in a spot where it can sit undisturbed for 3–4 weeks. During this time, yeast will consume the last bits of fermentable extract (assuming that you capped your fermenter or racked before fermentation ended), excess pressure will be vented along with sulfur aromatics from the spunding valve, and yeast will settle from the beer as activity ceases. If your fermentation finishes before spunding, adding priming sugar before aging works perfectly if you plan on serving your lager from a keg or have a counter-pressure bottle filler.
At the end of the 3–4 week lagering phase at 54 °F (14 °C), your beer has undergone diacetyl and acetaldehyde reduction (with or without the room temperature rest), carbonation, and most of the yeast has settled out of the beer. You’re 90% complete and have yet to need a refrigerator. At this point, you can chill your beer and serve from a keg or bottle if you have the right equipment (or chill and drink the bottles if you have lagered in the bottle). The problem is that as soon as you chill your gravity-clarified, cool-lagered beer, it is going to instantly turn cloudy when haze-active proteins and polyphenols cuddle in the chilly beer. If you are OK with that, all is good. But if you want clear beer, you have a problem that requires us to roll back the timeline a bit.
An easy and effective solution is to add AN PEP when you pitch your yeast. In the U.S., White Labs sells a diluted version of Brewers Clarex® called Clarity Ferm to homebrewers. If you have access to this product, it’s the easiest path forward. If not, and you want clear beer, you are going to need to chill your beer after lagering. One option is to position your lagering vessel/keg in a bucket at the beginning of the lagering process. After 3-4 weeks, use ice, water, and some salt to make a water brine with a temperature around 28 °F (-2 °C). To maintain this cold temperature, you will need to add ice and salt several times per day. The good news is that cold stabilization only takes 1–2 days. But the bad news is that commercial brewers typically filter beer at this stage because chill haze particles are only slightly denser than beer and take a very long time to settle. And I’m guessing you don’t want to filter or mess around with silica gel or PVPP.
Another option is to use the ice and salt trick to get your beer very cold without buying a second refrigerator and fining your beer with something like Kieselsol or Biofine Clear. This process, although requiring cold temperatures, is much faster than traditional cold conditioning and much easier than filtration. You must add Kieselsol or Biofine Clear at least a few days prior to bottling because the sediment should be removed before consuming and the sediment is too fluffy to decant beer from the bottle.