Recording Your Brew Day
 Most professional brewers have had a prior career path before deciding to become a brewer. It is neat to see how each brewer uses their past talents to solve a brewing situation in their own unique way. Before my professional brewing career, I had a few years experience in the emergency medical services (EMS) field. During our training, we were taught about proper documentation, and that “if you don’t write it down, then it didn’t happen.” From early on it has been programmed into my head the importance of proper documentation. Over the years, a few EMS calls have been brought to court due to the nature of the incidents, and it was my detailed note taking in my reports that swung the case in one direction or the other. When I got into brewing beer I continued to use this same practice of detailed note taking and documentation in an attempt to become a better brewer. I enjoy the results of being able to review the data I need to make the right decisions during my brewing day.
As most new brewers are, I was overwhelmed with trying to fully understand all the processes that go into making a batch of beer all at once. As I continued to learn, got more hands-on experience, and then moved into the professional world of brewing, I slowly started to change my brew log sheets to fit all the information that I would need to properly document a batch of beer to my liking. As I look back on my earlier batches, I see so much information that I didn’t record because I just wasn’t aware of it, or didn’t understand the importance of the data.
To help calibrate your system you need to first understand what your batch targets are.
What is a 5-gallon (19-L) batch? Is it 5 gallons (19 L) in the kettle pre-boil, 5 gallons (19 L) post-boil, the volume in the fermenter, or is it the packaging volume?

Seeing that the original gravity is first able to be taken, along with a volume reading, at post-boil, this is where I consider my equipment size. While you must know your pre-boil volume to get the mash efficiency, the post-boil volume will allow you to start measuring your volume losses through each process. For this reason, and because recipes are written to post-boil numbers, I always refer to my equipment by post-boil volume numbers. While some may claim “5-gallon/19-L batches,” I personally target 9 gallons (34 L) pre-boil, 6 gallons (23 L) post-boil (I do a 90-minute boil), 5.5 gallons (21 L) in fermenter, and close to 5 gallons (19 L) packaged. All of this said, and I refer to my batches as 6-gallon (23-L) batches to make sure I hit my gravity target.
Over the years, while working at several breweries, I have been told by numerous people that I document more information on batches than most brewers they have come across. I have always taken much pride in this. Being in the process of starting and building a new brewery, I have made our brewery logs to include all the important key data points that I feel are necessary to properly document a batch. When taking notes, it helps to understand the recipe writing process, gravity points, points per gallon (PPG) of malts and grains, mash efficiencies, and things of that nature so that you know what information you should record. In this article, I will go over what I feel are key data topics to document so that you can better evaluate your beer, procedures, and other useful data so that you can adjust your brewing practices if needed to hit your targets.
Why is Documentation Important?
I would like to think that there are two types of brewers out there. One that follows directions well by adding in the ingredients at the right time and temperatures, and then there is the academic brewer who is looking to make a better product each time by fully understanding every aspect of the brew session. Despite what type of brewer you may be, it is always nice to be able to look back on your notes to evaluate a full day’s worth of hard work if you choose to do so. If there is any need for troubleshooting, then you will be armed with all the information needed to correct the problem, or prevent that issue from happening again in the future.
In my 15+ years experience as a brewer, I have had only a handful of batches that were 100% textbook perfect where all targets were met with no mishaps. This is a very rare experience, and feels like a great triumph and victory when it does occur.
Other than troubleshooting, another good reason for meticulous note taking is to calibrate your system. The more factors and data that you collect on a system or batch will help you dial in recipes. Whether you like to brew only one-off beers that you created, your favorite “tried and true” recipe, a clone, or a professional brewery’s actual recipe to their brewery specifications, with an abundance of notes you can see where the deficiencies and influxes are so you can adjust accordingly to your system specifications and habits. Once your system is fully calibrated, and you can expect to hit your targets, you might decide to try another brewer’s recipe that they wrote using their system. Knowing all of their specs, and being able to apply it to your brewhouse, will help keep the consistency of the beer.
Not all brewers are the same. Even at breweries that have two or more brewers, it takes much practice and training to all become accustomed to each other’s style and the way each operates on a particular brewing system. Minor differences between brewers can change the targets of a beer. Being able to read detailed notes and learn from every batch will help you be consistent in hitting all of your targets.
Some newer brewers might come across a few topics that you are unable to record. With collecting as many notes as you can, you are able to better make educated guesses on the missing topics using the other data. Also, always feel free to add any bit of other information that you feel you might need, as these lists are always evolving. Here are the main key data topics that I like to gather while producing a batch of beer.
Brew Day Notes
At the top of my brew sheet I include my favorite highlights that I often use for easy reference. They include: Date, Batch Name, Batch Number, Beer Style, Brewer’s Names, Boil Time, TGU (total gravity units), Pre-Boil Volume, Post-Boil Volume, IBU, CGravity (correcting gravity factor due to higher gravity wort and the increasing harder ability to isomerize the hops alpha acids as the wort gravity rises), Original Gravity, Final Gravity, ABV %, ABW %, Mash Efficiency %, Yeast Strain, and Yeast Attenuation %.
When listing any ingredients, make sure to document the manufacturer, lot numbers, crop year, and expiration dates if given for later reference. Also, when listing the malt varieties make sure to include the Points per Pound per Gallon (PPG) that you are using in your calculations. This may be given by the malt supplier as an actual analysis number, or an overall average estimate that can be found on one of many homebrewing sites that offer a PPG list of common malts and grains. Beersmith.com and Brewunited.com are two sites that offer PPG lists.
Most PPGs listed are maximum extracts that come from a fine grind (0.2 mm grind) / dry base, which is obtained through a congress mash in a laboratory. As brewers, we obtain our malts with moisture content and normally mill our malts coarsely (around 0.7 mm). If you have a few specs you can dial in an actual PPG. Malt analysis reports usually include fine grind / dry base percentage (FG/DB%), fine grind / coarse grind difference percentage (FG/CG%), coarse grind / dry base percentage (CG/DB%), and moisture content percentage. We are more interested in the coarse grind / as-is percentage (CG/As-Is%), as it is more relevant to normal brewing conditions.
For example, the malt analysis report for Crisp Malting Group’s Maris Otter English pale 2-row gives a FG/DB of 81.5%, FG/CG difference of 0.9%, and a moisture of 3.5%. To find the CG/DB%, you take the product of FG/DB% and FG/CG% then subtract it from the FG/DB%, which totals 80.77%. You now take the product of CG/DB% and moisture %, and subtract that from the CG/DB to get the CG/As-Is percentage. In this case, Crisp Maris Otter has a 77.94% extract. This extract percentage is an extract of sucrose, which has a PPG of 46, therefore 46 X 0.7794 = 36.85 CG/As-Is PPG. Many brewing sites list Crisp Maris Otter at 38 maximum FG/DB PPG. When you take into consideration the moisture content and FG/CG difference, the new PPG is now 36.33 PPG for CG/As-Is.
For the most part these numbers are fairly close and produce results within the expected ranges, but the numbers can differ enough to notice from lot number to lot number. The same applies for hop varieties with consideration to crop years, alpha acids, hop storage index (HSI), and storage conditions. With having a premade brew sheet to use on brew day that lists your target data points in order of the time that you would collect it helps in keeping organization, as well as reminding you to take a reading at the correct time.
For my brew day I try to record the following data: Start/End Times, Start/End Propane Tank Weight (fuel consumption), Water Source, Water Report (if available), Dough In Time, Start/End Hot Liquor Tank (HLT) Volume (mash in water volume), Salt Additions (if any), Strike Temperature, Target Mash Temperature, Initial Mash Temperature, pH Readings (I like to take these every 10 minutes), along with Gravity/Brix readings at recorded Volume and Temperature, Start/End Lauter Times, Start/End Sparge Time, Sparge Water Temperature, Start/End HLT (for sparge volume and salt treatment), Total Water Used, Total Water Retained By Grist, Pre-Boil Volume, Pre-Boil Gravity Unit (GU) divided by 100% Efficiency Gravity GU to get Mash Efficiency Percentage, Kettle Full Time, Type Of Kettle Heat (direct flame, electric elements, electric stove top, steam, Etc.), Kettle Heat On Time, Kettle Heat Off Time, Boil Time, Kettle Additions (with Weights, Times, Alpha Acids, Hop Utilization Percentage, and any Finings and Yeast Nutrients).
You also want to keep notes on your times and temperatures of your whirlpool and knockout methods (glycol heat exchanger, counterflow wort chiller, immersion wort chiller). A 20-minute whirlpool and transfer will leave the wort at hot temperatures for longer periods of time the bigger the equipment gets. I find it to be quicker to chill wort and transfer a 5-gallon (19-L) batch than I can a 500-gallon (1,900-L) batch even though the hoses and pumps are also in proportion to the kettle size.
Weather
Something that I have picked up over many batches was to record the current weather. I always homebrew outside, and the weather is different each time, causing much difference in each batch. Knowing the weather during mashing as well as during the boil can help you plug in a few variables that might help predict the correct strike temperature to hit your target; or to estimate the boil off resulting in higher or lower gravity and/or volume. I personally have used the weather app “eWeather HD” for the past five years to collect the following data on batches with outstanding results:
Current Temperature, Dew Point, Humidity Percentage, Chance Of Precipitation Percentage (indicates possible future pressure drops, increases, or stagnant stalls in air pressure that can cause poor boil-off leading to improper evaporation), Yesterday’s Pressure (in hg), Current Pressure (in hg), Sea Level Pressure (in hg), Wind Direction and Wind Speed.
I have found that, even when brewing indoors at breweries, this information plays a major role in boil-off rates when using a kettle-out exhaust column to relieve steam with and without kettle fans.
Elevation
Elevation is another factor, but is for the most part a constant one as your brewing location rarely changes. High altitude definition is 3,000 feet above sea level, and even at 2,000 feet you can notice that the boiling point has dropped from 212 °F (100 °C) at sea level to 208 °F (98 °C). The higher you get in elevation the lower the boiling evaporating temperature becomes, changing the chemistry of boil-off and hop isomerization rates. Household cooking instructions suggest that you boil longer when in higher elevations, so I would suggest 90-minute boils when brewing at higher elevations. I have had only a few experiences brewing at high altitudes, and had great boil-off rates.
Fermentation / Cellar Work Notes
There is some key information that you should get during the fermentation and cellaring process. During knockout, was the wort oxygenated, and if so with what method? Make sure to log the Yeast Manufacturer and Strain, Preparation Before Pitch such as a yeast starter or propagation vs. direct pitch, Number Of Generations, Viability Percentage, Cell Density, Pitching Volume, Pitching Wort Temperature, Fermentation Temperature, and the Volume of Wort being pitched into.
I don’t expect homebrewers to take samples of their gravity every day, but if you choose to do so you can learn a whole lot about how a particular yeast strain works under your current brewery conditions. If you are able to take pH readings you can see how the pH changes from water to mash, sparge, and fermentation to a final pH. No matter if you are a brewer who uses a bucket fermenter or a fancy conical stainless steel fermenter with capping and spunding valve options, make sure to take notes on your dry hopping or finings procedures, when you cap the fermenter, and any pressure PSI readings that need to be taken. Remember to degas all samples for accurate readings. When you have reached terminal gravity and completed a diacetyl rest, you will then be ready to cold crash the beer. Document all times and temperatures. If you do yeast harvests, be sure to document the temperature, how much volume you pull, and any yeast specifications like those already mentioned. The more information you have on how your yeast works the better you can predict its outcome and timeframe. A 78% attenuated beer tastes much different than an 82% attenuated beer.
Transferring
In a brewery setting, this is a major task that takes up the majority of the work day and requires its own paperwork. Transfers in homebrewing should only take a minimal amount of time, and usually are as simple as syphoning beer from the fermenter to a bottling bucket or keg. There are some brewers who have the equipment and means to filter their beer through any of the multiple filtering gadgets that are out on the market. Over the years, I have noticed close to a 10% loss from fermenter to brite tank (a beer vessel to prepare beer for packaging), and close to a 12% loss for filtered beer. The significant loss is largely due to trub and yeast, and these numbers will change from batch to batch with different styles, filtering methods, and operator methods and/or error.
Knowing how much volume to expect from each step of the process will allow you to make future adjustments to hit target volumes of a particular gravity or ABV. When transferring beer, be sure to record vessel, temperature, and pressure from fermenter prior to transfer, and the same in the brite tank after transfer. Recording Start/End transfer times plus clean up time will allow you to better manage your time. If using any fining agents such as Biofine Clear, isinglass, or gelatin, document the amount and method being dosed into the final brite tank volume. Most homebrewers don’t use industry-style brite beer tanks/vessels, but a bottling bucket or secondary fermenter to pull the beer off the yeast (and to measure volume) before kegging are also forms of brite beer vessels.
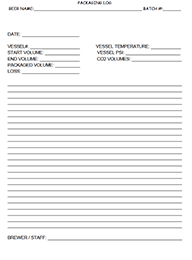
Packaging
Depending on your equipment, your method of carbonation, and packaging procedures, at this point your beer should be in some sort of brite beer tank. This may be a stainless steel bright vessel with a carbonation stone, a bottling bucket for bottle conditioning, a secondary before keg conditioning, or a direct closed system pressurized transfer to a keg for forced carbonation. No matter the method you decide to use, you have already pulled beer off the trub and yeast in the fermenter, and prepared it for final packaging with volume measurements.
With final packaging volumes tallied, you will now know the full batch loss and the amount lost in each section to adjust to better hit your target packaged volume. Is your beer under-carbonated or do you have bottle bombs? If you took detailed notes on the carbonation method, weights and type of priming sugars, and an accurate volume of beer, then you should should be able to easily diagnose any carbonation problems. This information will help keep consistency and allow for brewers to adjust for future batches. I also use the same information while homebrewing to better calibrate my system and hit my targets.
Analysis of Data
While I love to brew beer, one of my favorite things to do is to go over my brew sheets and analyze my careful planning and hard day’s work. How close did I come to my targets? If I did miss a target, then where and what caused the deviation in course? Often the answers to a problem are right there in front of you if you have taken the right notes and data to properly analyze a batch of beer. Many of these times the difference between targets and actual readings are minor, and don’t stray far away from the overall desired spirit of the beer. In these cases just a little tweaking might be in order.
If a major problem occurs, it should be fairly clear with proper documentation where and what caused the problem. Even if you cannot redeem your batch, or it has taken an entire new character than the original recipe called for, you will be able to learn from mistakes and adjust for future batches.
As I mentioned earlier, I have had only a handful of 100% perfect textbook brew days. I feel the reason that this was possible was mainly due to persistent note taking, detailed documentation, reviewing of the data to come up with a new approach, then repeating the process to narrow in my variables. With practice, experience, and a wealth of detailed documentation, you can take ahold of your brew-house, and sail it through any beer adventures that may be in store.
Downloadable blank copies of the six brewing logs I use, with space for every criteria covered in this story, are available below.