Selecting A Fermenter And The Intricacies Of Shelf Stability
Q I’ve been brewing for 30-ish years. Not being as young as I used to be, it’s time to move on from my old reliable glass carboys for fermentation. But what should I get? I’d prefer to steer clear of plastic buckets. There are stainless steel fermenters and the cheaper plastic conical fermenters. I’m not sure which route to go.
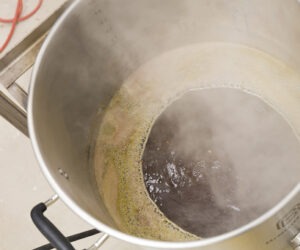
I liked my glass because I could take a peek at the batch, but mostly because they are relatively easy to clean. But, they are heavy and even with a handle or lift straps, hard to carry. I do mostly 5-gallon (19-L) batches and the occasional 2.5- to 3-gallon (9- to 11-L) batch.
Ken Stech
Pendleton, South Carolina
A This is a straight-up opinion question and I will give you my thoughts sans specific type or brand. And as a reminder to seasoned readers and news to newer readers, 20 years of my professional career was with a custom, stainless steel equipment company where I saw some pretty interesting brewing equipment.

My first thought on this topic is for the brewer to define what they want or need with a fermenter. When brewing at home, I like to ferment in one vessel then age and carbonate in a separate vessel. This method is well-suited for plastic. These vessels are relatively lightweight, they do not break, and make for handy fermenters. And as a bonus, clear options allow the brewer to see what’s going on in the fermenter. The primary downside to plastic containers is oxygen migration.
As long as you are not aging your beer for prolonged periods in plastic, the risk of oxidation can definitely be mitigated by racking into another vessel shortly before or after fermentation is complete. Old-school brewers like us cut our teeth reading about primary and secondary fermenters. The current trend is to do everything in a single vessel, but old-school secondary vessels do have their benefits. And one of the biggies is allowing for the use of a simple primary vessel and a simple secondary vessel. At home, the handy secondary is usually a keg because beer can be aged, conditioned, clarified, and served from a single tank. Brewers with the right sort of space can open-ferment in something as simple as a bucket and rack into a keg.
But since you’re not interested in buckets there are lots of alternatives in the world of plastic fermenters these days. If I were looking at this myself, I would select a fermenter with an over-sized outlet valve at the bottom to allow for the removal of trub and yeast sediment, a lid on the top for easy access, and racking port for when it’s time to move the beer into a secondary.
Another option these days is to do what most commercial breweries do, and that’s buy a stainless steel vessel that can be used for both fermentation and all of the things that can be done in a pressurized secondary vessel. These little cuties have a long list of benefits. For starters, stainless steel is just plain cool stuff. Stainless tanks are tough, keep oxygen and light out, and can be customized to the hilt by adding special nozzles (that’s what tank-folk call the bits and bats welded to the vessel), thermal wells for thermometers, cooling jackets, insulation, and whatever else one wants to add.

With all of this comes a few downsides. For starters, a tricked out stainless fermenter is much heavier than your glass carboy. That may not be a problem if you put it on wheels or bring your wort to the tank. Another challenge is discovered when one does a cost per volume calculation, because this number keeps falling and falling as tank size increases. This fact drives brewers towards larger vessels and larger is not always better if the goal is to have fun brewing lots of different types of beer because pretty soon a brewer simply has too much of a single beer. Large or small, stainless fermenters are usually heavier than glass carboys and cannot be simply hefted into a refrigerated fermentation chamber. But these tanks can be equipped with cooling jackets and simply connected to a glycol system and controlled by picking up a thermocouple or RTD (resistance thermometer detector) to connect to a temperature controller and glycol solenoid valve to maintain the perfect temperature. But those years in the stainless world tell me this is quickly becoming expensive.
Whether you are going to plastic or stainless, consider how your new fermenter will be cleaned. Clean-in-place (CIP) equipment can be super handy, but cleaning a tank with a CIP spray ball is not always as simple as pumping cleaner through the ball, rinsing, sanitizing, and filling. While some tank nozzles, such as those on the top of a tank, are cleaned during CIP, nozzles on the side and bottom cone of tanks usually need to be cleaned by hand because they are not properly cleaned with the tank CIP cycle. Some gasket types on lids and nozzles and the doodads connected to the nozzles should also be removed, cleaned by hand, and re-assembled after cleaning.
As long as you are not aging your beer for prolonged periods in plastic, the risk of oxidation can definitely be mitigated by racking into another vessel shortly before or after fermentation is complete.
The truth is that fancy fermenters can be a pain in the neck to clean. My preference is to minimize the number of tank nozzles to keep things as simple as possible. Speaking of nozzles, avoid pipe thread connections and industrial-type stainless steel ball valves for cold wort or beer applications because neither of these designs are hygienic (stainless is called out because material construction is only one part of hygienic design; cleanability is another).
At the risk of starting a serious chapter on fermenter design and use, I am going to ask myself a question: “What’s the advice you want to give Ken?” The first has to do with getting the post-boil wort into the fermenter. Instead of bringing my fermenter to the kettle, why not take the wort to the fermenter like all commercial breweries do things. A 25-foot (7.6-m) section of beer line makes for a great transfer line, since I brew outside and ferment in my basement. Simply affix a beer nut fitting and a shut-off valves on the end. No pump required because gravity never takes a day off.
For fermenter cooling control, either position the empty fermenter into a refrigerated space before filling or rely upon the coolness of the basement and yeast strain selection to deal with what you have. The ultimate dream includes temperature controlled “closets” that are cooled with window-mount air conditioners and controlled with something like a CoolBot. Instead of using a glycol chiller, cooling jackets, controllers, and all of the stuff that comes with this sort of installation, my advice includes stainless tanks on wheels or carboys on carts that are simply rolled from fermentation into cold storage. Old-school lager cellar meets homebrewing. Oh, and this dream basement set-up includes a simple overhead crane system to help with the heavy lifting.
Questions without definitive answers are fun because they allow one to explore ideas and construct new solutions. The best advice I can offer is to ask yourself what you want to do with your brewing tools, then go out and buy, build, or re-purpose equipment to meet your brewing needs. The opposite approach is to buy something that someone else designed for things that you may not need to do. I mentioned working for a custom stainless company for a reason; stainless steel process equipment is really cool stuff, but it can become very expensive in a flash. It also can require much in the way of support equipment that can turn the homebrewing hobby into a brewery engineering hobby.
Q Talk to us about methods used to stabilize beers, ciders, seltzers, and such that may have fermentables in the package.
Brian Andrews
Las Vegas, Nevada
A Wow, this is quite the rabbit hole of a question. Let’s start out with why a fermented beverage, be it beer, wine, seltzer, cider, or some other tasty tipple, may be packaged with fermentable sugars. The most common reason for homebrewers to have fermentable sugars in the package is for bottle conditioning. The idea, of course with bottle conditioning, is to add enough fermentables to achieve the carbonation goals of whatever is being carbonated in the package. Add too little or too much priming sugar and the carbonation is going to be off. This is why it’s so important to package completely fermented beer and to know the volume of beer being primed. But that’s not what this question is about. You want to know how to end up with fermentable sugars in the glass without having to worry about over-carbonated or exploding beverages.
Rabbit Hole #1; Exploding Packages
Most homebrewers hear stories about bottle bombs when first getting into homebrewing, and some of us have first-hand experience with these problematic packages. Aluminum cans started to really become popular with craft brewers about a decade ago and with this new craft beer package, the occasional story of an exploding can was heard. At about the same time an increasing number of craft brewers began brewing beers with lots of fermentables in the finished beer. Heavily fruited beers, enormous imperial stouts flavored with all sorts of interesting ingredients, pastry IPAs, and smoothie sours began popping up in the market. Beers with lots of unfermentables, especially lactose and maltodextrin, also became increasingly popular, but these carbohydrates shouldn’t result in refermentation in the package. At first, these beers were primarily draft beers served in limited volumes because brewers were pushing the envelope of style. Beer lovers wanted these potables in packages more portable than growlers, so breweries began canning and bottling these beers. That was when exploding packages really burst onto the scene.
Most homebrewers hear stories about bottle bombs when first getting into homebrewing, and some of us have first-hand experience with these problematic packages.
Although some brewers took the odd approach of expecting customers to handle these packages with the deft skills of a beer-bomb expert, many breweries hit the pause button. A few of the cheekier breweries came up with clever packaging warning of impending explosions and others criticized consumers for not being more careful with these delicate products. The cautious crowd were developing processes and quality control (QC) practices to address this very real problem and other brewers simply decided to steer clear of the problem entirely by not producing these products. Breweries are businesses and it has become very difficult not to brew what so many beer consumers want; as demand grows, so does the number of breweries brewing these types of beers.
The rabbit hole of exploding packages presents two useful takeaway ideas for homebrewers wanting to minimize the risk of unwanted secondary fermentation. The first is not much fun, but is pragmatic; don’t bottle or can beer with excess fermentable sugars. For bottle-conditioning homebrewers, this is not a huge limitation because lots of fermentables in the package doesn’t work with this method. The other takeaway idea is to produce these beers, package into kegs, force carbonate, store the beer as cold as possible without freezing, which is not a problem for some of these beers chocked full of soluble solids (sugar) that decrease the freezing point to ~25 °F (~-4 °C), and keep a hawk-eyed watch for signs of fermentation. Draft beer carbonation can always be reduced by venting a keg, and an uptick in carbonation level with these sweet brews is a good signal that it’s time to have some friends over to clear out the keg for another brew.
Rabbit Hole #2; Peeking Over the Fence
Although flash and tunnel pasteurization systems are not new to U.S. craft breweries, many breweries that own these incredibly useful tools keep quiet about the topic because of the biases that accompany pasteurized beer. I have one thought about these biases . . . whatever. As more breweries started to wrestle with the exploding package dilemma, the number of craft breweries with pasteurizers began to grow.
The silver bullet to dealing with fermentables in the package is a tunnel pasteurizer that runs the entire package (beer, bottle, and cap, or beer, can, and lid) through the pasteurization process. Most commercially pasteurized beers are exposed to between about 10 and 100 pasteurization units (PUs), where 1 PU is equal to 60 seconds at 60 °C (140 °F) or 0.6 seconds at 67 °C (152.5 °F). The major flavor downsides to pasteurization, especially in beers with high levels of dissolved oxygen (above about 100 ppb), are accelerated oxidation and the development of cooked aromas during the process. Once pasteurization is complete, the risk of microbiological growth in the package drops as the PU level increases and the accelerated aging during the heating process stops. Brewers determine PU targets based upon several variables including baseline micro levels, beer properties, and expected shelf life. Another set of real problems with this silver bullet are capital expense, energy use, and space requirements.
A more compact and less costly pasteurization system is an in-line flash pasteurizer, also called high-temperature short-time or HTST pasteurization. HTST systems are the norm for milk pasteurization. The major difference between milk and beer pasteurization, however, is that the goal of milk pasteurization is to kill pathogenic microbes and the goal of beer pasteurization is to kill spoilage microbes. That’s why it is totally normal for refrigerated milk to sour when stored for too long, while still being safe to drink. The challenge with using HTST systems for beer is preventing re-contamination with spoilage bacteria during filling. For this reason, tunnel pasteurizers remain the gold standard for beer.
What on earth does any of this have to do with homebrewing? Not much! But that does not stop homebrewers from peeking over the fence and wondering what craft brewers are doing, just like some craft brewers did when they peeked over the fence into larger craft- and macro-brewing operations. However, homebrewers can batch pasteurize their beer. Although not common nor practical for commercial brewers to use, bottles or cans of beer can be submerged in hot water. The thermal cycle is similar to a tunnel pasteurizer, just with a different setup. I will leave the design specifics for another day, but a simple system could be configured from a brew kettle, a cooler or two, and a water pump; load the bottles into the cooler(s), gravity drain water back to the kettle, and use the pump to deliver hot water to the cooler(s). A key requirement for this method is a counter-pressure filler. It is also best to have as little yeast in the package as possible because the heat treatment will definitely lead to cell autolysis.
One closing thought about pasteurization. It works.
Rabbit Hole #3; Utilizing Chemistry
The modern person is accustomed to magic pills that solve all sorts of problems. Wouldn’t it be great if there was a magic pill that could be added to backsweetened beverages to prevent fermentation in the package? Yeah, yeah, that’s a thing. Maybe. Although potassium metabisulfite (KMS) and potassium sorbate both do a great job of slowing microbial activity in packaged beverages, neither completely prevent re-fermentation. And not all microorganisms are equally affected. Sorbate is generally more effective at inhibiting yeast than bacteria, whereas sulfites are more effective at inhibiting, and even killing, certain bacteria and wild yeast.
Because both of these compounds are weak acids, their ionic states are pH dependent and their potency as antimicrobial preservatives changes with pH. What this means in practice is that the pH of the beverage being stabilized must be factored into the determination of dosage rates. Sulfite usage has another layer of complexity because sulfites can react with beverage compounds and become bound. Bound SO2 has no preservative effect and the only way to know how much free SO2 is present is to run an analysis after KMS additions. (As an aside, you can dive much deeper down this rabbit hole by visiting BYO’s sister publication at Winemakermag.com as sulfite levels are a big topic of discussion for winemakers). Sorbate is easier to deal with because the target levels are simply a function of pH and target organism.
Digging any further into this topic quickly becomes similar to water chemistry. The takeaways about the use of sulfite and/or sorbate to inhibit changes in backsweetened beverages are that both of these preservatives have their uses, neither are absolute, dosing rate depends on cell density in the package, and a fairly complete understanding accompanied by some wet chemistry is required to get it right. In other words, read more about this advanced topic because there is no one-size-fits-all solution.
What’s the Point?
This entire discussion leaves one wondering how to go about backsweetening at home. My tendency leans towards a combination of efficacy and simplicity. A good start to any of these methods is yeast removal; gravity sedimentation, with or without finings, and/or filtration are the common options. Also select flocculent yeast strains that are easier to leave behind when racking.
Beverage pH was not discussed earlier in the context of secondary fermentation, but suffice to say, bottle conditioning becomes trickier as pH drops. I would take advantage of this and push my beverage pH down as low as possible without goofing up the flavor profile. No reason to make things easier for the microbes we want to stop. To finish things off, I would stick to draft-only products, keep these gems chilly-chill, be vigilant with the QC through regular “sampling.”
Musing from the field . . . (an aside)
Every so often I see or hear something at a brewing meeting that really gets my gears turning. Unfortunately, the last brewing meeting I attended was over 14 months ago. The lack of in-person interaction with the brewing world has resulted in more time conversing and observing in that strange world of social media. Brewing groups have been good neighborhoods to cruise when boredom sets in.
It’s been really exciting to see posts from so many homebrewers who identify as “noobs” or folks who are dusting off their equipment after their last brews some years ago. Lots of great conversations out there in the virtual world. And some information that can lead those seeking information astray. The unintentional misinformation shone a light on just how amazing it is to work at a magazine for brewers with a technical review board comprised of accomplished homebrewers, commercial brewers, brewing scientists, and engineers, among other experts who are committed to helping other brewers make great beer. Here’s to the whole BYO team!