Speeding Up Your All-Grain Brew Day
A key aspect of improving your beers is to brew more often. Unfortunately, since homebrewing is just a hobby, many brewers struggle to fit additional brewing sessions into their busy lives.
Of course, the shorter the brew session, the easier it is to find the time for. If you can crank out a beer in less than four hours, that opens up weeknights and ensures you can reserve your limited weekend time for “honey do’s” or spending time with the family.
In the following pages, I’m going to show you how to shave hours off your average brew session. We will start by discussing the core techniques of speeding up the brew day. Then we will go through some tips that can shave big chunks off your total brewing time. Finally we will wrap everything up with a step-by-step example brew day utilizing all the items we covered. Regardless of the beer you are brewing, there are three main concepts to saving time. Keep them in mind at all times and you are in for a quick ride.
Focus on the Critical Path
Whether it is building a house or brewing a beer, focusing on the critical path is the heart of time efficiency. The basic principle of the Critical Path Method is to identify the longest set of activities that must be done sequentially to complete a project. This technique can easily be applied to your brew session to ensure you remain focused on getting the job done. When you look at your brew day, there is a sequence of tasks you have to complete before you are done.
For an all-grain brew day, this sequence is:
Setting up your hot liquor vessel
Heating your strike water
Doughing in
Mashing
Lautering
Boiling
Chilling
Transferring to the fermenter
Pitching yeast
Cleaning the boil kettle and putting away the last equipment
Each of these items should be your highest priority since any delays will directly add to the length of your brew day. Additionally, focus your energy on shortening these steps because the sum of their durations is your total brew day.
The ideal optimization is to move a task off of the critical path so it no longer contributes to the total at all. You will notice that there are many typical brew day activities that do not appear on my list. Items like milling your grain, setting up your mash tun, heating the wort to boiling, and sanitizing the fermenter. I skipped them because you can do them while you are waiting around for the other steps to complete. Which leads to our next concept.
Fill the Downtime With Other Tasks
There are plenty of times during the brew day when there is nothing you can actively do on the critical path. However, there are things you can accomplish. For example, while the strike water is heating up, you can grind your grain.
There are many tasks you can do during otherwise wasted downtime, including setting up the boil kettle during the mash and weighing out hops during the mash so you are ready to add the 60-minute addition right when the boil starts.
Another time-saving tip some brewers miss is to begin heating the wort while you are lautering. You can start your burner as soon as you have about an inch (~ 2.5 cm) of runoff in your boil kettle. Ideally you should reach a boil right about the time that you complete the lauter.
Of course, you should also set up equipment before you need it. For example, if you use hoses for lautering, connect them before the end of the mash. And likewise, use the time during the boil or while chilling the wort to sanitize the fermenter.
While those are some very specific tasks I do during my brew day with my system and process, you should look to apply the general pattern. Whenever you have downtime on brew day, ask yourself what you can be doing to shorten the session. Prioritize preparing for the next critical path item, but then feel free to handle anything else. If you stay on top of tasks, you will still find plenty of time to kick up your feet and relax during the longer steps.
Special Case: Clean as You Go
One of the most important downtime activities is cleaning up and putting away equipment. Some brewers I have spoken to take up to an hour to clean up everything at the end of the brew. Worse yet, I have heard of brewers leaving equipment, including mash tuns, dirty. Not only does this extend your next brew day, but it establishes a barrier to brewing the next time. Who wants to start a brew session by cleaning up last time’s mess?
Just like eating your vegetables before dessert, it makes sense to not put off any cleaning. Some things you can do during your brew day include wiping down and putting away the grain mill while waiting for the strike water to heat or the mash to convert and cleaning out and putting away the mash tun during the boil. With these steps, you will only be left with a few items to clean at the tail end of the brew day. Ideally that should be just your boil kettle, chiller, transfer hoses, and pump (if you use one) since they were all in use until you put the wort in the fermenter.
Brew to a Plan
It is critical for you to have a mechanism to enforce consistency on your brew day so that you can make improvements. The easiest way to do this is to follow a plan that ensures you do not miss steps, you have the cues to prepare for upcoming tasks and you are able to lock in time savings on future batches.
The simplest way to do this is with the printable brew day checklists available in many brewing texts. Start with one of these and make a checklist that reflects your process. A slightly more advanced approach is to use brewing software that provides templates for printing out the steps specific to an individual beer recipe.
A plan is not useful unless it is followed, so make sure you have it available and take good notes as you work your way through it.
Ultimately, your goal is to have your checklist cover all the details so you do not have to deal with exceptions. Varying from your process usually means you are distracted from working on your critical path tasks while you deal with the problem. For example, if you forget to mill your grain before your strike water is ready, you now have to delay your dough-in as you catch up, adding minutes to the length of your brew day.
Measure Your Process
Once you have a plan for your brew day, you have the perfect place to confirm your critical path tasks and document how long each takes. Set a timer at the start of session and write down the starting time for each item. With a little math, you will be able to see how long each item takes and therefore where it is worth investing in optimizations. You can also go back and identify items that could be removed from the critical path.
For example, when I started brewing, I was using a kitchen stove. Heating up 5 gallons (19 L) to boiling could take an hour and a half. Since it was a critical path item, I had to wait for it to complete before moving on to the next critical path item (the boil) and so my day was pretty long. One of the biggest improvements I made back then was to get a turkey fryer style propane burner that got me to boiling in 30 minutes, shaving off a full hour from my brew day. I realized another big gain in time savings by upgrading my wort chiller.
This idea is the core of shortening your brew day: identify and measure your critical path tasks, and then find ways to shorten them without compromising the quality of your beer.
Tips to Optimize Your Critical Path Tasks
Over the years, I have found the following tips to be great time savers on brew day. They fall into several categories.
Setting Up Equipment
Establish a dedicated brew area that does not need to be cleaned up to prepare for brewing. In that area, leave as much equipment set up as possible so that you do not have to set it up and break it down each brew session. Store your remaining equipment near this dedicated brew area, so that you are not walking long distances to get what you need. Also, minimize the time you spend looking for items by returning them to their designated immediately after you have finished using them.
Grain Milling and Water Heating
Milling your grain shouldn’t be a critical path item, unless it takes a long time. Still, some ways to speed this task include motorizing your mill. While milling, you can be heating your water. Invest in the strongest burner you can find — there is a huge difference between a stovetop electric element and a propane turkey fryer. If you are brewing on a stovetop, consider goosing the temperature with some heat sticks if you have available electricity.
I have seen some commercial breweries and have heard of some homebrewers using tankless water heaters dialed up to higher temperatures to achieve an instant strike temperature right from the faucet. Please consult a licensed plumber if you decide to go this route, and make sure it is set up in a way that does not risk scalding anyone.
 Mashing
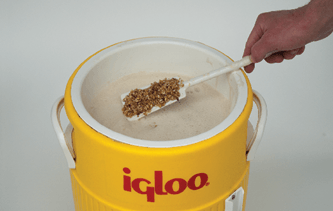
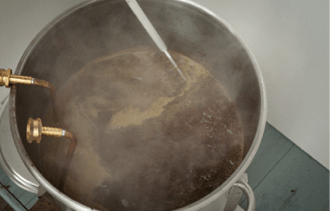
You may be able to shorten your saccharification rest and still brew good beer. The 60-minute mash time given in most single infusion recipes is just a rule of thumb, but most mashes will convert much more quickly than this. If you want to save time, test for conversion after about 20 minutes, check your specific gravity and start the lauter once you show complete conversion and have hit a reasonable specific gravity. Stir the mash regularly to speed this process along.
To cut drastic amounts of time from your brew day, skip multi-step mashing in favor of single infusion. You may also want to skip the mash out, although your extraction efficiency might suffer slightly.
What’s the ultimate way to shorten your mash? Brew with malt extract instead. This is particularly true for styles that have fairly straightforward grain bills and when you can find a good supply of fresh extract.
Lautering
Increasing the rate at which you run off your wort will save time. You may want to increase the rate of your fly sparging or try batch sparging. You will likely need to lower your expected efficiency and correspondingly increase your grain bill to compensate, though. To minimize the amount of time spent lautering, try no-sparge brewing.
 Boiling
When using malts that have been kilned beyond the lightest amounts, you have less to worry about with regards to dimethyl sulfide (DMS), so you do not need a full 60-minute boil. If you move your earliest hop additions to later in the boil (adjusting for the difference in hop utilization), you can shorten the boil time.
Wort Chilling
To speed wort chilling, increase the diameter and length of your immersion chiller, if that is what you are using. (Stepping up from 3⁄8-inch x 25 feet to 1⁄2-inch x 50 feet is a huge improvement.) Use a cheap sump pump to recirculate ice water through the chiller once your tap water has stopped dropping the temperature as quickly. Or, switch to a counter-flow chiller, which can be faster to get to pitching temperatures than an immersion chiller. Whirlpool your wort with a pump or spoon, or at the very least swirl your chiller around in the cooling wort to ensure that hot wort is constantly being exposed to the chiller.
Putting Everything into Practice
All of that theory sounds great, but what does it look like in practice? Below is a timeline for my typical 6-gallon (23-L) all-grain brew day. Items marked with an asterisk are not on the critical path. The whole brew day takes under 4 hours.
Timed Brew Day Example
Start (HH:MM), Finish (HH:MM), Duration in minutes, Brewing Step
0:00 0:05 5 minutes: Set up equipment
0:05 0:35 30 minutes: Heat up water to strike temperature
0:05 0:15 10 minutes: Mill grain*
0:35 0:40 5 minutes: Dough-in
0:40 1:25 45 minutes: Mash (abbreviated)
0:40 0:45 5 minutes: Measure hop additions*
1:25 1:30 5 minutes: No-sparge drain (lauter)*
1:25 1:45 20 minutes: Heat up runoff to boil
1:45 2:45 60 minutes: Boil
1:45 2:00 15 minutes: Clean up mash tun*
2:45 3:05 20 minutes: Chill to fermentation temperature
2:45 2:55 10 minutes: Sanitize fermenter*
3:05 3:15 10 minutes: Transfer to fermenter and pitch yeast
3:15 3:35 20 minutes: Clean boil kettle and misc. equipment
3:35 3:45 10 minutes: Put equipment away
* = steps not on the critical path
Conclusion
You never get something for nothing, and advanced brewers will see obvious tradeoffs associated with some of these suggestions. Use your own judgement about where your priorities lie (for example, in a faster brew day or achieving higher extract efficiency). To ensure that you continue to brew high quality beer, you should also avoid adopting more than one time-saving tip each brew day — determine if shortening one step affects your beer before shortening another. Hopefully these suggestions will help shorten your brew sessions!
 Mashing
 Boiling