Plug-n-Brew – Electric Homebrew System
Far too many people seem to assume that using propane heaters is the only way to go. After all, most US craft brewers use steam heating in the kettle and hot liquor tank; direct firing of the kettle is rarely, if ever practiced.
I have been using electrical heating for homebrewing for some forty years or so, and have tried all sorts of setups. My first point is only about electrical heating, and not about complicated electrically-run control systems. You can take electic brewing as far as you like and build the sort of set-up where you just press a button and the finished beer comes out the other end, but I like to keep things simple. My second point is that I am not going to give you a step-by-step approach to building your own electrically-fired kettle, but rather a general guide as to how I went about setting up such a system, and my experiences of what not to do.
My original attempt at electric brewing, back before I moved from England to the US, was an ignominious failure. We bought a new washer, leaving me with the old small one, which came with a heating element and held about 5-6 gallons (19-23 L) of water. I thought it would be perfect and started to boil a brew in it (after thorough cleaning, of course). In those days I only had access to cone hops, and these little beasts handily blocked up the fine grating that sat above the heating element. In a matter of minutes the element was no longer covered by liquid and promptly burnt itself out. Lesson I – do not let the element run dry!
Plan B was that at the time I could buy old 10-gallon (38-L) wash boilers quite cheaply. These had electric heating under the bottom of the boiler, with something like a 5KW output and were complete with a suitable faucet for wort run-off. I tried one and quickly bought another, for the first worked very well, giving rapid boiling and with no risk of the element going dry.

When I moved to the US in 1978 I brought one of these along with me. It of course required a 240-volt source to work properly, but that was not a problem since all I had to do was to change the plug and cable so that I could connect it to the socket designed for our electric drier. All was well for some years, but it was old when I bought it and eventually the heating arrangement gave up the ghost and I could find no one who could repair it. So I bought a Bruheat boiler, a British product that was sold in the US in the 1980s. It was made of plastic, held 7 gallons (26 L), and was heated by a 3KW element fitted with a thermostatic variable control on the outside of the vessel. Being British, it needed a 240-volt supply, and since I lived in a new house with the drier far from my brewing area, I had to install such a supply. That was easy enough because it was an old house and I had to get it converted from fuses to circuit breakers, for which I employed
an electrician, and simply got him to hook me up with 240-volt supply in my brewing area. Lesson II – do not do this yourself — get a professional!
I ran with this type of bucket for a good many years and generally had good results. I did not use it as a mash tun, a purpose it was supposed to serve, partly because I had a separate mashing system, also electrically controlled, which worked very well until it packed up and I could not get it repaired. The Bruheat boiler lived on, however, although it did present a couple of problems. First the plastic faucet did not permit attaching a sparge arm, so I had to sparge manually. Second, the faucet began to leak after a while and had to be replaced two or three times, a minor fault, but an annoying one. Third, I would sometimes have problems with hop material blocking the faucet, even though I put in a mesh strainer. Fourth, I did not have a separate hot liquor tank, which presented me with some problems that would require some hard work.
So the next stage came when I wanted to improve the system and to incorporate a hot liquor tank sparge arm and to convert to stainless steel vessels, partly for looks and partly for convenience in cleaning. By this time I was living in the condominium I presently inhabit, and one of the first things I did after moving in was to get an electrician to put in a 240-volt point in what was to be my brewing area. Perhaps I should point out here that I have always brewed in a basement, and had no choice to brew anywhere else in the condo, so propane gas heating was entirely out of the question. Lesson III – do not use a burner inside, carbon monoxide really does kill!
So I built a system with a boiler powered by two 3 KW heating elements each separately controlled by a rheostat. For the latter, after much hunting around I used controls for an electric cooker, and built a junction box to connect them up to the heating elements. Well, that was not a success, largely because I had long forgotten my soldering technique. I think the thing worked twice before the rheostat and junction box burnt out. Lesson IV – do not try to build electrical systems yourself!
I had now to go to Plan X, which started with purchasing a 10-gallon (26-L) stainless pot, complete with thermometer, sight glass and ball valve, the latter being suitable for attaching a proper sparge arm. I drilled a hole of appropriate dimensions and fitted in a Bruheat element and controller. My reasoning was that (a) I had such an element, and (b) it would not only heat the water but the thermostat would also maintain it at 160–170 °F (71–77 °C), just right for sparging. So I now had a working stainless hot liquor tank. In case you are wondering, five or six years ago you could still buy these elements and thermostats separately in the US, but I have been unable to locate any current US source, (though there is an alternative, read on).
My next step was to set up a boiling kettle, and I started with a 10-gallon (26-L) Blichmann Boilermaker. I first thought of using another Bruheat-type element, but then I asked myself whether I really needed thermostatic control in the kettle since all I needed from that was to be able to reach a boil quickly and to keep the wort at a rolling boil. So then I wondered whether I could simply use a standard water heater element, and if I did so, how big would it need to be and whether an ordinary 110-volt system could be used to run it. I could have consulted an electrician to answer these questions, but I did not need to. For at that time I ran across a supplier that sold a 3.5 KW element securely fixed to an appropriate cable and plug, together with a fitting to fix it to a 5- to 7-gallon (19- to 26-L) boiler, at the sum of $59.95, although of course you can build your own using a 30-amp drier cable. That was fine for my purpose, but if you want to build a setup for larger volumes of beer they also have elements of higher wattage. And if you want to put a variable control on it, some electric brewing suppliers offer those as well, of varying complexity and price.
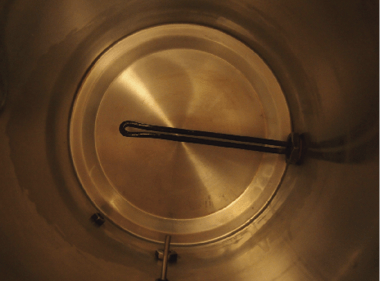
Now I had to drill a suitable hole in the Blichmann boiler. No problem and I did this so that the element sat at right angles to the faucet. Next was the small matter that the element, although it would run off the 110-volt supply, needed a 30-amp circuit. Back to calling in the electrician, who installed such a point, along with a GCFI in the circuit. Note that any electrical supply in a wet area should incorporate a GCFI, and not just in your brewery. I also had him install a separate switch for this circuit on the wall so that I could turn the element off quickly and could easily avoid a boil over. In no time at all I had filled the boiler with water switched on the juice to try it out, with complete success, taking 6 gallons (23-L) of cold water to the boil in about half an hour. In other words the most straightforward system was ideal for my needs, something I had overlooked when I first went for the all-too fancy double element heating system. Lesson V – keep it simple.
Lastly, I normally do not brew in high summer, but for once I did, thinking that with the air conditioner on all would be well. I had not got too far into the wort boil when the whole basement steamed up – I had simply overloaded the a/c unit to the extent that it took a day or so to get back to normal! There is always something waiting out there to trip you up, so Lesson VI — never forget Murphy’s Law.
The boiler now sits under a fan hood that was designed for kitchen use, which ventilates to the outside, and fogging up is no longer a problem. Finally all I had to do was run a length of “elephant trunk” hose to an exit point in the wall of the basement.
I’m an Electric Brewer
In the end my system is pretty simple, and not particularly expensive. You can do the same and be able to brew indoors close to a water source and with steady, dependable heating that is not going to poison you. You may think that I took a long time to sort out such a straightforward solution, but that in part was due to the fact that I always put more effort into the actual brewing than I did into the technology of my brewery. Surely that isn’t a bad thing?
Related Links:
• Build a countertop all-electric homebrewery: www.byo.com/component/resource/article/1987
• Check out Kal Wallner’s all-electric dream homebrewery: https://byo.com/photos/category/70
“
I have been using electrical heating for homebrewing for some forty years or so, and have tried all sorts of setups.