The Lighter Side of Specialty Malt
Brewing is a form of expression for me, and I’m guessing it is for you, too. I’m about to say something you already know: Brewing beer is a science and an art. The masters of the craft understand not only the process but also the tools available. Specialty malt is one of the greatest tools brewers have at their disposal.

Is specialty malt perfect for every recipe and style? No, but neither are bacteria, high-alpha hops, or soft water. These malts are most easily defined by what they are not: Base malt, which makes up most of your grain bill. Base malts like two-row, pale ale, and Pilsner malt can be used up to 100% of the mash bill and are the “base” of your beer, relied upon for starch, and following a mash, their sugar. Other base malts, like Vienna, Munich, and mild malt might be mistaken for specialty malt due to their specific use or higher color, and because they are often used in lower percentages than other base malts. Think of specialty malt as anything that typically doesn’t require mashing and provides other key attributes to the beer.
Specialty malts provide many key aspects to your beer such as flavor, aroma, color, body, mouthfeel, sweetness, acidity, and head retention — many variables! They can even influence overall alcohol, but much less so than base malt. Of course, the techniques you use to brew your beer and the other ingredients also affect the above.
The focus of this article is light-colored special malts, which are some of the most versatile specialty malts. I’m defining these as anything up to 30 Lovibond (°L). You might see maltsters now using Standard Reference Method (SRM), or in other countries European Brewery Convention (EBC). SRM has become the standard for beer color, at least in the United States. SRM is relatively close to Lovibond, but they do deviate. The conversation is SRM = Lovibond x 1.3546-0.76

Light specialty malts, given their relatively low color contribution, can be used in most beer styles — from American pale ale to German bocks, Belgian golden ales, and even darker porters and stouts. The flexibility of these malts means they can add flavor depth or improve foam and head retention when used in small, almost unnoticeable amounts, and create a smooth mouthfeel and fuller body to what might otherwise come across as a watery beer.
How Specialty Malts are Made
Much like brewing, the making of specialty malt is both science and art. It requires skillful maltsters, accurate timing, and good temperature control.
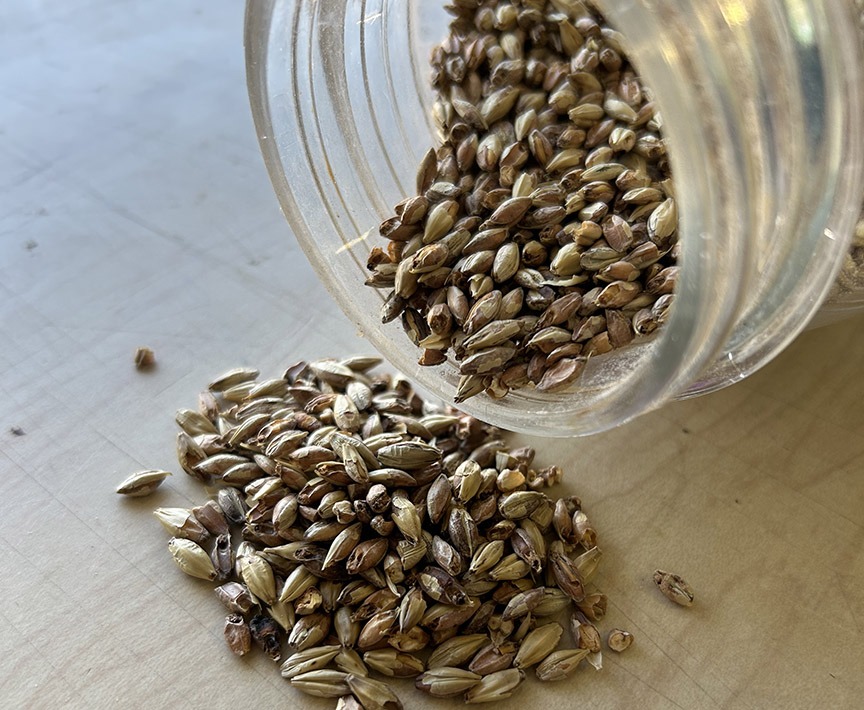
Specialty malts can be made from any grain through the malting process and/or roasting. In the case of most light-colored specialty malts, as is the case with base malt, barley is the most common grain used. Wheat and oats are also fairly common. Raw grain goes through the malting process of steeping, germination, and drying by kilning (lower temperatures), or roasting (higher temperatures), or both. Base malts are never roasted because the maltster wants to preserve the starch and enzymes in base malt to make sugar. Otherwise your yeast will have nothing to ferment. With specialty malt, all bets are off! Specialty malt is not meant to be 100% of the grain bill. Maltsters are free to do whatever they want as long as it’s dry enough for storage, transportation, and milling. Raw grain can easily rot — it’s one of the reasons we use malt. Some specialty “malts” are actually specialty “grains,” but often get lumped together into one category as “specialty malt.” These grains skip the malting process completely and the raw grain is roasted. If you’ve made a dark beer, you’ve likely used roasted barley.
Depending on the type of malt made, the process typically consists of three or four steps: Steeping, germination, and kilning, or depending on the malt the third or fourth step may be roasting. Roasting can be used instead of kilning, as is the case for dark unmalted grains, as well as caramel or crystal malts.
Steeping – The steeping process typically lasts between 40–48 hours. During this time, the grain is soaked and drained in intervals, often four to eight hours at a time, depending on the variety of barley and how well it takes up water. As water is absorbed by the grain, the moisture content in the kernel jumps from about 12% to around 44%. The barley begins sprouting with this additional water, the critical ingredient for growth. The available enzymes inside stimulate the embryo. Growth also creates more enzymes, good for brewers who need them to convert starch into sugar during mashing. Little white rootlets start to sprout, just visible as a white dot outside of the barley, known as “chit.”
Germination – As soon as the barley is “chitted” and reaches the correct moisture, it is moved from the steeping tanks to long troughs or beds, referred to as germination vessels. The barley sits for four to five days, and the maltster watches the chit grow into rootlets. The grain is turned and aerated during germination to keep the barley from growing together and to maintain consistent growth throughout the grain bed.
Kilning – Growth needs to be stopped before the grain becomes full-blown plants that would use up all of the good starches and enzymes. Germination is halted by adding heat through kilning and/or roasting. Kilning is the drying process used to produce base and kilned specialty malts (as opposed to drum roasted). Hot, dry air flows into the kiln from a slotted or screen bottom, exposing the malt to heat, and takes 1-2 days to lower the malt moisture to around 4.5%. Time and temperature are the maltster’s primary tools and control the variety of malt being made.
A number of light specialty malts are made in the kiln. These include:
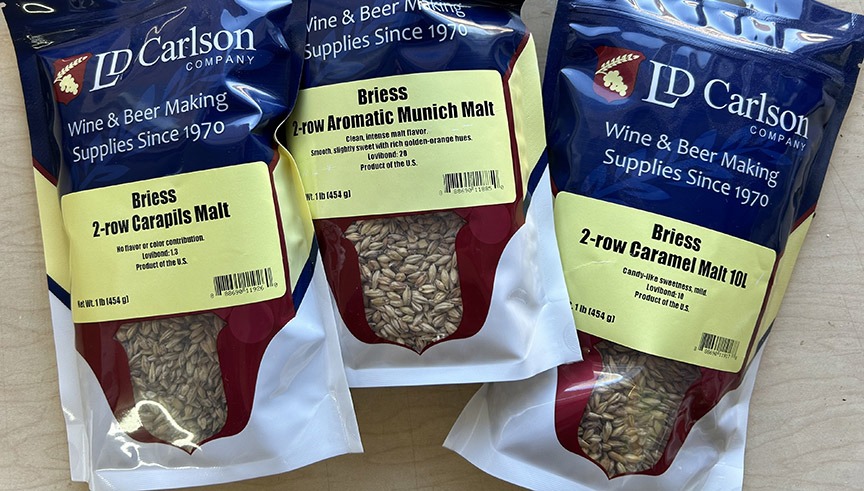
• Dextrin malt – This includes trademarked malts such as Briess Carapils® and Weyermann Carafoam®.
• Munich malt – Lighter Munich malts can be considered a base malt. As a specialty flavor contributor, I think of anything 10 °L or darker as more of a specialty malt, with Munich typically reaching up to 30 °L in color. Some of these darker Munich malts are called “aromatic malt” due to the intense malt flavor and aroma they provide.
• Kilned caramel or crystal malt – Differentiated by its more subtle flavor (and sometimes color) contribution than roasted caramel or crystal malt.
• Other unique specialty malts – Many are made in the kiln and include: Red malts, melanoidin malts, and honey malts, as well as unique maltster-specific specialty malts. An example is Simpsons Golden Naked Oats®, a light-colored caramelized oat.
Roasting – Kilning typically uses lower temperatures, from 160–220 °F (71– 104 °C), where roasting uses temperatures from 160–750 °F (71–400 °C). This temperature range allows for darker malts and a wide variety of specialty malts that couldn’t be produced by kilning alone. Roasting uses a number of different techniques. The use of unmalted grains, “green malt” directly from the germination vessel, and malt from the kiln provides the specialty maltster endless opportunities for a variety of roasted specialty products. Roasted caramel malts, which start as green malt from the germination vessel, are typically stewed to convert the starch into sugar and then roasted to “crystallize” or “caramelize” the sugar inside the kernel. The sugar is a hard glassy bead inside the grain — be careful when chewing caramel malt because the sugar inside can be hard enough to chip teeth!
Almost all dark specialty malt is made in a roaster, but light specialty malt can be too. This includes:
• Amber malt – Typically, a finished base malt from the kiln is put into the roaster, and depending on the time and temperature, these “toasted” malts generally range in color from 20–80 °L.
• Biscuit malt – Bready and nutty, biscuit malts tend to be some of the most flavorful light specialty malts.
• Roasted caramel or crystal malt – One of the most popular light specialty malts. These often add to body and mouthfeel but also provides a caramel, toffee, or burnt sugar note to the flavor and aroma.
• Other unique specialty malts – Many variations using different types of grain and subtle changes to technique give the maltster’s “signature” and allow for the production of unique malts. Malts that begin with “Cara” have been caramelized and often are a unique variation on caramel malt. Other unique grains and malts from the roaster will simply state they are roasted, such as “light roasted oats.”
Best Uses
Now that we know more about specialty malt, let’s talk about its practical uses. For many brewers, specialty malt in small amounts is their secret weapon. It enhances their beer and, in some cases, is not even detectable to the most experienced beer judge or drinker. In many cases, the goal isn’t to overwhelm the beer with these malts, but to work with them within a threshold that elevates the beer.
Body and mouthfeel enhancement – A watery beer can be off-putting, but too much body can feel too heavy. Mashing hot will leave additional complex sugars in the beer, but similar to head retention, using some specialty malt that has undergone the Maillard reaction (the process of browning, which creates more complex compounds in the beer) is another way to enhance both body and mouthfeel. Certain aspects that affect mouthfeel, such as alcohol content and carbonation, are not as easy to control with specialty malt.
Body and mouthfeel applications:
• Including 5–10% dextrin malt in your grain bill will increase body in the beer.
• 5–10% of light caramel malt (5–30 °L) is one of the best ways to improve the body in many beers. At the upper end of this range it contributes some color and dark sugary flavors also.
• 3–20% Munich malt is another way to enhance the body. Darker Munich malts (15–30 °L) contribute a nice deep golden color and add a nice bready character to your beer as well.
Flavor and aroma contribution – One of the primary reasons people use any specialty malt is to hit a specific flavor or aroma profile, or to increase the intensity. Key flavor and aroma contributions include:
• Caramel malts (up to 30 °L)– Caramel, toffee, almond.
• Munich and Aromatic malts– Toast, grainy, nutty.
• Amber malts – Bread, pretzel, burnt sugar.
• Biscuit malts – Saltine cracker, biscuit, graham cracker.
Flavor and aroma applications:
• When looking to balance hops against the malt character of the beer, a small amount of 2–5% caramel malt can help bring focus and backbone to the bitterness.
• If you are looking to add traditional or continental character to a lager, Munich malt of 10–20 °L, in the range of 5–20% of the mash bill, is a
great addition.
• Some of the more distinctive flavors of amber and biscuit malts can get quite intense. Dry roasted malts are best added from 2–5% in most beers where a more dynamic malt flavor is desired. Think amber, brown, and dark beers.
Color contribution – It’s worth mentioning that many specialty malts contribute color. Although it can be hard to target a specific color, brewers often target oranges and reds for specific styles. It’s true we drink first with our eyes, and color does matter. But, oftentimes, it is one of the hardest things to control. Malts like Bestmalz Red-X® have hit the market, specifically targeting brewers looking for red color. The other difficult part to manage with specialty malts is how dark a beer might get, especially when the beer is meant to be lighter in style. In the case of classic Pilsners or lagers, nothing darker than a 2 °L dextrin malt is used.
Color contribution applications:
• When some golden hues are called for, Munich and caramel malts up to 20 °L might be used in moderation, up to 5–10%. A darker copper color will develop above 30 °L.
• When red color is desired, try a Munich or similar specialty malt in the 20–30 °L range, at a rate of 5–20% of the malt bill. These are often used in conjunction with a small amount (1–2%) of a dark roasted malt like chocolate or roasted barley to accentuate the color and to add some dryness to a style like Irish red ale.
Great for Extract Brews Too
Not brewing all-grain? Specialty malts typically do not need to be converted or mashed, so steeping during extract brewing works well. Any light specialty malt can be used from 2–12 oz. (57–340 g) at a time for a 5-gallon (19-L) batch. In total, often target between 4–8 oz. (113–227 g), and no more than 2 lbs. (0.9 kg) of specialty malt at a time. You only need about 15 minutes of steep time at 152 °F (67 °C) to extract most of their given attributes (but starchier specialty malts like Munich, when steeped, may not convert to sugar or contribute significantly to your gravity or ABV). You can also steep specialty grains separately, say in a French press or small muslin bag in a kettle, and add it to your boil or fermenter.
There are many ways light specialty malt can have a positive contribution to your beer. Take good tasting notes on your recipe, your brewing process, and when you finally get to enjoy the beer, the flavors and aromas. There is no better way to learn what you can achieve with light specialty malts than using them!
The following recipes highlight ways light specialty malts can be used.
Here are examples of how to use light specialty malt. The Golden Ale recipe uses two specialty malts that will add some body and mouthfeel to what otherwise might be a fairly straightforward beer. The subtle complexity of the dextrin and caramelized oats make this a summery beer without being boring.
The Helles Bock recipe takes light specialty malts in a completely different direction, and showcases the bold and dynamic flavors you can achieve using lighter malts. The four specialty malts all contribute to the beer in their own way providing a broad range of flavors and aromas including biscuity, bready, malty, and toffee notes.
Blonde Bloke British Golden Ale
(5 gallons/19 L, all-grain)
OG = 1.043 FG = 1.011
IBU = 30 SRM = 3.5 ABV = 4.2%
British golden ale was partly developed in response to the proliferation of imported lagers that started gaining favor with U.K. drinkers in the 1980s. British ale brewers experimented with lager-like ales, and the style persists. With some light specialty malt, a refreshing summer bitter can be made.
Ingredients
7.8 lbs. (3.5 kg) Golden Promise pale ale malt
0.5 lb. (0.23 kg) dextrin malt
0.5 lb. (0.23 kg) Simpsons Golden Naked Oats®
4.8 AAU Fuggle hops (60 min.) (1 oz./28 g at 4.8% alpha acids)
6 AAU Cascade hops (20 min.) (1 oz./28 g at 6% alpha acids)
1 oz. (28 g) Cascade hops (dry hop)
1⁄2 tsp. yeast nutrient (15 min.)
White Labs WLP005 (British Ale), Wyeast 1318 (London Ale III), or SafAle S-04 yeast
3⁄4 cup corn sugar (if priming)
Step by Step
Mix the milled grain in 2.4 gallons (9.1 L) of water on brew day and hold the mash at 152 °F (67 °C) for 60 minutes. Slowly sparge with enough water to collect 6.4 gallons (24.1 L) wort. Total boil time is 60 minutes. Add the first hop addition at the start of the boil. Add the remaining hops and yeast nutrient per the schedule.
After the boil, cool the wort to 70 °F (10 °C) and transfer to the fermenter. Pitch your yeast and dry hops and aerate the wort if using a liquid yeast. Ferment at 70 °F (21 °C) for seven days or until primary fermentation is complete and yeast has settled out of suspension. Prime and bottle condition or keg and force carbonate to 2.5 volumes CO2.
Tip: Although the base malt will be a key contributor to flavor in this recipe, what you’ll notice in this golden ale is a creamy white head, a smooth mouthfeel, and medium-full body. If you want to make it a bit lighter for summer, but still maintain some mouthfeel and body, cut the specialty malt in half, using only 0.25 lb. (0.11 kg) of each.
Blonde Bloke British Golden Ale
(5 gallons/19 L, extract with grains)
OG = 1.043 FG = 1.011
IBU = 30 SRM = 3.5 ABV = 4.2%
Ingredients
4.25 lbs. (1.9 kg) extra light or Pilsen light dried malt extract
0.5 lb. (0.23 kg) dextrin malt
0.5 lb. (0.23 kg) Simpsons Golden Naked Oats®
4.8 AAU Fuggle hops (60 min.) (1 oz./28 g at 4.8% alpha acids)
6 AAU Cascade hops (20 min.) (1 oz./28 g at 6% alpha acids)
1 oz. (28 g) Cascade hops (dry hop)
1⁄2 tsp. yeast nutrient (15 min.)
White Labs WLP005 (British Ale), Wyeast 1318 (London Ale III), or SafAle S-04 yeast
3⁄4 cup corn sugar (if priming)
Step by Step
Steep the milled grain in 2 gallons (7.6 L) of water at 152 °F (67 °C) for 15 minutes. Remove the steeping bag and bring water to a boil. Remove from heat and add the malt extract. Stir until dissolved and then return to heat and bring to a boil. Total boil time is 60 minutes. Add the first hop addition at the start of the boil. Add the remaining hops and yeast nutrient per the schedule.
After the boil, cool the wort to 70 °F (10 °C) and transfer to the fermenter. Pitch your yeast and dry hops and aerate the wort if using liquid yeast. Ferment at 70 °F (21 °C) for 7 days or until primary fermentation is complete and yeast has settled out of suspension. Prime and bottle condition or keg and force carbonate to 2.5 volumes CO2.
20/30 Vision Helles Bock
(5 gallons/19 L, all-grain)
OG = 1.068 FG = 1.017
IBU = 29 SRM = 9 ABV = 6.8%
Helles bock is described as pale, strong lager with a grainy-sweet maltiness and aroma. The style allows for a little caramel flavor as well as some toasty notes that can really amplify this beer. A blend of light-colored specialty malts ranging from 20–30 °L in color, and including both dry roasted and caramelized malts, make this a special treat for German lager lovers.
Ingredients
13 lbs. (5.9 kg) Pilsner malt
4 oz. (113 g) Weyermann CaraRed® malt
4 oz. (113 g) biscuit malt
4 oz. (113 g) Weyermann CaraAmber® malt
4 oz. (113 g) dark Munich malt (30 °L)
4.5 AAU Hallertauer Mittelfrüh hops (60 min.) (1 oz./28 g at 4.5% alpha acids)
4.5 AAU Hallertauer MIttelfrüh hops (30 min.) (1 oz./28 g at 4.5% alpha acids)
1⁄2 tsp. yeast nutrient (15 min.)
White Labs WLP833 (German Bock Lager), Wyeast 2206 (Bavarian Lager), or SafLager W-34/70 yeast
3⁄4 cup corn sugar (if priming)
Lallemand CBC-1 yeast (if priming)
Step by Step
On brew day, mix the milled grain in 3.9 gallons (14.8 L) of water and hold the mash at 152 °F (67 °C) for 60 minutes. Slowly sparge with enough water to collect 6.4 gallons (24.1 L) wort. Total boil time is 60 minutes. Add the first hop addition at the start of the boil. Add the remaining hops and yeast nutrient per the schedule.
After the boil is complete, cool the wort to 50 °F (10 °C). Pitch your yeast and aerate the wort heavily if using liquid yeast. Ferment at 55 °F (13 °C) until primary fermentation is complete. Gently transfer to a secondary vessel. Lager for 6 weeks at 48 °F (9 °C) or below.
Prime and bottle condition or keg and force carbonate to 2.5 volumes CO2. I recommend priming with a 1⁄2 tsp. of a bottling yeast strain like Lallemand CBC-1, hydrated and stirred into the beer prior to bottling.
Tip: The goal of this recipe is to showcase how rich and complex a lighter-colored golden lager can be with a handful of different light specialty malts. Try using any combination of light specialty malts (30 °L or less in color) up to a pound in this recipe, just be sure to have at least 4 oz. (0.11 kg) of biscuit or Munich malt in there.
20/30 Vision Helles Bock
(5 gallons/19 L, extract with grains)
OG = 1.068 FG = 1.017
IBU = 29 SRM = 9 ABV = 6.8%
Ingredients
7.1 lbs. (3.2 kg) extra light or Pilsen light dried malt extract
4 oz. (113 g) Weyermann CaraRed® malt
4 oz. (113 g) biscuit malt
4 oz. (113 g) Weyermann CaraAmber® malt
4 oz. (113 g) dark Munich malt (30 °L)
4.5 AAU Hallertauer Mittelfrüh hops (60 min.) (1 oz./28 g at 4.5% alpha acids)
4.5 AAU Hallertauer MIttelfrüh hops (30 min.) (1 oz./28 g at 4.5% alpha acids)
1⁄2 tsp. yeast nutrient (15 min.)
White Labs WLP833 (German Bock Lager), Wyeast 2206 (Bavarian Lager), or SafLager W-34/70 yeast
3⁄4 cup corn sugar (if priming)
Lallemand CBC-1 yeast (if priming)
Step by Step
Steep the milled grain in 2 gallons (7.6 L) of water at 152 °F (67 °C) for 15 minutes. Remove the steeping bag and bring water to a boil. Remove from heat and add the malt extract. Stir until dissolved. Return to heat and bring to a boil. Total boil time is 60 minutes. Add the first hop addition at the start of the boil. Add the remaining hops and yeast nutrient per the schedule.
After the boil is complete, cool the wort to 50 °F (10 °C). Pitch your yeast and aerate the wort heavily if using liquid yeast. Ferment at 55 °F (13 °C) until primary fermentation is complete. Gently transfer to a secondary vessel. Lager for 6 weeks at 48 °F (9 °C) or below.
Prime and bottle condition or keg and force carbonate to 2.5 volumes CO2. I recommend priming with a 1⁄2 tsp. of a bottling yeast strain like Lallemand CBC-1, hydrated and stirred into the beer prior to bottling.


