Winemaking for the Modern Homebrewer
So there’s a rumor that you beer guys want to try making wine. That’s a great idea. With an understanding of brewing, you’ve already got a leg up on somebody looking to make wine with no prior fermentation experience. In fact, that brewing knowledge you have may even give you some advantages to make totally unique, flavorful wines that even experienced winemakers have never dared to make. We’re going to get into that subject — of how brewers are changing the wine game to create new styles of wine — later, but let me first introduce the art and science of making wine to you homebrewers who want to start at the beginning.
As a production winemaker for nearly three decades, I can state without hesitation that, in my opinion, beer is much more difficult to craft than wine. One rogue microbe can profane an entire tank of beer. Sanitation must be religious in brewing, while wine’s low pH gives the liquid a built-in edge of microbial stability. A famous winemaker told me 20 years ago, “If it’s clean enough to eat a sandwich off of, it’s clean enough to make wine in.”
In 2001, my wife and I enjoyed having two winemaking interns from the TUM Weihenstephan in Freising (Bavaria), Germany. The cleanliness of the stainless tanks we used and care they took to clean the crusher/destemmer and press every night were likely factors that made our 2001 vintage wines extraordinary — the Pinot Noir and Chardonnay produced are still drinking beautifully more than 20 years later. In other words, you have skills as a brewer that give you an advantage over us winemakers, who are a bit lazier on sanitation.
While some of the knowledge and equipment between these two hobbies will carry over, the two processes and approaches are quite different. Making beer is precise, recipe- and process-focused, and egalitarian: Most ingredients are available to all brewers for a level playing field. Winemakers are limited by the quality of the vineyards and grapes they use — wine is about preservation of ingredient quality through fermentation.

Of course, you could start with a wine kit. Similar to brewing with malt extract, wine kits can lead to great tasting wines and require less time and equipment. However, for this article, I’m going to be talking about making wine from grapes.
Let’s jump into wine production basics and see what we can do to make some good wine.
• More than any other factor, the quality of a wine is dependent on the quality of the fruit crushed. Fresh, ripe, cold winegrapes prevent feral ferments and the production of volatile acidity (VA), which is the first step toward the wine becoming vinegar.
• Winegrapes (from the Vitis vinifera species) contain more fermentable sugar than any fruit on the planet, making it perfect for fermenting into wine without requiring added sugar.
• As grapes mature on the vine they gain sugar, which in the wine world is described as degrees Brix — a measurement of the percentage of fermentable sugar in the grape by weight (25 °Brix means 25% sugar in the grape, and that is very sweet), and lose acidity (acid goes down, pH goes up). Choosing a pick date is as important as choosing a beer style. Picking early makes a light, crisp wine (think Pilsner, Kölsch, or helles), while picking late makes a dense, jammy wine more like a fruited milkshake IPA or Belgian quad.
• Choosing a single grape (varietal wine), or a mix of varieties (blend) is akin to choosing the beer style as well. Learning to make single-varietal wines before playing with co-ferments and blends is preferable, in my experience.
• Getting the fruit at perfect ripeness, and with the clusters cool and sound are goals that can’t be overstated. If picking yourself, try to pick in the morning or evening when the grapes are cool to reduce the potential for VA and spontaneous fermentation. Ripe winegrapes taste like candy to me — almost impossibly sweet for raw fruit. After 25+ harvests, my rule of thumb is that if I wonder if it’s ready for harvest, it’s not.
• For equipment to make wine from fresh grapes you will need a fermentation vessel with enough room for the wine to rise 20% during active fermentation, a crusher-destemmer that pulls the grapes from the stems while crushing them (you can get away with not having one, but that will dictate a lot of your wine’s style), a wine press, some buckets, barrels, or aging vessels, a pH meter, hydrometer or refractometer to measure Brix, smaller vessels for extra/topping wine, and ways to move liquid from vessel-to-vessel. These are the absolute basics and it will be no surprise how many companies there are out there that want to sell you more winemaking equipment. My opinion: Save your money on the fancy toys and buy better fruit. As a homebrewer, you likely have some of this equipment already and the big-ticket items can likely be rented from your local winemaking shop.
• White grapes are usually pressed without destemming, as the stems open up juice channels and allow the wine to flow out of the press.
• Red grapes are generally destemmed and the grapes are crushed to make a “must” (comparable to wort) of skins and juice, and the fermentation occurs with skin contact and mixing (punching down) the fermenting skins/juice a few times a day to keep the skins that will rise to the top from drying out and letting microbes gain a foothold. Red ferments are commonly covered by a screen or a clean sheet to keep fruit flies and other insects out.
• Most winemakers prefer to allow their wines to ferment to dryness (usually described as less than 3 g/L of residual sugar), but brewers are likely to have a different view of sweetness in their beverages, and playing with residual sugar is another tool on your belt as brewer-turned-winemaker.
• Wine takes a few days to a few weeks to ferment to dryness, with temperature playing an important role. Winemakers control and limit the heat produced in fermentation, believing that white wine fermented cool retains better aroma, and red wines fermented below 90 °F (32 °C) may show more subtle fruit and spice, as well as more roundness/completeness.
• Wines age. Most commercial red wines are aged for about a year in barrel, with new oak barrels giving quite a lot of toasty/roasty bouquet and flavor, while older oak barrels (as long as they are clean and well kept) still allow small amounts of oxygen into the wine and help tame the tannins in reds and broaden the palate for whites. You can also age the wine in glass, plastic, etc., and many home winemakers use oak chips, cubes, spirals, or staves to give the wine the oak flavor they seek — similar to those homebrewed oak-aged stouts.
• Keep your aging vessels (carboys, barrels, tanks, jugs) fully topped-up to minimize oxidation and VA.
• Learn to recognize when a wine is stable and bottle-ready. To avoid refermentation in bottle, make sure the wine is finished fermenting and dry, and also finished malolactic fermentation (when used), which is a bacterial process that uses Oenococcus oeni to convert malic acid (bright, citrus/apple flavor) to lactic acid (smooth, round, potentially buttery in whites). Adding sulfur dioxide (SO2) in the form of potassium metabisulfite after malolactic (ML) is critical for a modern, quality wine, and since SO2 is more efficient at lower pH/higher acid, we describe microbial stability at 0.8% molecular stability. It’s easy to find charts of parts-per-million needed in various pH wines to achieve stability and calculators for adding various powders/solutions of sulfite. The two recipes at the end of this story will provide further guidance on the basic winemaking procedure.
But, I’m a Homebrewer
Now comes the twist of this article, and the part where traditionally trained winegrowers and winemakers start feeling a little sheepish: Get creative.
A new trend has emerged in recent years as some established brewers are branching out and creating wine labels. Odell Brewing in Fort Collins, Colorado; Foam Brewers in Burlington, Vermont; Wicked Weed and Burial Brewing, both of Asheville, North Carolina; among them. Patrick Rue, who founded The Bruery in Placentia, California, left the brewing world after a decade of tremendous success to start a new venture. In 2019 he opened his own winery in Napa Valley, Erosion, which has since added small batch beer production to its lineup as well.
While commercial wine production was new to Rue and many other brewers who have taken this route, the creative spirit that craft beer is known for and techniques learned in a brewery never really left. This philosophy brought over from the brewing world is putting a new spin on wine.
“When a brewer becomes a winemaker . . . there’s less of a sense of tradition or ‘that’s the way it’s always been done.’ For me, the most common area where I can impact flavor is by incorporating ingredients that fall outside of typical wine ingredients,” says Rue. “Brewers have a lot of control when it comes to making beer ranging from raw material selection to process decisions. As a result, brewers tend to think of how to express certain flavors in the beers they make. Winemakers, on the other hand, tend to have less control. The grapes they have are of a certain varietal, from a certain area, and the weather is going to do what it’s going to do.”
Beyond adding unique ingredients, another area homebrewers may have an advantage to making wine comes from their experience in regards to intervention, a term winemakers often proudly state they like to minimalize. Whereas winemakers often follow the same recipe and technique year after year and “let the grapes’ expression shine,” brewers are more apt to continuously adjust a recipe until it hits all of the marks the brewer is shooting for.
“Many brewers focus on refining a recipe by tweaking techniques and elements in their brew; one thing many winemakers can learn from. Small refinements can go a long way,” says Don Schroeder, the Winemaker at SeaSmoke Cellars in the Santa Rita Hills of California.
These refinements may come in the form of the type of oak used, additives and enzymes, aging durations, yeast strains, and so much more. Instead of sticking to one way of doing things, the brewer-turned-winemaker is always tinkering with recipes
Let’s Get Crazy
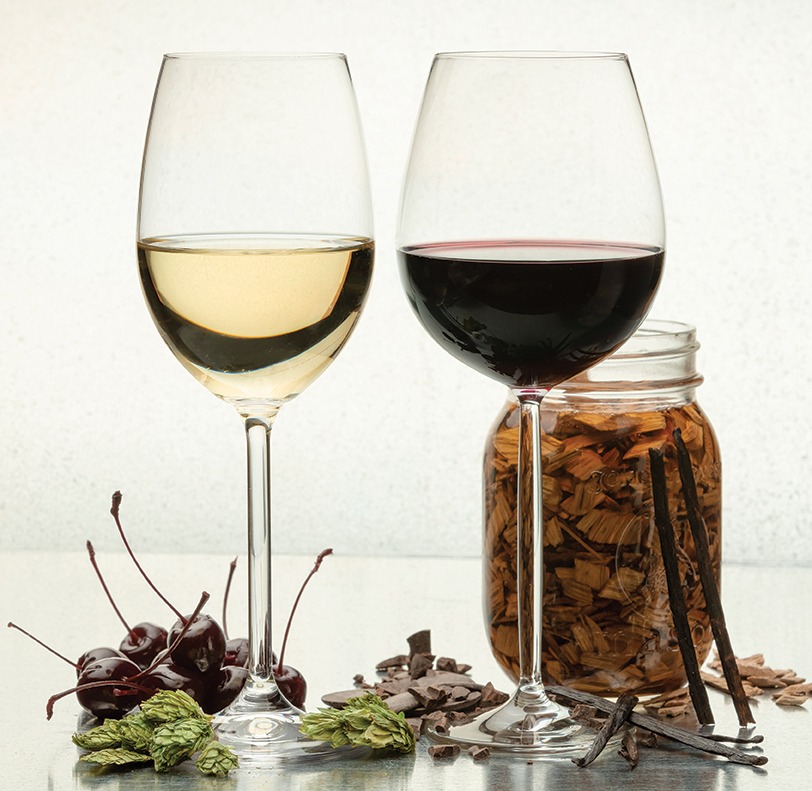
What are some of these ingredients brewers-turned-winemakers are using in their wines? The list Rue has executed at Erosion is already long enough to make the traditional winemaker a little queasy, and it likely is just the beginning for the winery that has been in business just a few years.
“A few examples that are top of mind are dry hopping a white wine, adding sour cherries to a Chardonnay to make it a ‘rosé’ of sorts, adding cacao and vanilla beans to a Merlot, aging late-harvest Sauvignon Blanc in spirit barrels. I’ve enjoyed the results, they’ve all contributed something unique while preserving the flavor of the base wine.”
Again, these are non-traditional, but as an experienced homebrewer it shouldn’t be too hard to envision the impact they bring to wine.

“It takes some effort to have a traditional wine drinker come to terms with what we’re doing, but craft beer drinkers understand the concept without much further explanation,” Rue says.
A traditional winemaker himself, Schroeder is also a craft beer aficionado. From the outside, he appreciates some of these new techniques winemakers are experimenting with. “One brewing technique being used in winemaking that I am really enjoying is dry hopping dry white wines. If done right it can add some lovely complexity to an affordable white.”
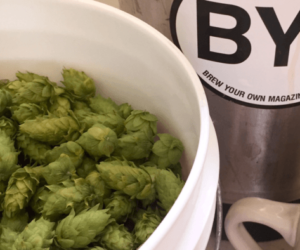
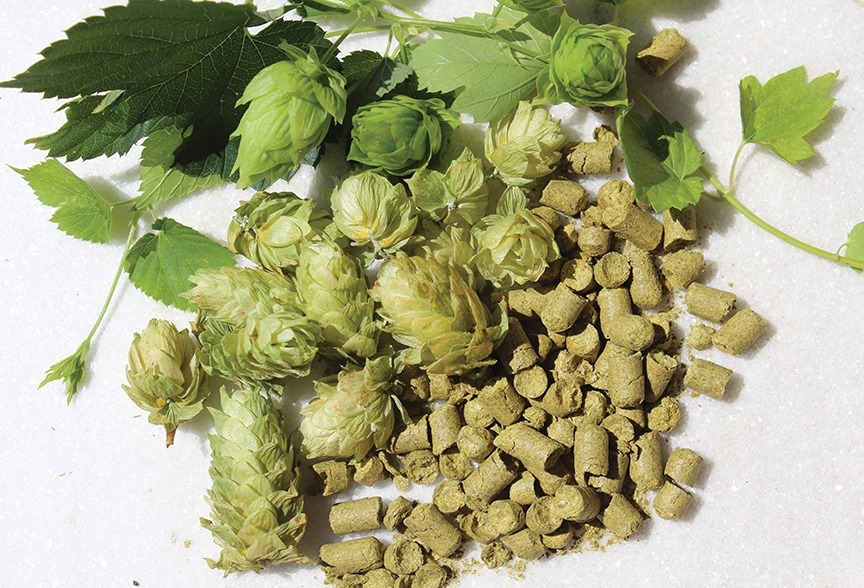
If you consider dry hopping a white wine, a good starting point would be hop varieties described as “vinous.” A few notable examples include Nelson SauvinTM from New Zealand, Hallertau Blanc from Germany, and AstraTM from Australia; however, other hop descriptors such as peach, pineapple, melon, lemon, and lime may also be good complements to a crisp white wine. Small dry hop additions for a few days is all that is needed, but some trial and error to dial in the right amount for your taste is to be expected.
Whether it is an addition of hops, cocoa nibs, vanilla beans, spirit-soaked oak chips, or any other new brewer-inspired addition; this is a great time to split that batch of wine you are making into smaller 1-gallon (4-L) trials.
Want to get even crazier? How about Brettanomyces? As a winemaker, the thought of introducing the “spoilage” yeast into a winemaking space is almost unthinkable. Of course, many breweries intentionally inoculate their beer with Brett (it is worth mentioning, that most of these either intentionally sour all of their beers or have separate brewing spaces for these Brett beers so as not to infect their clean styles).
Wicked Weed started an offshoot wine label named Vidl in 2019 that is run by the head blender of the brewery’s sour beer program. Some of the beers Wicked Weed is best known for are wild fermentations. As such, it shouldn’t come as a huge surprise that all of Vidl’s wines are also spontaneously fermented. None of their wines receive sulfite, fining agents, or anything else. Natural wine, if you will. Sourcing grapes from the same region as their hops — Washington State’s Yakima Valley, the wines are intended to express the terroir of the region. And, yes, this includes Brett in some examples.
As a longtime winemaker who follows a much more traditional approach to my own commercial production, I can also share an admiration for those who are changing the game. And I will offer this promise: I’ll keep my mind open to new styles of beer, wine, and hybrids of the two. And if this article leads you to make some wine, funky, fresh, or somewhere in the middle, do send me a bottle so we can taste it together and chat about your craft.
Oh, and to all you brewers — thanks for beer. I drink a lot of it, I just wish I was talented enough to make the stuff.
Wine Recipes
These are basic 5-gallon (19-L) recipes for a white (Sauvignon Blanc) and red (Pinot Noir) wines. Ingredients can be scaled up or down if you secure more or less grapes and want to change the batch size. Target chemistry is my own and can be tweaked for style.
Sauvignon Blanc Instructions (5 gallons/19 L)
100 lbs. (45 kg) Sauvignon Blanc grapes. Target chemistry: 22–24 °Brix, 3.2–3.5 pH, 5–8 g/L titratable acidity.
Press the fruit fresh and cool (I like to press below 65 °F/18 °C). Yield should be between 6–7 gallons (23–27 L) depending on the press. Pressing harder produces higher pH and some bitter compounds as seeds/stems start to break.
Juice can go into a small tank or vessel to settle overnight, rack clean juice to ferment, or you can ‘press dirty’ straight into your fermenter.
Stir in one gram per gallon of Fermaid-K yeast nutrient. I would also recommend 1 g of potassium metabisulfite (KMBS) into the main juice ferment, which should give you about 20–30 ppm free SO2 that will knock down feral yeast and keep the juice clean and fresh as the yeast wakes up.
For aromatic whites, I like to use the yeast QA23. It produces great aroma, and has low H2S production. Follow the manufacturer’s instructions to rehydrate the yeast, and do consider adding some nutrient product like GO-FERM.
When adding the yeast to the prepared juice, I pour the yeast very slowly into a thick film on the surface of the juice. We don’t want to mix it in for a few days, let it develop a robust community on the top of the vessel so it is not shocked into the low pH must. Expect the wine to start audibly bubbling and fermenting within 24–48 hours. If there are not signs of an active fermentation after 2–3 days, you may need to take a juice sample to the lab and figure out what’s going wrong.
Taste the wine as it ferments, and also test it. When fermentation is complete (it should have less than 0.5% residual sugar), rack off the sediment and transfer to an aging vessel. There are a number of wine test kits and small-scale lab equipment available from homebrew retailers that will come in handy when making wine.
Sauvignon Blanc isn’t normally aged or taken through malolactic fermentation (MLF). So once the wine is dry and you’re happy with the flavors, (sooner the better) add SO2 to 0.8% molecular. (A 5-gallon/19-L carboy at 3.4 pH would require 1 g of KMBS to hit about 30 ppm or 0.8 molecular SO2. Molecular SO2 is a sliding scale with pH, as less SO2 is needed at low pH, more SO2 at high pH.) Because you will likely bottle without the wine going through MLF, a full dose of potassium sorbate to the wine lot is recommended to keep the wine from refermenting in the bottle.
Bottle it! You can buy bottling units, but hoses and gravity works just as well in wine as it does with homebrew. The quality of your cork is critical — buy an unopened package of corks — and you’ll need a floor corker. These are available at your local homebrew/home winemaking retailer.
Rest it! The wine will likely taste great for a few days, but then closes down for a few weeks to a few months. Three to four months is usually plenty of time after bottling to start drinking the stuff like it’s going out of style.
Pinot Noir Instructions (5 gallons/19 L)

100 lbs. (45 kg) Pinot Noir grapes. Target chemistry: 24–26 °Brix, 3.3–3.6 pH, 5–6 g/L titratable acidity.
Crush/destem the fruit fresh. At small quantities, this job can be done with your hands, but much larger and you will want to buy, borrow, or rent a crusher/destemmer to more easily remove the berries from the stems. Move the grapes directly into the fermentation vessel with at least 8–10 inches (20–25 cm) of extra room for the fermentation to expand and be stirred. As the fermenter fills, sprinkle SO2 (1 g KMBS) in the must and stir. Chill the must down to at least 60 °F (16 °C) or as low as 45 °F (7 °C) for a cold soak, which can be done in a temperature-controlled space or by adding frozen bottles of water to the must.
Cold soak the fruit at least two days if possible. Punch down the cap, mixing the juice and skins to a uniform mixture a few times a day, being sure to never allow the cap to dry out or get funky (keeping it wet will keep the bad bugs at bay). Allow the freshly crushed and chilled grape must to sit for a day or two, or three, as they begin to absorb color and flavor from the skins. Once you see some bubbles actively forming on the edges of the fermenter (native ferment has started), it’s time to add your Fermaid-K (1 gram per gallon), punch the cap down, mixing the must to a uniform consistency, and then add commercial yeast (RC-212 is my suggestion), rehydrated to instructions, in the corner of the fermenter, allowing it to create a robust population. Once the area where the yeast was pitched begins rising from active ferment, punch the yeast “corner” into the rest of the must. Active fermentation should begin throughout the vessel within 12 hours. If the ferment stalls or fails, research restarting wine ferments, and consider a more aggressive
yeast strain.
Once fermentation is complete (0 °Brix or lower), press into a barrel or aging vessel. Wine that flows freely out of the press (without pressure) is called free run and considered the highest quality. The harder you press a wine, the more bitterness can be created from seeds, so I like to press soft and multiple times to get the best yield and quality. Fill the fermenter as high as possible to limit air space and, if using a barrel, top up once a week for the first couple months, and then every couple weeks afterwards to make up for wine lost to the barrel until bottling. If using glass or plastic fermenters, add oak chips, cubes, staves, or other oak alternatives. I’d strongly recommend French oak for Pinot Noir, at a medium toast.
Add a malolactic bacteria and test for malolactic fermentation (MLF) completion. You can send it to a lab or order a chromatography kit to do this at home.
Once MLF is complete, keep the wine at 0.8 free SO2 stability until bottling, checking and bumping the SO2 every few months. At 3.5–3.6 pH, that’s about 40 ppm free SO2 in the wine. Also, when I add KMBS to a wine, I first mix it completely into distilled water in glass labware.
Bottle it! Follow the same instructions as bottling the white. What about fining or filtration? As long as you’ve done a good job racking the clean wine off the lees (sediment) a few times, the wine can likely be bottled and enjoyed non-fined or filtered. It’s a long, complicated subject, which I’ll leave to your research.
Rest it! As stated in the Sauvignon Blanc recipe, “bottle shock” is a real phenomenon, so expect your wine to be ready for drinking a few months after bottling, and showing its full array of aroma and flavor after 3–6 months of cellaring.