Yeast Pitching and Propagation: Techniques
As a homebrewer, propagating yeast to get the appropriate amount of yeast pitched for best results seems like a no brainer. But you may be surprised to learn that a package of yeast may not contain enough cells for your usual 5-gallon (19-L) batch. The appropriate pitch rate is actually higher. Making a yeast starter, also known as yeast propagation, seems to be a technique often reserved for seasoned homebrewers. Maybe it’s because learning to brew is a process in and of itself, and adding one more early step may create some confusion. I’m here to tell you that propagating yeast is easy enough that those new to homebrewing can benefit from just a few additional steps that will ultimately provide your beer with an adequate yeast supply, and in turn, a cleaner, more predictable flavor profile.
There are a few things that I see in the brewing process that set great craft brewers apart from homebrewers – and proper yeast supply to the wort probably tops that list. Healthy, active yeast in great abundance is crucial. It will cut down on fermentation time, produce cleaner and more style-appropriate beers, and allow the brewer’s yeast to outcompete other organisms that may be trying to live and thrive in your beer. It’s not easy getting an exact count on your yeast without lab equipment, but we can make a good estimate. Let’s look at some of the basic equipment, yeast, and the calculations you can use to make a yeast starter, and ensure the proper pitch rate in your beer.
Yeast Starter Gear
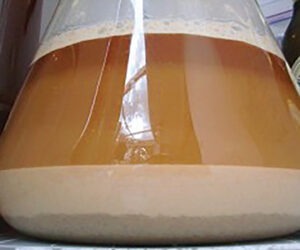
If there’s one piece I can recommend for yeast propagation, it’d be an Erlenmeyer flask. An Erlenmeyer flask is easy to close from contamination and take accurate measures in. The second couple pieces of equipment would be a magnetic stir bar and stir plate. If you’d like to keep this simple, and keep your costs down, you can purchase just the flask or build your own stir plate. The value in a stir plate lies in the ability to create a larger mass of yeast faster. A stir plate creates a continuous vortex, keeping the yeast in suspension, and well oxygenated. These days, a stir plate can be built or purchased for under $50, and a stir bar is often included.
If you’re using a stir plate, you can get away with a smaller Erlenmeyer flask, as you’ll be creating a larger density of cells using less liquid. But be sure you’re using an appropriate size — a good rule of thumb is to be sure your liquid is never more than 2⁄3 your flask size. This cuts down on the messes, increases the probability of the stir plate working well, and better volume to surface area ratios. We’ll get to the specifics of starter size later.

You’ll also want to keep dried malt extract (DME) on hand. Since you’ll be making your starter in advance, DME is an easy-to-store food for your yeast. A cotton plug, or a foam stopper, or even a piece of aluminum foil wrapped over the top, can be used as a lid for the flask when actively growing yeast, allowing an exchange of air and any over activity to escape. A stopper and airlock for the flask can be utilized if you ever need to store the yeast a week or more beyond its active growth phase.
Another weapon in your yeast propagation arsenal is yeast nutrient. It’s added insurance for yeast health early on, and increases cell concentrations in yeast starters. Yeast need nitrogen during these early stages for growth, so nitrogen-rich yeast nutrients work best. Follow the instructions on your yeast nutrient’s packaging for appropriate addition amount.
Yeast Estimate
Commercially-produced yeast is the best and easiest way to start propagating yeast. Liquid packages typically contain 100 billion live yeast cells. Dry yeast package estimates range from 6 to 20 billion live yeast cells per gram. Lallemand estimates its dry yeast at 7.5 billion cells per gram, and comes in an 11-gram package. Fermentis states that their dried yeast is >6 billion cells/gram. Check the packaging or manufacturer’s website to see if they make mention of the cell count. Most homebrew yeast, if stored appropriately, is packaged in a way that it is close to 100% viable within its given best buy date. Below you will find a helpful chart based on the numbers I could find from some common homebrewer’s yeast manufacturers.

Pitch Perfect
Without your own home yeast lab, we typically have to go with what commercial yeast companies have told us we purchased in their pack. So what’s a proper pitch rate, and how do we get there? Before you determine pitch rate, you’ll need to know what you’re brewing. How big is the beer, and what style is it? There are numerous pitch rates, and the industry standard for cell counts per milliliter seems to grow each year. The chart below has some pitch rates, which I recommend based on these parameters.

Although overpitching can have a negative effect on beer like larger amounts of acetaldehyde compounds which create a green apple flavor, the rate at which you would need to overpitch to achieve something noticeable seems to be pretty high. I’ve noticed a few breweries have posted they pitch all of their ales at 1 billion cells per liter per °Plato, and their lagers at 2 billion cells per liter per °Plato. While this lies on the higher end of the yeast-pitching spectrum, this seems like a safe practice. Lager yeast is less active due to the lower temperatures, the rule of thumb has been to double the pitch rate.
Pale Ale Pitch Example
So how do you calculate the required number of yeast cells? We’ll use the formula — Pitch Rate (billion cells/L/°P) x °Plato x Batch Volume (L) = Total Yeast Cells Needed to calculate.
For the following example we’ll say we’re brewing 5 gallons (19 L) of pale ale with an original gravity of 1.056. We’ll need to determine our pitch rate from Figure 2. 0.75 million cells per milliliter equals 0.75 billion cells per liter. We’ll next need to convert our original gravity to degrees Plato, 1.056 becomes 13.8 °P. The formula for converting is a bit tough to commit to memory:
°Plato = 135.997 (SG3) – 630.272 (SG2) + 1111.14 (SG) – 616.868
Converting our pale ale’s 1.056 gravity (SG) to °Plato:
135.997 (1.0563) – 630.272 (1.0562) + 1111.14 (1.056) – 616.868 = 13.8 °P
For reference many homebrewers and craft brewers cheat this formula by simply dividing the gravity points above 1.000 by 4. So for our beer it would be 56/4 = 14. Pretty close, and definitely close enough for pitch rate calculations when propagating yeast. The higher the gravity reading of the wort, the less accurate this cheat formula works though.
We also need to convert gallons to milliliters. 1 gallon equals 3,785 milliliters or 3.8 L, so for a 5-gallon batch we’ll be pitching in to 18,925 milliliters or 18.9 L of wort. Now that we have the correct volume of wort and °Plato, we’re ready to calculate our pitch rate using our formula from above. 0.75 billion cells/L/°P (pitch rate for ale) x 13.8 (°Plato of wort) x 18.9 liters (batch size) = 195,873,750,000 yeast cells, or about 196 billion cells.
Propagating The Appropriate Amount
Now that we’ve determined how much yeast you need to pitch, it is time to figure out the best method for getting to that pitch level. You can purchase enough yeast in order to obtain that level or you can propagate the yeast yourself. If you plan to propagate yourself, the next step is to estimate growth rate. There are numerous factors including the yeast’s attenuation, if you’ve added yeast nutrient, if you’re using a stir plate, and general wort fermentability that contribute to the estimated growth rate.
The easiest way to estimate growth rate is by using an online growth calculator and there are several which are offered for free. Many of these growth calculators are based on utilizing a low gravity wort such as the 1.036, as is used by Chris White in the book he co-authored with Jamil Zainasheff, Yeast: The Practical Guide to Beer Fermentation. This is easy as it takes 100 g of DME mixed with 1 L to create this strength wort. The general rule of thumb with yeast growth in this wort strength is about 150 million cells/mL.
One final piece is for those that possess a stir plate. Yeast growth rate due to the constant mixing, expelling of CO2, and ingest of O2; allows yeast improved reproduction rates. The estimated volume of water and DME you need to make the appropriate amount of yeast is 40% less when a starter is placed on a stir plate versus an un-stirred starter.
Advanced Propagation – Determing your own Growth Rate
Looking to strike out on your own and calculate your own desired volume and gravity of your starter? Let’s take a spin through the basic concepts. We’ll start by using an estimated growth rate of 0.4 billion-yeast cells per gram of DME. That means that a gram of DME, when fed to yeast, will allow that yeast to create 400 million cells.
In the above pale ale pitch rate example, we determined we needed 196 billion cells for our beer. Keep in mind we’re starting with some from our package of yeast. In this example, let’s say we start with a White Labs Pure Pitch liquid yeast package, which contains 100 billion active cells. This means if I use their WLP001 California Ale strain, I need 96 billion more cells for pitch. To determine how many grams of DME I need for an appropriate amount of food, I can simply divide 96 billion by 0.4 billion-yeast cells per gram of DME.
96 billion cells/400 million cells/g DME= 240 g DME needed for additional yeast growth required for an appropriate pitch rate. You don’t want to make too high a gravity starter so that the wort is easily fermentable. We’ll target a starter gravity of 1.056, the original gravity of our wort. You may choose a different target gravity, but I’d recommend no higher than your beer’s target original gravity.
1 gram of dry malt extract mixed with 1 mL of water provides a wort gravity with a SG of 1.344. If you take the difference of your two gravities to determine the proper dilution. 344 gravity points / 56 targeted points = 6.14 difference factor. Multiply by the grams of yeast you have to determine how many milliliters of water you will need, 6.14*240= 1,474 mL of water.
You’ll want an Erlenmeyer flask that can handle 1,474 milliliters, or about 1.5 L of wort. A general rule is to leave yourself some space. Between two thirds and three quarters the given volume of your flask is safe. In this case 1.5 L would be 75% the volume of a 2000 mL flask. Cutting it close, but you should have just enough volume and headspace for this starter if you have a 2000 mL flask.
Propagation Process
2000 mL flask
1.5 L of water
240 grams of DME
1 package of White Labs WLP001 California Ale Yeast
Fermcap (optional)
1. Begin by pulling your yeast out of the fridge to allow it to slowly adjust to room temperature and become active.
2. Fill your clean flask with 1.5 L of room temperature water. If your flask is made from borosilicate glass it can be heated directly, and by bringing your water to a boil, is an easy way to sanitize your flask and your wort.
3. Mix the 240 g (8.5 oz.) DME into the water and bring to a boil in order to sterilize the wort. This can be done in asauce pan or in a borosilicate glass Erlenmeyer flask. DME dissolves equally well in cold or warm water, so you can add the DME at any point. Simmer wort for 15 minutes to sterilize. Fermcap can be added to prevent boil-overs.
4. After wort is sterilized, and cooled back to room temperature, pitch the package of yeast in to your flask. Again, gently shake or stir so that the yeast slurries into the mixture. This additional aeration aids the yeast as well.
5. Close the Erlenmeyer flask with a cotton plug, foam stopper, or foil wrapped completely around and down the neck. Allow 48 hours prior to pitching into wort.
Whether propagating lager or ale yeast, room temperature will suffice. In general, 48 hours of activity will provide you with the majority of yeast growth that will occur. We want to catch the yeast while they’re active and healthy, so waiting too long to pitch a starter may have an adverse effect on the yeast starter’s viability.
Conclusion
The most difficult task in making a yeast starter is determining the appropriate size and amount of the starter. There are numerous calculators online that can aid you in the math. Should you make a starter even if you’re unsure of the exact quantities? If you only have one package of yeast for a 5-gallon batch, then you probably should. Overpitching is hard to achieve if you have a ballpark idea of what you’re doing, and underpitching can cause even more issues. I hope you’ll take some time to go through the process of determining your pitch rate and propagation volume. Getting consistent results is well worth the effort!