Your Own Draft System
If you brew your own beer, you know the drill. A few friends come over on brew day. The brewing process is fun and relaxing. There are plenty of natural breaks in the work. You and your friends talk about the latest innovations in brewing equipment, brag about your homebrews, drink a few of the same, and generally have a good time. Why, one or two of your friends even stay all the way through the process and help you clean up.
There is not much to do over the next few weeks. You monitor the fermentation, rack the beer at some point, and consider recipes for your next brew. The one thing you try not to think about is the next step in the production process of your current brew—you have to bottle it. That’s when the work really starts. Now the problem becomes finding your friends. Where are they on bottling day? The answer is anywhere but in your brewery.
So you wash your bottles. Then you rinse them. Then you sanitize them, fill them, cap them, clean them off, and put them away. But it doesn’t stop there. Every time you drink a bottle of your brew, you dutifully rinse it out and dry it upside down. This way something won’t grow in the bottom of the bottle, something as weird as the results of your high school science project.
You brew often, so bottles are everywhere. There are full ones in the refrigerator, more aging down in the cellar. Your working supply takes up a whole closet. There are some more out in the garage that you just picked up from a local bar. You can’t wait to clean the dregs and cigarette butts out of those. From the start of the brewing process to the point of consump-tion, how many times does a homebrewer handle each bottle? The answer is the same for most: too many. There has got to be a better way. You need a draft homebrew system.

You have seen draft systems advertised, but nothing you have seen excites you. They are too expensive, or a reviewer has pointed out their limitations or lack of flexibility. Besides, you are a homebrewer. That leaves you with but one alternative, build your own draft homebrew system.
The Pieces
To put your own system together, there are a few basic items you will need. First, you must have a gas cylinder to hold carbon dioxide along with a pressure regulator and shut-off valve to control the flow of the gas. Find at least one five-gallon soda container, with the accompanying gas and liquid connectors that are fitted with a hose barb attachment. The basic system is complete with 3/16-inch diameter tubing, a hand-held beer dispensing tap, a few hose clamps, and a refrigerator.
Carbon dioxide gas cylinders come in various sizes ranging from just a few points up to 50 pounds. (The gas in the cylinder is actually in liquid form and is measured in pounds.) The small cylinders, up to five pounds, are easy to handle but have to be refilled too often.
Larger cylinders, above 20 pounds, are much too bulky and heavy for convenient use. For your home try a 20 pound cylinder. If you intend to transport your cylinder often, to events such as beer tastings and parties, look for a 10 pound cylinder.
A note about transporting these cylinders: When full of gas, a typical cylinder will have more than 2,000 pounds per square inch of pressure. Always attach the cylinder securely to some type of fixed support, both at home and in your vehicle, to prevent accidents.
A new 20 pound cylinder will cost $80 to $100, a 10 pound cylinder slightly less. To find a cylinder locally, look in the yellow pages for either a bottled gas company, a local soft drink distributor, or a company that services fire extinguishers. Sometimes used cylinders are available at a substantial savings. The bottled gas company can foil the cylinder for you. Filling a 20 pound cylinder will cost around $8. Be sure to specify that you want “food grade” carbon dioxide. If you put your system together properly with no leaks, a 20 pound cylinder will last you a long time.
A pressure regulator with a shut-off valve is necessary to control the flow of gas from the cylinder to the container holding your beer. A two-gauge regulator is best. The first gauge reads the amount of pressure in the gas cylinder. The second reads the pressure in the line going to your beer. Ask for a low pressure beer regulator (0 to 30 psi). A normal soda pop regulator is set to operate at a much higher pressure than you will need for your beer. Ask for a regulator wherever you find your gas cylinder. You can’t have one without the other. A new regulator will cost about $40. To protect your investment, gauge cages are available. These cages fit around the regulator and protect it from bumps, blows, and minor falls. A gauge cage costs $10.
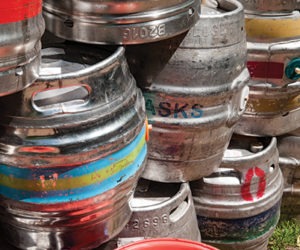
The next piece of equipment you will need is a “keg.” Normal beer kegs, besides having a much larger volume than the normal batch size of most homebrewers, are difficult to access for cleaning and filling without specialized equipment. Fortunately, typical stainless steel soda pop canisters hold five gallons, a very common batch size for most homebrews. These canisters are easy to access for cleaning and filling, and stainless steel is the material of choice for a container holding draft beer. A new soda pop container will cost about $80. However, many soda pop distributors are currently changing to “bag in a box” dispensing systems. Surplus soda pop containers are in abundance and can often be purchased for a song, or maybe a few homebrews. Check with your local distributor to see if any surplus containers are for sale.
Be careful that the used kegs don’t smell like soda. You may want to take them apart and replace the soda-tainted O-rings, if necessary.
These soda pop containers, called Cornelius kegs, are serviced by simple connectors that either deliver gas to or dispense liquid from the container. There are two general types of connectors, pin types and pop-it types. These two types of connectors are generally associated with the two major soft drink companies. Neither system has a significant advantage over the other. Just make sure to match the connectors with the type of “keg” you have. These connectors can be purchased along with your keg. They cost about $8 a pair new.
The system is completed by connecting the components together with the five feet of 3/16-inch inside tubing. (It’s important to use sufficient beer line to ensure a gentle pour from the tap when your keg is at relatively high pressure—10 to 15 psi.) Proper use of the hose clamps ensures tight connections that will not allow gas leaks. The beer is dispensed from your keg through a hand-held tap. The tubing and clamps are available at most hardware stores for a nominal cost. The hand-held tap may be available at your local homebrew store and usually costs around $6. If not, the tap, and any other pieces that you are having trouble locating, can be purchased from one of several mail order businesses that specialize in beverage dispensing. Some of the best known are Foxx Equipment Co., 1-800-821-2254, Braukunst, 1-800-972-2728, and Rapids, 1-800-472-7431. These companies are also good sources of spare parts and additional optional equipment.
One of the biggest advantages of this type of draft system is its expandability and flexibility. To increase your capacity you can simply add more “kegs.” Also, if you look hard enough, you can find soda pop canisters in other sizes, mostly three and 10 gallons. The three-gallon kegs are great for mobile situations. The 10 gallon kegs are perfect for larger batch sizes. Gas manifolds are available that allow you to service several kegs with the same gas cylinder and regulator. Additional serving taps allow you to serve several beers at once. Simple and inexpensive counter pressure bottle fillers can be used with the system to put portions of your draft beer in bottles if you choose to do so.
The system also does not require any specialized or expensive tools. All you will need is a screwdriver to attach the hose clamps and the gauge cage, and a large crescent wrench to install and remove the pressure regulator to and from the gas cylinder. The use of bulk carbon dioxide, in contrast to the small disposable cartridges of gas used in many other systems, is much less expensive per pound of gas.
The major disadvantage of this type of draft system is the need for refrigeration. Your draft beer will not necessarily have the kind of protection that bottle conditioning provides. Thus it will need to be kept refrigerated. With the shelves removed, a normal refrigerator will hold up to three five-gallon kegs. This does not leave much space for anything else, except hop storage in the freezer. You will have to have a dedicated refrigerator for your draft beer. Where do you find a used refrigerator? Try apartment complexes that are replacing their old ones. Often you’ll get a very reasonable price.
The biggest advantage to such a draft beer system is the savings in your labor that you will realize over time. You will easily save one to two hours for every batch of beer you would have bottled. The total cost of the system new is around $225 (refrigerator not included). Finding any, or all, of the components in used condition can bring the cost down considerably.
You will also notice subtle differences in your draft homebrew. A draft beer usually has a smoother flavor profile than the bottle conditioned version of the same product. The clincher is reducing the amount of time you spend dealing with all those bottles. Being able to spend more time enjoying your homebrews can only be described as priceless.