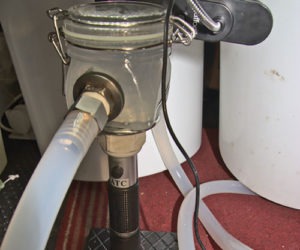
Toolbox Pump
Cooling your wort in a timely matter could make the difference between a crisp, hoppy ale or a sour, infected mess.
I’m sure a lot of brewers can remember a time when they had to lug a near-boiling pot of almost beer into their sink or bath tub and add what seemed like endless bags of ice into the tub to cool their wort. After doing this myself I knew there had to be a better way and that’s when I decided to invest in a plate chiller and a pump. Since I didn’t have a dedicated brewing area, I wanted to come up with an easy and portable cooling station being that half the year I brew in my kitchen and the other half I’m in my backyard. I came across the “Pumped up Toolbox” article from the October 2009 BYO and thought that was the perfect solution for me — well, after I put my own spin on it.
For this project I used an old metal toolbox. The toolbox has multiple valves on in the front so you could use this system simply as a pump for transferring wort or whirlpooling after the boil without pumping unnecessary gunk through the chiller, or you can also easily add other components like a hopback without modifying anything. You can also use the pump to clean and back flush the plate chiller to insure that there’s no gunk left in it. I opted not to hardwire a switch for the pump onto the box since I’m not experienced with wiring electrical components and decided to just buy a $12 outlet switch, which works great.
The only potential problem with the design is the chance the pump could overheat and fail due to the closed-in nature of the toolbox. This is easily remedied by leaving the lid open while the pump is in use, or installing a small computer fan or two into the sidewalls of the toolbox to pull hot air off the pump and blow cool air into the box when the pump is in use. As a caution, when I would start whirlpooling the pump would seize up and stop working for no apparent reason. After some testing I realized at near-boiling temperature there are air bubbles at the bottom of my kettle and it will start to cavitate my pump and cause it to stop working. So the solution I found was to restrict the flow of liquid out of the pump by about 40% and to slowly open the valve as the wort cooled over the next few minutes. With this technique I don’t have any problem pumping liquid.
Tool List:
Power Drill
Crescent wrench
Pliers
7⁄8-inch drill bit
1 1⁄2-inch drill bit
Parts List:
Toolbox, minimum of 22 inches (56 cm) in length
Plate chiller
Pump
(3) 1⁄2-inch stainless steel tees
(2) 1⁄2-inch mini ball valves male/female
(3) 2-piece 1⁄2-inch ball valves
(3) 1.5-inch nipples (1) 1⁄2-inch 90 degree male/female stainless steel elbow
(2) 5⁄8-inch male hose barb
5 Female garden hose thread (GHT) to 5⁄8-inch barb
4 Male cam lock “type F” 2 “Big C” cam locks for every tube you make.
1 foot (30 cm) large 1⁄2-inch ID x 3⁄4-inch OD silicone tubing (More tubing is needed for more disconnect hoses.)
5 feet (1.5 m) 5⁄8-inch ID vinyl hose
Gilmour brass one-way shutoff
Hose clamps
Ground fault interruptor
Belkin power switch
2 Gilmour metal quick connector set with overmold
Teflon tape


