Build a Fermentation Temperature Control System
 Whether the topic is brewing techniques or DIY projects, learning and sharing with others have played a huge role in my homebrewing hobby. A common problem that I’ve found a lot of homebrewers have (this included myself) is how to keep beer fermenting at a consistent, desired temperature.
My first solution to this problem was to use a mini-fridge, which worked pretty well when I was brewing 5-gallon (19-L) batches. However, it didn’t take long before I started brewing 10–15 gallon (38–67 L) batches and didn’t have space in my mini-fridge anymore. Now, I found myself faced with the same problem. I could simply buy a secondary mini-fridge, or perhaps a larger refrigerator that could hold multiple fermenters. But multiple refrigerators would add up in cost (not to mention the added space requirements), and while a larger refrigerator would work well if all my beers where supposed to ferment at the same temperature, it would not work if I had multiple batches that needed to ferment at different temperatures. What if I wanted to make an Oktoberfest and an oatmeal stout at the same time?
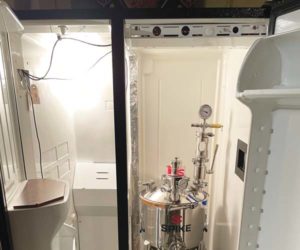
This lead me looking for a solution that doesn’t take up as much space, is reasonably priced, and allows for different temperatures if needed. After spending time searching the internet and talking with friends from local homebrewing clubs, I built a fermentation controlled system. This system is pretty simple to build and I’ve found it works very well. There are two different parts to this project — one that will heat up your fermenter and another that will cool it if the temperature rises too high.
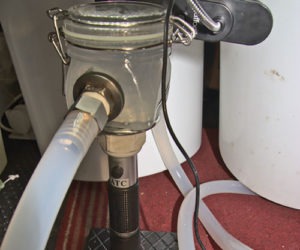
The driving force to provide the cooling effect is an ice bath. A temperature controller connected to a pond pump will turn on a pump sitting inside the ice bath to carry water through a fermentation jacket when the temperature rises too high.

The same temperature controller will turn on a fermentation heater when the temperature drops too low, raising the temperature back into the pre-set range through the use of flex watt tape.
I later substituted the ice/water bath with a window air conditioning unit using its evaporating coils to cool a glycol/water solution. You can find several resources online if you’re interested in pursuing the window air conditioner option, but I’m going to keep this project simple so anyone can do it with minimal safety concerns that may arise when modifying air conditioning units.
To keep the system heated I am using flex watt heat tape, however you could use a pre-made fermentation heat wrap from a homebrew supply shop and use only the cooling side of this system if you choose.
PARTS & TOOLS
• Cool Zone Cooling Jacket (Gotta-Brew SKU#CJ5065)
• Flex watt heat tape (11 x 24 inches/28 x 61 cm)
• Clip sets for heat tape
• Flex watt cord set (6 foot/1.8 m, 18 gauge cord)
• Dual stage temperature controller
• Insulated cooler
• Crimping tool
• Pond pump