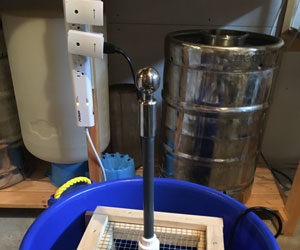
Carboy Spray Wand
Probably every homebrewer’s least favorite part of the hobby is the sometimes staggering amount of cleaning that is required to produce a sanitary, contaminant-free batch of beer. And one of the most stubborn things to clean can often be that thick, nasty-looking ring of dried kräusen gunk that is almost always present after a healthy fermentation. This is especially true for brewers who use blow-off tubing, as the kräusen travels all the way up the neck of the carboy.
You can soak the carboy overnight in a solution of water and a cleaning agent such as B-Brite and then use a carboy brush to get the stubborn cling-on gunk. Or, you could just use a high-pressure sprayer to blast away the left over kräusen.
There are two basic ways to build this carboy sprayer: either with soft copper tubing or with hard copper pipe. If you intend to use soft copper tubing, you’ll need two compression fittings and a few adapters. I chose to use 3⁄8-inch OD copper tubing (to navigate the narrow neck of a glass carboy) along with 3⁄8-inch x 1⁄2-inch compression coupling (Watts part # A-118), a 3⁄8-inch x 1⁄4-inch compression coupling (Watts part # A-116), a
3⁄4-inch male hose thread x 1⁄2-inch male pipe thread adapter (Watts part # A-663), and a 1⁄8-inch hose barb x 1⁄4-inch male pipe thread adapter (Watts part # A-85). These fittings work with my usual brewing setup, so feel free to make changes based on your equipment, whether it includes an outside garden hose or an indoor utility sink.
For those of you with PET carboys, or if you happen to have a glass carboy with a wider-than-normal mouth, hard copper pipe is a great alternative to copper tubing. It’s less pliable than soft tubing, but far more sturdy over the long haul and there are several available fittings allowing for many different designs to accommodate a wide range of needs.
Going with hard copper pipe also means that you’ll need to solder the joints and fittings together, as it is too rigid for regular compression fittings to work properly. If you’ve never soldered copper pipe before (referred to as “sweating” copper), don’t let that stop you from giving this project a try. The process of soldering copper is very simple to learn (but difficult to master, of course), the equipment to do it is inexpensive (less than $20 for the basic gear), and it’s a useful general home-improvement skill. Be sure to wear appropriate safety equipment and follow all precautions as directed.
Parts and Tools
Soft Copper Option
- 2-foot (or longer) piece of 3⁄8-inch OD soft copper tubing
- 3⁄8-inch x 1⁄2-inch compression coupling (Watts part # A-118)
- 3⁄8-inch x 1⁄4-inch compression coupling (Watts part # A-116)
- 3⁄4-inch male hose thread x 1⁄2-inch male pipe thread adapter (Watts part # A-663)
- 1⁄8-inch hose barb x 1⁄4-inch male pipe thread adapter (Watts part # A-85).
Hard Copper Option
- 2-foot (or longer) piece of 1⁄2-inch OD copper pipe
- 3⁄4-inch male garden hose adapter fitting
- 45-degree street elbow
- 90-degree street elbow
- end cap


