DIY Can Seamer
Taking homebrew on the go
As a homebrewer, you know that the ultimate goal is to enjoy the delicious and refreshing taste of your own handcrafted beer. However, with the traditional bottling process, you might find yourself struggling with inconsistent carbonation levels, or even worse, exploding bottles. There are better ways to package.
First off, to deal with the inconsistent carbonation, kegging your beer is the first step towards the goal of improved packaging. The advantages to kegs beyond carbonation are plentiful, but portability is a clear disadvantage. Bottling the now carbonated beer does fine, but canning, to me, is the winner.
Canning your beer provides a host of benefits, from longer shelf life (if canned properly) to increased portability. Cans are impervious to light and oxygen, which can degrade the flavor of your beer over time. Additionally, cans are much easier to transport than bottles, and they’re also more durable, meaning you can take your homebrew with you to the river or pool without worrying about breakage.
Unfortunately, commercial can seamers can be expensive for most beginner homebrewers. In addition, in many countries there are not many suppliers that offer this type of product. This is where a DIY can seamer comes in handy. By building your own can seamer using a 3-D printer, you can save a significant amount of money while still achieving professional-level results.

Of course, building your own can seamer requires some technical know-how, but with the right resources and a bit of patience it’s a feasible project for most homebrewers. By sourcing the necessary components and using open-source design plans, you can customize your can seamer to your specific needs and preferences.
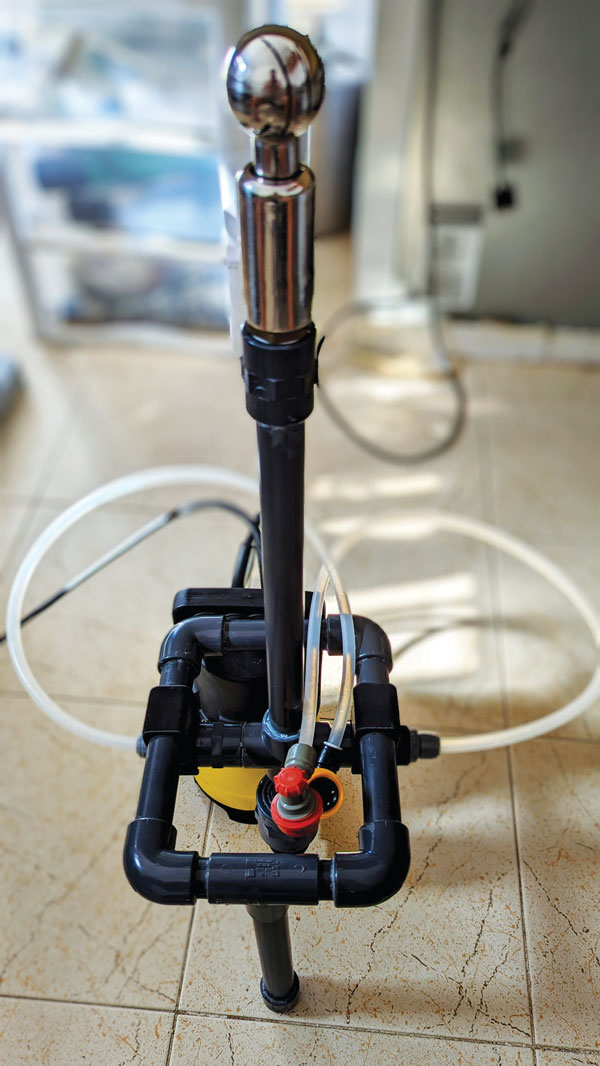
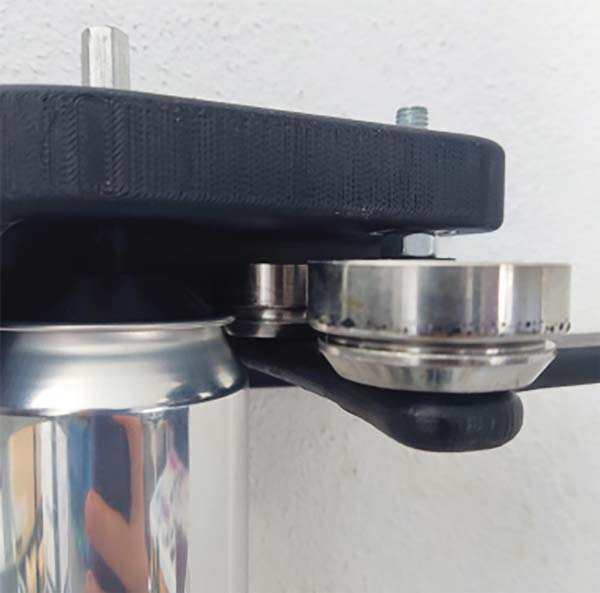
Ensuring good stability for a can seamer, especially with a 3-D printed design, presents a significant challenge. To solve this problem, my solution was to mount the seamer on a wall to address the variability of vibrations and movements. In addition, the design of the can seamer faced another challenge in finding an efficient way to seam the lid. This was addressed by purchasing two commercial seam rollers, which provided the necessary precision and efficiency to achieve high-quality seams without compromising the integrity of the can. The first roller makes the seal and the second rounds the edge and thus makes it safe and pleasant to the touch.
To keep costs down and make the can seamer affordable, I opted to use a drill for rotation power instead of the laborious installation of a motor with its electronics. Despite potentially providing less precision and consistency, this solution has worked well.
All in all, a DIY can seamer is a great addition to any homebrew setup, allowing you to easily and efficiently package your beer in a portable and durable container. With the added benefit of potentially improving flavor retention, canning your beer is a no-brainer for any serious homebrewer. So why not take the plunge and build your own can seamer today?
Tools & Materials
- 3-D printer
- 3-D models to print (link at: https://www.dropbox.com/scl/fo/idotiq5nol244uy346gvz/h?dl=0&rlkey=cixh6d8ghya3nzufgng6nvyx9)
- (1) First operation roller
- (1) Second operation roller
- (1) Screw for bearing M6 – D8 – L35 mm
- (2) Hex head screws M8 – L40 mm
- (3) M8 nuts
- (1) Nut M6 L20 mm (drill attachment)
- Several M8 washers
- (5) 608 Bearings – 8 x 22 x 7 mm
- (8) Screws and wall plugs
Steps
1. Print the plastic pieces
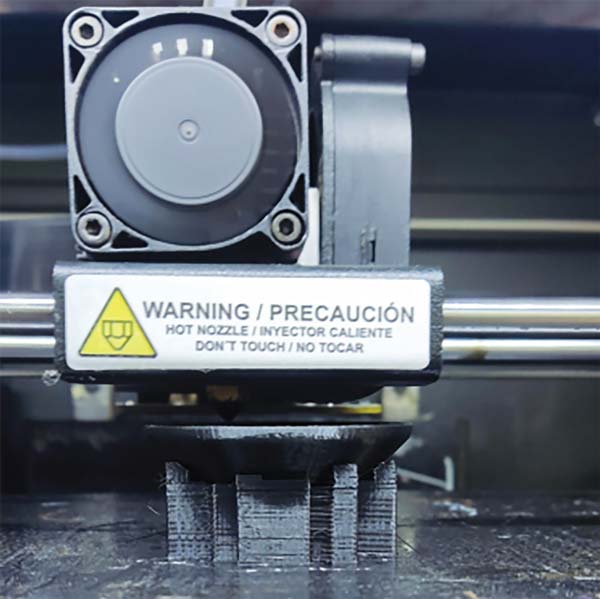
To begin, you’ll need to 3-D print the plastic pieces for the seamer. I recommend that, as much as possible, you print them with a high amount of infill, close to 100%, since several of them will bear significant forces.

First image above shows the 3-D printer and the results from the printer are found below in second photo. I have provided my 3-D files to BYO that you could use and the .stl files can be found at: https://www.dropbox.com/scl/fo/idotiq5nol244uy346gvz/h?dl=0&rlkey=cixh6d8ghya3nzufgng6nvyx9

2. Mount top part on the wall
Make sure it is completely horizontal, as any inclination will result in increased vibrations when operating. High precision in this step will save you a lot of trouble in the future.
Mounting the screw into wood or some other form of a stable base is required in case some instability exists.
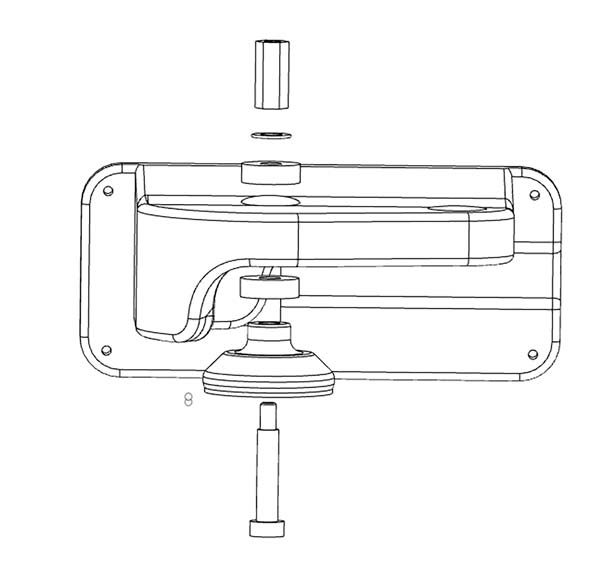
3. Assemble left axis
Mount the retaining wheel in the left hole with the special screw for bearings and two bearings. It is important that the screw is secured with extra-strong glue to the retaining wheel. You can apply threadlocker glue to the top nut to prevent it from loosening due to vibrations.

4. Assemble right axis
Mount the handle with the two sealing wheels in the right hole of the bracket and align it with the help of washers or nuts so that it matches the height of the retaining wheel.

5. Assemble the base and mount it on the wall
Finally, align and screw the bracket with the screw that serves as the base for the can to the wall. It is important that it is perfectly aligned with the top wheel to avoid imperfections in the seal due to misalignment. Keep in mind that the screw’s travel is designed for cans from 11 to 17 oz. (330 ml to 500 ml), so you will need to measure the distance accurately in these two positions before attaching the bracket to the wall.
6. Let’s Work
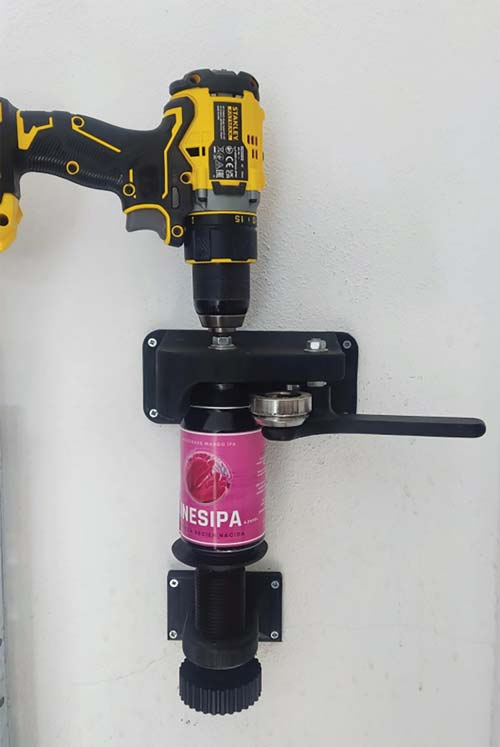
Once you have the assembly in place, you can position your drill on the top part. The following are my tips from using it:
- Tighten the can as much as possible to the top bracket to avoid potential leaks.
- The drill speed should be between medium and low; as you become more comfortable, you can increase it.
- The first sealing operation is performed with the wheel that has the thin groove; you’ll need to press firmly and for an extended period to ensure a good seam.
- The second operation with the wheel of the thick groove should be done more gently and at medium speed.