Gas on Tap: Projects

I have been building a new brewhouse after doing some fairly elaborate backyard renovations, and after putting together the kitchenette I realized it was time to bottle up some of my lambic to enter into our state competition. Anything that could go wrong did, of course. For a start, my 22-kg CO2 bottle is located on the other side of the room. “No problem,” I thought, “I’ll run some gas line across the room and have a manifold so that I can have easy access.” So once I had the counterpressure filler setup and the capper ready I started to bottle.
Sure enough, the gas lines started getting messy and before long were knocking bottles over. I thought that there had to be a better way to mount the manifold. And then it came to me . . . what I really needed was a turret in the wall! The ease of using a ball lock quick disconnect (adjustable pressure valve) would make life so much easier, if only I could find a way to mount it in a wall . . .
It turns out that the interior diameter of a piece of 3⁄4″ parallel thread is almost exactly the bore size you want to create a 1⁄2″ female thread, so I was in luck there. My next thought was to make a bulkhead fitting out of the parallel thread and hook the turret up to that. Here is how it all came together.
Materials
A gas turret from a Corney keg with male thread
A length of 3⁄4″ parallel thread (if you’re going to do this at home you will need to use brass)
A hose barb with a male 1⁄2″ thread
Gas line
2 3⁄4″ brass nuts
Tools
A 1⁄2″ BSP second thread tap (also known as a plug tap)
A hack saw
A fine metal file
A can of rapid tap, or similar machining lubricant
A large spanner (aka wrench) to fit the tap sink (the longer the better)
A good heavy vice, preferably mounted in a bench top
A few pieces of wood (to protect the thread in the vice)
High density plumbing thread tape
A power drill and a 25-mm spade bit
 Step One: Preparation
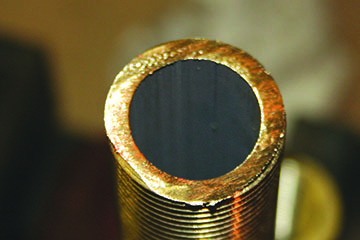
Cut yourself enough parallel thread to penetrate the wall you’re building into, leaving enough extra length for the nuts to get a good grip (for 16-mm melamine I used 35-mm lengths). Make sure you cut square and file off any rough edges.
Put your cut parallel thread into the vice pointed up and sandwiched between two pieces of hardwood (you will need to tighten this through the task as the thread will cut into the wood, loosening it.
 Step Two: Cutting the thread
If you’ve never cut a thread before, here are a few tips:
• Use plenty of lubricant. This will make the job go much more easily and reduce wear on your thread tap. A tap this size is relatively expensive, so take care of it!
• Make sure you get the alignment of the tap right — even a slight deviation from perpendicular will make the thread tap stall (smaller taps would break — this one will just stop turning as you get further down the job). The first couple of turns will determine the path of the tap for the rest of the cut — you cannot make adjustments once these first cuts are made.
• Make the initial cuts by turning the tap by hand or with a smaller spanner. At the early stages precision is more important than force.
• Once the tap is aligned and sitting well in the job, start using the larger spanner. Turn the tap half a turn, then go a quarter turn back to clean up the cut. You need to do this to clear out the cut debris. If you don’t the tap will become jammed.
• Use more lubricant. Keep applying it throughout the cutting process.
Once the tap has passed all the way though the job (for small lengths), clean up the thread with a small bottle brush, some methylated spirits and paper towel. And, for good measure, run a 3⁄4 die nut (or an ordinary nut if you don’t have a die nut) along the whole length to make sure that the external thread hasn’t been damaged.
Step Three: Assembly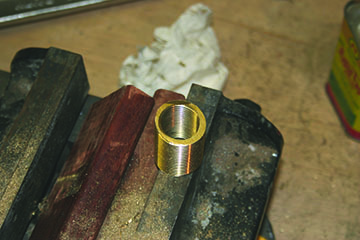
With the thread cut and the hard work out of the way, it’s time to assemble. I attached the gas turret and hose barb before mounting it in the wall to make life a bit simpler. Use plenty of high density thread tape (and possibly even some plumbers paste for good measure) — I don’t want to have to pull it apart once it’s mounted.
To cut the hole in the wall, I used a 25-mm spade bit, which is just a bit too small for the 3⁄4″ and allows you to cut a thread into the timber. The remaining parallel thread served well as a makeshift thread tap in the timber, allowing a snug fit for the finished bulkhead. Be careful not to cut yourself on the parallel thread through! If you’d prefer, go for a 27-mm spade bit and use a couple of 3⁄4″ washers to tighten up against.
Step Four: Finishing up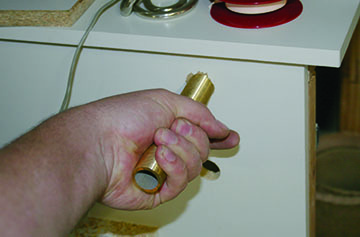
One thing I needed to keep in mind was that I’m working in a wet area, so I need to make sure that the melamine is sealed. I used a white kitchen silicone to make sure that the raw timber was sealed from moisture in the work area.
The finished assembly looks pretty flashy and is solid as a rock, which is perfect. I’ve now got easy access to my gas when purging kegs, filling bottles or transferring liquid under CO2.
Of course it didn’t stop there. I also made fittings for cleaning solution and water to make cleaning out lines and equipment significantly easier. Two kegs sit behind the wall filled with water and cleaning solution, ready to go.
 Conclusion
This small addition has made working around the kitchenette much easier and less prone to breakage from straying gas/fluid lines. I hope it helps you out too!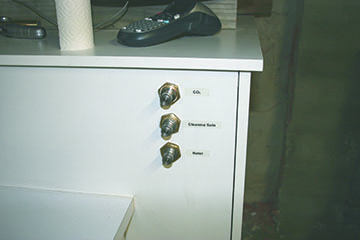

 Step One: Preparation
 Step Two: Cutting the thread