Like everything in homebrewing – the hobby is what you make of it. Want to eke out a few more percentage points of attenuation? How about lagering right in your fermenter at near-freezing temperatures? Fermentation temperature control is where homebrewers often will exact a little more attention, striving for precision from initial pitch to packaging.
Visit any craft brewery and you’re likely to see large, jacketed fermenters that run a glycol solution through their inner and outer skins. These gems can maintain precise temperature control at the touch of a button. Oh the jealousy as a homebrewer! But is it really just a dream to have that kind of control? The simple answer is – absolutely not! With the flood of sophisticated homebrew fermenters on the market, each with their own cooling coils, and heating jackets; precise temperature control of these beauties is only a portion of your paycheck away. (Well, hopefully a portion!).
But now, how to control the cooling? After all, unless you’re an exclusive kveik yeast user, cooling is the most important aspect of maintaining precise temperature throughout fermentation. Sure, you can fill a cooler full of ice bottles and exchange daily until you’re ready to package. Is that really what you want to do after shelling out the dough for your dream fermenter? There are better ways! In this article we will show you how to make your own glycol chiller with the capacity to control many fermenters at once down to near-freezing temperatures for as long as you desire. And the best part: You can do this for a small fraction of the cost of a pre-built unit.
An air-conditioning system functions off a basic principle of physics that when a substance is converted from a liquid to a gas (known as phase change) heat is absorbed.
An air-conditioning system functions off a basic principle of physics that when a substance is converted from a liquid to a gas (known as phase change) heat is absorbed. A refrigerant is used with specific properties to exploit the phase change and maximize this heat absorption. When deconstructing any mechanical refrigeration system, there are two heat exchangers, a compressor, and an expansion valve. The evaporator is the heat exchanger on the “cold” end of the cycle that converts from liquid to gas and absorbs heat from the area around it. Instead of blowing air over the evaporator, as home air conditioners typically do, the evaporator can be placed into a bath of glycol where it absorbs heat energy from the glycol bath and lowers its temperature. The second heat exchanger, the condensing coil, is used to move heat energy from the hot, liquid refrigerant exiting the compressor to the external environment before the liquid refrigerant is expanded to a gas in the evaporator coil. This is done outside of the glycol bath.
To construct a glycol chiller we will start with a standard “window” A/C unit and modify it to allow the evaporator to be placed in a glycol bath. This bath will serve as a cold liquid source to pump into your chilling coil.
Tools and Material
5,000 BTU window A/C unit
40–60-qt. (37–57-L) cooler
Inkbird ITC-1000F controller
Aquarium wave pump (~500 gph)
Enclosure: Wood, plywood, plexiglass, fasteners, and paint.
14-gauge minimum wire
(2) 120V duplex outlets, switches, wire nuts
1 can expandable pond foam
3 ft. (0.9 m) of ½-in. (13 mm) pipe insulation
5 gal. (19 L) propylene glycol with rust inhibitor
5 gal. (19 L) distilled water
Optional: Tablet display with power cord, LED lights, etc.
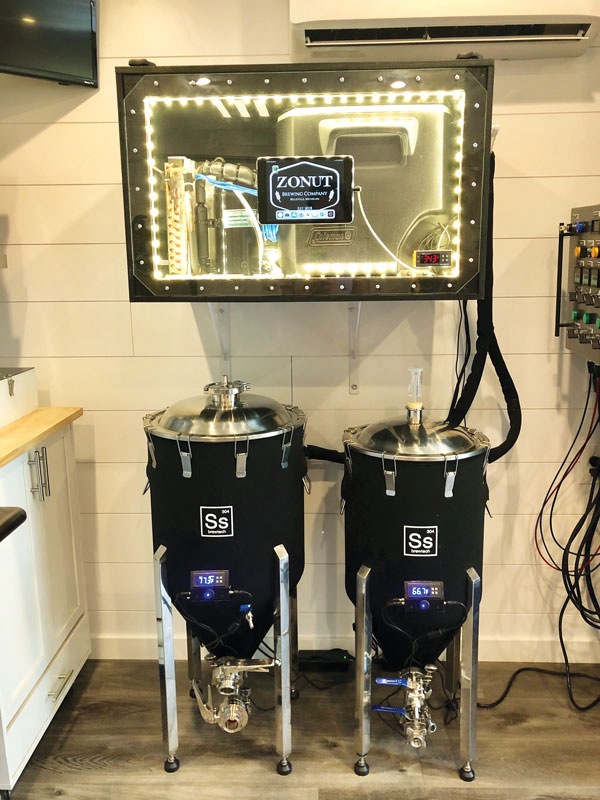
While there are tons of designs for fermentation chambers to be found, this build incorporates smart design, a clean look, and repurposed equipment to create a unique system.
Subscribe Today!
Become a subscriber today and you'll receive a
new issue every other month plus unlimited access
to our full archive of backlogged issues.
This website uses cookies to improve your experience. You can opt-out if you wish.AcceptRejectRead More
Privacy & Cookies Policy
Privacy Overview
This website uses cookies to improve your experience while you navigate through the website. Out of these, the cookies that are categorized as necessary are stored on your browser as they are essential for the working of basic functionalities of the website. We also use third-party cookies that help us analyze and understand how you use this website. These cookies will be stored in your browser only with your consent. You also have the option to opt-out of these cookies. But opting out of some of these cookies may affect your browsing experience.
Necessary cookies are absolutely essential for the website to function properly. This category only includes cookies that ensures basic functionalities and security features of the website. These cookies do not store any personal information.
Any cookies that may not be particularly necessary for the website to function and is used specifically to collect user personal data via analytics, ads, other embedded contents are termed as non-necessary cookies. It is mandatory to procure user consent prior to running these cookies on your website.